Koha 3.10 Manual (en)
Nicole C. Engard
2012
Nicole C. Engard/ByWater Solutions/BibLibre
This manual is licensed under the GNU General Public License, version 3 or later
Learn more about this license in the GPL3 Appendix
2012
Administration
Global System Preferences
Global system preferences control the way your Koha system works in general. Set these preferences before anything else in Koha.
- Get there: More > Administration > Global System Preferences
Global System Preferences Link and Search
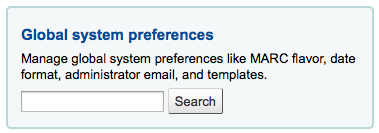
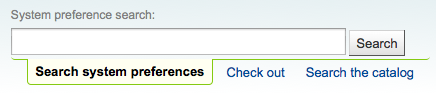
System preferences can be searched (using any part of the preference name or description) using the search box on the ‘Administration’ page or the search box at the top of each system preferences page.
Preferences search at the top of System Preference page
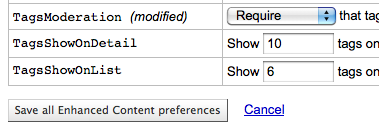
When editing preferences a ‘(modified)’ tag will appear next to items you change until you click the ‘Save All’ button:
After editing TagsModeration the ‘(modified)’ label appears
After saving your preferences you’ll get a confirmation message telling you what preferences were saved:
Preference save confirmation message

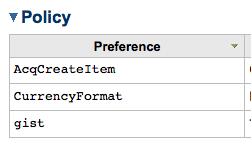
Each section of preferences can be sorted alphabetically by clicking the small down arrow to the right of the word ‘Preference’ in the header column
Sort option at the top right of each section of preferences
If the preference refers to monetary values (like maxoutstanding) the currency displayed will be the default you set in your Currency and Exchange Rate administration area. In the examples to follow they will all read USD for U.S. Dollars.
Acquisitions
Get there: More > Administration > Global System Preferences > Acquisitions
Policy
AcqCreateItem
Default: placing an order
Asks: Create an item when ___.
Values:
- cataloging a record
- placing an order
- receiving an order
Description:
- This preference lets you decide when you’d like to create an item record in Koha. If you choose to add an item record when ‘placing an order’ then you will enter item information in as you place records in your basket. If you choose to add the item when ‘receiving an order’ you will be asked for item record information when you’re receiving orders in acquisitions. If you choose to add the item when ‘cataloging a record’ then item records will not be created in acquisitions at all, you will need to go to the cataloging module to add the items.
AcqViewBaskets
Default: created by staff member
Asks: Show baskets ___
Values:
- created by staff member
- from staff member’s branch
- in system, regardless of owner
Description:
- When in acquisitions this preference allows you to control whose baskets you can see when looking at a vendor. The default value of ‘created by staff member’ makes it so that you only see the baskets you created. Choosing to see baskets ‘from staff member’s branch’ will show you the baskets created by anyone at the branch you’re logged in at. Finally, you can choose to set this preference to show you all baskets regardless of who created it (‘in system, regardless of owner). Regardless of which value you choose for this preference, superlibrarians can see all baskets created in the system.
BasketConfirmations
Default: always ask for confirmation
Asks: When closing or reopening a basket, ___.
Values:
- always ask for confirmation
- do not ask for confirmation
Descriptions:
- This preference adds the option to skip confirmations on closing and reopening a basket. If you skip the confirmation, you do not create a new basket group.
CurrencyFormat
Default: 360,000.00 (US)
Asks: Display currencies using the following format ___
Values:
- 360,000.00 (US)
- 360 000,00 (FR)
gist
Default: 0
Asks: The default tax rate is ___
Description:
- This preference will allow the library to define a default Goods and Services Tax rate. The default of value of 0 will disable this preference.
Tip
Enter this value as a number (.06) versus a percent (6%).
UniqueItemFields
Default: barcode
Asks:___ (space-separated list of fields that should be unique for items, must be valid SQL fields of items table)
Description:
- If this preference is left blank when adding items in acquisitions there will be no check for uniqueness. This means that a duplicate barcode can be created in acquisitions which will cause errors later when checking items in and out.
Administration
These preferences are general settings for your system.
Get there: More > Administration > Global System Preferences > Administration
CAS Authentication
The Central Authentication Service (CAS) is a single sign-on protocol for the web. If you don’t know what this is, leave these preferences set to their defaults.
AllowPKIAuth
Default: no
Asks: Use ___ field for SSL client certificate authentication
Values:
- no
- the common name
- the email address
casServerUrl
Asks: The CAS Authentication Server can be found at ___
Interface options
These preference are related to your Koha interface
DebugLevel
Default: lots of
Asks: Show ___ debugging information in the browser when an internal error occurs.
Values:
- lots of - will show as much information as possible
- no - will only show basic error messages
- some - will show only some of the information available
Description:
- This preference determines how much information will be sent to the user’s screen when the system encounters an error. The most detail will be sent when the value level is set at 2, some detail will be sent when the value is set at 1, and only a basic error message will display when the value is set at 0. This setting is especially important when a system is new and the administration is interested in working out the bugs (errors or problems) quickly. Having detailed error messages makes quick fixes more likely in problem areas.
delimiter
Default: semicolons
Asks: Separate columns in an exported report file with ___ by default.
Values:
- #’s
- backslashes
- commas
- semicolons
- slashes
- tabs
Description:
- This preference determines how reports exported from Koha will separate data. In many cases you will be able to change this option when exporting if you’d like.
KohaAdminEmailAddress
This is the default ‘From’ address for emails unless there is one for the particular branch, and is referred to when an internal error occurs.
Asks: Use ___ as the email address for the administrator of Koha.
Description:
- This preference allows one email address to be used in warning messages set to the OPAC. If no email address is set for the branch this address will receive messages from patrons regarding modification requests, purchase suggestions, and questions or information regarding overdue notices. It is recommended that a email address that can be accessed by multiple staff members be used for this purpose so that if one librarian is out the others can address these requests. This email address can be changed when needed.
noItemTypeImages
Default: Show
Asks: ___ itemtype icons in the catalog.
Values:
- Shows
- Don’t show
Description:
- This preference allows the system administrator to determine if users will be able to set and see an item type icon the catalog on both the OPAC and the Staff Client. The images will display in both the OPAC and the Staff Client/Intranet. If images of item types are disabled, text labels for item types will still appear in the OPAC and Staff Client.
virtualshelves
Default: Allow
Asks: ___ staff and patrons to create and view saved lists of books.
Values:
- Allow
- Don’t Allow
Description:
- This preference controls whether the lists functionality will be available in the staff client and OPAC. If this is set to “Don’t allow” then no one will be able to save items to public or private lists.
Login options
These preferences are related to logging into your Koha system
AutoLocation
Default: Don’t require
Asks: ___ staff to log in from a computer in the IP address range specified by their library (if any).
Set IP address range in the library administration area - Get there: More >
Administration > Basic Parameters > Libraries & Groups
Values:
- Don’t require
- Require
Description:
- This preference protects the system by blocking unauthorized users from accessing the staff client program and settings. Authorized and unauthorized users are determined by their computer’s IP addresses. When the preference is set to ‘Require’, IP authorization is in effect and unauthorized IP addresses will be blocked. This means that staff cannot work from home unless their IP address has been authorized. When set to ‘Don’t require’, anyone with a staff client login will have access no matter which IP address they are using.
IndependantBranches
Default: Don’t prevent
Asks: ___ staff (but not superlibrarians) from modifying objects (holds, items, patrons, etc.) belonging to other libraries.
Values:
- Don’t prevent
- Prevent
Description:
- This preference should only be used by library systems which are sharing a single Koha installation among multiple branches but are considered independent organizations, meaning they do not share material or patrons with other branches and do not plan to change that in the future. If set to ‘Prevent’ it increases the security between library branches by: prohibiting staff users from logging into another branch from within the staff client, filtering out patrons from patron searches who are not a part of the login branch conducting the search, limiting the location choices to the login branch when adding or modifying an item record, preventing users from other branch locations from placing holds or checking out materials from library branches other than their own, and preventing staff from editing item records which belong to other library branches. All of these security safeguards can be overridden only by the superlibrarian, the highest level of privileges.
Important
It is important that this value be set before going live and that it NOT be changed
insecure
Default: Don’t allow
Asks: ___ staff to access the staff client without logging in.
Values:
- Allow
- Don’t allow
Description:
- This preference controls whether or not authentication (user login) will be required to gain access to the staff client. If set to ‘Allow’, all authentication is bypassed. If set to ‘Don’t allow’ authentication (login) on the staff client is required.
Important
Setting this to ‘Allow’ is dangerous, and should not be done in production environments.
SessionStorage
Default: in the MySQL database
Asks: Store login session information ___
Values:
- as temporary files
- in the MySQL database
- in the PostgreSQL database - .. important:: PostgreSQL is not yet supported
Description:
- This preference allows administrators to choose what format session data is stored in during web sessions.
timeout
Default: 12000000
Asks: Automatically log out users after ___ milliseconds of inactivity.
Description:
- This preference sets the length of time the Staff Client or OPAC accounts can be left inactive before re-logging in is necessary. The value of this preference is in seconds. At this time, the amount of time before a session times out must be the same for both the Staff Client and the OPAC.
Authorities
Get there: More > Administration > Global System Preferences > Authorities
General
AutoCreateAuthorities
Default: do not generate
Asks: When editing records, ___ authority records that are missing.
Values:
- do not generate
- generate
Important
BiblioAddsAuthorities must be set to “allow” for this to have any effect
Description:
- When this and BiblioAddsAuthorities are both turned on, automatically create authority records for headings that don’t have any authority link when cataloging. When BiblioAddsAuthorities is on and AutoCreateAuthorities is turned off, do not automatically generate authority records, but allow the user to enter headings that don’t match an existing authority. When BiblioAddsAuthorities is off, this has no effect.
BiblioAddsAuthorities
Default: allow
Asks: When editing records, ___ them to automatically create new authority records if needed, rather than having to reference existing authorities.
Values:
allow - This setting allows you to type values in the fields
controlled by authorities and then adds a new authority if one does not exist
don’t allow - This setting will lock the authority controlled
fields, forcing you to search for an authority versus allowing you to type the information in yourself.
dontmerge
Default: Don’t
Asks: ___ automatically update attached biblios when changing an authority record.
Values:
- Do
- Don’t
Description:
- This preference tells Koha how to handle changes to your Authority records. If you edit an authority record and this preference is set to ‘Do’ Koha will update all of the bib records linked to the authority with the new authority record’s data. If this is set to “Don’t” then Koha won’t edit bib records when changes are made to authorities.
Important
If this is set to merge you will need to ask your administrator to enable the merge_authorities.pl cronjob.
MARCAuthorityControlField008
Default: || aca||aabn | a|a d
Asks: Use the following text for the contents of MARC authority control field 008 position 06-39 (fixed length data elements).
Important
Do not include the date (position 00-05) in this preference, Koha will calculate automatically and put that in before the values in this preference.Description:
- This preference controls the default value in the 008 field on Authority records. It does not effect bibliographic records.
UseAuthoritiesForTracings
Default: Don’t use
Asks: ___ authority record numbers instead of text strings for searches from subject tracings.
Values:
Don’t use - Search links look for subject/author keywords
(example: opac-search.pl?q=su:Business%20networks)
Use - Search links look for an authority record (example:
opac-search.pl?q=an:354)
Description:
- For libraries that have authority files, they may want to make it so that when a link to an authorized subject or author is clicked on the OPAC or staff client it takes the searcher only to a list of results with that authority record. Most libraries do not have complete authority files and so setting this preference to ‘Don’t use’ will allow searchers to click on links to authors and subject headings and perform a keyword search against those fields, finding all possible relevant results instead.
Linker
These preference will control how Koha links bibliographic records to authority records. All bibliographic records added to Koha after these preferences are set will link automatically to authority records, for records added before these preferences are set there is a script (misc/link_bibs_to_authorities.pl) that your system administrator can run to link records together.
CatalogModuleRelink
Default: Do not
Asks: ___ automatically relink headings that have previously been linked when saving records in the cataloging module.
Values:
- Do
- Do not
Description:
- Longtime users of Koha don’t expect the authority and bib records to link consistently. This preference makes it possible to disable authority relinking in the cataloging module only (i.e. relinking is still possible if link_bibs_to_authorities.pl is run). Note that though the default behavior matches the previous behavior of Koha (retaining links to outdated authority records), it does not match the intended behavior (updating biblio/authority link after bibliographic record is edited). Libraries that want the intended behavior of authority control rather than the way Koha used to handle linking should set CatalogModuleRelink to ‘Do’. Once setting this to ‘Do’ the following preferences can also be set.
LinkerKeepStale
Default: Do not
Asks: ___ keep existing links to authority records for headings where the linker is unable to find a match.
Values:
- Do
- Do not
Description:
- When set to ‘Do’, the linker will never remove a link to an authority record, though, depending on the value of LinkerRelink, it may change the link.
LinkerModule
Default: Default
Asks: Use the ___ linker module for matching headings to authority records.
Values:
Default - Retains Koha’s previous behavior of only creating
links when there is an exact match to one and only one authority record; if the LinkerOptions preference is set to ‘broader_headings’, it will try to link headings to authority records for broader headings by removing subfields from the end of the heading
First match - Creates a link to the first authority record that
matches a given heading, even if there is more than one authority record that matches
Last match - Creates a link to the last authority record that
matches a given heading, even if there is more than one record that matches
Description:
- This preference tells Koha which match to use when searching for authority matches when saving a record.
LinkerOptions
Asks: Set the following options for the authority linker ___
Important
This feature is experimental and shouldn’t be used in a production environment until further expanded upon.
Description:
- This is a pipe separated (|) list of options. At the moment, the only option available is “broader_headings.” With this option set to “broader_headings”, the linker will try to match the following heading as follows:=600 10$aCamins-Esakov, Jared$xCoin collections$vCatalogs$vEarly works to 1800. First: Camins-Esakov, Jared–Coin collections–Catalogs–Early works to 1800 Next: Camins-Esakov, Jared–Coin collections–Catalogs Next: Camins-Esakov, Jared–Coin collections Next: Camins-Esakov, Jared (matches! if a previous attempt had matched, it would not have tried this)
LinkerRelink
Default: Do
Asks: ___ relink headings that have previously been linked to authority records.
Values:
- Do
- Do not
Description:
- When set to ‘Do’, the linker will confirm the links for headings that have previously been linked to an authority record when it runs, correcting any incorrect links it may find. When set to ‘Do not’, any heading with an existing link will be ignored, even if the existing link is invalid or incorrect.
Cataloging
Get there: More > Administration > Global System Preferences > Cataloging
Display
hide_marc
Default: Display
Asks: ___ MARC tag numbers, subfield codes and indicators in MARC views.
Values:
- Display – shows the tag numbers on the cataloging interface MARC editor with tags showing .. image:: images/admin/globalprefs/hide_marc-display.png
- Don’t display – shows just descriptive text when cataloging MARC editor without tags showing .. image:: images/admin/globalprefs/hide_marc-dont.png
IntranetBiblioDefaultView
Default: ISBD form
Asks: By default, display biblio records in ___
Values:
ISBD form – displays records in the staff client in the old card catalog format - See ISBD preference
for more information
Labelled MARC form – displays records in the staff client in MARC with text labels to explain the different fields
MARC form – displays records in the staff client in MARC
normal form – visual display in the staff client (for the average person)
Description:
- This setting determines the bibliographic record display when searching the catalog on the staff client. This setting does not affect the display in the OPAC which is changed using the BiblioDefaultView preference under the OPAC preference tab. This setting changes the look of the record when first displayed. The MARC and ISBD views can still be seen by clicking in the sidebar.
ISBD
Default: MARC21 Default Appendix or UNIMARC Default Appendix
Asks: Use the following as the ISBD template:
Description:
- This determines how the ISBD information will display. Elements in the list can be reordered to produce a different ISBD view. ISBD, the International Standard Bibliographic Description, was first introduced by IFLA (International Federation of Library Associations) in 1969 in order to provide guidelines for descriptive cataloging. The purpose of ISBD is to aid the international exchange of bibliographic records for a variety of materials.
LabelMARCView
Default: Don’t
Asks: ___ collapse repeated tags of the same type into one tag entry.
Values:
- Do – will combine all identical tag numbers under one heading in the MARC view in the OPAC and Staff Client MARC View in the Staff Client with LabelMARCView set to Do .. image:: images/admin/globalprefs/LabelMARCView-do.png
- Don’t – will list all of the tags individually in the MARC view in the OPAC and Staff Client MARC View in the Staff Client with LabelMARCView set to Don’t .. image:: images/admin/globalprefs/LabelMARCView-dont.png
OpacSuppression
Default: Don’t hide
Asks: ___ items marked as suppressed from OPAC search results.
Values:
Don’t hide – will show items in OPAC search results if they are marked suppressed
Hide – will not show items in OPAC search results if they’re marked as suppressed - Each bib record with items you want to hide from the
OPAC simply need to have the 942n field set to 1. The index then hides it from display in OPAC but will still display it in the Staff Client
Description:
- An authorized value for 942$n field should be set to eliminate errors. One example would be to create an authorized value titled SUPPRESS with a value of 0 for don’t suppress and 1 for suppress.
Important
If this preference is set to ‘hide’ and you have the 942n field set to 1, it will hide the entire bib record - not just an individual item.
Important
You must have the Suppress index set up in Zebra and at least one suppressed item, or your searches will be broken.
URLLinkText
Default: Online Resource
Asks: Show ___ as the text of links embedded in MARC records.
Description:
- If the 856 field does not have a subfield 3 or y defined, the OPAC will say ‘Click here to access online.’ If you would like the field to say something else enter that in this field.
UseControlNumber
Default: Don’t use
Asks: ___ record control number ($w subfields) and control number (001) for linking of bibliographic records.
Values:
Don’t use - When clicking on links to titles that appear next to
‘Continues’ and ‘Continued by’ in the detail display Koha will perform a title search
Use - When clicking on links to titles that appear next to
‘Continues’ and ‘Continued by’ in the detail display Koha will perform a control number (MARC field 001) search
Important
Unless you are going in and manually changing 773$w to match your rigorously-defined bibliographic relationships, you should set this preference to “Don’t use” and instead set EasyAnalyticalRecords to “Display”
Description:
- If you have a serial called “Journal of Interesting Things” which has a separate record from when it was called “Transactions of the Interesting Stuff Society,” you could add linking fields to indicate the relationship between the two records. UseControlNumber allows you to use your local accession numbers for those links. In MARC21, the relevant sections of the two records might look like this:=001 12345 =110 2_$aInteresting Stuff Society. =245 10$aTransactions of the Interesting Stuff Society. =785 00$aInteresting Stuff Society$tJournal of Interesting Things.$w12346 =001 12346 =110 2_$aInteresting Stuff Society. =245 10$aJournal of Interesting Things. =780 00$aInteresting Stuff Society$tTransactions of the Interesting Stuff Society.$w12345 With UseControlNumber set to ‘Use’, the 78x links will use the Control Numbers is subfield $w, instead of doing a title search on “Journal of Interesting Things” and “Transactions of the Interesting Stuff Society” respectively.
Interface
advancedMARCeditor
Default: Don’t display
Asks: ___ descriptions of fields and subfields in the MARC editor.
Description:
- This preference determines whether or not MARC field names will be present when editing or creating MARC records.
Values:
- Display MARC editor with text labels .. image:: images/admin/globalprefs/advancedMARCeditor-display.png
- Don’t display MARC editor without text labels .. image:: images/admin/globalprefs/advancedMARCeditor-dontdisplay.png
DefaultClassificationSource
Default: Dewey Decimal System
Asks: Use ___ as the default classification source.
Values:
- ANSCR (Sound Recordings)
- Dewey Decimal Classification
- Library of Congress Classification
- Other/Generic Classification Scheme
- SuDoc Classification (U.S. GPO)
- Universal Decimal Classification
Linda Culberson
October 2011
Nicole C.
Engard
Fixed typos, changed content where necessary and added new screenshots.
EasyAnalyticalRecords
Asks: ___ easy ways to create analytical record relationships
Default: Don’t Display
Values:
- Display
- Don’t Display
Important
If you decide to use this feature you’ll want to make sure that your UseControlNumber preference is set to “Don’t use” or else the “Show analytics” links in the staff client and the OPAC will be broken.
Description:
- An analytic entry in a catalog is one that describes a part of a larger work that is also described in the catalog. In bibliographic cataloging, analytic entries may be made for chapters in books or special issues of articles in periodicals. In archival cataloging, analytic entries may be made for series or items within a collection. This feature in Koha allows for an easy way of linking analytic entries to the host records, and this system preference adds several new menu options to the staff cataloging detail pages to allow that to happen.
Record Structure
AlternateHoldingsField & AlternateHoldingsSeparator ^^^^^^^^^^^^^^^^^^^^^^^^^^^^^^^^^^^^^^^^^^^^^^^^^^^
Asks: Display MARC subfield ___ as holdings information for records that do not have items, with the subfields separated by ___.
Description:
- Sometimes libraries migrate to Koha with their holding info in the 852 field (OCLC holdings information field) and choose not to transfer that information into the 952 (Koha holdings information field) because they don’t plan on circulating those items. For those libraries or other libraries that have data in the 852 fields of their records that they want to display, these preferences let you choose to display holdings info from a field other than the 952 field. The AlternateHoldingsField preference can contain multiple subfields to look in; for instance 852abhi would look in 852 subfields a, b, h, and i.
- With AlternateHoldingsField set to 852abhi and AlternateHoldingsSeparator set to a space the holdings would look like the following: Alternate Holdings Display .. image:: images/admin/globalprefs/AlternateHoldingsField.png
autoBarcode
Default: generated in the form <branchcode>yymm0001
Asks: Barcodes are ___
Values:
- generated in the form <branchcode>yymm0001
- generated in the form <year>-0001
- <year>-0002. generated in the form 1, 2, 3
- incremental EAN-13 barcodes
- not generated automatically
Description:
- This setting is for libraries wishing to generate barcodes from within Koha (as opposed to scanning in pre-printed barcodes or manually assigning them).
DefaultLanguageField008
Asks: Fill in the default language for field 008 Range 35-37 ___.
Description:
- This preference will allow you to set the language for your 008 field by default. If this is left empty it will default to English (eng). See the MARC Code List for Languages for additional values for this preference.
item-level_itypes
Default: specific item
Asks: Use the item type of the ___ as the authoritative item type (for determining circulation and fines rules, etc).
Values:
- biblio record
- specific item
Description:
- This preference determines whether the item type Koha uses for issuing rules will be an attribute of the bibliographic record or the item record. Most libraries refer to the item record for item types. It also determines if the item type icon appears on the OPAC search results. If you have the preference set to ‘biblio record’ then Koha displays the item type icon on the search results to the left of the result info. Item Type Icons to the Left of Result Information .. image:: images/admin/globalprefs/item-level_itypes.png
itemcallnumber
Default: 082ab
Asks: Map the MARC subfield to an item’s callnumber.
Tip
This can contain multiple subfields to look in; for instance 082ab would look in 082 subfields a and b.
Description:
- This setting determines which MARC field will be used to determine the call number that will be entered into item records automatically (952$o). The value is set by providing the MARC field code (050, 082, 090, 852 are all common) and the subfield codes without the delimiters ($a, $b would be ab).
Examples:
- Dewey: 082ab or 092ab; LOC: 050ab or 090ab; from the item record: 852hi
marcflavour
Default: MARC21
Asks: Interpret and store MARC records in the ___ format.
Description:
- This preference defines global MARC style (MARC21 or UNIMARC) used for encoding. MARC21 is the standard style for the US, Canada and Britain. UNIMARC is a variation of MARC21 that is used in France, Italy, Russia, and many other countries.
Values:
- MARC21
- UNIMARC
MARCOrgCode
Default: OSt
Asks: Fill in the MARC organization code ___ by default in new MARC records (leave blank to disable).
Description:
- The MARC Organization Code is used to identify libraries with holdings of titles and more.
Learn more and find your library’s code on the MARC Code list for Organizations or in Canada on the Canadian Symbols Directory.
NewItemsDefaultLocation
Asks: When items are created, give them the temporary location of ___ (should be a location code, or blank to disable).
z3950NormalizeAuthor & z3950AuthorAuthFields
Defaults: Don’t copy & 701,702,700
Asks: ___ authors from the UNIMARC ___ tags (separated by commas) to the correct author tags when importing a record using Z39.50.
Description for z3950NormalizeAuthor:
- This preference allows for ‘Personal Name Authorities’ to replace authors as the bibliographic authority. This preference should only be considered by libraries using UNIMARC.
Values for z3950NormalizeAuthor:
- Copy
- Don’t copy
Description for z3950AuthorAuthFields:
- This preference defines which MARC fields will be used for ‘Personal Name Authorities’ to replace authors as the bibliographic authorities. This preference only applies to those using UNIMARC encoding. The MARC fields selected here will only be used if ‘z3950NormalizeAuthor’ is set to “Copy”. The default field are 700, 701, and 702.
Spine Labels
SpineLabelAutoPrint
Default: don’t
Asks: When using the quick spine label printer, ___ automatically pop up a print dialog.
Values:
- do
- don’t
SpineLabelFormat
Default: <itemcallnumber><copynumber>
Asks: Include the following fields on a quick-printed spine label: (Enter in columns from the biblio, biblioitems or items tables, surrounded by < and >.)
SpineLabelShowPrintOnBibDetails
Default: Don’t display
Asks: ___ buttons on the bib details page to print item spine labels.
Values:
- Display ‘Print Label’ link appears on bibliographic record in the staff client .. image:: images/admin/globalprefs/SpineLabelShowPrintOnBibDetails.png
- Don’t display
Circulation
Get there: More > Administration > Global System Preferences > Circulation
Checkout Policy
AllFinesNeedOverride
Default: Require
Asks: ___ staff to manually override all fines, even fines less than noissuescharge.
Values:
- Don’t require
- Require
Description:
- This preference let’s you decide if you want to always be warned that the patron has fines when checking out. If you have it set to ‘Require’ then no matter how much money the patron owes a message will pop up warning you that the patron owes money.
AllowFineOverride
Default: Don’t allow
Asks: ___ staff to manually override and check out items to patrons who have more than noissuescharge in fines.
Values:
- Allow
- Don’t allow
Description:
- This preference lets you decide if you staff can check out to patrons who owe more money than you usually let them carry on their account. If set to ‘Allow’ staff will be warned that the patrons owes money, but it won’t stop the staff from checking out to the patron.
AllowItemsOnHoldCheckout
Default: Don’t allow
Asks: ___ checkouts of items reserved to someone else. If allowed do not generate RESERVE_WAITING and RESERVED warning. This allows self checkouts for those items.
Values:
- Allow
- Don’t allow
Important
This system preference relates only to SIP based self checkout, not Koha’s web based self checkout.
Description:
- When this preference is set to ‘Allow’ patrons will be able to use your external self check machine to check out a book to themselves even if it’s on hold for someone else. If you would like Koha to prevent people from checking out books that are on hold for someone else set this preference to “Don’t allow.”
AllowNotForLoanOverride
Default: Allow
Asks: ___ staff to override and check out items that are marked as not for loan.
Values:
- Allow
- Don’t allow
Description:
- This parameter is a binary setting which controls the ability of staff (patrons will always be prevented from checking these items out) to check out items that are marked as “not for loan”. Setting it to “Allow” would allow such items to be checked out, setting it to “Don’t allow” would prevent this. This setting determines whether items meant to stay in the library, such as reference materials, and other library resources can be checked out by patrons.
AllowRenewalLimitOverride
Default: Allow
Asks: ___ staff to manually override the renewal limit and renew a checkout when it would go over the renewal limit.
Values:
- Allow
- Don’t allow
Description:
- This preference is a binary setting which controls the ability of staff to override the limits placed on the number of times an item can be renewed. Setting it to “Allow” would allow such limits to be overridden, setting it to “Don’t allow” would prevent this. This is a preference in which if it is set to “allow” it would allow the library staff to use their judgment for overriding the renew limit for special cases, setting it to “Don’t allow” prevents an opportunity for abuse by the library staff.
AutomaticItemReturn
Default: Do
Asks: ___ automatically transfer items to their home branch when they are returned.
Values:
- Do
- Don’t
Description:
- This preference is a binary setting which determines whether an item is returned to its home branch automatically or not. If set to “Don’t”, the staff member checking an item in at a location other than the item’s home branch will be asked whether the item will remain at the non-home branch (in which case the new location will be marked as a holding location) or returned. Setting it to “Do” will ensure that items checked in at a branch other than their home branch will be sent to that home branch.
CircControl
Default: the library the item is from
Asks: Use the checkout and fines rules of ___
Values:
the library the item is from - The circulation and fines policies will be
determined by the library that owns the item
the library the patron is from - The circulation and fines policies will be
determined the patron’s home library
the library you are logged in at - The circulation and fines policies will be
determined by the library that checked the item out to the patron
HomeOrHoldingBranch
Default: the library the item was checked out from
Asks: Use the checkout and fines rules of ___
Description:
- This preference establishes what may be done with a loaned item once the item has been returned. It deals with situations in which one library branch has borrowed materials from a different branch. Essentially it decides whether a library may check the borrowed item back out to its patron or if it must immediately send the item back to the owning location.
Values:
- the library the item is from
- the library the item was checked out from
Important
It is not recommend that this setting be changed after initial setup of Koha
Important
This preference does nothing unless the IndependantBranches preference is set to ‘Prevent’.
- *Get there:*More > Administration > Global System Preferences > Admin > IndependantBranches
InProcessingToShelvingCart
Default: Don’t move
Asks: ___ items that have the location PROC to the location CART when they are checked in.
Values:
- Don’t move
- Move
IssuingInProcess
Default: Don’t prevent
Asks: ___ patrons from checking out an item whose rental charge would take them over the limit.
Values:
- Don’t prevent
- Prevent
Description:
- This preference determines if a patron can check items out if there is an overdue fine on the account and any of the materials the patron wishes to check out will potentially tip the account balance over the maximum fines policy the library has in place.
Example: Your library has a $5 limit set for ‘fines’ (ie, after incurring $5 in fines, a patron can no longer check out items). A patron comes to the desk with 5 items to check out (4 books and a video) The patron has $4 in charges already on their account. One of the videos has a rental charge of $1, therefore making the total fines on the patron’s account suddenly $5 (the limit).
IssueLostItem
Default: diplay a message
Asks: When issuing an item that has been marked as lost, ___.
Values:
display a message Lost message when checking out .. image:: images/admin/globalprefs/IssueLostItem-msg.png
do nothing - This option will just check the item out without
notifying you that the item was marked lost.
require confirmation Confirm checkout of lost item .. image:: images/admin/globalprefs/IssueLostItem-confirm.png
Description:
- This preference lets you define how library staff are notified that an item with a lost status is being checked out. This will help staff mark items as ‘available’ if you choose to ‘display a message’ or ‘require confirmation.’ If you choose to ‘do nothing,’ there will be no notification that the item being checked out is marked as ‘lost.’
maxoutstanding
Default: 5
Asks: Prevent patrons from making holds on the OPAC if they owe more than ___ USD in fines.
noissuescharge
Default: 5
Asks: Prevent patrons from checking out books if they have more than ___ USD in fines.
Description:
- This preference is the maximum amount of money owed to the library before the user is banned from borrowing more items. This also coincides with maxoutstanding that limits patrons from placing holds when the maximum amount is owed to the library.
OverduesBlockCirc
Default: Ask for confirmation
Asks: ___ when checking out to a borrower that has overdues outstanding
Values:
Ask for confirmation - Will not let you check an item out to patrons with
overdues until a librarian confirms that it is okay
Block - Block all patrons with overdue items from being able
to check out
Don’t block - Allow all patrons with overdue items to continue to
check out
OverdueNoticeBcc
Asks: Send all notices as a BCC to this email address ___
This preference makes it so that a librarian can get a copy of every notice sent out to patrons.
Tip
If you’d like more than one person to receive the blind copy you can simply enter in multiple email addresses separated by commas.
PrintNoticesMaxLines
Asks: Include up to ___ item lines in a printed overdue notice.
Note
If the number of items is greater than this number, the notice will end with a warning asking the borrower to check their online account for a full list of overdue items.
Tip
Set to 0 to include all overdue items in the notice, no matter how many there are.
Important
This preference only refers to the print notices, not those sent via email.
RenewalPeriodBase
Default: the old due date of the checkout
Asks: When renewing checkouts, base the new due date on ___
Values:
- the old due date of the checkout
- the current date
ReturnBeforeExpiry
Default: Don’t require
Asks: ___ patrons to return books before their accounts expire (by restricting due dates to before the patron’s expiration date).
Values:
- Don’t require
- Require
Description:
- This is preference may prevent a patron from having items checked out after their library card has expired. If this is set to “Require”, then a due date of any checked out item can not be set for a date which falls after the patron’s card expiration. If the setting is left “Don’t require” then item check out dates may exceed the expiration date for the patron’s library card.
ReturnToShelvingCart
Default: Don’t move
Asks: ___ all items to the location CART when they are checked in.
Values:
- Don’t move
- Move
TransfersMaxDaysWarning
Default: 3
Asks: Show a warning on the “Transfers to Receive” screen if the transfer has not been received ___ days after it is sent.
Description:
- The TransferMaxDaysWarning preference is set at a default number of days. This preference allows for a warning to appear after a set amount of time if an item being transferred between library branches has not been received. The warning will appear in the Transfers to Receive report.
UseBranchTransferLimits & BranchTransferLimitsType ^^^^^^^^^^^^^^^^^^^^^^^^^^^^^^^^^^^^^^^^^^^^^^^^^^
Defaults: Don’t enforce & collection code
Asks: ___ branch transfer limits based on ___
UseBranchTransferLimits Values:
- Don’t enforce
- Enforce
BranchTransferLimitsType Values:
- collection code
- item type
BranchTransferLimitsType Description:
- This parameter is a binary setting which determines whether items are transferred according to item type or collection code. This value determines how the library manager is able to restrict what items can be transferred between the branches.
useDaysMode
Default: Don’t include
Asks: Calculate the due date using ___.
Values:
- circulation rules only.
- the calendar to push the due date to the next open day.
- the calendar to skip all days the library is closed.
Description:
- This preference controls how scheduled library closures affect the due date of a material. The ‘the calendar to skip all days the library is closed’ setting allows for a scheduled closure not to count as a day in the loan period, the ‘circulation rules only’ setting would not consider the scheduled closure at all, and ‘the calendar to push the due date to the next open day’ would only effect the due date if the day the item is due would fall specifically on the day of closure.
Example:
- The library has put December 24th and 25th in as closures on the calendar. A book checked out by a patron has a due date of December 25th according to the circulation and fine rules. If this preference is set to ‘circulation rules only’ then the item will remain due on the 25th. If the preference is set to ‘the calendar to push the due date to the next open day’ then the due date will be December 26th. If the preference is set to ‘the calendar to skip all days the library is closed’ then the due date will be pushed to the 27th of December to accommodate for the two closed days.
The calendar is defined on a branch by branch basis. To learn more about the calendar, check out the ‘Calendar & Holidays‘ section of this manual.
Fines Policy
finesCalendar
Default: not including the days the library is closed
Asks: Calculate fines based on days overdue ___
Values:
- directly
- not including the days the library is closed
Description:
- This preference will determine whether or not fines will be accrued during instances when the library is closed. Examples include holidays, library in-service days, etc. Choosing ‘not including the days the library is closed” setting will enable Koha to access its Calendar module and be considerate of dates when the library is closed. To make use of this setting the administrator must first access Koha’s calendar and mark certain days as “holidays” ahead of time.
The calendar is defined on a branch by branch basis. To learn more about the calendar, check out the ‘Calendar & Holidays‘ section of this manual.
finesMode
Default: Calculate (but only for mailing to the admin)
Asks: ___ fines
Values:
- Calculate (but only for mailing to the admin)
- Calculate and charge
- Don’t calculate
Important
Requires that you have the fines cron job running (misc/cronjobs/fines.pl)
Holds Policy
AllowHoldDateInFuture
Default: Allow
Asks: ___ hold requests to be placed that do not enter the waiting list until a certain future date.
Values:
- Allow
- Don’t allow
AllowHoldsOnDamagedItems
Default: Allow
Asks: ___ hold requests to be placed on damaged items.
Values:
- Allow
- Don’t allow
Description:
- This parameter is a binary setting which controls whether or not hold requests can be placed on items that are marked as “damaged” (items are marked as damaged by editing subfield 4 on the item record). Setting this value to “Don’t allow” will prevent anyone from placing a hold on such items, setting it to “Allow” will allow it. This preference is important because it determines whether or not a patron can place a request for an item that might be in the process of being repaired or not in good condition. The library may wish to set this to “Don’t allow” if they were concerned about their patrons not receiving the item in a timely manner or at all (if it is determined that the item is beyond repair). Setting it to “Allow” would allow a patron to place a hold on an item and therefore receive it as soon as it becomes available.
AllowHoldPolicyOverride
Default: Allow
Asks: ___ staff to override hold policies when placing holds.
Values:
- Allow
- Don’t allow
Description:
- This preference is a binary setting which controls whether or not the library staff can override the circulation and fines rules as they pertain to the placement of holds. Setting this value to “Don’t allow” will prevent anyone from overriding, setting it to “Allow” will allow it. This setting is important because it determines how strict the libraries rules for placing holds are. If this is set to “Allow”, exceptions can be made for patrons who are otherwise normally in good standing with the library, but there is opportunity for the staff to abuse this function. If it is set to “Don’t allow”, no abuse of the system is possible, but it makes the system entirely inflexible in respect to holds.
AllowOnShelfHolds
Default: Allow
Asks: ___ hold requests to be placed on items that are not checked out.
Values:
- Allow
- Don’t Allow
Description:
- This preference is a binary setting which controls the ability of patrons to place holds on items that are not currently checked out. Setting it to “Don’t allow” allows borrowers to place holds on items that are checked out but not on items that are on the shelf (or assumed available in the library), setting it to “Allow” allows borrowers to place holds on any item that is available for loan whether it is checked out or not. This setting might be set to “Allow” if the library system is a multi branch system and patrons used the hold system to request items from other libraries, or if the library wanted to allow users to place holds on items from home through the OPAC. Setting it to “Don’t allow” would enforce a first come, first served standard.
AutoResumeSuspendedHolds
Default: Allow
Asks: ___ suspended holds to be automatically resumed by a set date.
Values:
- Allow
- Don’t allow
Description:
- If this preference is set to ‘Allow’ then all suspended holds will be able to have a date at which they automatically become unsuspended. If you have this preference set to ‘Allow’ you will also need the Unsuspend Holds cron job running.
canreservefromotherbranches
Default: Allow
Asks: ___ a user from one library to place a hold on an item from another library
Description:
- This preference is a binary setting which determines whether patrons can place holds on items from other branches. If the preference is set to “Allow” patrons can place such holds, if it is set to “Don’t allow” they cannot. This is an important setting because it determines if users can use Koha to request items from another branch. If the library is sharing an installation of Koha with other independent libraries which do not wish to allow interlibrary borrowing it is recommended that this parameter be set to “Don’t allow”.
Values:
- Allow
- Don’t allow (with independent branches)
DisplayMultiPlaceHold
Default: Don’t enable
Asks: ___ the ability to place holds on multiple biblio from the search results
Values:
- Don’t enable
- Enable
emailLibrarianWhenHoldIsPlaced
Default: Don’t enable
Asks: ___ sending an email to the Koha administrator email address whenever a hold request is placed.
Values:
- Don’t enable
- Enable
Description:
- This preference enables Koha to email the library staff whenever a patron requests an item to be held. While this function will immediately alert the librarian to the patron’s need, it is extremely impractical in most library settings. In most libraries the hold lists are monitored and maintained from a separate interface. That said, many libraries that allow on shelf holds prefer to have this preference turned on so that they are alerted to pull an item from the shelf.
Important
In order for this email to send you must have a notice template with the code of HOLDSPLACED
Important
This notice will only be sent if the process_message_queue.pl cronjob being run periodically to send the messages.
ExpireReservesMaxPickUpDelay
Default: Don’t allow
Asks: ___ holds to expire automatically if they have not been picked by within the time period specified in ReservesMaxPickUpDelay
Values:
- Allow
- Don’t allow
Description:
- If set to ‘allow’ this will cancel holds that have been waiting for longer than the number of days specified in the ReservesMaxPickUpDelay system preference. Holds will only be cancelled if the Expire Holds cron job is runnning.
ExpireReservesMaxPickUpDelayCharge
Default: 0
Asks: If using ExpireReservesMaxPickUpDelay, charge a borrower who allows his or her waiting hold to expire a fee of ___ USD
Description:
- If you are expiring holds that have been waiting too long you can use this preference to charge the patron for not picking up their hold. If you don’t charge patrons for items that aren’t picked up you can leave this set to the default which is 0. Holds will only be cancelled and charged if the Expire Holds cron job is running.
OPACAllowHoldDateInFuture
Default: Allow
Asks: ___ patrons to place holds that don’t enter the waiting list until a certain future date.
Values:
Allow - AllowHoldDateInFuture
must also be enabled for this to work
Don’t allow
OPACAllowUserToChooseBranch
Default: Allow
Asks: ___ a user to choose the branch to pick up a hold from.
Values:
- Allow
- Don’t allow
Description:
- Changing this preference will not prevent staff from being able to transfer titles from one branch to another to fill a hold, it will only prevent patrons from saying they plan on picking a book up at a branch other than their home branch.
ReservesControlBranch
Default: item’s home library
Asks: Check the ___ to see if the patron can place a hold on the item.
Values:
- item’s home library.
- patron’s home library.
ReservesMaxPickUpDelay
Default: 7
Asks: Mark a hold as problematic if it has been waiting for more than ___ days.
Description:
- This preference (based on calendar days, not the Koha holiday calendar) puts an expiration date on an item a patron has on hold. After this expiration date the staff will have the option to release the unclaimed hold which then may be returned to the library shelf or issued to the next patron on the item’s hold list. Items that are ‘expired’ by this preference are moved to the ‘Holds Over’ tab on the ‘Holds Awaiting Pickup‘ report.
ReservesNeedReturns
Default: Don’t automatically
Asks: ___ mark holds as found and waiting when a hold is placed specifically on them and they are already checked in.
Values:
- Automatically
- Don’t automatically
Description:
- This preference refers to ‘item specific’ holds where the item is currently on the library shelf. This preference allows a library to decide whether an ‘item specific’ hold is marked as “Waiting” at the time the hold is placed or if the item will be marked as “Waiting” after the item is checked in. This preference will tell the patron that their item is ‘Waiting’ for them at their library and ready for check out.
StaticHoldsQueueWeight & RandomizeHoldsQueueWeight ^^^^^^^^^^^^^^^^^^^^^^^^^^^^^^^^^^^^^^^^^^^^^^^^^^
StaticHoldsQueueWeight Default: 0
RandomizeHoldsQueueWeight Default: in that order
Asks: Satisfy holds from the libraries ___ (as branchcodes, separated by commas; if empty, uses all libraries) ___
RandomizeHoldsQueueWeight Values:
in random order - If StaticHoldsQueueWeight is left at the default
Koha will randomize all libraries, otherwise it will randomize the libraries listed.
in that order - If StaticHoldsQueueWeight is left at the default
then this will use all of your branches in alphabetical order, otherwise it will use the branches in the order that you entered them in the StaticHoldsQueueWeight preference.
Descriptions:
- These preferences control how the Holds Queue report is generated using a cron job. If you do not want all of your libraries to participate in the on-shelf holds fulfillment process, you should list the the libraries that *do* participate in the process here by inputting all the participating library’s branchcodes, separated by commas ( e.g. “MPL,CPL,SPL,BML” etc. ). By default, the holds queue will be generated such that the system will first attempt to hold fulfillment using items already at the pickup library if possible. If there are no items available at the pickup library to fill a hold, build_holds_queue.pl will then use the list of libraries defined in StaticHoldsQueueWeight. If RandomizeHoldsQueueWeight is disabled ( which it is by default ), the script will assign fulfillment requests in the order the branches are placed in the StaticHoldsQueueWeight system preference. For example, if your system has three libraries, of varying sizes ( small, medium and large ) and you want the burden of holds fulfillment to be on larger libraries before smaller libraries, you would want StaticHoldsQueueWeight to look something like “LRG,MED,SML”. If you want the burden of holds fulfillment to be spread out equally throughout your library system, simply enable RandomizeHoldsQueueWeight. When this system preference is enabled, the order in which libraries will be requested to fulfill an on-shelf hold will be randomized each time the list is regenerated. Leaving StaticHoldsQueueWeight empty is contraindicated at this time. Doing so will cause the build_holds_queue script to ignore RandomizeHoldsQueueWeight, causing the script to request hold fulfillment not randomly, but by alphabetical order.
SuspendHoldsIntranet
Default: Allow
Asks: ___ holds to be suspended from the intranet.
Values:
- Allow
- Don’t allow
Description:
- The holds suspension feature can be turned on and off in the staff client by altering this system preference. If this is set to ‘allow’ you will want to set the AutoResumeSuspendedHolds system preference.
SuspendHoldsOpac
Default: Allow
Asks: ___ holds to be suspended from the OPAC.
Values:
- Allow
- Don’t allow
Description:
- The holds suspension feature can be turned on and off in the OPAC by altering this system preference. If this is set to ‘allow’ you will want to set the AutoResumeSuspendedHolds system preference.
Interface
AllowAllMessageDeletion
Default: Don’t allow
Asks: ___ staff to delete messages added from other libraries.
Values:
- Allow
- Don’t allow
CircAutocompl
Default: Try
Asks: ___ to automatically fill in the member when entering a patron search on the circulation screen.
Description:
- This preference is a binary setting which determines whether auto-completion of fields is enabled or disabled for the circulation input field. Setting it to “Try” would enable a staff member to begin typing a name or other value into the field and have a menu pop up with suggestions for completing it. Setting it to “Don’t try” would disable this feature. This preference can make staff members’ jobs easier or it could potentially slow down the page loading process.
Values:
- Don’t try
- Try When CircAutocompl is turned on search results will appear below the search box .. image:: images/admin/globalprefs/CircAutocompl.png
CircAutoPrintQuickSlip
Default: open a print quick slip window
Asks: When an empty barcode field is submitted in circulation ___
Values:
- clear the screen
- open a print quick slip window
Description:
- If this preference is set to open a quick slip for printing it will eliminate the need for the librarian to click the print button to generate a checkout receipt for the patron they’re checking out to. If the preference is set to clear the screen then “checking out” an empty barcode will clear the screen of the patron you were last working with.
FilterBeforeOverdueReport
Default: Don’t require
Asks: ___ staff to choose which checkouts to show before running the overdues report.
Description:
- Koha’s overdue report shows you all of the overdue items in your library system. If you have a large library system you’ll want to set this preference to ‘Require’ to force those running the report to first limit the data generated to a branch, date range, patron category or other such filter. Requiring that the report be filtered before it’s run prevents your staff from running a system heavy report and slowing down other operations in the system. Overdue Report Filters .. image:: images/admin/globalprefs/FilterBeforeOverdueReport.png
Values:
- Don’t require
- Require
FineNotifyAtCheckin
Default: Don’t notify
Asks: ___ librarians of overdue fines on the items they are checking in.
Values:
- Don’t notify
- Notify
Description:
- With this preference set to ‘Notify’ all books that have overdue fines owed on them will pop up a warning when checking them in. This warning will need to acknowledged before you can continue checking items in. With this preference set to ‘Don’t notify,’ you will still see fines owed on the patron record, you just won’t have an additional notification at check in. Fine notification at checkin .. image:: images/admin/globalprefs/FineNotifyAtCheckin.png
DisplayClearScreenButton
Default: Show
Asks: ___ a button to clear the current patron from the screen on the circulation screen.
Values:
- Don’t show No X in the top right .. image:: images/admin/globalprefs/DisplayClearScreenButtonOff.png
- Show X in the top right will clear the screen .. image:: images/admin/globalprefs/DisplayClearScreenButton.png
itemBarcodeInputFilter
Default: Don’t filter
Asks: ___ scanned patron barcodes.
Values:
Convert from CueCat format
Convert from Libsuite8 form
Don’t filter
EAN-13 or zero-padded UPC-A from
Remove spaces from
Remove the first number from T-prefix style - This format is common among those libraries
migrating from Follett systems
NoticeCSS
Asks: Include the stylesheet at ___ on Notices.
Important
This should be a complete URL, starting with http://
Description:
- If you would like to style your notices with a consistent set of fonts and colors you can use this preference to point Koha to a stylesheet specifically for your notices.
previousIssuesDefaultSortOrder
Default: earliest to latest
Asks: Sort previous checkouts on the circulation page from ___ due date.
Values:
- earliest to latest
- latest to earliest
RecordLocalUseOnReturn
Default: Don’t record
Asks: ___ local use when an unissued item is checked in.
Values:
- Don’t record
- Record
Description:
- When this preference is set to “Don’t record” you can record local use of items by checking items out to the statistical patron. With this preference set to “Record” you can record local use by checking out to the statistical patron and/or by checking in a book that is not currently checked out.
soundon
Default: Don’t enable
Asks: ___ circulation sounds during checkin and checkout in the staff interface.
Values:
- Don’t enable
- Enable
Important
This feature is not supported by all browsers. Requires an HTML5 compliant browser.
SpecifyDueDate
Default: Allow
Asks: ___ staff to specify a due date for a checkout.
Due dates are calculated using your circulation and fines rules, but staff can override that if you allow them to specify a due date at checkout.
Description:
- This preference allows for circulation staff to change a due date from the automatic due date to another calendar date. This option would be used for circumstances in which the due date may need to be decreased or extended in a specific circumstance. The “Allow” setting would allow for this option to be utilized by staff, the “Don’t allow” setting would bar staff from changing the due date on materials.
Values:
- Allow Specify Due Date Box Shows .. image:: images/admin/globalprefs/SpecifyDueDate.png
- Don’t allow Specify Due Date Box Doesn’t Show .. image:: images/admin/globalprefs/SpecifyDueDate-no.png
todaysIssuesDefaultSortOrder
Default: latest to earliest
Asks: Sort today’s checkouts on the circulation page from ___ due date.
Values:
- earliest to latest
- latest to earliest
UpdateTotalIssuesOnCirc
Default: Do not
Asks: ___ update a bibliographic record’s total issues count whenever an item is issued
Values:
Do .. important:: This increases server load significantly; if
performance is a concern, use the cron job to update the total issues count instead.
Do not
Description:
- Koha can track the number of times and item is checked out and store that on the item record in the database. This information is not stored by default. Setting this preference to ‘Do’ will tell Koha to track that info everytime the item is checked out in real time. Otherwise you could use the cron job to have Koha update that field nightly.
UseTablesortForCirc
Default: Don’t enable
Asks: ___ the sorting of current patron checkouts on the circulation screen.
Values:
- Don’t enable
- Enable
Important
Enabling this function may slow down circulation time for patrons with many checkouts.
WaitingNotifyAtCheckin
Default: Don’t notify
Asks: ___ librarians of waiting holds for the patron whose items they are checking in.
Values:
- Don’t notify
- Notify Notification that a hold is waiting .. image:: images/admin/globalprefs/WaitingNotifyAtCheckin.png
Description:
- When checking in books you can choose whether or not to have a notice pop up if the patron who returned the book has a hold waiting for pick up. If you choose ‘Notify’ for WaitingNotifyAtCheckin then every time a hold is found for the patron who had the book out last a message will appear on your check in screen.
Self Checkout
AllowSelfCheckReturns
Default: Don’t allow
Asks: ___ patrons to return items through web-based self checkout system.
Values:
- Allow
- Don’t allow
Description:
- This preference is used to determine if you want patrons to be allowed to return items through your self check machines. By default Koha’s self check interface is simply for checking items out.
AutoSelfCheckAllowed, AutoSelfCheckID & AutoSelfCheckPass ^^^^^^^^^^^^^^^^^^^^^^^^^^^^^^^^^^^^^^^^^^^^^^^^^^^^^^^^^
Important
Most libraries will want to leave this set to ‘Don’t allow.’ This preference turns off the requirement to log into the self checkout machine with a staff username and password by storing the username and password for automatic login.
AutoSelfCheckAllowed Default: Don’t allow
Asks: ___ the web-based self checkout system to automatically login with this staff login ___ and this password ___ .
AutoSelfCheckAllowed Values:
- Allow
- Don’t allow
AutoSelfCheckID needs to be set to the username of a staff member with ‘circulate’ permissions.
AutoSelfCheckPass needs to be set to the password of a staff member with ‘circulate’ permissions.
SelfCheckHelpMessage
Asks: Include the following HTML in the Help page of the web-based self checkout system
Description:
- Clicking the ‘Help’ link in the top right of the self checkout interface opens up a three step process for using the self check interface. Adding HTML to this system preference will print that additional help text above what’s already included.
SelfCheckoutByLogin
Default: Barcode
Asks: Have patrons login into the web-based self checkout system with their ___
Values:
- Barcode Self Checkout Patron Card Number .. image:: images/circ/selfcheckout.png
- Username and password Shelf checkout by login .. image:: images/circ/SelfCheckoutByLogin.png
Description:
- This preference lets you decide how your patrons will log in to the self checkout machine. Barcode is the patron’s card number and their username and password is set using the opac/staff username and password fields on the patron record.
SelfCheckTimeout
Default: 120
Asks: Time out the current patron’s web-based self checkout system login after ___ seconds.
Description:
- After the machine is idle for the time entered in this preference the self check out system will log out the current patron and return to the starting screen.
ShowPatronImageInWebBasedSelfCheck
Default: Don’t show
Asks: ___ the patron’s picture (if one has been added) when they use the web-based self checkout.
Values:
- Don’t show
- Show
WebBasedSelfCheck
Default: Don’t enable
Asks: ___ the web-based self checkout system.
Values:
- Don’t enable
- Enable
Enabling this preference will allow access to the self checkout module in Koha.
Creators
These preferences have to do with creating content.
Get there: More > Administration > Global System Preferences > Creators
Patron Cards
These preferences are in reference to the Patron Card Creator tool.
ImageLimit
Asks: Limit the number of creator images stored in the database to ___ images.
Enhanced Content
Get there: More > Administration > Global System Preferences > Enhanced Content
Important
Always read the terms of service associated with external data sources to be sure that you are using the products within the allowed limits.
Tip
You cannot have more than one service for cover images (including local cover images) set up. If you set up more than one you will get multiple cover images. Instead choose only one source for cover images.
All
FRBRizeEditions
Default: Don’t show
Asks: ___ other editions of an item on the staff client
Values:
- Don’t show
- Show Editions tab in staff client .. image:: images/admin/globalprefs/editionstab.png
Description:
- Using the rules set forth in the Functional Requirements for Bibliographic records, this option, when enabled, pulls all editions of the same title available in your collection regardless of material type. Items will appear under an ‘Editions’ tab on the detail page for the title in question.. According to Libraries Unlimited’s Online Dictionary for Library and Information Science (http://lu.com/odlis/), FRBRizing the catalog involves collating MARC records of similar materials. FRBRization brings together entities (sets of Works, Expressions, or Manifestations), rather than just sets of Items. It can aid patrons in selecting related items, expressions, and manifestations that will serve their needs. When it is set to “Show”, the OPAC will query one or more ISBN web services for associated ISBNs and display an Editions tab on the details pages. Once this preference is enabled, the library must select one of the ISBN options (ThingISBN or XISBN). This option is only for the Staff Client; the OPACFRBRizeEditions option must be enabled to have the Editions tab appear on the OPAC.
OPACFRBRizeEditions
Default: Don’t show
Asks: ___ other editions of an item on the OPAC.
Description:
- Using the rules set forth in the Functional Requirements for Bibliographic records, this option, when enabled, pulls all editions of the same title available in your collection regardless of material type. Items will appear under an ‘Editions’ tab on the detail page for the title in question.. According to Libraries Unlimited’s Online Dictionary for Library and Information Science (http://lu.com/odlis/), FRBRizing the catalog involves collating MARC records of similar materials. FRBRization brings together entities (sets of Works, Expressions, or Manifestations), rather than just sets of Items. It can aid patrons in selecting related items, expressions, and manifestations that will serve their needs. When it is set to “Show”, the OPAC will query one or more ISBN web services for associated ISBNs and display an Editions tab on the details pages. Once this preference is enabled, the library must select one of the ISBN options (ThingISBN or XISBN). This option is only for the OPAC; the ‘FRBRizeEditions’ option must be turned “On” to have the Editions tab appear on the Staff Client.
Values:
- Don’t show
- Show Editions tab in the OPAC .. image:: images/admin/globalprefs/editions.png
This preference pulls all editions of the same title available in your collection regardless of material type. Items will appear under an ‘Editions’ tab on the detail page for the title in question.
Amazon
AmazonEnabled
Default: Don’t use
Asks: ___ data from Amazon on the staff interface (including reviews and “Search Inside” links on item detail pages).
Values:
- Don’t use
- Use
Important
This requires that you have signed up for and entered an access key.
- Sign up at: http://aws.amazon.com/
- Enter your key in the AWSAccessKeyID system preference
Description:
- This preference does not display any content but instead enables other Amazon-related preferences (AmazonCoverImages, AmazonSimilarItems, AmazonReviews). Before turning this feature to “Use”, the library must first set AWSAccessKeyID and AWSPrivateKey. Furthermore, if Amazon content is enabled, other jacket services should be disabled to avoid interference. This preference applies only to the Staff Client. In order to display Amazon content on the OPAC, please set the OPACAmazonEnabled preference.
OPACAmazonEnabled
Default: Don’t use
Asks: ___ data from Amazon on the OPAC (including reviews and “Search Inside” links on item detail pages).
Values:
- Don’t use
- Use
Important
This requires that you have signed up for and entered an access key.
- Sign up at: http://aws.amazon.com/
- Set your enter your key in the AWSAccessKeyID system preference
Description:
- This preference does not display any content but instead enables other Amazon-related preferences (AmazonCoverImages, AmazonSimilarItems, AmazonReviews). Before turning this feature to “Use”, the library must first set AWSAccessKeyID and AWSPrivateKey. Furthermore, if Amazon content is enabled, other jacket services should be disabled to avoid interference. This preference applies only to the OPAC. In order to display Amazon content on the Staff Client, please set the AmazonEnabled preference.
AmazonLocale
Default: American
Asks: Use Amazon data from its ___ website.
Value:
- American
- British
- Canadian
- French
- German
- Japanese
AWSAccessKeyID
Asks: Access Amazon content using the access key ___
Sign up at: http://aws.amazon.com/
Description:
- If the library has signed up for an Amazon Web Services (AWS) account, it will be assigned an Access Key ID. In order to enable Amazon content, cover images, reviews, and similar item suggestions, the library’s Access Key ID must be entered here.
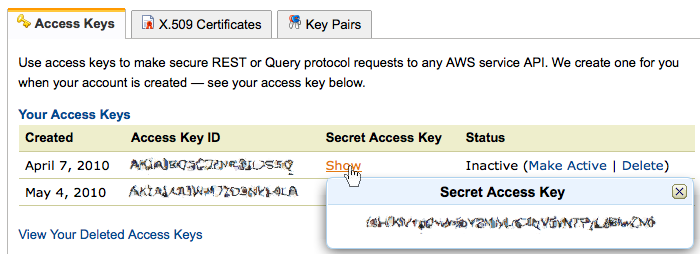
Once signed up your keys can be accessed by logging into your account and going to the ‘Security Credentials’ page. Your Access Key will be listed next to the date it was created.
Amazon Access Keys
AWSPrivateKey
Asks: Access Amazon content (other than book jackets) using the private key ___
Sign up at: http://aws.amazon.com/
Description:
- If the library has signed up for an Amazon Web Services (AWS) account, it will be assigned a Secret Access Key. In order to enable Amazon reviews and similar item suggestions, the library’s Secret Access Key must be entered here.
Once signed up your keys can be accessed by logging into your account and going to the ‘Security Credentials’ page. Next to your Access key is a link that says ‘Show,’ clicking this will open up your secret access key or your AWSPrivateKey.
Amazon Private Key
AmazonAssocTag
Asks: Put the associate tag ___ on links to Amazon.
Tip
This can net your library referral fees if a patron decides to buy an item after clicking through to Amazon from your site.
Description:
- An Amazon Associates Tag allows a library to earn a percentage of all purchases made on Amazon when a patron accesses Amazon’s site via links on the library’s website. More information about the Amazon Associates program is available at Amazon’s Affiliate Program’s website, https://affiliate-program.amazon.com/. Before a tag can be obtained, however, the library must first apply for an Amazon Web Services (AWS) account. Applications are free of charge and can be made at http://aws.amazon.com. Once an AWS account has been established, the library can then obtain the Amazon Associates Tag.
Sign up at: https://affiliate-program.amazon.com/
AmazonCoverImages
Default: Don’t show
Asks: ___ cover images from Amazon on search results and item detail pages on the staff interface.
Values:
- Don’t show
- Show
Description:
- This preference makes it possible to either allow or prevent Amazon cover images from being displayed in the Staff Client. Cover images are retrieved by Amazon, which pulls the content based on the first ISBN number in the item’s MARC record. Amazon offers this service free of charge, but interested libraries must first establish an Amazon Web Services (AWS) account (http://aws.amazon.com). If the value for this preference is set to “Show”, the cover images will appear in the Staff Client, and if it is set to “Don’t show”, the images will not appear. If activating this feature, the library must first set AWSAccessKeyID and AWSPrivateKey. Finally, if you’re using Amazon cover images, all other cover image services must be disabled. If they are not disabled, they will prevent AmazonCoverImages from functioning properly.
Important
Requires that AmazonEnabled is set to ‘Use’
AmazonReviews
Default: Don’t show
Asks: ___ reviews from Amazon on item detail pages on the staff interface.
Values:
- Don’t show
- Show
Description:
- This preference makes it possible to either allow or prevent Amazon reviews from being displayed in the Staff Client. Amazon offers this service free of charge, but interested libraries must first establish an Amazon Web Services (AWS) account (http://aws.amazon.com). If the value is set to “Show”, the reviews will appear in the Staff Client, and if it is set to “Don’t show”, the reviews will not appear. Before setting this to “Show”, the library must first set AWSAccessKeyID and AWSPrivateKey. Finally, if AmazonReviews is enabled, all other review services should be disabled to avoid interference.
Important
Since a change in terms of service by Amazon, this feature no longer works.
AmazonSimilarItems
Default: Don’t show
Asks: ___ similar items, as determined by Amazon, on item detail pages on the staff interface.
Values:
Don’t show
Show - This will use Amazon data to determine if you have
similar items in your collection - it will not show items that you do not already have cataloged at your library.
Description:
- This preference makes it possible to either allow or prevent Amazon’s suggestions for Similar Items from being displayed in the Staff Client. Amazon offers this service free of charge, but interested libraries must first establish an Amazon Web Services (AWS) account (http://aws.amazon.com). If the value is set to “Show”, the Similar Items suggestions will appear in the Staff Client, and if it is set to “Don’t show”, the suggestions will not appear. Before enabling this preference, the library must first set AWSAccessKeyID and AWSPrivateKey. Finally, if AmazonSimilarItems is enabled, all other similar item services should be disabled to avoid interference.
Important
Since a change in terms of service by Amazon, this feature no longer works.
OPACAmazonCoverImages
Default: Don’t show
Asks: ___ cover images from Amazon on search results and item detail pages on the OPAC.
Values:
- Don’t show
- Show
Description:
- This preference makes it possible to either allow or prevent Amazon cover images from being displayed in the OPAC. Cover images are retrieved by Amazon, which pulls the content based on the first ISBN number in the item’s MARC record. Amazon offers this service free of charge, but interested libraries must first establish an Amazon Web Services (AWS) account (http://aws.amazon.com). If the value for this preference is set to “Show”, the cover images will appear in the OPAC, and if it is set to “Don’t show”, the images will not appear. If activating this feature, the library must first set AWSAccessKeyID and AWSPrivateKey. Finally, if you’re using Amazon cover images, all other cover image services must be disabled. If they are not disabled, they will prevent AmazonCoverImages from functioning properly.
Important
Requires that OPACAmazonEnabled is set to ‘Use’
OPACAmazonSimilarItems
Default: Don’t show
Asks: ___ similar items, as determined by Amazon, on item detail pages on the OPAC.
Values:
Don’t show
Show - This will use Amazon data to determine if you have
similar items in your collection - it will not show items that you do not already have cataloged at your library.
Description:
- This preference makes it possible to either allow or prevent Amazon’s suggestions for Similar Items from being displayed in the OPAC. Amazon offers this service free of charge, but interested libraries must first establish an Amazon Web Services (AWS) account (http://aws.amazon.com). If the value is set to “Show”, the Similar Items suggestions will appear in the OPAC, and if it is set to “Don’t show”, the suggestions will not appear. Before enabling this preference, the library must first set AWSAccessKeyID and AWSPrivateKey. Finally, if AmazonSimilarItems is enabled, all other similar item services should be disabled to avoid interference.
Important
Since a change in terms of service by Amazon, this feature no longer works.
OPACAmazonReviews
Default: Don’t show
Asks: ___ reviews from Amazon on item detail pages on the OPAC.
Values:
- Don’t show
- Show
Description:
- This preference makes it possible to either allow or prevent Amazon reviews from being displayed in the OPAC. Amazon offers this service free of charge, but interested libraries must first establish an Amazon Web Services (AWS) account (http://aws.amazon.com). If the value is set to “Show”, the reviews will appear in the OPAC, and if it is set to “Don’t show”, the reviews will not appear. Before setting this to “Show”, the library must first set AWSAccessKeyID and AWSPrivateKey. Finally, if AmazonReviews is enabled, all other review services should be disabled to avoid interference.
Important
Since a change in terms of service by Amazon, this feature no longer works.
Babelthèque
Babeltheque
Default: Don’t
Asks: ___ include information (such as reviews and citations) from Babelthèque in item detail pages on the OPAC.
Description:
- This preference makes it possible to display a Babeltheque tab in the OPAC, allowing patrons to access tags, reviews, and additional title information provided by Babeltheque. The information which Babeltheque supplies is drawn from the French language-based Babelio.com, a French service similar to LibraryThing for Libraries. More information about Babeltheque is available through its website, http://www.babeltheque.com. Libraries that wish to allow access to this information must first register for the service at http://www.babeltheque.com. Please note that this information is only provided in French.
Values:
- Do Data from Babelthèque on the bib record .. image:: images/admin/globalprefs/Babeltheque.png
- Don’t
Babeltheque_url_js
Asks: ___ Defined the url for the Babeltheque javascript file (eg. http://www.babeltheque.com/bw_XX.js)
Babeltheque_url_update
Asks: ___ Defined the url for the Babeltheque update periodically (eq. http://www.babeltheque.com/.../file.csv.bz2).
Baker & Taylor
Important
This is a pay service, you must contact Baker & Taylor to subscribe to this service before setting these options.
BakerTaylorEnabled
Default: Don’t add
Asks: ___ Baker and Taylor links and cover images to the OPAC and staff client. This requires that you have entered in a username and password (which can be seen in image links).
Values:
- Add
- Don’t add
Description:
- This preference makes it possible to display Baker & Taylor content (book reviews, descriptions, cover images, etc.) in both the Staff Client and the OPAC. Libraries that wish to display Baker & Taylor content must first register and pay for this service with Baker & Taylor (http://www.btol.com). If Baker & Taylor content is enabled be sure to turn off other cover and review services to prevent interference.
Important
To use this you will need to also set the BakerTaylorUsername & BakerTaylorPassword system preferences
BakerTaylorBookstoreURL
Asks: Baker and Taylor “My Library Bookstore” links should be accessed at https:// ___ isbn
Description:
- Some libraries generate additional funding for the library by selling books and other materials that are purchased from or have been previously leased from Baker & Taylor. These materials can be accessed via a link on the library’s website. This service is often referred to as “My Library Bookstore.” In order to participate in this program, the library must first register and pay for the service with Baker & Taylor. Additional information about this and other services provided by Baker & Taylor is available at the Baker & Taylor website, http://www.btol.com. The BakerTaylorBookstoreURL preference establishes the URL in order to link to the library’s Baker & Taylor-backed online bookstore, if such a bookstore has been established. The default for this field is left blank; if no value is entered, the links to My Library Bookstore will remain inactive. If enabling this preference, enter the library’s Hostname and Parent Number in the appropriate location within the URL. The “key” value (key=) should be appended to the URL, and https:// should be prepended.
This should be filled in with something like koha.mylibrarybookstore.com/MLB/actions/searchHandler.do?nextPage=bookDetails&parentNum=10923&key=
Tip
Leave it blank to disable these links.
Important
Be sure to get this information from Baker & Taylor when subscribing.
BakerTaylorUsername & BakerTaylorPassword
Asks: Access Baker and Taylor using username ___ and password ___
Descriptions:
- This setting in only applicable if the library has a paid subscription to the external Content Café service from Baker & Taylor. Use the box provided to enter in the library’s Content Café username and password. Also, ensure that the BakerTaylorBookstoreURL and BakerTaylorEnabled settings are properly set. The Content Café service is a feed of enhanced content such as cover art, professional reviews, and summaries that is displayed along with Staff Client/OPAC search results. For more information on this service please see the Baker & Taylor website: http://www.btol.com
Important
Be sure to get this information from Baker & Taylor when subscribing.
Google
GoogleJackets
Default: Don’t add
Asks: ___ cover images from Google Books to search results and item detail pages on the OPAC.
Values:
- Add
- Don’t add
Description:
- This setting controls the display of applicable cover art from the free Google Books database, via the Google Books API. Please note that to use this feature, all other cover services should be turned off.
LibraryThing
LibraryThing for Libraries is a pay service. You must first contact LibraryThing directly for pricing and subscription information. Learn more at http://www.librarything.com/forlibraries. Also, for further configuration instructions please see the LibraryThing Wiki: http://www.librarything.com/wiki/index.php/Koha
ThingISBN
Default: Don’t use
Asks: ___ the ThingISBN service to show other editions of a title
Values:
- Don’t use
- Use
Description:
- Set to ‘Use’ to display an “Editions” tab on the item’s detail page. Editions are listed, complete with cover art (if you have one of the cover services enabled) and bibliographic information. The feed comes from LibraryThing’s ThingISBN web service. This is a free service to non-commercial sites with fewer than 1,000 requests per day.
Important
Requires FRBRizeEditions and/or OPACFRBRizeEditions set to ‘show’
Important
This is separate from Library Thing for Libraries and does not have a cost associated with it.
LibraryThingForLibrariesEnabled
Default: Don’t show
Asks: ___ reviews, similar items, and tags from Library Thing for Libraries on item detail pages on the OPAC.
Values:
- Don’t show
- Show
Description:
- This setting is only applicable if the library has a paid subscription to the external LibraryThing for Libraries service. This service can provide patrons with the display of expanded information on catalog items such as book recommendations. It also can offer advanced features like tagged browsing, patron written reviews, and a virtual library display accessed from the details tab.
Important
If this is set to ‘show’ you will need to enter a value in the ‘LibraryThingForLibrariesID‘ system preference.
LibraryThingForLibrariesID
Asks: Access Library Thing for Libraries using the customer ID ___
Description:
- This setting is only applicable if the library has a paid subscription to the external LibraryThing for Libraries service. Use the box provided to enter in the library’s LibraryThing for Libraries ID as provided to the library by LibraryThing. The ID number is a series of numbers in the form ###-#########, and can be found on the library’s account page at LibraryThing for Libraries. This service can provide patrons with the display of expanded information on catalog items such as book recommendations and cover art. It also can offer advanced features like tagged browsing, patron written reviews, and a virtual library display accessed from the details tab.
LibraryThingForLibrariesTabbedView
Default: in line with bibliographic information
Asks: Show Library Thing for Libraries content ___
Values:
- in line with bibliographic information
- in tabs
Description:
- This setting is only applicable if the library has a paid subscription to the external LibraryThing for Libraries service. This service can provide patrons with the display of expanded information on catalog items such as book recommendations and cover art. It also can offer advanced features like tagged browsing, patron written reviews, and a virtual library display accessed from the details tab.
Local Cover Images
AllowMultipleCovers
Default: Don’t allow
Asks: ___ multiple images to be attached to each bibliographic record.
Values:
- Allow
- Don’t allow
Description:
- If this preference is set to ‘Allow’ then you can upload multiple images that will appear in the images tab on the bib record in the OPAC and the staff client. This preference requires that either one or both LocalCoverImages and OPACLocalCoverImages are set to ‘Display.’ Multiple cover images .. image:: images/admin/globalprefs/AllowMultipleCovers.png
LocalCoverImages
Default: Don’t display
Asks: ___ local cover images on intranet search and details pages.
Values:
- Display
- Don’t display
Description:
- Setting this preference to ‘Display’ allows you to upload your own cover images to bib records and display them on the detail page in the staff client. At this time the cover will only show under the ‘Images’ tab on the holdings table on the detail display, not next to the title at the top left or on the search results.
OPACLocalCoverImages
Default: Don’t display
Asks: ___ local cover images on OPAC search and details pages.
Values:
- Display
- Don’t display
Description:
- Setting this preference to ‘Display’ allows you to upload your own cover images to bib records and display them on the detail page and search results in the OPAC.
Novelist Select
Novelist Select is not a free service. Contact your Ebsco representitive to get your log in information to embed this content in the OPAC.
Important
Novelist Select does not include cover images for the search results and bibliographic detail pages. You can choose any other cover image service for this content.
NovelistSelectEnabled
Default: Don’t add
Asks: ___ Novelist Select content to the OPAC.
Values:
- Add
- Don’t add
Important
Enabling this requires that you have entered in a user profile and password in the NovelistSelectProfile & NovelistSelectPassword preferencesDescription:
- Novelist Select from Ebsco is a subscription service that can provide additional content in the OPAC.
NovelistSelectProfile & NovelistSelectPassword
Asks: Access Novelist Select using user profile ___ and password ___.
Important
This information will be visible if someone views the source code on your OPAC.
Description:
- Novelist Select from Ebsco is a subscription service that can provide additional content in the OPAC.
NovelistSelectView
Default: in an OPAC tab
Asks: Display Novelist Select content ___
Description:
- Novelist Select provides a lot of content, for that reason you have four choices of where to display this content. The default view is in a tab in the holdings table. Novelist Select in a tab .. image:: images/admin/globalprefs/novelisttab.png The content is the same if you choose to show it above the holdings table or below it. If shown in the right column of the page it’s the same content, but displays a bit differently since space is limited. Novelist Select on the side .. image:: images/admin/globalprefs/novelistside.png
Values:
- above the holdings table
- below the holdings table
- in an OPAC tab
- under the Save Record dropdown on the right
OCLC
XISBN
Default: Don’t use
Asks: ___ the OCLC xISBN service to show other editions of a title
Description:
- Set to ‘Use’ to display an “Editions” tab on the item’s detail page. Editions are listed, complete with cover art and bibliographic information. The feed comes from OCLC’s xISBN web service. The feed limit for non-commercial sites is 1000 requests per day.
Values:
- Don’t use
- Use
Important
Requires FRBRizeEditions and/or OPACFRBRizeEditions set to ‘show’
OCLCAffiliateID
Asks: Use the OCLC affiliate ID ___ to access the xISBN service.
Description:
- This setting is only applicable if the library has an OCLC Affiliate ID. This allows WorldCat searching in the OPAC via the XISBN programming interface. Simply enter the library’s OCLC Affiliate ID in the box provided. Please note that using this data is only necessary if FRBRizeEditions and/or OPACFRBRizeEditions and XISBN settings are enabled. For more information on this service please visit the OCLC website: http://www.worldcat.org/affiliate/default.jsp.
Important
Unless you have signed up for an ID with OCLC, you are limited to 1000 requests per day. Available at: http://www.worldcat.org/affiliate/webservices/xisbn/app.jsp
XISBNDailyLimit
Default: 999
Asks: Only use the xISBN service ___ times a day.
Important
Unless you have signed up for an ID with OCLC, you are limited to 1000 requests per day. Available at: http://www.worldcat.org/affiliate/webservices/xisbn/app.jsp
Open Library
OpenLibraryCovers
Default: Don’t add
Asks: ___ cover images from Open Library to search results and item detail pages on the OPAC.
Values:
- Add
- Don’t add
Description:
- This setting controls the display of applicable cover art from the free Open Library database, via the Open Library API. Please note that to use this feature, all other cover services should be turned off.
Syndetics
Syndetics is a pay service. You must first contact Syndetics directly for pricing and subscription information.
SyndeticsEnabled
Default: Don’t use
Asks: ___ content from Syndetics.
Values:
- Don’t use
- Use
Description:
- When this option is enabled any of the Syndetics options can be used.
Important
Requires that you enter your SyndeticsClientCode before this content will appear.
SyndeticsClientCode
Asks: Use the client code ___ to access Syndetics.
Description:
- Once the library signs up for Syndetics’ services, Syndetics will provide the library with an access code. (Visit the Syndetics homepage at http://www.bowker.com/syndetics/ for more information.) This is the code that must be entered to access Syndetics’ subscription services. Syndetics is a paid subscription service. This value must be entered before SyndeticsEditions can be enabled. If the code is lost, corrupted, or forgotten, a new one can be obtained from http://www.bowker.com/syndetics/.
Important
You will need to get your client code directly from Syndetics.
SyndeticsCoverImages & SyndeticsCoverImageSize
SyndeticsCoverImages Default: Don’t show
SyndeticsCoverImageSize Default: medium
Asks: ___ cover images from Syndetics on search results and item detail pages on the OPAC in a ___ size.
Descriptions:
- When enabled, SyndeticsCoverImages, allows libraries to display Syndetics’ collection of full-color cover images for books, videos, DVDs and CDs on their OPAC. For each book or item that comes up during a user search, the cover image for that title will be displayed. Since these cover images come in three sizes, the optimum size must be selected using the SyndeticsCoverImageSize preference after SyndeticsCoverImages are enabled. Syndetics cover images come in two sizes: mid-size (187 x 187 pixels), and large (400 x 400 pixels). Syndetics is a paid subscription service. The SyndeticsClientCode must be entered and the SyndeticsEnabled option must be activated before this service can be used. Other cover image preferences should also be disabled to avoid interference.
SyndeticsCoverImages Values:
- Don’t show
- Show
SyndeticsCoverImageSize Values:
- medium
- large
SyndeticsAuthorNotes
Default: Don’t show
Asks: ___ notes about the author of a title from Syndetics on item detail pages on the OPAC.
Values:
- Don’t show
- Show
Description:
- When this option is set to “Show”, Syndetics provides notes and short author biographies for more that 300,000 authors, in both fiction and nonfiction. With this option enabled the library can display Syndetics Author Notes on the OPAC. According to the Syndetics Solutions website (http://www.bowker.com/syndetics/), Author Notes include lists of contributors for many multi-author texts and compilations. The SyndeticsClientCode must be entered and the SyndeticsEnabled option must be activated before this service can be used.
SyndeticsAwards
Default: Don’t show
Asks: ___ information from Syndetics about the awards a title has won on item detail pages on the OPAC.
Values:
- Don’t show
- Show
Description:
- When this option is set to “Show”, Syndetics provides its clients with a list of awards that any title has won. With this service enabled the library can display those awards for each book on its website. For each book or item that comes up during a user search, the list of awards for that title will be displayed. When a user clicks on a given award, information about that award is presented along with a list of the other titles that have won that award. If the user clicks on any title in the list, they will see holdings information about that title in their region. This option is a paid subscription service. The SyndeticsClientCode must be entered and the SyndeticsEnabled option must be activated before this service can be used.
SyndeticsEditions
Default: Don’t show
Asks: ___ information about other editions of a title from Syndetics on item detail pages on the OPAC
Description:
- When enabled this option shows information on other editions of a title from Syndetics on the item detail pages of the OPAC. Syndetics is a paid subscription service. The SyndeticsClientCode must be entered and the SyndeticsEnabled option must be activated before this service can be used.
Values:
- Don’t show
- Show
Important
Requires OPACFRBRizeEditions set to ‘show’
SyndeticsExcerpt
Default: Don’t show
Asks: ___ excerpts from of a title from Syndetics on item detail pages on the OPAC.
Values:
- Don’t show
- Show
Description:
- This preference allows Syndetics to display excerpts given to them from selected publishers. The excerpts are available from prominently reviewed new titles, both fiction and non-fiction. The excerpts include poems, essays, recipes, forwards and prefaces. Automatic links provided by the ISBNs within local MARC records are required to integrate Syndetics secured, high-speed Internet servers to the library OPACs. For more information see (http://www.bowker.com/syndetics/).
SyndeticsReviews
Default: Don’t show
Asks: ___ reviews of a title from Syndetics on item detail pages on the OPAC.
Values:
- Don’t show
- Show
Description:
- Syndetics Reviews is an accumulation of book reviews available from a variety of journals and serials. The reviews page displays colored images of reviewed books dust jackets, partnered with the names of the journal or serial providing the review. Clicking on an icon opens a window revealing the book title, author’s name, book cover icon and the critic’s opinion of the book. Automatic links provided by the ISBNs within local MARC records are required to integrate Syndetics secured, high-speed Internet servers to the library OPACs. For more information see (http://www.bowker.com/syndetics/).
SyndeticsSeries
Default: Don’t show
Asks: ___ information on other books in a title’s series from Syndetics on item detail pages on the OPAC.
Values:
- Don’t show
- Show
Description:
- Each fiction title within a series is linked to the complete series record. The record displays each title in reading order and also displays the publication order, if different. Alternate series titles are also displayed. Automatic links provided by the ISBNs within local MARC records are required to integrate Syndetics secured, high- speed Internet servers to the library OPACs. For more information see (http://www.bowker.com/syndetics/).
SyndeticsSummary
Default: Don’t show
Asks: ___ a summary of a title from Syndetics on item detail pages on the OPAC.
Values:
- Don’t show
- Show
Description:
- Providing more than 5.6 million summaries and annotations derived from book jackets, edited publisher copy, or independently written annotations from Book News, Inc. Covering fiction and non-fiction, this summaries option provides annotations on both trade and scholarly titles. For more information see (http://www.bowker.com/syndetics/).
SyndeticsTOC
Default: Don’t show
Asks: ___ the table of contents of a title from Syndetics on item detail pages on the OPAC.
Values:
- Don’t show
- Show
Description:
- This preference allows staff and patrons to review the Table of Contents from a wide variety of publications from popular self-help books to conference proceedings. Specific Information access is the main purpose for this option, allowing patrons guidance to their preferred section of the book. Special arrangements with selected book services is used to obtain the table of contents for new publications each year. Automatic links provided by the ISBNs within local MARC records are required to integrate Syndetics secured, high-speed Internet servers to the library OPACs. For more information see (http://www.bowker.com/syndetics/).
Tagging
TagsEnabled
Default: Allow
Asks: ___ patrons and staff to put tags on items.
Values:
- Allow
- Don’t allow
Description:
- Set to ‘Allow’ enable tagging. A tag is metadata, a word added to identify an item. Tags allow patrons to classify materials on their own. TagsEnabled is the main switch that permits the tagging features. TagsEnable must be set to ‘Allow’ to allow for other tagging features.
TagsModeration
Default: Don’t require
Asks: ___ that tags submitted by patrons be reviewed by a staff member before being shown.
Values:
- Don’t require
- Require
Description:
- When set to ‘Require,’ all tags to be first filtered by the tag moderator. Only approved tags will be visible to patrons. When set to ‘Don’t require’ tags will bypass the tag moderator and patrons’ tags to be immediately visible. When this preference is enabled the moderator, a staff member, would approve the tag in the Staff Client. The moderator will have the option to approve or reject each pending tag suggestion.
When moderation is required all tags go through the tag moderation tool before becoming visible.
- Get there: More > Tools > Tags
TagsShowOnList
Default: 6
Asks: Show ___ tags on search results on the OPAC.
Tip
Set the value to 0 (zero) to turn this feature off.
TagsInputOnList
Default: Allow
Asks: ___ patrons to input tags on search results on the OPAC.
Values:
- Allow Tags on Search Results .. image:: images/admin/globalprefs/TagsInputOnList.png
- Don’t allow
TagsShowOnDetail
Default: 10
Asks: Show ___ tags on item detail pages on the OPAC.
Tip
Set the value to 0 (zero) to turn this feature off.
TagsInputOnDetail
Default: Allow
Asks: ___ patrons to input tags on item detail pages on the OPAC.
Values:
- Allow Add Tags on Detail .. image:: images/admin/globalprefs/TagsInputOnDetail.png
- Don’t allow
TagsExternalDictionary
Asks: Allow tags in the dictionary of the ispell executable ___ on the server to be approved without moderation.
Description:
- The dictionary includes a list of accepted and rejected tags. The accepted list includes all the tags that have been pre-allowed. The rejected list includes tags that are not allowed. This preference identifies the “accepted” dictionary used. Ispell is an open source dictionary which can be used as a list of accepted terms. Since the dictionary allows for accurately spelled obscenities, the libraries policy may dictate that modifications are made to the Ispell dictionary if this preference is use. For more information about Ispell http://www.gnu.org/software/ispell/ispell.html. Enter the path on your server to a local ispell executable, used to set $Lingua::Ispell::path.
I18N/L10N
These preferences control your Internationalization and Localization settings.
Get there: More > Administration > Global System Preferences > I18N/L10N
CalendarFirstDayOfWeek
Default: Sunday
Asks: Use ___ as the first day of week in the calendar.
Values:
- Monday
- Sunday
Description:
- Using this preference you can control what day shows as the first day of the week in the calendar pop ups throughout Koha and on the Calendar tool. If you change this preference and don’t see a change in your browser try clearing your cache since it makes changes to the Javascript on these pages.
dateformat
Default: mm/dd/yyyy
Asks: Format dates like ___
Values:
- dd/mm/yyyy
- mm/dd/yyyy
- yyyy/mm/dd
Description:
- This preference controls how the date is displayed. The options are the United States method, mm/dd/yyyy (04/24/2010), the metric method, dd/mm/yyyy (24/04/2010) or ISO, which is the International Standard of Organization, yyyy/mm/dd (2010/04/24). The International Standard of Organization would primarily be used by libraries with locations in multiple nations that may use different date formats, to have a single display type, or if the library would be in a region that does not use the United States or metric method. More information regarding the ISO date format can be found at http://www.iso.org/iso/iso_catalogue.htm.
language
Default: English
Asks: Enable the following languages on the staff interface
Values:
- English
To install additional languages you need to run misc/translation/install-code.pl. For example, to install French you would run the following command install-code.pl fr-FR to make the templates, once they exist and are in the right place then they will show up as an option in this preference.
opaclanguages
Default: English
Asks: Enable the following languages on the OPAC
Values:
- English
To install additional languages you need to run misc/translation/install-code.pl. For example, to install French you would run the following command install-code.pl fr-FR to make the templates, once they exist and are in the right place then they will show up as an option in this preference.
opaclanguagesdisplay
Default: Don’t allow
Asks: ___ patrons to select their language on the OPAC.
Values:
- Allow When this preference is on, patrons can choose their language from a list at the bottom of the OPAC .. image:: images/admin/globalprefs/opaclanguagesdisplay.png
- Don’t allow
Local Use
These preferences are defined locally.
Get there: More > Administration > Global System Preferences > Local Use
Tip
Sometimes preferences which are either new or outdated will appear in this tab, if you didn’t add any preferences to this tab then it’s best to ignore preferences listed here.
Logs
Logs keep track of transaction on the system. You can decide which actions you want to log and which you don’t using these preferences.
Get there: More > Administration > Global System Preferences > Logs
CataloguingLog
Default: Don’t log
Asks: ___ any changes to bibliographic or item records.
Values:
- Don’t log
- Log
Important
Since this occurs whenever a book is cataloged, edited, or checked in or out it can be very resource intensive - slowing down your system.
FinesLog
Default: Log
Asks: ___ when overdue fines are charged or automatically forgiven.
Values:
- Don’t log
- Log
LetterLog
Default: Log
Asks: ___ when an automatic claim notice is sent.
Values:
- Don’t log
- Log
Tip
This log tracks all notices that go to patrons including the overdue notices.
SubscriptionLog
Default: Log
Asks: ___ when serials are added, deleted or changed.
Values:
- Don’t log
- Log
OPAC
Get there: More > Administration > Global System Preferences > OPAC
Appearance
These preferences control how things appear in the OPAC.
AuthorisedValueImages
Default: Don’t show
Asks: ___ images for authorized values (such as lost statuses and locations) in search results and item detail pages on the OPAC.
Values:
- Don’t show
- Show
Get there: More > Administration > Authorized Values
BiblioDefaultView
Default: in simple form
Asks: By default, show bib records ___
Values:
as specified in the ISBD template. - See ISBD preference
for more information
in simple form.
in their MARC format.
Description:
- This preference determines the level of bibliographic detail that the patron will see on the OPAC detail page. The simple form displays the graphical interface; MARC format displays the MARC21 cataloging view; ISBD displays the ISBD (International Standard Bibliographic Description, AACR2) view.
COinSinOPACResults
Default: Include
Asks: ___ COinS / OpenURL / Z39.88 in OPAC search results.
Values:
Don’t include - If you choose not to include COinS on the search
results, it will still be loaded on the individual bibliographic records.
Include - Enabling this feature will slow OPAC search response
times.
Description:
- COinS stands for ContextObjects in Spans. COinS is a method to embed bibliographic metadata in the HTML code of web pages. This allows bibliographic software to publish machine-readable bibliographic items and client reference management software (such as Zotero) to retrieve bibliographic metadata. The metadata can also be sent to an OpenURL resolver. This allows, for instance, searching for a copy of a book in one’s own library.
DisplayOPACiconsXSLT
Default: Don’t show
Asks: On pages displayed with XSLT stylesheets on the OPAC, ___ icons for itemtype and authorized values.
Important
OPACXSLTResultsDisplay and/or OPACXSLTDetailsDisplay must be set to use an XSLT stylesheet for this to show (default or custom)
Values:
- Don’t show
- Show DisplayOPACiconsXSLT .. image:: images/admin/globalprefs/DisplayOPACiconsXSLT.png
Tip
See the XSLT Icon Guide for more information on these icons.
hidelostitems
Default: Don’t show
Asks: ___ lost items on search and detail pages.
Description:
- Items that are marked lost by the library can either be shown or not shown on the OPAC. By setting the value to “Don’t show,” the lost item is not shown on the OPAC. By setting the value “Show,” the lost item is shown on the OPAC for patrons to view with a status of ‘lost.’
Values:
- Don’t show
- Show Lost item showing in the OPAC .. image:: images/admin/globalprefs/hidelostitems.png
LibraryName
Asks: Show ___ as the name of the library on the OPAC.
Tip
This value will appear in the title bar of the browser
Tip
Edit ‘opacheader‘ if you’d like to add a library name above your search box on the OPAC
Browser title and address bar

OpacAddMastheadLibraryPulldown
Default: Don’t add
Asks: ___ a library select pulldown menu on the OPAC masthead.
Values:
- Add Library select box on Koha OPAC .. image:: images/admin/globalprefs/OpacAddMastheadLibraryPulldown-add.png
- Don’t Add No library select box on Koha OPAC .. image:: images/admin/globalprefs/OpacAddMastheadLibraryPulldown-dontadd.png
OPACBaseURL
Asks: The OPAC is located at http:// ___
Important
This must be filled in correctly for RSS, unAPI, and search plugins to work.
Important
This must be filled in to show ‘OPAC View’ links from bib records in the staff client:
With OPACBaseURL set, links to the OPAC will appear on each individual bib record in the staff client
opaccolorstylesheet
Asks: Include the additional CSS stylesheet ___ to override specified settings from the default stylesheet.
Description:
- The preference can look for stylesheets in the template directory for your OPAC language, for instance: /koha-tmpl/opac-tmpl/prog/en/css. If you upload a custom file, opac-mystyles.css to this directory, you can specify it by entering opac-mystyles.css in your opaccolorstylesheet system preference. This adds your custom stylesheet as a linked stylesheet alongside the OPAC’s default CSS files. This method is preferable because linked stylesheets are cached by the user’s browser, meaning upon repeat visits to your site the user’s browser will not have to re-download the stylesheet, instead using the copy in the browser’s cache.
- If you would rather, you can upload your CSS to another server and enter the full URL pointing to it’s location remember to begin the URL with http://
Tip
Leave this field blank to disable it
Note
This file will add a linked CSS, not replace the existing default CSS.
opaccredits
Asks: Include the following HTML in the footer of all pages in the OPAC:
Tip
Click the ‘Click to edit; link to enter HTML to appear at the bottom of every page in the OPAC
HTML version of a footer for your OPAC
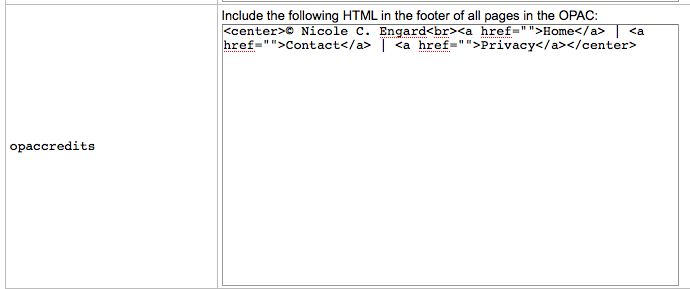
A sample of what can appear in your OPAC credits/footer
Description:
- This setting is for credits that will appear at the bottom of your OPAC pages. Credits traditionally encompass copyright information, last date updated, hyperlinks or other information represented in an HTML format. This is static information and any updates must be entered manually.
Learn more in the OPAC Editable Regions section.
OPACDisplay856uAsImage
Default: Neither details or results page
Asks: Display the URI in the 856u field as an image on: ___
Values:
Both results and details pages - .. important:: Not implemented yet
Detail page only - .. important:: OPACXSLTDetailsDisplay
needs to be on for this preference to work.
Showing the 856u as an image .. image:: images/admin/globalprefs/OPACDisplay856uAsImage.png
Neither details or results page
Results page only - .. important:: Not yet implemented
Description:
- In addition to this option being set, the corresponding XSLT option must be turned on. Also, the corresponding 856q field must have a valid MIME image extension (e.g., “jpg”) or MIME image type (i.e. starting with “image/”), or the generic indicator “img” entered in the field. When all of the requirements are met, an image file will be displayed instead of the standard link text. Clicking on the image will open it in the same way as clicking on the link text. When you click on the image it should open to full size, in the current window or in a new window depending on the value in the system pref OPACURLOpenInNewWindow. Sample 856 in MARC Record .. image:: images/admin/globalprefs/856imagemarc.png
OpacExportOptions
Default: bibtex|dc|marcxml|marc8|utf8|marcstd|mods|ris
Asks: List export options that should be available from OPAC detail page separated by |: ___
Description:
- In the OPAC on the right of each bib record there is a menu that allows for saving the record in various formats. This patch will allow you to define which options are in the pull down menu. Available options are: BIBTEX (bibtex), Dublin Core (dc), MARCXML (marcxml), MARC-8 encoded MARC (marc8), Unicode/UTF-8 encoded MARC (utf8), Unicode/UTF-8 encoded MARC without local use -9xx, x9x, xx9- fields and subfields (marcstd), MODS (mods), and RIS (ris).
OpacFavicon
Asks: Use the image at ___ for the OPAC’s favicon.
Important
This should be a complete URL, starting with http://
Tip
Turn your logo into a favicon with the Favicon Generator.
Description:
- The favicon is the little icon that appears next to the URL in the address bar in most browsers. The default value for this field (if left blank) is the small ‘K’ in the Koha logo. Default Koha Favicon .. image:: images/admin/globalprefs/favicon.png
opacheader
Asks: Include the following HTML in the header of all pages in the OPAC
Sample HTML to be displayed at the top of my OPAC
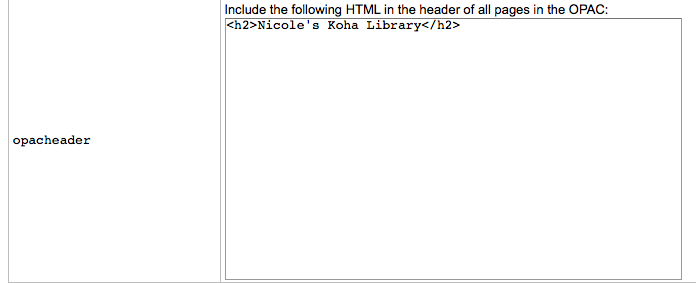
Tip
This value will appear above the main content of your page
OPAC display of the value from ‘opacheader’
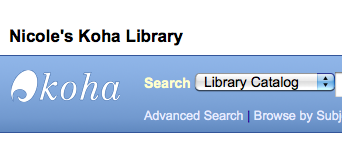
Tip
Edit ‘LibraryName‘ if you’d like to edit the contents of the <title> tag
Learn more in the OPAC Editable Regions section.
OpacHighlightedWords
Default: Don’t highlight
Asks: ___ words the patron searched for in their search results.
Values:
- Don’t highlight
- Highlight
OpacKohaUrl
Default: Don’t show
Values:
- Don’t show
- Show
Description:
- When this preference is set to ‘Show’ text will appear in the bottom right of the OPAC footer stating ‘Powered by Koha’ and linking to the official Koha website. Powered by Koha .. image:: images/admin/globalprefs/OpacKohaUrl.png
opaclayoutstylesheet
Default: opac.css
Asks: Use the CSS stylesheet /css/ ___ on all pages in the OPAC, instead of the default
Description:
- This setting’s function is to point to the *.css file used to define the OPAC layout. A *.css file is a cascading stylesheet which is used in conjunction with HTML to set how the HTML page is formatted and will look on the OPAC. There are two stylesheets that come with the system; opac.css and opac2.css. A custom stylesheet may also be used. A style sheet designated in the opacstylesheet preference will override the stylesheet listed here. The stylesheets listed in the opaclayoutstylesheet preference are held on the Koha server.
Tip
Leave this field blank to disable it and let Koha use the default file instead
OpacMaintenance
Default: Don’t show
Asks: ___ a warning that the OPAC is under maintenance, instead of the OPAC itself.
Note
this shows the same warning as when the database needs to be upgraded, but unconditionally.
Description:
- This preference allows the system administrator to turn off the OPAC during maintenance and display a message to users. When this preference is switched to “Show” the OPAC is not usable. The text of this message is not editable at this time.
Values:
Don’t show
Show - When this preference is set to show the maintenance
message the ability to search the OPAC is disabled and a message appears OPAC Maintenance Message .. image:: images/admin/globalprefs/opacmaintenance.png
OpacMainUserBlock
Default: Welcome to Koha... <hr>
Asks: Show the following HTML in its own column on the main page of the OPAC
HTML entered in this field will appear in the center of the main page of your OPAC
Sample OpacMainUserBlock appears below the search bar
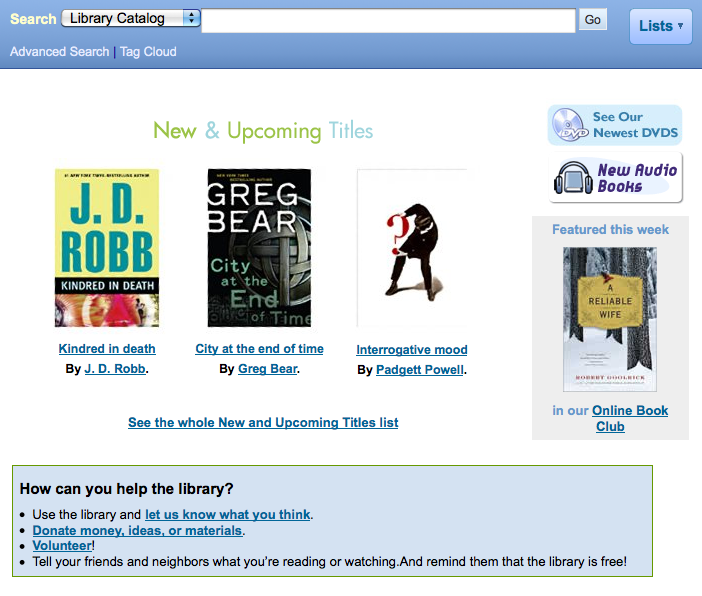
Learn more in the OPAC Editable Regions section.
OPACMySummaryHTML
Asks: Include a “Links” column on the “my summary” tab when a user is logged in to the OPAC, with the following HTML (leave blank to disable).
Description:
- In this preference you can enter HTML that will appear on the ‘Checked Out’ tab on the ‘My Summary’ section when logged in to the OPAC. The placeholders {BIBLIONUMBER}, {TITLE}, {ISBN} and {AUTHOR} will be replaced with information from the displayed record. This can be used to enter in ‘share’ links for social networks or generate searches against other library catalogs. Example of ‘Links’ column with a value in the OPACMySummaryHTML preference .. image:: images/admin/globalprefs/OPACMySummaryHTML.png
Sample Data:<p><a href=”http://www.facebook.com/sharer.php?u=http://YOUROPAC.ORG/cgi-bin/koha/opac-detail.pl?biblionumber={BIBLIONUMBER}”>Share on Facebook</a> <br />TITLE: {TITLE} <br />AUTHOR: {AUTHOR} <br />ISBN: {ISBN} <br />BIBLIONUMBER: {BIBLIONUMBER}</p>
OpacNav
Default: Important links here.
Asks: Show the following HTML on the left hand column of the main page and patron account on the OPAC (generally navigation links)
Sample navigation links
Learn more in the OPAC Editable Regions section.
OpacNavBottom
Asks: Show the following HTML on the left hand column of the main page and patron account on the OPAC, after OpacNav, and before patron account links if available:
Description: When a patron is logged in to their account they see a series of tabs to access their account information. OpacNav appears above this list of tabs and OpacNavBottom will appear below them. When not on the patron account pages the HTML in OpacNavBottom will just appear right below OpacNav.
OpacNav and OpacNavBottom on Patron Account
OpacNavRight
Asks: Show the following HTML in the right hand column of the main page under the main login form.
Description: HTML entered in this preference will appear on the right hand side of the OPAC under the log in form. If the log in form is not visible this content will move up on the right column.
OpacNavRight
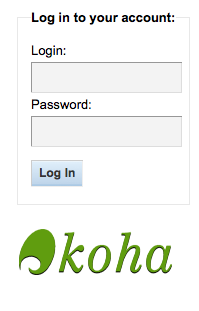
OPACNoResultsFound
No Default
Asks: Display this HTML when no results are found for a search in the OPAC
This HTML will display below the existing notice that no results were found for your search.
HTML in OPACNoResultsFound will appear below lines that look like this

OpacPublic
Default: Enable
Asks: ___ Koha OPAC as public. Private OPAC requires authentication before accessing the OPAC.
Values:
- Don’t enable
- Enable
Description:
- This preference determines if your OPAC is accessible and searchable by anyone or only by members of the library. If set to ‘Don’t enable’ only members who are logged into the OPAC can search. Most libraries will leave this setting at its default of ‘Enable’ to allow their OPAC to be searched by anyone and only require login for access to personalized content.
OPACResultsSidebar
Asks: Include the following HTML under the facets in OPAC search results
Description:
- The HTML entered in this preference will appear on the search results pages below the list of facets on the left side of the screen.
OPACSearchForTitleIn
Default: <li><a href=”http://worldcat.org/search?q={TITLE}” target=”_blank”>Other Libraries (WorldCat)</a></li> <li><a href=”http://www.scholar.google.com/scholar?q={TITLE}” target=”_blank”>Other Databases (Google Scholar)</a></li> <li><a href=”http://www.bookfinder.com/search/?author={AUTHOR}&title={TITLE}&st=xl&ac=qr” target=”_blank”>Online Stores (Bookfinder.com)</a></li>
Asks: Include a “More Searches” box on the detail pages of items on the OPAC, with the following HTML (leave blank to disable)
Note
The placeholders {BIBLIONUMBER}, {CONTROLNUMBER}, {TITLE}, {ISBN}, {ISSN} and {AUTHOR} will be replaced with information from the displayed record.
Tip
You can use this field to add social networking share links by using code similar to this </ul></div></div><div class=”detailtagcell”> <script src=”http://connect.facebook.net/en_US/all.js#xfbml=1“></script><fb:like href=”http://opac.mylibrary.tld/bib/{BIBLIONUMBER}” show_faces=”true” width=”450” font=”“></fb:like> <div><a href=”http://twitter.com/share” class=”twitter-share-button” data-url=”http://opac.mylibrary.tld/bib/{BIBLIONUMBER}” data-text=”I’m reading this” data-count=”horizontal”>Tweet</a><script type=”text/javascript” src=”http://platform.twitter.com/widgets.js”></script></div></div><div><div><ul> The starting </ul> is necessary to break out of the ‘Search for this Title In’ pull down menu OPACSearchForTitleIn with Social Networking Links .. image:: images/admin/globalprefs/OPACSearchForTitleIn.png
OPACShowBarcode
Default: Don’t show
Asks: ___ the item’s barcode on the holdings tab.
Values:
- Don’t show Barcode not shown in the OPAC .. image:: images/admin/globalprefs/OPACShowBarcode-noshow.png
- Show Barcode shown in the OPAC .. image:: images/admin/globalprefs/OPACShowBarcode-show.png
Description:
- This preference allows you to control whether patrons can see items’ barcodes in the OPAC.
OPACShowCheckoutName
Default: Don’t show
Asks: ___ the name of the patron that has an item checked out on item detail pages on the OPAC.
Values:
- Don’t show
- Show
Description:
- This preference allows all patrons to see who has the item checked out if it is checked out. In small corporate libraries (where the OPAC is behind a firewall and not publicly available) this can be helpful so coworkers can just contact the patron with the book themselves. In larger public and academic libraries setting this to ‘Show’ would pose serious privacy issues.
OPACShowHoldQueueDetails
Default: Don’t show any hold details
Asks: ___ to patrons in the OPAC.
Values:
Don’t show any hold details
Show holds The holdings table on the bibliographic record will show the number of holds .. image:: images/admin/globalprefs/OPACShowHoldQueueDetails-showholds.png
Show holds and priority level
Show priority level Patron record in the OPAC shows where in line the patron waits for their hold. .. image:: images/admin/globalprefs/OPACShowHoldQueueDetails-priority.png - opacuserlogin
needs to be set to ‘allow’
OpacShowRecentComments
Default: Don’t show
Asks: ___ a link to recent comments in the OPAC masthead.
Values:
- Don’t show
- Show
Description:
- If you have chosen to allow comments in your OPAC by setting reviewson to ‘Allow’ you can include a link to the recent comments under the search box at the top of your OPAC with this preference. Recent Comments link on OPAC .. image:: images/admin/globalprefs/OpacShowRecentComments.png
OPACShowUnusedAuthorities
Default: Show
Asks: ___ unused authorities in the OPAC authority browser.
Values:
Do not show
Show - .. important:: Requires that the OpacAuthorities
preference is set to ‘Allow’
Description:
- When patrons search your authority file via the OPAC they will see all authorities in your system even if you don’t have them linked to any bibliographic records. This preference lets you determine what the default behavior is when searching authorities via the OPAC. If you choose ‘Do not show’ it will only show patrons authority records that are linked to bib records in the search results. Otherwise the system will show all authority records even if they aren’t linked to records.
opacsmallimage
Asks: Use the image at ___ in the OPAC header, instead of the Koha logo. If this image is a different size than the Koha logo, you will need to customize the CSS.
Description:
- The opacsmallimage system pref is a little tricky to deal with because you really have to tweak some CSS at the same time. The default CSS defines a region just large enough to display the Koha logo, and if your logo doesn’t match the Koha logo’s dimensions (120 pixels wide by 38 pixels high), it won’t display correctly.
Important
This should be a complete URL, starting with http://
OpacStarRatings
Default: no
Asks: Show star-ratings on ___ pages.
Values:
- no
- only details Star Ratings on the Details Page .. image:: images/admin/globalprefs/OpacStarRatings-details.png
- results and details OPAC Star Ratings on the Search Results .. image:: images/admin/globalprefs/OpacStarRatings-results.png
Description:
- Star ratings are a way for your patrons to leave ratings without having to leave a full review. Patrons who are not logged in will only be able to see the stars, once logged in patrons can click on the stars on the details page to leave their own rating. Clicking on the stars on the search results will not submit a rating.
OPACURLOpenInNewWindow
Default: don’t
Asks: When patrons click on a link to another website from your OPAC (like Amazon or OCLC), ___ open the website in a new window.
Values:
- do
- don’t
Description:
- This preference determines if URLs in the OPAC will open in a new window or not. When clicking on a link in the OPAC, a patron does not need to worry about navigating away from their search results.
OPACUserCSS
Asks: Include the following CSS on all pages in the OPAC
Description:
- OPACUserCSS allows the administrator to enter styles that will overwrite the OPAC’s default CSS as defined in ‘opaclayoutstylesheet’ or ‘opacstylesheet’. Styles may be entered for any of the selectors found in the default style sheet. The default stylesheet will likely be found at http://your_koha_address/opac-tmpl/prog/en/css/opac.css. Unlike opaccolorstylesheet, opaclayoutstylesheet and opacstylesheet this preference will embed the CSS directly on your OPAC pages.
opacuserjs
Asks: Include the following JavaScript on all pages in the OPAC
OPAC login box before opacuserjs edit
JavaScript in opacuserjs to change the OPAC login box
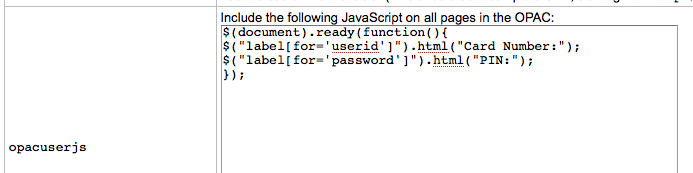
New OPAC login box after editing opacuserjs
Description:
- This preference allows the administrator to enter JavaScript or JQuery that will be embedded across all pages of the OPAC. Administrators may use this preference to customize some of the interactive sections of Koha, customizing the text for the login prompts, for example. Sample JQuery scripts used by Koha libraries can be found on the wiki: http://wiki.koha-community.org/wiki/JQuery_Library.
OPACXSLTDetailsDisplay
Default: default
Asks: Display OPAC details using XSLT stylesheet at ___
Values:
leave empty to not use the XSLT stylesheet - In previous versions of Koha this was the setting
that read ‘normally’
enter “default” for the default one
put a path to define a XSLT file - ex: /path/to/koha/and/your/stylesheet.xsl - If in a multi-language system you can enter
{langcode} in the path to tell Koha to look in the right language folder - ex:
/home/koha/src/koha-tmpl/opac/prog/{langcode}/xslt/OpacDetail.xsl
- ex. http://mykohaopac.org/{langcode}/stylesheet.xsl
put an URL for an external specific stylesheet - ex: http://mykohaopac.org/stylesheet.xsl
Description:
- XSLT stylesheets allow for the customization of the details shows on the screen when viewing a bib record. This preference will allow you either use the default look that comes with Koha or design your own stylesheet.
OPACXSLTResultsDisplay
Default: default
Asks: Display OPAC results using XSLT stylesheet at ___
Values:
leave empty to not use the XSLT stylesheet - In previous versions of Koha this was the setting
that read ‘normally’
enter “default” for the default one
put a path to define a XSLT file - ex: /path/to/koha/and/your/stylesheet.xsl - If in a multi-language system you can enter
{langcode} in the path to tell Koha to look in the right language folder - ex:
/home/koha/src/koha-tmpl/opac/prog/{langcode}/xslt/OpacDetail.xsl
- ex. http://mykohaopac.org/{langcode}/stylesheet.xsl
put an URL for an external specific stylesheet - ex: http://mykohaopac.org/stylesheet.xsl
Description:
- XSLT stylesheets allow for the customization of the details shows on the screen when viewing the search results. This preference will allow you either use the default look that comes with Koha or design your own stylesheet.
Features
numSearchRSSResults
Default: 50
Asks: Display ___ search results in the RSS feed.
Description:
- By default the RSS feed that is automatically generated for every search results page will list 50 items. This can sometimes be too much for some RSS feed readers and for some people this isn’t enough. This preference allows you to adjust this number to show the best number of results for your patrons.
OpacAuthorities
Default: Allow
Asks: ___ patrons to search your authority records.
Description:
- This preference displays the link on the OPAC for the authority search (titled ‘Browse by Subject’). By setting the preference to “Allow” patrons can use this search link of the OPAC.
Important
While labeled ‘Browse’ it is important to note that this is in fact an authority search, not an authority browse. Authority Search in the OPAC .. image:: images/admin/globalprefs/authoritysearch.png
Values:
Allow - A link labeled ‘Browse by Subject’ will appear at
the top of your OPAC under the search box ‘Browse by Subject’ link under search box on OPAC .. image:: images/admin/globalprefs/OpacAuthorities.png
Don’t allow
opacbookbag
Default: Allow
Asks: ___ patrons to store items in a temporary “Cart” on the OPAC.
Values:
- Allow
- Don’t allow
Description:
- This preference allows the user to temporarily save a list of items found on the catalog. By using the Book Bag, or Cart, the user can print out or email a list of items found. The user does not need to be logged in. This list is temporary and will be emptied, or cleared, at the end of the session.
OpacBrowser
Important
This preference only applies to French systems at this time.
Default: Don’t allow
Asks: ___ patrons to browse subject authorities on OPAC
Values:
- Allow
- Don’t allow
Important
run the Authorities Browser Cron Job to create the browser list
OpacBrowseResults
Default: enable
Asks: ___ browsing and paging search results from the OPAC detail page.
Values:
- disable
- enable Browsing and Paging Search Results .. image:: images/admin/globalprefs/OpacBrowseResults.png
Description:
- This preference will control the option to return to your results and/or browse them from the detail page in the OPAC.
OPACFinesTab
Default: Allow
Asks: ___ patrons to access the Fines tab on the My Account page on the OPAC.
Values:
Allow - opacuserlogin
needs to be set to ‘allow’
Don’t allow
OpacPasswordChange
Default: Allow
Asks: ___ patrons to change their own password on the OPAC.
Values:
Allow - opacuserlogin
needs to be set to ‘allow’
Don’t allow
Important
Enabling this will break LDAP authentication.
OPACPatronDetails
Default: Allow
Asks: ___ patrons to notify the library of changes to their contact information from the OPAC.
Values:
Allow - opacuserlogin
needs to be set to ‘allow’
Don’t allow
Description:
- If patrons are allowed to notify the library of changes an email will be sent to the library administration email address with the changes. Lines that start with the field name in all caps are the lines that the patron made changes to.
OPACpatronimage
Default: Don’t show
Asks: ___ patron images on the patron information page in the OPAC.
Values:
- Don’t show
- Show
Description:
- If patronimages is set to allow the upload of patron images via the staff client, then setting this preference to ‘show’ will show the patron what image you have on file for them when they view their personal information on their account in the OPAC.
OpacTopissue
Default: Don’t allow
Asks: ___ patrons to access a list of the most checked out items on the OPAC.
Values:
Allow - A link to ‘Most Popular’ will appear at the top of
your OPAC ‘Most Popular’ link under the search box .. image:: images/admin/globalprefs/OpacTopissue.png
Don’t allow
Description:
- This preference allows the administrator to choose to show the “Most Popular” link at the top of the OPAC under the search box. The “Most Popular” page shows the top circulated items in the library, as determined by the number of times a title has been circulated. This allows users to see what titles are popular in their community. It is recommended that you leave this preference set to ‘Don’t allow’ until you have been live on Koha for a couple of months, otherwise the data that it shows will not be an accurate portrayal of what’s popular in your library. Sample top issues page .. image:: images/admin/globalprefs/topissues.png
opacuserlogin
Default: Allow
Asks: ___ patrons to log in to their accounts on the OPAC.
Values:
Allow
Don’t allow - The OPAC will still be searchable if patrons can’t
log in, this just disables the patron account access via the OPAC
RequestOnOpac
Default: Allow
Asks: ___ patrons to place holds on items from the OPAC.
Values:
Allow - opacuserlogin
needs to be set to ‘allow’
Don’t allow
reviewson
Default: Allow
Asks: ___ patrons to make comments on items on the OPAC.
Values:
Allow - Patrons comments/reviews all require moderation
before they appear in the OPAC
- opacuserlogin needs to be set to ‘Allow’
Don’t allow
Description:
- This button allows the patrons to submit comments on books they have read via the OPAC. If this preference is set to “Allow” reviews are first sent to the staff client for staff approval before the review is displayed in the OPAC. The staff member who reviews and approves comments may find the pending comments on the Comments tool. The staff member can then choose to approve or delete the comments.
ShowReviewer
Default: full name
Asks: Show ___ of commenter with comments in OPAC.
Values:
- first name
- first name and last initial
- full name
- last name
- no name
- username
Description:
- If you would like to protect your patron’s privacy in the OPAC you can choose to hide their names or parts of their names from any of the comments they leave on bib records in your system. reviewson needs to be set to ‘Allow’ for this to preference to come in to play
ShowReviewerPhoto
Default: Show
Asks: ___ reviewer’s photo beside comments in OPAC.
Values:
Hide
Show - reviewson needs to
be set to ‘Allow’ and ShowReviewer needs to be set to ‘Show’ for this to preference to come in to play ShowReviewerPhoto set to ‘Show’ .. image:: images/admin/globalprefs/ShowReviewerPhoto.png
Description:
- This system preference allows libraries to show avatars next to patron’s comments in the OPAC. These avatars are pulled from the Libravatar library, an open source powered product that allows Internet users to choose a small icon to display next to their name on various different websites. The library has no control over the images the patron chooses to display.
suggestion
Default: Allow
Asks: ___ patrons to make purchase suggestions on the OPAC.
Values:
Allow - opacuserlogin
needs to be set to ‘allow’ unless AnonSuggestions is set to ‘allow’
Don’t allow
Policy
AllowPurchaseSuggestionBranchChoice
Default: Don’t allow
Asks: ___ patrons to select branch when making a purchase suggestion
Values:
- Allow
- Don’t allow
Description:
- If your library system lets patrons make purchase suggestions for a specific branch you can set this preference to ‘Allow’ to add a branch selection option to the purchase suggestion form.
OpacAllowPublicListCreation
Default: Allow
Asks: ___ opac users to create public lists
Values:
- Allow
- Don’t allow
Description:
- Public lists are visible to anyone who visits your OPAC. With this preference you can control whether or now patrons are allowed to create these public lists. If this is set to “Don’t allow” then only staff will be able to create public lists.
Important
This preference will only be taken in to account if you have virtualshelves set to ‘Allow’
OpacAllowSharingPrivateLists
Important
This feature is not active yet but will be released soon
Default: Don’t allow
Asks: ___ opac users to share private lists with other patrons.
Values:
- Allow
- Don’t allow
Description:
- This feature will add the option for patrons to share their lists with other patrons.
OPACFineNoRenewals
Default: 99999
Asks: Only allow patrons to renew their own books on the OPAC if they have less than ___ USD in fines
Tip
Leave this field blank to disable
Important
To allow renewals in the OPAC, opacuserlogin needs to be set to ‘allow’
OPACItemHolds
Default: Allow
Asks: ___ patrons to place holds on specific items in the OPAC.
Values:
Allow - Patrons can place holds on specific items as well as
the next available item.
- opacuserlogin needs to be set to ‘allow’
Don’t allow - If this is disabled, users can only put a hold on
the next available item.
OpacRenewalAllowed
Default: Don’t allow
Asks: ___ patrons to renew their own books on the OPAC.
Values:
Allow - opacuserlogin
needs to be set to ‘allow’
Don’t allow - Staff will still be able to renew items for patrons
via the staff client
Description:
- This preference allows the administration to choose if patrons can renew their checked out materials via their checked out history in the OPAC. It allows patrons to renew their materials without having to contact the library or having to return to the library.
OpacRenewalBranch
Default: the branch the item was checked out from
Asks: Use ___ as branchcode to store in the statistics table
Values:
- NULL
- ‘OPACRenew’
- the item’s home branch
- the patron’s home branch
- the branch the item was checked out from
Description:
- This value is used in the statistics table to help with reporting. The statistics table in Koha keeps track of all checkouts and renewals, this preference defines which branch is entered in to the table when a patron renews an item for themselves via the OPAC.
OPACViewOthersSuggestions
Default: Don’t show
Asks: ___ purchase suggestions from other patrons on the OPAC.
Values:
Don’t show
Show - opacuserlogin
needs to be set to ‘allow’
SearchMyLibraryFirst
Default: Don’t limit
Asks: ___ patrons’ searches to the library they are registered at.
Values:
Don’t limit - Searching the OPAC will show results from all
libraries
- If you’re a one branch system, choose ‘Don’t limit’
Limit - Patrons will still be able to search other libraries
via the Advanced search page - but will be limited to searches for their library only from the basic search box
- opacuserlogin needs to be set to ‘allow’
singleBranchMode
Default: Don’t allow
Asks: ___ patrons to select their branch on the OPAC.
Values:
Allow - opacuserlogin
needs to be set to ‘allow’
Don’t allow
Description:
- This preference is for libraries that have branches but do not want to share their items among other branches within their system. If the preference is set to “Don’t allow” then holdings will be shown for all branches within a system. On the “Home” screen of the OPAC users have the choice of narrowing down results by item location. Setting this preference to “Allow” will display only one branch’s holdings.
Privacy
AnonSuggestions
Default: Don’t allow
Asks: ___ patrons that aren’t logged in to make purchase suggestions.
Important
If set to ‘Allow’, suggestions are connected to the AnonymousPatron
Values:
- Allow
- Don’t allow
AnonymousPatron
Default: 0
Asks: Use borrowernumber ___ as the Anonymous Patron (for anonymous suggestions and reading history)
Tip
Before setting this preference create a patron to be used for all anonymous suggestions and/or reading history items. This patron can be any type and should be named something to make it clear to you that they’re anonymous (ex. Anonymous Patron).
EnableOpacSearchHistory
Default: Keep
Asks: ___ patron search history in the OPAC.
Values:
- Don’t keep
- Keep
OPACPrivacy
Default: Don’t allow
Asks: ___ patrons to choose their own privacy settings for their reading history.
Important
This requires opacreadinghistory set to ‘Allow’ and AnonymousPatron to be set to your anonymous patron’s borrowernumber.
Values:
- Allow
- Don’t allow
opacreadinghistory
Default: Allow
Asks: ___ patrons to see what books they have checked out in the past.
Important
Enabling this will make it so that patrons can view their circulation history in the OPAC unless you have OPACPrivacy set to ‘Allow.’
Important
This data is stored in the system regardless of your choice, unless your patrons have chosen to never have their reading history kept.
Shelf Browser
OPACShelfBrowser
Default: Show
Asks: ___ a shelf browser on item details pages, allowing patrons to see what’s near that item on the shelf.
Values:
- Don’t show
- Show OPACShelfBrowser .. image:: images/admin/globalprefs/OPACShelfBrowser.png
Description:
- This preference allows patrons to view what is located on the shelf near the item they looked up. The shelf browser option appears on the details page to the right of each items’ call number. Clicking the ‘Browse Shelf’ link allows for a virtual shelf browsing experience via the OPAC and lets patrons see other books that may relate to their search and items that sit on the shelf near the item they are looking at.
Important
This uses up a fairly large amount of resources on your server, and should be avoided if your collection has a large number of items.
ShelfBrowserUsesCcode
Default: Don’t use
Asks: ___ the item collection code when finding items for the shelf browser.
Values:
- Don’t use
- Use
Description:
- If your library uses collection codes then you might want the shelf browser to take into consideration what collection the books belong to when populating the virtual shelf browser.
ShelfBrowserUsesHomeBranch
Default: Use
Asks: ___ the item home branch when finding items for the shelf browser.
Values:
- Don’t use
- Use
Description:
- If you have a multiple branch system you may want to make sure that Koha takes into consideration what branch owns the books when populating the virtual shelf browser for accuracy.
ShelfBrowserUsesLocation
Default: Use
Asks: ___ the item location when finding items for the shelf browser.
Values:
- Don’t use
- Use
Description:
- If your library uses shelving locations then you might want the shelf browser to take into consideration what shelving location the books belong to when populating the virtual shelf browser.
Patrons
Get there: More > Administration > Global System Preferences > Patrons
AddPatronLists
Default: specific categories
Asks: List ___ under the new patron menu.
Values:
- general patron types Add patron options with AddPatronLists set to general patron types .. image:: images/admin/globalprefs/AddPatronLists-category.png
- specific categories Add patron options with AddPatronLists set to specific categories .. image:: images/admin/globalprefs/AddPatronLists-specific.png
AutoEmailOpacUser
Default: Don’t send
Asks: ___ an email to newly created patrons with their account details.
Description:
- AutoEmailOpacUser allows library users to be notified by email of their account details when a new account is opened at the email address specified in the AutoEmailPrimaryAddress preference. The email contains the username and password given to or chosen by the patron when signing up for their account and can be customized by editing the ACCTDETAILS notice.
Values:
- Don’t send
- Send
AutoEmailPrimaryAddress
Default: alternate
Asks: Use ___ patron email address for sending out emails.
Values:
- alternate
- first valid
- home
- work
Description:
- If you choose ‘first valid’ as the value for AutoEmailPrimaryAddress the system will check the email fields in this order: home, work, then alternate. Otherwise the system will use the email address you specify.
autoMemberNum
Default: Do
Asks: ___ default the card number field on the patron addition screen to the next available card number
Values:
Do - If the largest currently used card number is
26345000012941, then this field will default to 26345000012942 for the next patron
Don’t
Description:
- This preference determines if the patron’s barcode is automatically calculated. This prevents the person setting up the library card account from having to assign a number to the new card. If set to ‘Do’ the system will calculate a new patron barcode by adding 1 to the maximum barcode already present in the database.
BorrowerMandatoryField
Default: surname|cardnumber|barcode
Asks: The following database columns must be filled in on the patron entry screen: ___
Description:
- This preference enables the system administrator to choose which fields your library would like required for patron accounts. Enter field names separated by | (bar). This ensures that basic information is included in each patron record. If a patron leaves one of the required fields blank an error message will issue and the account will not be created.
Important
Separate columns with |
Tip
For help with field names, ask your system administrator or view the database structure associated with the borrowers table.
borrowerRelationship
Default: father|mother
Asks: Guarantors can be the following of those they guarantee ___
Description:
- This preference enables the system administrator to define valid relationships between a guarantor (usually a parent) & a guarantee (usually a child). Defining values for this field does not make the guarantor field required when adding a guarantee type patron. This preference creates a drop down list identifying the relationship of the guarantor to the guarantee. To disable the ability to add children types in Koha you can leave this field blank.
Important
Input multiple choices separated by |
BorrowerRenewalPeriodBase
Default: current date
Asks: When renewing borrowers, base the new expiry date on ___
Values:
- current date.
- current membership expiry date.
Description:
- This preference controls what the patron’s new expiration date will be when you renew their card. Using the ‘current date’ will add the subscription period to today’s date when calculating the new expiration date. Using ‘current membership expiry date’ will add the subscription period to the old expiration date for the patron when renewing their account.
BorrowersTitles
Default: Mr|Mrs|Miss|Ms
Asks: Borrowers can have the following titles ___
Description:
- This preference allows the staff to choose the titles that can be assigned to patrons. The choices present as a drop down list when creating a patron record.
Important
Input multiple choices separated by |
BorrowerUnwantedField
Asks: The following database columns will not appear on the patron entry screen: ___
Description:
- This preference enables the system administrator to choose which fields your library doesn’t need to see on the patron entry form. Enter field names separated by | (bar).
Important
Separate columns with |
Tip
For help with field names, ask your system administrator or view the database structure associated with the borrowers table.
checkdigit
Default: Don’t
Asks: ___ check and construct borrower card numbers in the Katipo style.
Values:
- Do
- Don’t
Important
This overrides autoMemberNum if on.
EnableBorrowerFiles
Default: Don’t
Asks: ___ enable the ability to upload and attach arbitrary files to a borrower record.
Values:
- Do
- Don’t
Description:
- When enabled this will add a ‘Files’ tab to the left of the patron detail page where you can view and upload files to the patron record.
EnhancedMessagingPreferences
Default: Allow
Asks: ___ patrons to choose which notices they receive and when they receive them.
Values:
- Allow
- Don’t allow
Important
This only applies to certain kinds of notices, overdue notices will be sent based on the library’s rules, not the patron’s choice.
Description:
These messages are in addition to the overdue notices that the library sends. The difference between these notices and overdues is that the patron can opt-in and out of these. Setting this preference to ‘Allow’ will allow patrons to choose to receive any one of the following messages: - Item Checkout : A notice that lists all the of the
items the patron has just checked out, this is an electronic form of the checkout receipt
- Item Due : A notice on the day and item is due back at the library
- Hold Filled : A notice when you have confirmed the hold is waiting for the patron
- Item Checkin : A notice that lists all the of the items the patron has just checked in
- Advanced Notice : A notice in advance of the patron’s items being due (The patron can choose the number of days in advance)
ExtendedPatronAttributes
Default: Enable
Asks: ___ searching, editing and display of custom attributes on patrons.
Values:
Don’t enable
Enable - Define attributes in Koha administration - Get there: More > Administration > :ref:`Patron Attribute
Types <patronattributetypes>`
Description:
- Patron attributes are library-defined custom fields that can be applied to patron records.
Tip
Use custom attributes for fields that the default patron record does not support such as driver’s license number or student ID number.
intranetreadinghistory
Default: Allow
Asks: ___ staff to access a patron’s checkout history
Important
If you have the OPACPrivacy preference set to ‘Allow’ and the patron has decided to not have their history kept staff will only see currently checked out items.
Values:
- Allow
- Don’t allow
Important
This data is stored in the system regardless of your choice.
MaxFine
Default: 9999
Asks: The late fine for all checkouts will only go up to ___ USD.
Description:
- This preference controls the default cap on fines accrued by the patron. Leaving this preference blank means that there is no cap on the amount of fines a patron can accrue. If you’d like, single item caps can be specified in the circulation rules matrix.
memberofinstitution
Default: Don’t
Asks: ___ allow patrons to be linked to institutions
Values:
- Do
- Don’t
Important
In order to allow this, the library must have Institution patrons to link members to
minPasswordLength
Default: 3
Asks: Login passwords for staff and patrons must be at least ___ characters long.
Important
This applies to both the staff login and the patron OPAC login.
NotifyBorrowerDeparture
Default: 30
Asks: Show a notice that a patron is about to expire ___ days beforehand.
Description:
- When the patron attempts to check out materials, a warning will appear in the check out window of the Staff Client telling the librarian that the patrons account is about to expire.
Important
This notice will appear on the patron’s record in the staff client.
patronimages
Default: Allow
Asks: ___ images to be uploaded and shown for patrons on the staff client.
Values:
- Allow
- Don’t allow
SMSSendDriver
Asks: Use the SMS::Send:: ___ driver to send SMS messages.
Some examples of values are:
- SMS::Send::Us::Ipipi
- SMS::Send::US::TMobile
- SMS::Send::US::Verizon
Additional values can be found here: http://search.cpan.org/search?query=sms%3A%3Asend&mode=all
Important
Only drivers available as Perl modules will work in this preference, so make sure a Perl module is available before choosing an SMS service.
Once a driver is entered in the preference an option will appear in the staff client and the OPAC on the patron messaging form to choose to receive messages as SMS
SMSSendDriver Options
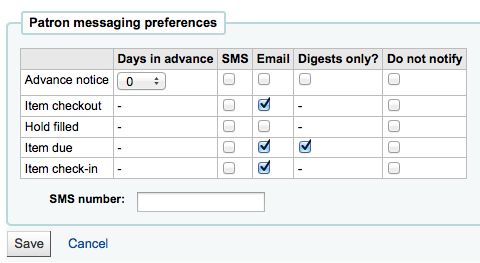
Important
You must allow EnhancedMessagingPreferences for this to work.
StatisticsFields
Default: location|itype|ccode
Asks: Show the following fields from the items database table as columns on the statistics tab on the patron record: ___
Statistics on Patron Record
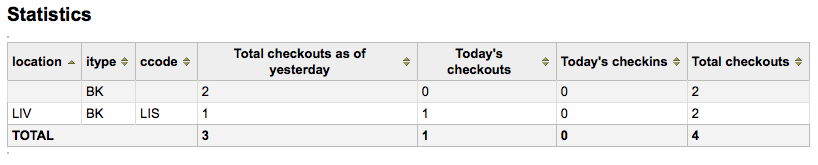
Important
Enter the values separated by bars (|)
Description:
- This preference lets you set which fields will show on the patron record on the Statistics tab.
TalkingTechItivaPhoneNotification
Default: Disable
Asks: ___ patron phone notifications using Talking Tech i-tiva (overdues, predues and holds notices currently supported).
Values:
- Disable
- Enable
Description:
- To learn more about setting up this third party product view the Talking Tech Appendix.
Important
Requires that you have EnhancedMessagingPreferences set to Allow to use.
uppercasesurnames
Default: Don’t
Asks: ___ store and display surnames (last names) in upper case.
Values:
- Do
- Don’t
Searching
Get there: More > Administration > Global System Preferences > Searching
Features
NoZebra
Default: Use
Asks: ___ the Zebra search engine. Searches are very slow on even modest sized collections when Zebra is off.
Values:
- Don’t use
- Use
NoZebraIndexes
Default: See the Systems Preferences Appendix
OpacGroupResults
Default: Don’t use
Asks: ___ PazPar2 to group similar results on the OPAC.
Values:
- Don’t use
- Use
Important
This requires that PazPar2 is set up and running.
QueryAutoTruncate
Default: automatically
Asks: Perform wildcard searching (where, for example, Har would match Harry and harp) ___ (The * character would be used like so: Har* or *logging.)
Values:
- automatically
- only if * is added
Description:
- This setting allows for searches to be automatically truncated or for additional characters to be added to the end of a search string. When set to “automatically” the search string automatically ends with a wildcard function. For example, a search for the word “invent” with auto truncation enabled will also retrieve results for inventor, invention, inventory, etc. If you don’t want this to happen automatically you can still be perform wildcard searches manually by adding an asterisk (*). Typing “invent*” even with auto truncation disabled will retrieve the same inventor, invention, inventory results. Auto truncation bypasses the necessity to type long search strings in their entirety.
QueryFuzzy
Default: Try
Asks: ___ to match similarly spelled words in a search (for example, a search for flang would also match flange and fang)
Values:
- Don’t try
- Try
Description:
- This preference enables “fuzzy” searching, in which the search engine returns results that are similar to, but not exactly matching, the word or words entered by the user. This preference enables the search function to compensate for slightly misspelled names or phrases.
QueryRemoveStopwords
Default: Don’t remove
Asks: ___ stop words specified in Koha from searches.
Values:
Don’t remove - .. important:: If NoZebra is set
to ‘Use’ leave this preference set to ‘Don’t remove’
Remove - Requires that you have updated your Koha Stop Words list
Important
Requires that NoZebra is set to ‘Don’t use’
Important
Zebra, on its own, handles a few of the most common stop words
QueryStemming
Default: Try
Asks: ___ to match words of the same base in a search
Values:
Don’t try
Try - A search for enabling would also match enable and
enabled
Description:
- This preference enables word stemming. Stemming allows the search function to return multiple versions of the same word, as well as related terms (i.e., both fish and fishing would be returned).
Important
Requires that NoZebra is set to ‘Use’
QueryWeightFields
Default: Enable
Asks: ___ ranking of search results by relevance
Values:
- Disable
- Enable
Important
Requires that NoZebra is set to ‘Use’
TraceCompleteSubfields
Default: Force
Asks: ___ subject tracings in the OPAC and Staff Client to search only for complete-subfield matches.
Values:
Don’t force - Searches for subject keywords (example:
opac-search.pl?q=su:World%20Wide%20Web)
Force - Searches for complete subject fields (example:
opac-search.pl?q=su,complete-subfield:World%20Wide%20Web)
Description:
- When TraceCompleteSubfields is set to “force,” clicking on links in non-authority controlled subject tracings will only find other records where the entire subfields match. Leaving it at “don’t force” does a keyword search of the subject indexes.
Important
This preference assumes that you’re using XSLT stylesheets as set in the OPACXSLTDetailsDisplay preference.
TraceSubjectSubdivisions
Default: Include
Asks: ___ subdivisions for searches generated by clicking on subject tracings.
Values:
Don’t include - Searches for subject keywords (example:
opac-search.pl?q=su,complete-subfield:%22Web%20sites%22)
Include - Searches for complete subject fields (example:
opac-search.pl?q=(su,complete-subfield:%22Web%20sites%22)%20and%20(su,complete-subfield:%22Design.%22))
Description:
- When TraceSubjectSubdivisions is set to “Include,” if you click on a subject with subdivisions (subfields other than ‘a’) they will be searched along with the subject heading (subfield ‘a’). To have only the subject heading (subfield ‘a’) searched, set this preference to “Don’t include.”
Important
This preference assumes that you’re using XSLT stylesheets as set in the OPACXSLTDetailsDisplay preference.
UseICU
Default: Not using
Asks: ___ ICU Zebra indexing.
Values:
- Not using
- Using
Description:
- ICU is a set of code libraries providing Unicode and Globalization support for software applications. What this means is ICU Zebra indexing is only necessary if you use non-roman characters in your cataloging. If using ICU Zebra indexing you will want to not use QueryFuzzy.
Important
This setting will not affect Zebra indexing, it should only be used to tell Koha that you have activated ICU indexing if you have actually done so, since there is no way for Koha to figure this out on its own.
Important
Talk to your system administrator when changing this preference to make sure that your system is set up properly for this to work.
Results Display
defaultSortField & defaultSortOrder
defaultSortField Default: author
defaultSortOrder Default: ascending
Asks: By default, sort search results in the staff client by ___, ____
Description:
- These preferences set the default sort field and sort order for searches on the staff side. Regardless of your choice, the other sort options are still available in the drop down list on the advanced search page.
defaultSortField Values:
- author
- call number
- date added
- date of publication
- relevance
- title
- total number of checkouts
defaultSortOrder Values:
- ascending
- descending
- from A to Z
- from Z to A
displayFacetCount
Default: Don’t show
Asks: ___ facet counts.
Description:
- This preference lets you decide if you show how many times a facet is used in your search results in the OPAC and the staff client. The relevance of these numbers highly depends on the value of the maxRecordsForFacets preference. Showing these numbers can potentially effect the performance of your searching, so test your system with different values for this preference to see what works best.
Values:
- Don’t show
- Show Number of times each Facet is found in results .. image:: images/admin/globalprefs/displayFacetCount.png
FacetLabelTruncationLength
Default: 20
Asks: Truncate facets length to ___ characters, in OPAC/staff interface.
Description:
- In the OPAC and the staff client your facets are cut off at 20 characters by default. Depending on your layout this may be too many or two few letters, this preference lets you decide what number is best for your library’s design.
maxItemsInSearchResults
Default: 20
Asks: Show up to ___ items per biblio in the search results
Description:
- This preference will let you set how many results display by default when a search is run on the Staff Client.
maxRecordsForFacets
Default: 20
Asks: Build facets based on ___ records from the search results.
Description:
- By default Koha only bases facets on the first page of results (usually 20 results). This preference lets you tell Koha to based the facet descriptions and numbers on any number of search results returned. The higher this number the longer it will take for your search results to return, so test with various different values to find the best balance for your library.
OPACdefaultSortField & OPACdefaultSortOrder
OPACdefaultSortField Default: relevance
OPACdefaultSortOrder Default: ascending
Asks: By default, sort search results in the OPAC by ___, ___
Description:
- These preferences set the default sort field and sort order for searches on the OPAC. Regardless of your choice, the other sort options are still available in the drop down list on the advanced search page.
OPACdefaultSortField Values:
- author
- call number
- date added
- date of publication
- relevance
- title
- total number of checkouts
OPACdefaultSortOrder Values:
- ascending
- descending
- from A to Z
- from Z to A
OPACItemsResultsDisplay
Default: Don’t show
Asks: ___ an item’s branch, location and call number in OPAC search results.
Values:
- Don’t show
- Show
Description:
- This setting selects the information about an item that will display in the search results page of the OPAC. The results can display the status of an item and/or full details including branch, location, and call number. While the ‘Show’ option allows for more information to be displayed on the search results page, the information can be overwhelming for large collections with multiple branches.
Search Form
AdvancedSearchTypes
Default: itemtype
Asks: Show tabs in OPAC and staff-side advanced search for limiting searches on the ___ fields (separate values with |).
Description:
- On the advanced search page you can choose to allow filters on one or all of the following: Item types (itemtypes), Collection Codes (ccode) and Shelving Location (loc). If you would like to be able to limit searches on item type and shelving location for example you would enter itemtypes|loc in the preference input box. The order of these fields will determine the order of the tabs in the OPAC and staff client advanced search screens. Values within the search type are OR’ed together, while each different search type is AND’ed together in the query limits. The current stored values are supported without any required modification.Each set of advanced search fields are displayed in tabs in both the OPAC and staff client. The first value in the AdvancedSearchTypes syspref is the selected tab; if no values are present, “itemtypes” is used. For non-itemtype values, the value in AdvancedSearchTypes must match the Authorised Value name, and must be indexed with ‘mc-‘ prefixing that name. Searching by Item Type and Shelving Location .. image:: images/admin/globalprefs/AdvancedSearchTypes.png
expandedSearchOption
Default: don’t show
Asks: By default, ___ “More options” on the OPAC and staff advanced search pages.
Values:
- don’t show
- show
Serials
Get there: More > Administration > Global System Preferences > Serials
opacSerialDefaultTab
Default: Subscriptions tab
Asks: Show ___ as default tab for serials in OPAC.
Important
Please note that the Serial Collection tab is currently available only for systems using the UNIMARC standard.
Values:
- Holdings tab
- Serial Collection tab
- Subscriptions tab
OPACSerialIssueDisplayCount
Default: 3
Asks: Show the ___ previous issues of a serial on the OPAC.
Description:
- This preference allows the administrator to select the number of recent issues for each serial which appear in the OPAC when the serial is accessed. This is just the default value, patrons can always click to see a full list of serials.
RenewSerialAddsSuggestion
Default: Don’t add
Asks: ___ a suggestion for a biblio when its attached serial is renewed.
Values:
- Add
- Don’t add
Description:
- If set to “Add”, this preference will automatically add a serial to the Acquisitions Purchase Suggestions menu when clicking the ‘renew’ option. If you don’t use the Acquisitions module to manage serials purchases it’s best to leave this set as ‘Don’t add.’
RoutingListAddReserves
Default: Place
Asks: ___ received serials on hold if they are on a routing list.
Values:
- Place
- Don’t place
RoutingListNote
Asks: Include following note on all routing lists
Description:
- Text entered in this box will appear below the routing list information.
RoutingSerials
Default: Don’t add
Asks: ___ received serials to the routing list.
Description:
- This preference determines if serials routing lists are enabled or disabled for the library. When set to “Add”, serials routing is enabled and a serial can be directed through a list of people by identifying who should receive it next. The list of people can be established for each serial to be passed using the Serials module. This preference can be used to ensure each person who needs to see a serial when it arrives at the library will get it. Learn more in the routing list section of this manual.
Values:
- Add
- Don’t add
StaffSerialIssueDisplayCount
Default: 3
Asks: Show the ___ previous issues of a serial on the staff client.
Description:
- This preference allows the administrator to select the number of recent issues for each serial which appear in the Staff Client when the serial is accessed. This is just the default value, staff members can always click to see a full list of serials.
SubscriptionDuplicateDroppedInput
Asks: List of fields which must not be rewritten when a subscription is duplicated (Separated by pipe |) ___
Description:
- When duplicating a subscription sometimes you don’t want all of the fields duplicated, using this preference you can list the fields that you don’t want to be duplicated. These field names come from the subscription table in the Koha database. Learn what fields are in that table on the Koha DB Schema site.
SubscriptionHistory
Default: full history
Asks: When showing the subscription information for a bibliographic record, preselect ___ view of serial issues.
Values:
- brief history Brief History .. image:: images/admin/globalprefs/SubscriptionHistory-brief.png
- full history Full History .. image:: images/admin/globalprefs/SubscriptionHistory-full.png
Description:
- This preference determines what information appears in the OPAC when the user clicks the More Details option. The ‘brief’ option displays a one-line summary of the volume and issue numbers of all issues of that serial held by the library. The ‘full’ option displays a more detailed breakdown of issues per year, including information such as the issue date and the status of each issue.
Staff Client
Get there: More > Administration > Global System Preferences > Staff Client
Appearance
Display856uAsImage
Default: Neither details or results page
Asks: Display the URI in the 856u field as an image on: ___
Values:
Both results and details pages - .. important:: Not implemented yet
Detail page only - .. important:: XSLTDetailsDisplay
needs to be on for this preference to work.
Showing the 856u as an image .. image:: images/admin/globalprefs/Display856uAsImage.png
Neither details or results page
Results page only - .. important:: Not yet implemented
Description:
- In addition to this option being set, the corresponding XSLT option must be turned on. Also, the corresponding 856q field must have a valid MIME image extension (e.g., “jpg”) or MIME image type (i.e. starting with “image/”), or the generic indicator “img” entered in the field. When all of the requirements are met, an image file will be displayed instead of the standard link text. Clicking on the image will open it in the same way as clicking on the link text. When you click on the image it should open to full size, in the current window or in a new window depending on the value in the system pref OPACURLOpenInNewWindow. Sample 856 Field .. image:: images/admin/globalprefs/856imagemarc.png
intranet_includes
Default: includes
Asks: Use include files from the ___ directory in the template directory, instead of includes/. (Leave blank to disable)
intranetcolorstylesheet
Asks: Include the stylesheet /intranet-tmpl/prog/en/css/ ___ on all pages in the staff interface.
Description:
- This preference is used to set the background color and style of the Staff Client. The value is a .css file. The system administrator should determine which file is appropriate.
Important
Leave this field blank to disable.
IntranetFavicon
Asks: Use the image at ___ for the Staff Client’s favicon.
Important
This should be a complete URL, starting with http://
Tip
Turn your logo into a favicon with the Favicon Generator.
Description:
- The favicon is the little icon that appears next to the URL in the address bar in most browsers. The default value for this field (if left blank) is the small ‘K’ in the Koha logo. Default Koha Favicon .. image:: images/admin/globalprefs/favicon.png
IntranetmainUserblock
Asks: Show the following HTML in its own column on the main page of the staff client
Sample HTML for IntranetmainUserblock
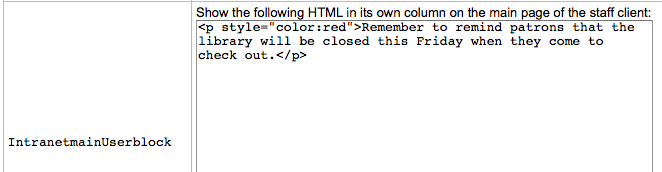
Message from IntranetmainUserblock as it appears on the Staff Client main page
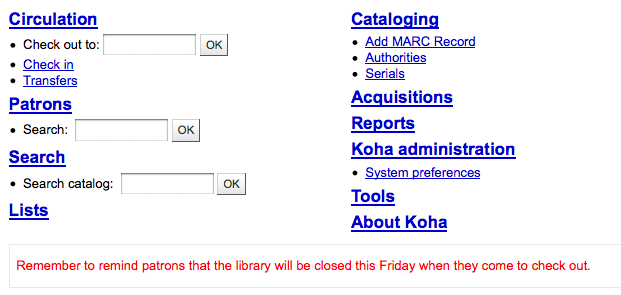
IntranetSlipPrinterJS
Asks: Use the following JavaScript for printing slips.
Description:
- The most logical use of this preference is in conjunction with the jsPrintSetup Firefox add-on. Learn more about this preference and the add-on setup on the Koha wiki at http://wiki.koha-community.org/wiki/Setting_up_slip_printer_to_print_silently.
intranetstylesheet
Asks: Include the stylesheet at ___ on all pages in the staff interface, instead of the default.
Description:
- The Intranetstylesheet preference is a layout and design feature for the intranet or staff client. To change the stylesheet from the original, place in this preference the file path to the style sheet - include the entire url starting with http://. This preference allows a library to customize the appearance of the Staff Client.
Important
This should be a complete URL, starting with http://
IntranetUserCSS
Asks: Include the following CSS on all pages in the staff client
intranetuserjs
Asks: Include the following JavaScript on all pages in the staff interface
Sample JavaScript to alter the staff client login
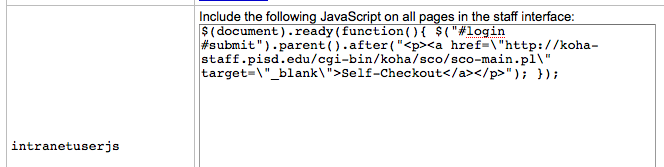
Link to Self Checkout appears on staff client login because of JavaScript
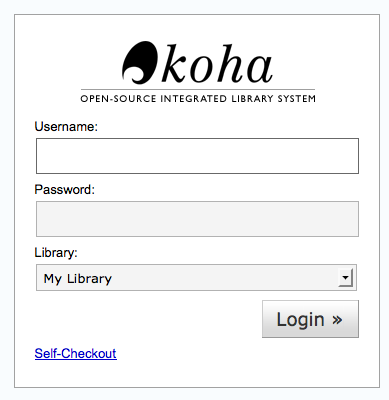
Description:
- This preference allows the administrator to enter JavaScript or JQuery that will be embedded across all pages of the Staff Client. Administrators may use this preference to customize some of the interactive sections of Koha, customizing the text for the login prompts, for example. Sample JQuery scripts used by Koha libraries can be found on the wiki: http://wiki.koha-community.org/wiki/JQuery_Library.
SlipCSS
Asks: Include the stylesheet at ___ on Issue and Reserve Slips.
Important
This should be a complete URL, starting with http://
Description:
- If you would like to style your receipts or slips with a consistent set of fonts and colors you can use this preference to point Koha to a stylesheet specifically for your slips.
StaffAuthorisedValueImages
Default: Show
Asks: ___ images for authorized values (such as lost statuses and locations) in search results.
Values:
- Don’t show
- Show
XSLTDetailsDisplay
Default: default
Asks: Display details in the staff client using XSLT stylesheet at ___
Values:
leave empty to not use the XSLT stylesheet - In previous versions of Koha this was the setting
that read ‘normally’ Detail display without XSLT stylesheets .. image:: images/admin/globalprefs/XSLTDetailsDisplay-off.png
enter “default” for the default one Detail display using XSLT stylesheets .. image:: images/admin/globalprefs/XSLTDetailsDisplay-on.png
put a path to define a XSLT file - ex: /path/to/koha/and/your/stylesheet.xsl - If in a multi-language system you can enter
{langcode} in the path to tell Koha to look in the right language folder - ex:
/home/koha/src/koha-tmpl/intranet-tmpl/prog/{langcode}/xslt/intranetDetail.xsl
- ex. http://mykoha.org/{langcode}/stylesheet.xsl
put an URL for an external specific stylesheet - ex: http://mykoha.org/stylesheet.xsl
Description:
- XSLT stylesheets allow for the customization of the details shows on the screen when viewing a bib record. This preference will allow you either use the default look that comes with Koha or design your own stylesheet.
XSLTResultsDisplay
Default: default
Asks: Display results in the staff client using XSLT stylesheet at ___
Values:
leave empty to not use the XSLT stylesheet - In previous versions of Koha this was the setting
that read ‘normally’
enter “default” for the default one
put a path to define a XSLT file - ex: /path/to/koha/and/your/stylesheet.xsl - If in a multi-language system you can enter
{langcode} in the path to tell Koha to look in the right language folder - ex:
/home/koha/src/koha-tmpl/intranet-tmpl/prog/{langcode}/xslt/intranetDetail.xsl
- ex. http://mykoha.org/{langcode}/stylesheet.xsl
put an URL for an external specific stylesheet - ex: http://mykoha.org/stylesheet.xsl
Description:
- XSLT stylesheets allow for the customization of the details shows on the screen when viewing the search results. This preference will allow you either use the default look that comes with Koha or design your own stylesheet.
yuipath
Default: included with Koha
Asks: Use the Yahoo UI libraries ___
Values:
from Yahoo’s servers - With this option there is less demand on your
servers, but if the Internet goes down there will be issues
included with Koha - With this option calls are made faster, and they
will still work if the Internet goes down
Description:
- The yuipath preference allows for the user to define a local path or web URL to the Yahoo User Interface Library (http://developer.yahoo.com/yui/2/). This library is a resource of developer tools including JavaScript and style sheets.
Options
HidePatronName
Default: Show
Asks: ___ the names of patrons that have items checked out or on hold on detail pages or the “Place Hold” screen.
Values:
- Don’t show
- Show
intranetbookbag
Default: Show
Asks: ___ the cart option in the staff client.
Values:
- Don’t show
- Show
viewISBD
Default: Allow
Asks: ___ staff to view records in ISBD form on the staff client.
Values:
- Allow
- Don’t allow
viewLabeledMARC
Default: Allow
Asks: ___ staff to view records in labeled MARC form on the staff client.
Values:
- Allow
- Don’t allow
viewMARC
Default: Allow
Asks: ___ staff to view records in plain MARC form on the staff client.
Values:
- Allow
- Don’t allow
Web Services
Get there: More > Administration > Global System Preferences > Web Services
OAI-PMH
OAI-PMH
Default: Disable
Asks: ___ Koha’s OAI-PMH server.
Values:
- Disable
- Enable
Description:
- For the Open Archives Initiative-Protocol for Metadata Harvesting (OAI-PMH) there are two groups of ‘participants’: Data Providers and Service Providers. Data Providers (open archives, repositories) provide free access to metadata, and may, but do not necessarily, offer free access to full texts or other resources. OAI-PMH provides an easy to implement, low barrier solution for Data Providers. Service Providers use the OAI interfaces of the Data Providers to harvest and store metadata. Note that this means that there are no live search requests to the Data Providers; rather, services are based on the harvested data via OAI-PMH. Koha at present can only act as a Data Provider. It can not harvest from other repositories. The biggest stumbling block to having Koha harvest from other repositories is that MARC is the only metadata format that Koha indexes natively. Visit http://www.oaforum.org/tutorial/english/page3.htm for diagrams of how OAI-PMH works.
Learn more about OAI-PMH at: http://www.openarchives.org/pmh/
OAI-PMH:AutoUpdateSets
Default: Disable
Asks: ___ automatic update of OAI-PMH sets when a bibliographic record is created or updated.
Values:
- Disable
- Enable
OAI-PMH:ConfFile
If this preference is left empty, Koha’s OAI Server operates in normal mode, otherwise it operates in extended mode. In extended mode, it’s possible to parameter other formats than marcxml or Dublin Core. OAI-PMH:ConfFile specify a YAML configuration file which list available metadata formats and XSL file used to create them from marcxml records.
For more information, see the sample conf file in the appendix.
OAI-PMH:MaxCount
Default: 50
Asks: Only return ___ records at a time in response to a ListRecords or ListIdentifiers query.
Description:
- This is the maximum number of records that would be returned based on ListRecord or ListIdentifier queries from harvesters. ListRecords harvest the entire records while the ListIdentifier is an abbreviated form of ListRecords, retrieving only headers rather than records.
Basic Parameters
Get there: More > Administration
Important
Configure all ‘parameters’ in the order they appear.
Libraries & Groups
When setting up your Koha system you will want to add information for every library that will be sharing your system. This data is used in several areas of Koha.
- Get there: More > Administration > Basic Parameters > Libraries and Groups
When visiting this page you are presented with a list of the libraries and groups that have already been added to the system.
Library List
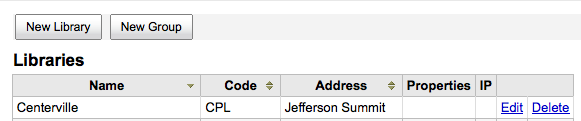
Group Lists
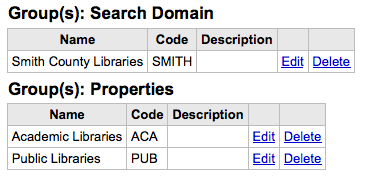
Adding a Library
To add a new library:
Click ‘New Library’
The top of the form asks for some basics about the library Basic Library Info .. image:: images/admin/basicparams/newlibrary.png - The library code should not contain any spaces and be
10 or fewer characters. This code will be used as a unique identifier in the database.
- The name will be displayed on the OPAC wherever the library name displays to the public and should be a name that makes sense to your patrons.
- If you have groups set up you can choose what group this library belongs to after entering in the code and name
Next you can enter basic contact info about the branch Library Contact Info .. image:: images/admin/basicparams/librarycontact.png - The address and contact fields can be used to make
notices custom for each library
The email address field is not required, but it should be filled for every library in your system - .. important:: Be sure to enter a library email address to make
sure that notices are sent to and from the right address
If the URL field is populated then the library name will be linked in the holdings table on the OPAC Linked Library Name .. image:: images/admin/basicparams/librarylink.png
The OPAC Info box is for you to put information about the library that will appear in the OPAC when the branch name is moused over in the holdings table OPAC Info .. image:: images/admin/basicparams/opacinfo.png
IP Address does not have be filled in unless you plan on limiting access to your staff client to a specific IP Address - .. important:: An IP address is required if you have enabled
Finally, if you have any notes you can put them here. These will not show in the OPAC
Tip
Of the fields listed, only ‘Library code’ and ‘Name’ are required
Editing/Deleting a Library
You will be unable to delete any library that has patrons or items attached to it.
Staff will be presented with a warning when trying to delete a library that is being used

Each library will have an ‘Edit’ link to the right of it. Click this link to edit/alter details associated with the library in question.
Important
You will be unable to edit the ‘Library code’
Adding a group
To add a Search Domain or Library Property Group click the ‘New Group’ button at the top of the screen
Add group form
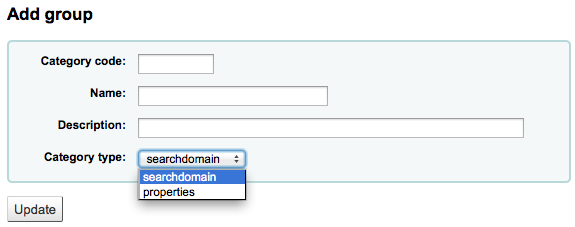
Of the fields on the group form, ‘Category code’ and ‘Name’ are the only required fields
Search Domain Groups
Search Domain Groups allow you to search a group of libraries at the same time instead of searching just one library or all libraries.
Search Domain Groups
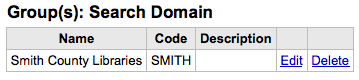
To see Search Domain Groups in action visit the staff client advanced search page in your Koha system:
Library group search on staff client
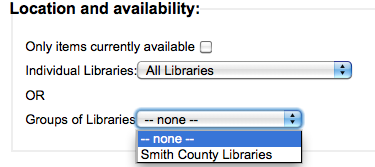
Library Property Groups
You can assign specific categories to your libraries by adding groups for them
Library Property Groups
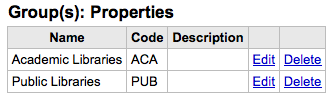
Properties are then applied to libraries via the add or edit library form
Groups on the Add/Modify library form
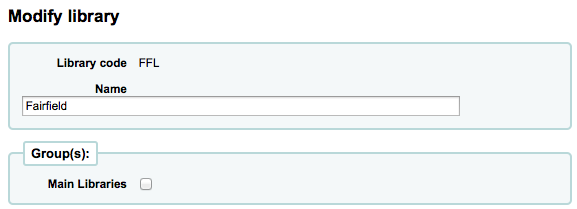
Item Types
Koha allows you to organize your collection by item types and collection codes.
- Get there: More > Administration > Basic Parameters > Item Types
Item types typically refer to the material type (book, cd, dvd, etc), but can be used in any way that works for your library.
Item Types
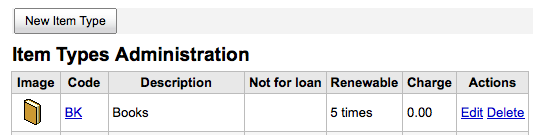
Adding Item Types
To add a new item type, simply click the ‘New Item Type’ button at the top of the Item Types page.
Sample DVD Item Type
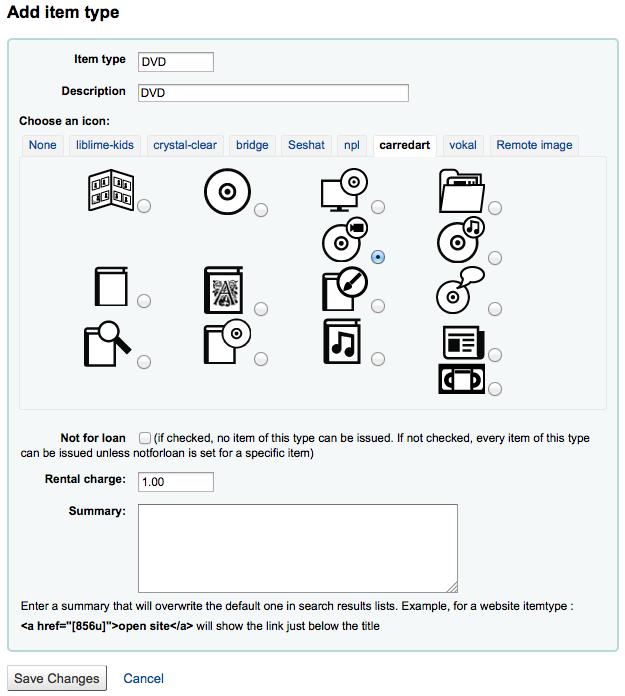
In the ‘Item Type’ field, enter a short code for your item type
The description is the plain text definition of the item type
You can choose to have an image associated with your item type - You can choose from a series of image
collections
For items that do not circulate, check the ‘Not for loan’ options - Items marked ‘Not for loan’ will appear in the
catalog, but cannot be checked out to patrons
Enter the total number of renewals allowed for the item type in the ‘Renewals’ box
For items that you charge a rental fee for, enter the total fee you charge in the ‘Rental charge’ field - .. important:: Do not enter symbols in this field, only numbers and
decimal points (ex. $5.00 should be entered as 5 or 5.00)
- This will charge the patron on checkout
When finished, click ‘Save Changes’ - .. tip:: All fields, with the exception of the ‘Item Type’
will be editable from the Item Types list
Your new item type will now appear on the list New DVD Item Type .. image:: images/admin/basicparams/newitemtype.png
Editing Item Types
Each item type has an Edit button beside it. To edit an item simply click the ‘Edit’ link.
Important
You will not be able to edit the code you assigned as the ‘Item Type’ but you will be able to edit the description for the item.
Deleting Item Types
Each item has a Delete button beside it. To delete an item, simply click the ‘Delete’ link.
Important
You will not be able to delete item types that are being used by items within your system.
Warning when you try to delete an item that is in use
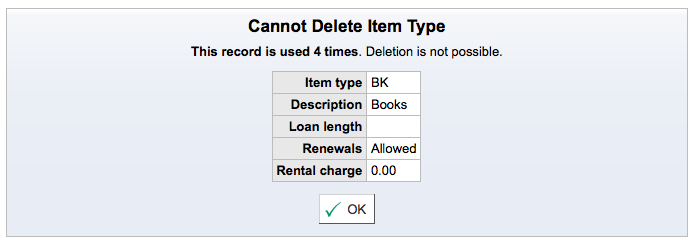
Authorized Values
Authorized values can be used in several areas of Koha. One reason you would add an authorized value category would be to control the values that can be entered into MARC fields by catalogers.
- Get there: More > Administration > Basic Parameters > Authorized Values
Existing Values
Koha installs with pre-defined values that your library is likely to use, for instance ‘Lost’.
Asort1 - Used for acquisitions statistical purposes
Asort2 - Used for acquisitions statistical purposes
BOR_NOTES - Values for custom patron notes that appear on the
circulation screen and the OPAC
Bsort1 - Used for patron statistical purposes
Bsort2 - Used for patron statistical purposes
CART - Is the shelving cart location, used by InProcessingToShelvingCart
CCODE - Collection codes (appears when cataloging and working
with items)
DAMAGED - Descriptions for items marked as damaged (appears when
cataloging and working with items)
HINGS_AS - General Holdings: Acquisition Status Designator
This data element specifies acquisition status for the unit
at the time of the holdings report.a
HINGS_C - General Holdings: Completeness Designator
HINGS_PF - Physical Form Designators
HINGS_RD - General Holdings: Retention Designator :: This data
element specifies the retention policy for the unit at the time of the holdings report.
HINGS_UT - General Holdings: Type of Unit Designator
LOC - Shelving location (usually appears when adding or
editing an item)
LOST - Descriptions for the items marked as lost (appears
when adding or editing an item)
Important
Values given to lost statuses should be numeric and not alphabetical in order for statuses to appear properly
MANUAL_INV - Values for manual invoicing types
NOT_LOAN - Reasons why a title is not for loan - .. important:: Values given to lost statuses should be numeric and
not alphabetical in order for statuses to appear properly
Tip
Negative number values will still allow holds (use for on order statuses for example) where as positive numbers will not allow holds or checkouts
PROC - The location to be used for NewItemsDefaultLocation
(change description as desired), also the location expected by InProcessingToShelvingCart.
RESTRICTED - Restricted status of an item
SUGGEST - List of patron suggestion reject or accept reasons
(appears when managing suggestions)
WITHDRAWN - Description of a withdrawn item (appears when adding
or editing an item)
YES_NO - A generic authorized value field that can be used
anywhere you need a simple yes/no pull down menu.
Add new Authorized Value Category
In addition to the existing categories that come by default with Koha, librarians can add their own authorized value categories to control data that is entered into the system. To add a new category:
Click ‘New Category’ New Authorized Category form .. image:: images/admin/basicparams/addauthcat.png
Limit your Category to 10 characters (something short to make it clear what the category is for) - .. important:: Category cannot have spaces or special characters
other than underscores and hyphens in it.
When adding a new category you’re asked to create at least one authorized value - Enter a code for your Authorized Value into the
‘Authorized value’ field - .. important:: Authorized value is limited to 80 characters and
cannot have spaces or special characters other than underscores and hyphens in it.
- Use the Description field for the actual value that will be displayed. If you want something different to show in the OPAC, enter a ‘Description (OPAC)’
- If you have StaffAuthorisedValueImages and/or AuthorisedValueImages set to show images for authorized values you can choose the image under ‘Choose an icon’
Click ‘Save’
Your new category and value will appear on the list of Authorized Values Custom Authorized Value on list of values .. image:: images/admin/basicparams/authvallist.png
Add new Authorized Value
New authorized values can be added to any existing or new category. To add a value:
Click ‘New authorized value for ...’ New Authorized Value form .. image:: images/admin/basicparams/addauthvalue.png
Enter a code for your Authorized Value into the ‘Authorized value’ field - .. important:: Authorized value is limited to 80 characters and
cannot have spaces or special characters other than underscores and hyphens in it.
Use the Description field for the actual value that will be displayed. If you want something different to show in the OPAC, enter a ‘Description (OPAC)’
If you have StaffAuthorisedValueImages and/or AuthorisedValueImages set to show images for authorized values you can choose the image under ‘Choose an icon’
Click ‘Save’
The new value will appear in the list along with existing values List of authorized values in MARC504 category .. image:: images/admin/basicparams/authvals.png
Patrons & Circulation
Settings for controlling circulation and patron information.
Patron Categories
Patron categories allow you to organize your patrons into different roles, age groups, and patron types.
- Get there: More > Administration > Patrons & Circulation > Patron Categories
Patron category list
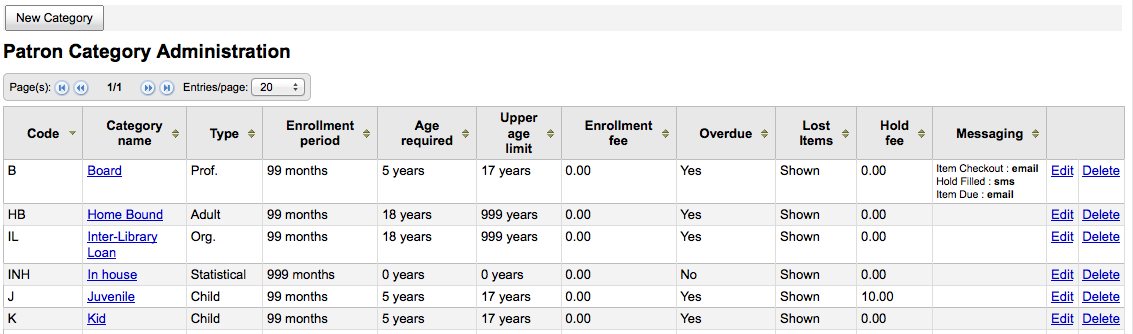
Patrons are assigned to one of six main categories:
Adult - Most common patron type, usually used for a general
‘Patron’ category.
Child - Children patrons can have a guardian to be attached to
them.
Staff - Librarians (and library workers) should be assigned the
staff category so that you can set their permissions and give them access to the staff client.
Organizational - Organizational patrons are organizations. Organizations
can be used as guarantors for Professional patrons.
Professional - Professional patrons can be linked to Organizational
patrons
Statistical - This patron type is used strictly for statistical
purposes, such as in house use of items.
Adding a patron category
To add a new patron category click ‘New Category’ at the top of the page
New patron category form
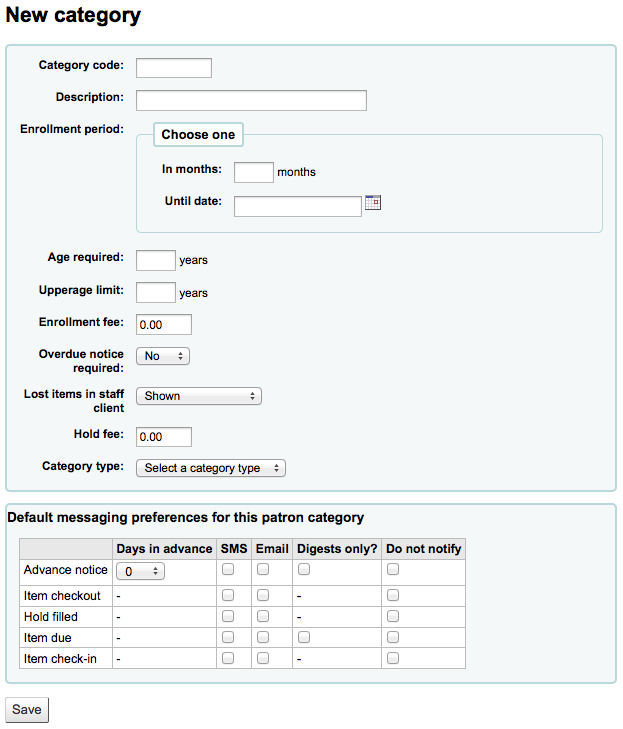
The ‘Category Code’ is an identifier for your new code. - .. important:: The category code is limited to 10 characters
(numbers and letters)
Important
This field is required in order to save your patron category. If left blank you will be presented with an error. Missing fields error .. image:: images/admin/patroncirc/patcaterror.png
Enter a plain text version of the category in the ‘Description’ field. - .. important:: This field is required in order to save your patron
category. If left blank you will be presented with an error. Missing fields error .. image:: images/admin/patroncirc/patcaterror.png
Enrollment period (in months) should be filled in if you have a limited enrollment period for your patrons (eg. Student cards expire after 9 months or until a specific date) - .. important:: You cannot enter both a month limit and a date
until. Choose to enter either one or the other.
Important
This field is required in order to save your patron category. If left blank you will be presented with an error. Missing fields error .. image:: images/admin/patroncirc/patcaterror.png
Some patron categories can have a minimum age (in years) requirement associated with them, enter this age in the ‘Age required’ - .. important:: This value will only be checked if BorrowerMandatoryField
defines the dateofbirth as a required field on the patron record
Patron categories can also have a maximum age (in years) associated with them (such as children), enter this age in the ‘Upperage limit’ - .. important:: This value will only be checked if BorrowerMandatoryField
defines the dateofbirth as a required field on the patron record
If you charge a membership fee for your patrons (such as those who live in another region) you can enter that in the ‘Enrollment fee’ field. - .. important:: Only enter numbers and decimals in this field
If you want your patron to receive overdue notices, set the ‘Overdue notice required’ to ‘Yes’
You can decide on a patron category basis if lost items are shown in the staff client by making a choice from the ‘Lost items in staff client’ pull down Choose a value for ‘Hide Lost Items’ .. image:: images/admin/patroncirc/hidelostitemspatron.png - .. important:: Note that this is only applicable in the staff
client, so changing this value on patron categories who do not have access to the staff client won’t make any difference
If you charge patrons for placing holds on items, enter the fee amount in the ‘Hold fee’ field. - .. important:: Only enter numbers and decimals in this field
In the ‘Category type’ field choose one of the six main parent categories Six main patron categories .. image:: images/admin/patroncirc/patroncatpulldown.png - .. important:: This field is required in order to save your patron
category. If left blank you will be presented with an error. Missing fields error .. image:: images/admin/patroncirc/patcaterror.png
Finally you can assign advanced messaging preferences by default to a patron category - .. important:: Requires that you have EnhancedMessagingPreferences
enabled
Important
These can be changed for individual patrons, this setting is just a default to make it easier to set up messages for an entire category
Cities and Towns
To standardize patron input you can define cities or towns within your region so that when new patrons are added librarians simply have to select the town from a list instead of having to type the town and zip (or postal) code information.
- Get there: More > Administration > Patrons & Circulation > Cities and Towns
Adding a City
To add a new city, click the ‘New City’ button at the top of the page and enter the city name, state, zip/postal code and country.
New city entry form
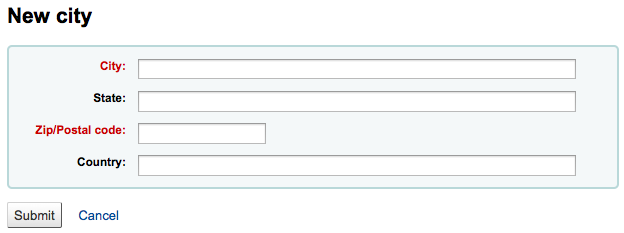
One you click Submit, your city will be saved and will be listed on the Cities and Towns page
List of Cities
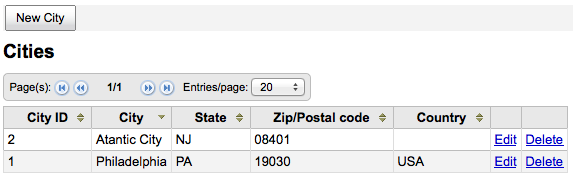
Cities can be edited or deleted at any time.
Viewing Cities on Patron Add Form
If you have defined local cities using the New city form, then when adding or editing a patron record you will see those cities in a pull down menu to make city selection easy.
Cities pull down on the patron record
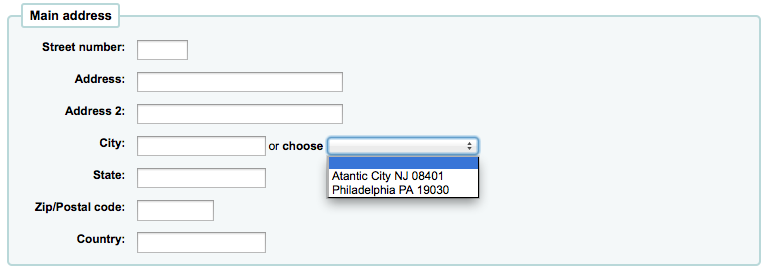
This will allow for easy entry of local cities into the patron record without risking the potential for typos or mistaken zip/postal codes.
Road Types
To standardize patron input you can define road types within your region so that when new patrons are added librarians simply have to select the road from a list instead of having to type it in.
Tip
If you want your patrons to have their road types abbreviated all of the time then you can enter the appropriate abbreviations here, if you’d like the road types to always be spelled out you can do that here as well.
Adding Road Types
To add a road type, click ‘New Road Type’ and then enter the road type the way you’d like it displayed.
New Road
Once you submit the form, your new road type will be listed on the Road Types page
Roads in Koha
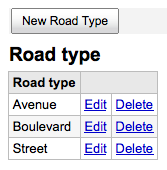
Viewing Road Types on Patron Add form
When adding or editing a patron, if you have road types defined, there will be a pull down to choose the road type from.
Road types on patron record
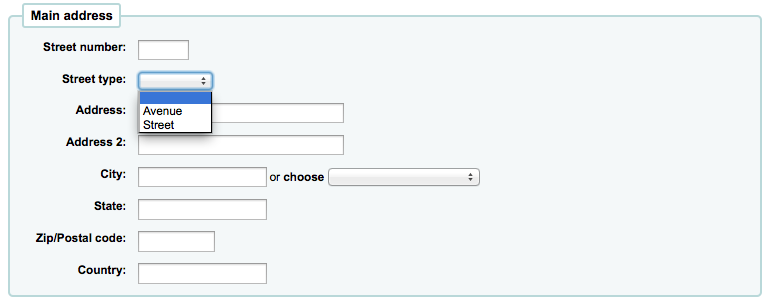
Patron Attribute Types
Patron attributes can be used to define custom fields to associate with your patron records. In order to enable the use of custom fields you need to set the ExtendedPatronAttributes system preference.
- Get there: More > Administration > Patrons & Circulation > Patron attribute types
A common use for this field would be for a student ID number or a Driver’s license number.
List of Patron Attributes
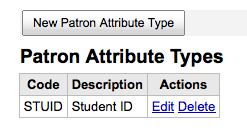
Adding Patron Attributes
To add a new Patron Attribute Type, click the ‘New Patron Attribute Type’ button at the top of the page
Add Patron Attribute Type form
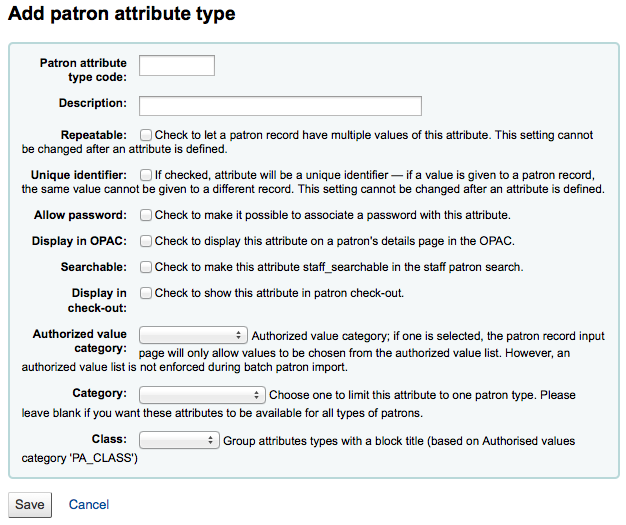
In the ‘Patron attribute type code’, enter a short code to identify this field - .. important:: This field is limited to 10 characters (numbers and
letters only)
Important
This setting cannot be changed after an attribute is defined
In the ‘Description’ field, enter a longer (plain text) explanation of what this field will contain
Check the box next to ‘Repeatable’ to let a patron record have multiple values of this attribute. - .. important:: This setting cannot be changed after an attribute is
defined
If ‘Unique identifier’ is checked, the attribute will be a unique identifier which means, if a value is given to a patron record, the same value cannot be given to a different record. - .. important:: This setting cannot be changed after an attribute is
defined
Check ‘Allow password’ to make it possible to associate a password with this attribute.
Check ‘Display in OPAC’ to display this attribute on a patron’s details page in the OPAC.
Check ‘Searchable’ to make this attribute searchable in the staff patron search.
Check ‘Display in check-out’ to make this attribute visible in the patron’s short detail display on the left of the checkout screen and other patron pages Show attribute in patron detail on the left .. image:: images/admin/patroncirc/showattribute.png
Authorized value category; if one is selected, the patron record input page will only allow values to be chosen from the authorized value list. - You will first need to add an authorized value list
for it to appear in this menu - *Get there:*More >
Administration > Basic Parameters > Authorized Values
Important
an authorized value list is not enforced during batch patron import.
If you’d like to only show this attribute on patrons of one type choose that patron type from the ‘Category’ pull down
If you have a lot of attributes it might be handy to group them so that you can easily find them for editing. If you create an Authorized Value for PA_CLASS it will show in the ‘Class’ pull down and you can then change your attributes page to have sections of attributes Patron Attributes Sorted .. image:: images/admin/patroncirc/pa_class.png
Click Save to save your new attribute
Once added your attribute will appear on the list of attributes and also on the patron record add/edit form
Patron Attributes list on the Patron add/edit form
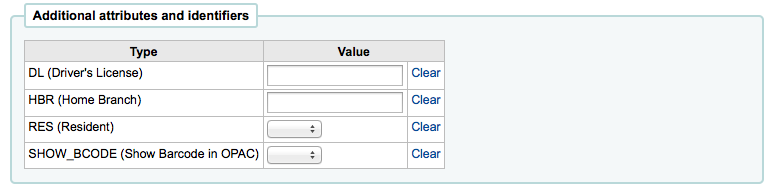
If you have set up classes for organizing attributes they will appear that way on the add/edit patron form
Grouped Attributes
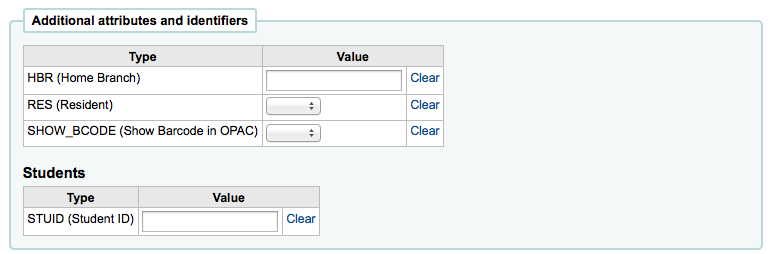
Editing/Deleting Patron Attributes
Each patron attribute has an edit and a delete link beside it on the list of attributes.
Some fields in the attribute will not be editable once created:
- Patron attribute type code
- Repeatable
- Unique identifier
You will be unable to delete an attribute if it’s in use.
Warning when trying to delete an attribute that is in use

Circulation and Fine Rules
These rules define how your items are circulated, how/when fines are calculated and how holds are handled.
- Get there: More > Administration > Patrons & Circulation > Circulation and fines rules
The rules are applied from most specific to less specific, using the first found in this order:
- same library, same patron type, same item type
- same library, same patron type, all item type
- same library, all patron types, same item type
- same library, all patron types, all item types
- all libraries, same patron type, same item type
- all libraries, same patron type, all item types
- all libraries, all patron types, same item type
- all libraries, all patron types, all item types
Tip
If you are a single library system choose your branch name before creating rules (sometimes having only rules for the ‘all libraries’ option can cause issues with holds)
Important
At the very least you will need to set a default circulation rule. This rule should be set for all item types, all libraries and all patron categories. That will catch all instances that do not match a specific rule. When checking out if you do not have a rule for all libraries, all item types and all patron types then you may see patrons getting blocked from placing holds. You will also want a rule for your specific library set for all item types and all patron types to avoid this holds issue. Koha needs to know what rule to fall back on.
Default Circulation Rules
Using the issuing rules matrix you can define rules that depend on patron/item type combos. To set your rules, choose a library from the pull down (or ‘all libraries’ if you want to apply these rules to all branches):
Libraries to apply the rules to
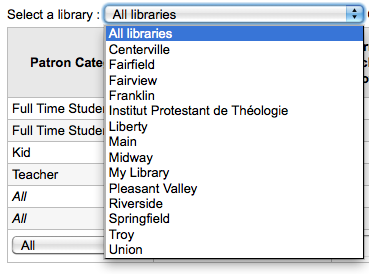
From the matrix you can choose any combination of patron categories and item types to apply the rules to
Setting issuing rules for your libraries

First choose which patron category you’d like the rule to be applied to. If you leave this to ‘All’ it will apply to all patron categories
Choose the ‘Item Type’ you would like this rule to apply to. If you leave this to ‘All’ it will apply to all item types
Limit the number of items a patron can have checked out at the same time by entering a number in the ‘Current Checkouts Allowed’ field
Define the period of time an item can be checked out to a patron by entering the number of units (days or hours) in the ‘Loan Period’ box.
Choose which unit of time, Days or Hours, that the loan period and fines will be calculate in
You can also define a hard due date for a specific patron category and item type. A hard due date ignores your usual circulation rules and makes it so that all items of the type defined are due on, before or after the date you specify.
‘Fine Amount’ should have the amount you would like to charge for overdue items - .. important:: Enter only numbers and decimal points (no currency
symbols).
Enter the ‘Fine Charging Interval’ in the unit you set (ex. charge fines every 1 day, or every 2 hours)
The ‘Fine Grace Period’ is the period of time an item can be overdue before you start charging fines. - .. important:: This can only be set for the Day unit, not in
Hours
The ‘Overdue Fines Cap’ is the maximum fine for this patron and item combination - .. important:: If this field is left blank then Koha will not put a
limit on the fines this item will accrue. A maximum fine amount can be set using the MaxFine system preference.
If your library ‘fines’ patrons by suspending their account you can enter the number of days their fine should be suspended in the ‘Suspension in Days’ field - .. important:: This can only be set for the Day unit, not in
Hours
Next decide if the patron can renew this item type and if so, enter how many times they can renew it in the ‘Renewals Allowed’ box
If the patron can place holds on this item type, enter the total numbers of items (of this type) that can be put on hold in the ‘Holds Allowed’ field
Finally, if you charge a rental fee for the item type and want to give a specific patron type a discount on that fee, enter the percentage discount (without the % symbol) in the ‘Rental Discount’ field
When finished, click ‘Add’ to save your changes. To modify a rule, create a new one with the same patron type and item type. If you would like to delete your rule, simply click the ‘Delete’ link to the right of the rule.
To save time you can clone rules from one library to another by choosing the clone option above the rules matrix.
Circulation & Fine Rules Clone Tool

After choosing to clone you will be presented with a confirmation message.
Circulation & Fine Rules Successfully Cloned Message
Default Checkouts and Hold Policy
You can set a default maximum number of checkouts and hold policy that will be used if none is defined below for a particular item type or category.
Default Checkouts and Hold Policy

From this menu you can set a default to apply to all item types and patrons in the library.
In ‘Total Current Checkouts Allowed’ enter the total number of items patrons can have checked out at one time
Control where patrons can place holds from using the ‘Hold Policy’ menu - From Any Library: Patrons from any library may put
this item on hold. (default if none is defined)
- From Home Library: Only patrons from the item’s home library may put this book on hold.
- No Holds Allowed: No patron may put this book on hold.
Control where the item returns to once it is checked in - Item returns home - Item returns to issuing branch - Item floats
- When an item floats it stays where it was checked in and does not ever return ‘home’
Once your policy is set, you can unset it by clicking the ‘Unset’ link to the right of the rule
Checkouts Per Patron
For this library, you can specify the maximum number of loans that a patron of a given category can make, regardless of the item type.
Set default checkouts per patron category

Tip
If the total amount loanable for a given patron category is left blank, no limit applies, except possibly for a limit you define for a specific item type.
Item Hold Policies
For this library, you can edit rules for given itemtypes, regardless of the patron’s category. Currently, this means hold policies.
Hold policies per item type

The various Hold Policies have the following effects:
- From Any Library: Patrons from any library may put this item on hold. (default if none is defined)
- From Home Library: Only patrons from the item’s home library may put this book on hold.
- No Holds Allowed: No patron may put this book on hold.
Important
Note that if the system preference AllowHoldPolicyOverride set to ‘allow’, these policies can be overridden by your circulation staff.
Important
These policies are based on the patron’s home branch, not the branch that the reserving staff member is from.
The various Return Policies have the following effects:
Item returns home: The item will prompt the librarian to transfer the item to its home library - .. important:: If the AutomaticItemReturn
preference is set to automatically transfer the items home, then a prompt will not appear
Item returns to issuing branch: The item will prompt the librarian to transfer the item back to the library where it was checked out - .. important:: If the AutomaticItemReturn
preference is set to automatically transfer the items home, then a prompt will not appear
Item floats: The item will not be transferred from the branch it was checked in at, instead it will remain there until transferred manually or checked in at another branch
Library Transfer Limits
Limit the ability to transfer items between libraries based on the library sending, the library receiving, and the collection code involved.
- Get there: More > Administration > Patrons & Circulation > Library Transfer Limits
These rules only go into effect if the preference UseBranchTransferLimits is set to ‘enforce’.
Before you begin you will want to choose which library you are setting these limits for.
Choose the library you’re setting limits for

Transfer limits are set based on the collections codes you have applied via the Authorized Value administration area.
Collection Code values assigned in the Authorized Value area
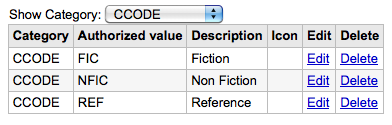
Collection codes will appear as tabs above the checkboxes:
Collection Code tabs
Check the boxes for the libraries that you accept checkins from for the item type you have selected at the top (in the example below - FIC)
Example transfer limits set up
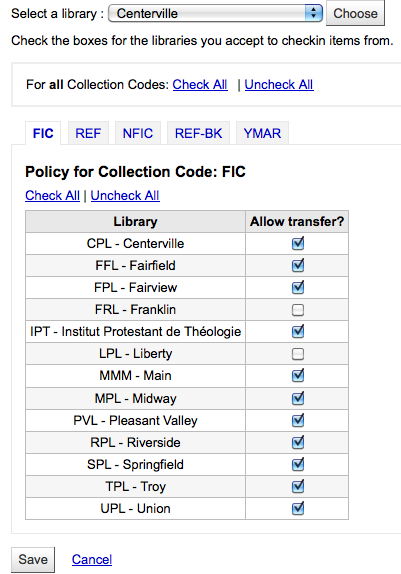
In the above example, Centerville library will allow patrons to return items from all libraries except Liberty and Franklin to their branch.
Item Circulation Alerts
Libraries can decide if they want to have patrons automatically notified of circulation events (check ins and check outs).
- Get there: More > Administration > Patrons & Circulation > Item Circulation Alerts
These preferences are set based on patron types and item types.
Important
These preference can be overwritten by changes in the individual patron’s messaging preferences.
To set up circulation alerts:
Choose your library from the pull down at the top of the screen Libraries to set Circulation Alerts .. image:: images/admin/patroncirc/librariesforalert.png - To set preferences for all libraries, keep the menu set
to ‘Default’
By default all item types and all patrons are notified of check ins and check outs. To change this, click on the item/patron type combo that you would like to stop notices for. Circulation Alert Matrix .. image:: images/admin/patroncirc/alertmatrix.png - In the above example, Juveniles and Kids will not
receive check out notices.
Catalog Administration
Set these controls before you start cataloging on your Koha system.
- Get there: More > Administration > Catalog
MARC Bibliographic Frameworks
Think of Frameworks as templates for creating new bibliographic records. Koha comes with some predefined frameworks that can be edited or deleted, and librarians can create their own frameworks for content specific to their libraries.
- Get there: More > Administration > Catalog > MARC Bibliographic Frameworks
Frameworks List
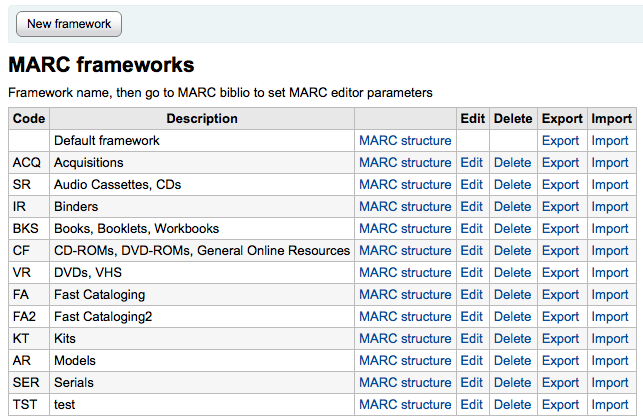
Important
Do not delete or edit the Default Framework since this will cause problems with your cataloging records - always create a new template based on the Default Framework, or alter the other Frameworks.
After clicking the ‘MARC structure’ link to the right of each framework you can decide how many fields you want to see on one screen by using the pagination options at the top of the table.
Pagination options
Add New Framework
To add a new framework
Click ‘New Framework’ Add Framework Form .. image:: images/admin/cataloging/addframework.png - Enter a code of 4 or fewer characters - Use the Description field to enter a more detailed
definition of your framework
Click ‘Submit’
Once your Framework is added click ‘MARC structure’ to the right of it on the list of Frameworks Choose basis for new Framework .. image:: images/admin/cataloging/startnewframework.png - You will be asked to choose a Framework to base your
new Framework off of, this will make it easier than starting from scratch
Once your Framework appears on the screen you can edit or delete each field by following the instructions for editing subfields
Edit Existing Frameworks
Clicking ‘Edit’ to the right of a Framework will only allow you to edit the Description for the Framework:
Edit Framework
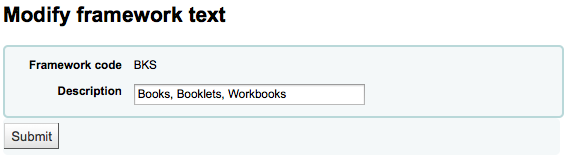
To make edits to the fields associated with the Framework you must first click ‘MARC Structure’ and then follow the instructions for editing subfields
Add subfields to Frameworks
To add a field to a Framework click the ‘New Tag’ button at the top of the Framework definition
New Tag Button
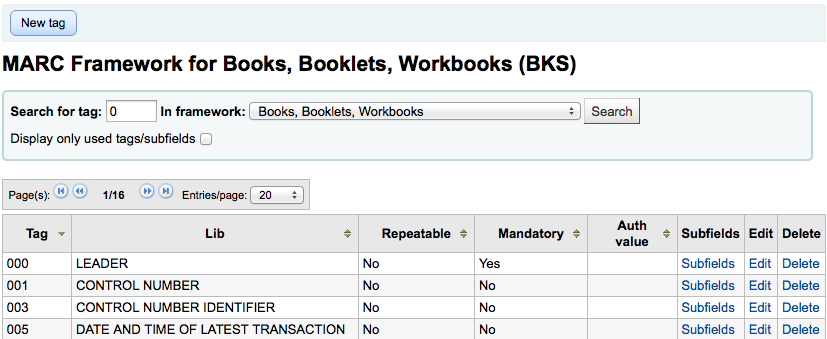
This will open up a blank form for entering MARC field data
Add a new tag to framework
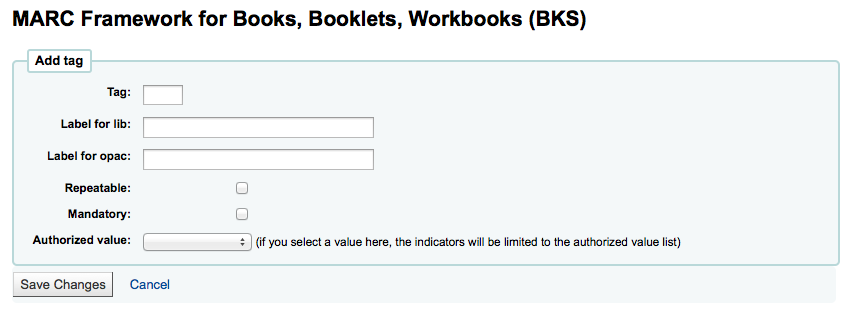
Enter the information about your new tag:
- The ‘Tag’ is the MARC field number
- The ‘Label for lib’ is the text that will appear in the staff client when in the cataloging module
- The ‘Label for OPAC’ is the text that will appear in the OPAC when viewing the MARC version of the record
- If this field can be repeated, check the ‘Repeatable’ box
- If this field is mandatory, check the ‘Mandatory’ box
- If you want this field to be a pull down with limited possible answers, choose which ‘Authorized value’ list you want to use
When you’re finished, click ‘Save Changes’ and you will be presented with your new field
New tag and link to subfields

To the right of the new field is a link to ‘Subfields,’ you will need to add subfields before this tag will appear in your MARC editor. The process of entering the settings for the new subfield is the same as those found in the editing subfields in frameworks section of this manual.
Edit Framework Subfields
Frameworks are made up of MARC fields and subfields. To make edits to most Frameworks you must edit the fields and subfields. Clicking ‘Edit’ to the right of each subfield will allow you to make changes to the text associated with the field
Modify MARC Field
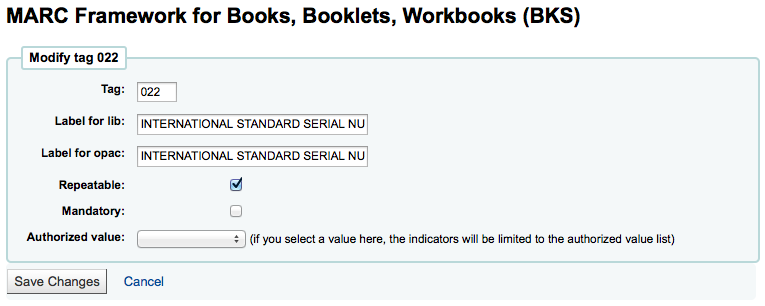
Each field has a tag (which is the MARC tag) - The ‘Label for lib’ is what will show in the staff
client if you have advancedMARCeditor set to display labels
- The ‘Label for OPAC’ is what will show on the MARC view in the OPAC
- If you check ‘Repeatable’ then the field will have a plus sign next to it allowing you to add multiples of that tag
- If you check ‘Mandatory’ the record will not be allowed to save unless you have a value assigned to this tag
- ‘Authorized value’ is where you define an authorized value that your catalogers can choose from a pull down to fill this field in
To edit the subfields associated with the tag, click ‘Subfields’ to the right of the tag on the ‘MARC Structure’ listing
From the list of subfields you can click ‘Delete’ to the right of each to delete the subfields
To edit the subfields click ‘Edit Subfields’ Editing the 504 Subfield .. image:: images/admin/cataloging/editsubfield.png
For each subfield you can set the following values - Text for librarian
- what appears before the subfield in the librarian interface
Text for OPAC - what appears before the field in the OPAC.
- If left empty, the text for librarian is used instead
Repeatable - the field will have a plus sign next to it
allowing you to add multiples of that tag
Mandatory - the record will not be allowed to save unless you
have a value assigned to this tag
Managed in tab - defines the tab where the subfield is shown. All
subfields of a given field must be in the same tab or ignored. Ignore means that the subfield is not managed.
Default value - defines what you want to appear in the field by
default, this will be editable, but it saves time if you use the same note over and over or the same value in a field often.
hidden - allows you to select from 19 possible visibility
conditions, 17 of which are implemented. They are the following: - -9 => Future use - -8 => Flag - -7 => OPAC !Intranet !Editor
Collapsed
- -6 => OPAC Intranet !Editor !Collapsed
- -5 => OPAC Intranet !Editor Collapsed
- -4 => OPAC !Intranet !Editor !Collapsed
- -3 => OPAC !Intranet Editor Collapsed
- -2 => OPAC !Intranet Editor !Collapsed
- -1 => OPAC Intranet Editor Collapsed
- 0 => OPAC Intranet Editor !Collapsed
- 1 => !OPAC Intranet Editor Collapsed
- 2 => !OPAC !Intranet Editor !Collapsed
- 3 => !OPAC !Intranet Editor Collapsed
- 4 => !OPAC Intranet Editor !Collapsed
- 5 => !OPAC !Intranet !Editor Collapsed
- 6 => !OPAC Intranet !Editor !Collapsed
- 7 => !OPAC Intranet !Editor Collapsed
- 8 => !OPAC !Intranet !Editor !Collapsed
- 9 => Future use
- ( ! means ‘not visible’ or in the case of Collapsed ‘not Collapsed’)
Is a URL - if checked, it means that the subfield is a URL
and can be clicked
Link - If you enter a field/subfield here (200b), a link
appears after the subfield in the MARC Detail view. This view is present only in the staff client, not the OPAC. If the librarian clicks on the link, a search is done on the database for the field/subfield with the same value. This can be used for 2 main topics : - on a field like author (200f in UNIMARC), put
200f here, you will be able to see all bib records with the same author.
- on a field that is a link (4xx) to reach another bib record. For example, put 011a in 464$x, will find the serials that are with this ISSN.
Warning
This value should not change after data has been added to your catalog
Koha link - Koha is multi-MARC compliant. So, it does not know
what the 245$a means, neither what 200$f (those 2 fields being both the title in MARC21 and UNIMARC). So, in this list you can “map” a MARC subfield to its meaning. Koha constantly maintains consistency between a subfield and its meaning. When the user want to search on “title”, this link is used to find what is searched (245 if you’re MARC21, 200 if you’re UNIMARC).
Authorized value - means the value cannot by typed by the librarian,
but must be chosen from a pull down generated by the authorized value list
- In the example above, the 504a field will show the MARC504 Authorized Values when cataloging Example of an Authorized Subfield .. image:: images/admin/cataloging/504auth.png
Thesaurus - means that the value is not free text, but must be
searched in the authority/thesaurus of the selected category
Plugin - means the value is calculated or managed by a
plugin. Plugins can do almost anything.
- For example, in UNIMARC there are plugins for every 1xx fields that are coded fields. The plugin is a huge help for cataloger ! There are also two plugins (unimarc_plugin_210c and unimarc_plugin_225a that can “magically” find the editor from an ISBN, and the collection list for the editor)
To save your changes simply click the ‘Save Changes’ button at the top of the screen
Import/Export Frameworks
Next to each framework is a link to either import or export the framework.
Export Framework
To export a framework simply click the ‘Export’ link to the right of framework title.
Export link next to framework

When you click ‘Export’ you will be prompted to choose what format to export the file in.
Export formats
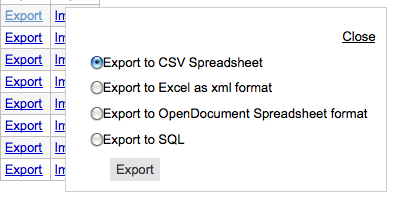
A framework exported this way can be imported into any other Koha installation using the import framework option.
Import Framework
An easy way to create a new framework is to import it from another Koha database. To import a framework you first need to create a new framework. Once you have that framework, click ‘Import’ to the right of the new framework.
Import link next to framework
You will be prompted to find a file on your computer to import into the framework.
Choose a file to import
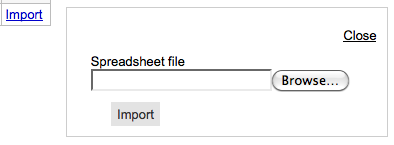
You will be asked to confirm your actions before the file is imported.
Confirm your desire to import
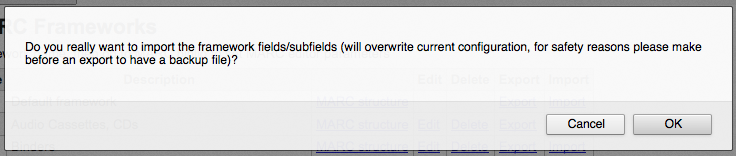
As your file is uploaded you will see an image that will confirm that the system is working.
Import timer

Once your import is complete you will be brought to the framework edit tool where you can make any changes you need to the framework you imported.
Koha to MARC Mapping
While Koha stores the entire MARC record, it also stores common fields for easy access in various tables in the database. Koha to MARC Mapping is used to tell Koha where to find these values in the MARC record. In many cases you will not have to change the default values set by in this tool on installation, but it is important to know that the tool is here and can be used at any time.
- Get there: More > Administration > Catalog > Koha to MARC Mapping
The Koha to MARC Mapping page offers you the option of choosing from one of three tables in the database to assign values to.
Koha to MARC Mapping Table Pull Down
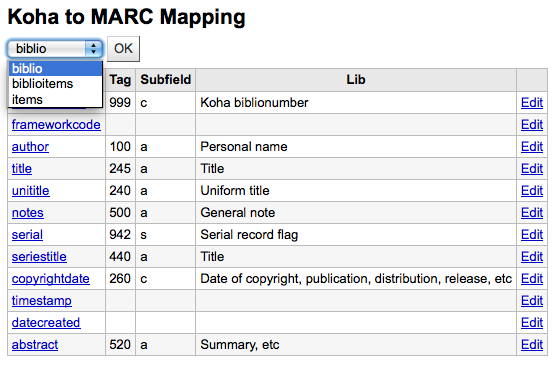
After choosing the table you would like to view, click ‘OK.’ To edit any mapping click on the ‘Koha Filed’ or the ‘Edit’ link.
Map MARC Field to Koha Field
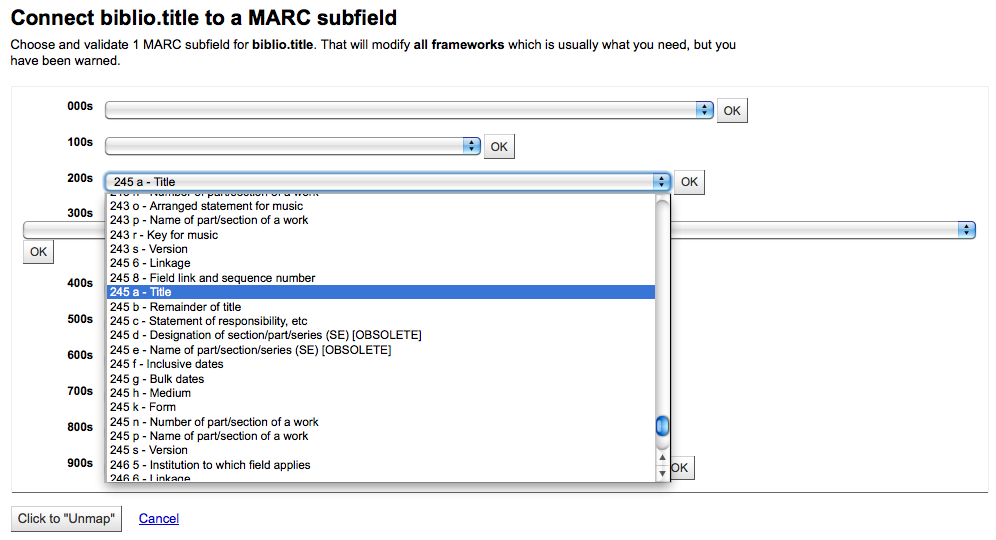
Choose which MARC field you would like to map to this Koha Field and click the ‘OK’ button. If you would like to clear all mappings, click the ‘Click to “Unmap”’ button.
Important
At this time you can map only 1 MARC field to 1 Koha field. This means that you won’t be able to map both the 100a and the 700a to the author field, you need to choose one or the other.
Keywords to MARC Mapping
This tool will allow you to map MARC fields to a set of predefined keywords.
- Get there: More > Administration > Catalog > Keywords to MARC Mapping
Important
This tool only effects sites that are not using the XSLT Stylesheets.
At this time the only keyword in use is ‘subtitle.’
Using this tool you can define what MARC field prints to the detail screen of the bibliographic record using keywords. The following example will use the subtitle field.
Using the Framework pull down menu, choose the Framework you would like to apply this rule to. For example, the subtitle for books can be found in the 245$b field.
Assigning Book Subtitle
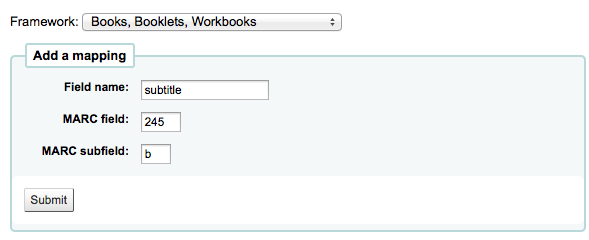
However the subtitle for DVDs appears in 245$p
Assigning DVD Subtitle
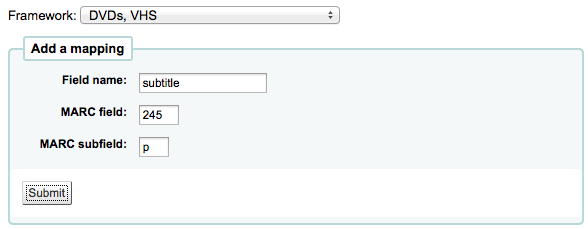
Using this tool you can tell Koha to print the right field as the subtitle when viewing the bibliographic record in the OPAC.
Subtitle display in the OPAC
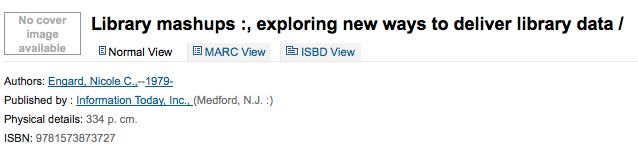
This tool can be used to chain together pieces of the record as well. If you want the series number to show in the title on your search results you simply have to map 490 $v to ‘subtitle’ along with the 245 $b.
Tip
Chain together the fields you want to show after the item title in the order in which you want them to appear.
Future developments will include additional keyword assigned fields.
MARC Bibliographic Framework Test
Checks the MARC structure.
- Get there: More > Administration > Catalog > MARC Bibliographic Framework Test
If you change your MARC Bibliographic framework it’s recommended that you run this tool to test for errors in your definition.
Framework Test
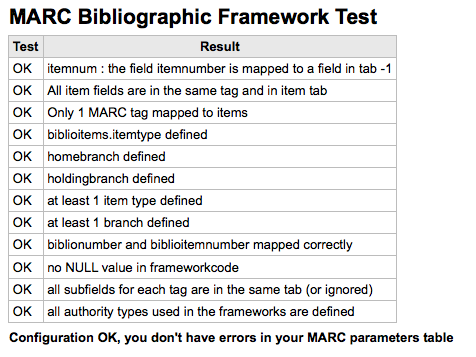
Authority Types
Authority Types are basically MARC Frameworks for Authority records and because of that they follow the same editing rules found in the MARC Bibliographic Frameworks section of this manual. Koha comes with many of the necessary Authority frameworks already installed. To learn how to add and edit Authority Types, simply review the MARC Bibliographic Frameworks section of this manual.
- Get there: More > Administration > Catalog > Authority Types
Savitra Sirohi
August 2010
Nicole C.
Engard
Fixed typos, changed content where necessary and added new screenshots.
Classification Sources
Source of classification or shelving scheme is an Authorized Values category that is mapped to field 942$2 in Koha’s MARC Bibliographic frameworks.
- Get there: More > Administration > Catalog > Classification sources
Classification Sources
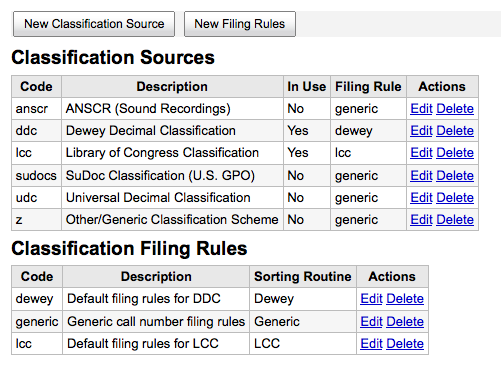
Commonly used values of this field are:
- ddc - Dewey Decimal Classification
- lcc - Library of Congress Classification
If you chose to install classification sources during Koha’s installation, you would see other values too:
- ANSCR (sound recordings)
- SuDOC classification
- Universal Decimal Classification
- Other/Generic Classification
Adding/Editing Classification Sources
You can add your own source of classification by using the New Classification Source button. To edit use the Edit link.
Add classification source
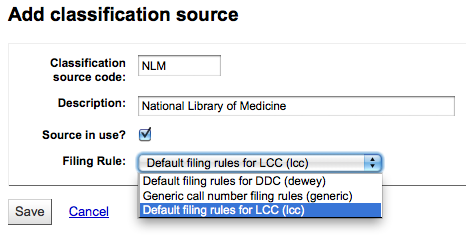
When creating or editing:
- You will need to enter a code and a description.
- Check the ‘Source in use?’ checkbox if you want the value to appear in the drop down list for this category.
- Select the appropriate filing rule from the drop down list.
Classification Filing Rules
Filing rules determine the order in which items are placed on shelves.
Values that are pre-configured in Koha are:
- Dewey
- LCC
- Generic
Filing rules are mapped to Classification sources. You can setup new filing rules by using the New Filing Rule button. To edit use the Edit link.
When creating or editing:
- Enter a code and a description
- Choose an appropriate filing routine - dewey, generic or lcc
Record Matching Rules
Record matching rules are used when importing MARC records into Koha.
- Get there: More > Administration > Catalog > Record Matching Rules
The rules that you set up here will be referenced with you Stage MARC Records for Import.
To create a new matching rule :
Click ‘New Record Matching Rule’ Add record matching rule .. image:: images/admin/cataloging/newmatchrule.png - Choose a unique name and enter it in the ‘Matching rule
code’ field
- ‘Description’ can be anything you want to make it clear to you what rule you’re picking
- ‘Match threshold’ - The total number of ‘points’ a biblio must earn to be considered a ‘match’
- Match points are set up to determine what fields to match on
- ‘Search index’ can be found by looking at the ccl.properties file on your system which tells the zebra indexing what data to search for in the MARC data”.
- ‘Score’ - The number of ‘points’ a match on this field is worth. If the sum of each score is greater than the match threshold, the incoming record is a match to the existing record
- Enter the MARC tag you want to match on in the ‘Tag’ field
- Enter the MARC tag subfield you want to match on in the ‘Subfields’ field
- ‘Offset’ - For use with control fields, 001-009
- ‘Length’ - For use with control fields, 001-009
- Koha only has one ‘Normalization rule’ that removes extra characters such as commas and semicolons. The value you enter in this field is irrelevant to the normalization process.
- ‘Required match checks’ - ??
Sample Record Matching Rule: Control Number
LOC Matching Rule
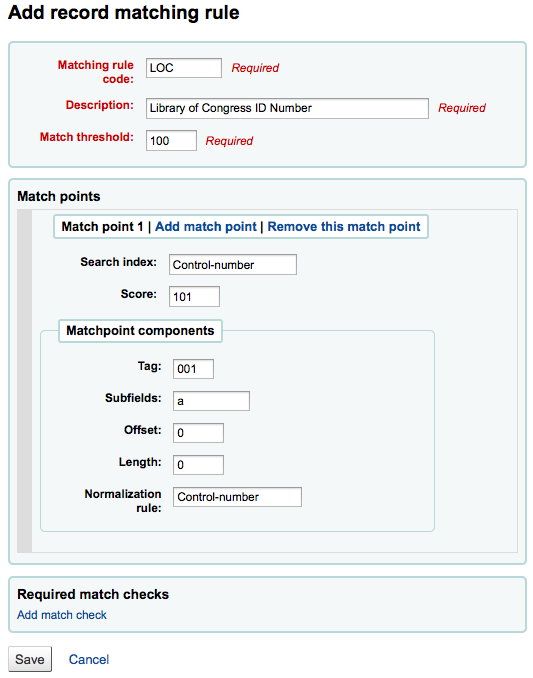
Match threshold: 100
Matchpoints (just the one):
Search index: Control-number
Score: 101
Tag: 001 - .. note:: this field is for the control number assigned by the
organization creating, using, or distributing the record
Subfields: a
Offset: 0
Length: 0
Normalization rule: Control-number
Required Match checks: none (remove the blank one) Remove match check .. image:: images/admin/cataloging/removematchcheck.png
OAI Sets Configuration
On this page you can create, modify and delete OAI-PMH sets
Create a set
To create a set:
- Click on the link ‘Add a new set’
- Fill the mandatory fields ‘setSpec’ and ‘setName’
- Then you can add descriptions for this set. To do this click on ‘Add description’ and fill the newly created text box. You can add as many descriptions as you want.
- Click on ‘Save’ button’
Modify/Delete a set
To modify a set, just click on the link ‘Modify’ on the same line of the set you want to modify. A form similar to set creation form will appear and allow you to modify the setSpec, setName and descriptions.
To delete a set, just click on the link ‘Delete’ on the same line of the set you want to delete.
Define mappings
Here you can define how a set will be build (what records will belong to this set) by defining mappings. Mappings are a list of conditions on record content. A record only need to match one condition to belong to the set.
- Fill the fields ‘Field’, ‘Subfield’ and ‘Value’. For example if you want to include in this set all records that have a 999$9 equal to ‘XXX’. Fill ‘Field’ with 999, ‘Subfield’ with 9 and ‘Value’ with XXX.
- If you want to add another condition, click on ‘OR’ button and repeat step 1.
- Click on ‘Save’
To delete a condition, just leave at least one of ‘Field’, ‘Subfield’ or ‘Value’ empty and click on ‘Save’.
Note
Actually, a condition is true if value in the corresponding subfield is strictly equal to what is defined if ‘Value’. A record having 999$9 = ‘XXX YYY’ will not belong to a set where condition is 999$9 = ‘XXX’.
And it is case sensitive : a record having 999$9 = ‘xxx’ will not belong to a set where condition is 999$9 = ‘XXX’.
Build sets
Once you have configured all your sets, you have to build the sets. This is done by calling the script misc/migration_tools/build_oai_sets.pl.
Acquisitions
The Koha Acquisitions module provides a way for the library to record orders placed with vendors and manage purchase budgets.
Before using the Acquisitions Module, you will want to make sure that you have completed all of the set up.
- Get there: More > Administration > Acquisitions
Currencies and Exchange Rates
If you place orders from more than one country you will want to input currency exchange rates so that your acquisitions module will properly calculate totals.
- Get there: More > Administration > Acquisitions > Currencies and Exchange Rates
Currencies
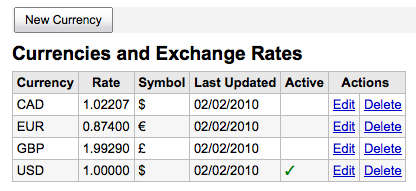
Tip
This data is not automatically updated, so be sure to keep it up to date so that your accounting is kept correct.
The active currency is the main currency you use in your library. Your active currency will have a check mark in the ‘Active’ column. If you don’t have an active currency you will see an error message telling you to choose an active currency.
No active currency warning
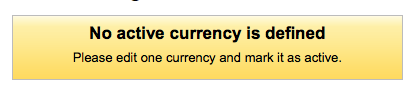
Budgets
Budgets are the top level used for tracking accounting values related to acquisitions.
- Get there: More > Administration > Acquisitions > Budgets
An example would be to create a budget for the current year and then breaking that into Funds for different areas of the library.
Add a budget
Budgets can either be created from scratch or by duplicating the previous year’s budget.
To duplicate a budget from a previous year, click on the link for the budget name from the list of budgets
Budgets List
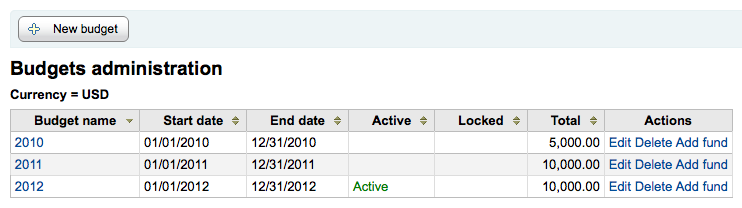
On the screen listing the budget breakdown click the Edit button at the top and choose to Duplicate budget
Duplicate Budget
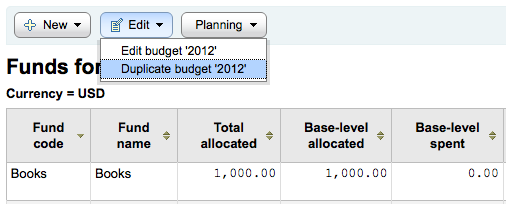
You will be presented with a form where you simply need to enter the new start and end date and save the budget.
New Duplicate Budget
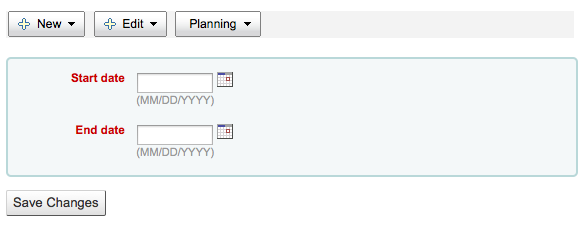
This will not only duplicate your budget, but all of the funds associated with that budget so that you can reuse budgets and funds from year to year.
If you haven’t used Koha before for acquisitions then you’ll need to start fresh with a new budget. To add a new budget click the ‘New Budget’ button.
New Budget Form
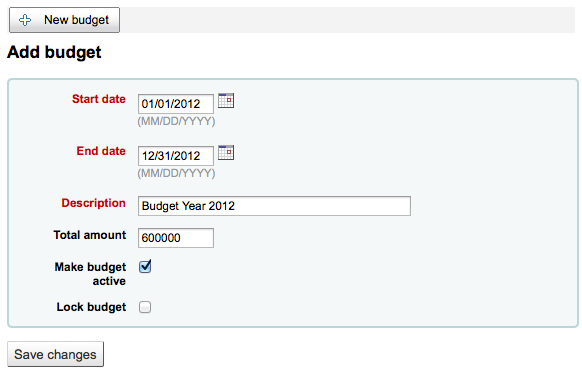
- Choose the time period this budget is for, whether it’s an academic year, a fiscal year, a quarter, etc.
- The Description should be something that will help you identify the budget when ordering
- In the amount box do not use any symbols, simply enter the amount of the budget with numbers and decimals.
- Marking a budget active makes it usable when placing orders in the acquisitions module, even if the order is placed after the budget end date. This will allow you to record orders that were places in a previous budget period.
- Locking a budget means that Funds will not be able to be modified by librarians
Once you have made your edits, click the ‘Save Changes’ button. You will be brought to a list of your existing budgets.
List of Budgets

Funds
- Get there: More > Administration > Acquisitions > Funds
Add a Fund
A fund is added to a budget.
Important
A budget must be defined before a fund can be created.To add a new fund click the New button and then choose
which Budget you would like to add the fund to.
Choose which budget to add a fund to
In the form that appears you wan to enter the basics about your fund.
New Fund Form
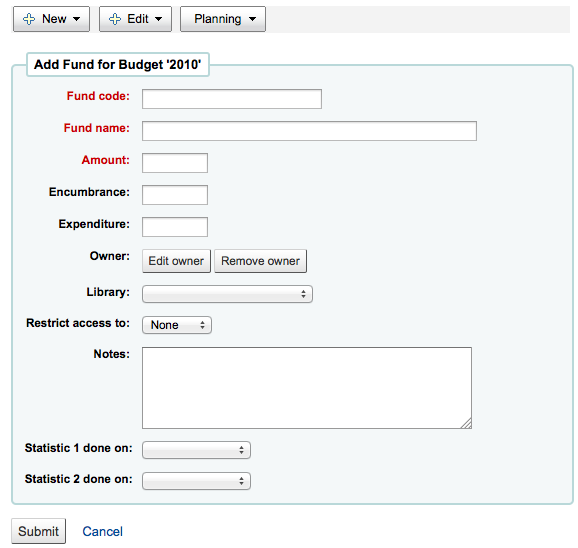
The three first fields are required, the rest are optional
- Fund Code is a unique identifier for your fund
- The Fund Name should be something that librarians will understand
- Amount should be entered with only numbers and decimals, no other characters
- Encumbrance ??
- Expenditure ??
- You can choose to assign this fund to a librarian. Doing so will make it so that only that librarian can make changes to the Fund
- Choose which library will be using this fund
- You can restrict who can order from this fund by choosing either the owner or the library from the ‘Restrict access to’ menu Restrict Fund Access .. image:: images/admin/acquisitions/restrictfund.png
- Notes are simply for any descriptive notes you might want to add so that librarians know when to use this fund
- Planning categories are used for statistical purposes. To learn more about planning categories, check out the Planning Category FAQ.
When complete, click ‘Submit’ and you will be brought to a list of all of the funds for the budget.
List of funds
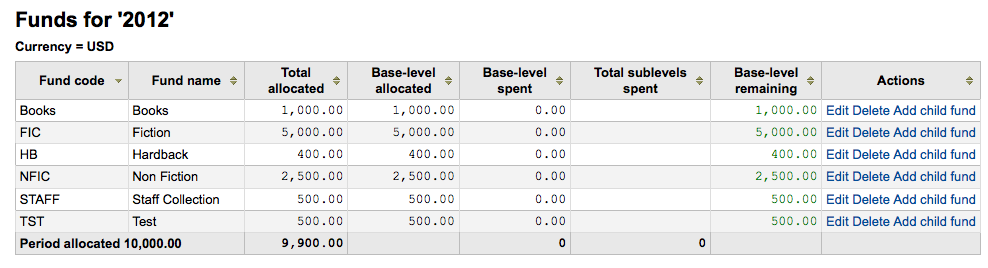
To the right of each fund you will find the ‘Edit,’ ‘Delete,’ and ‘Add Child Fund’ options. A child fund simply a sub-fund of the fund listed. An example would be to have a fund for ‘Fiction’ and under that have a fund for ‘New Releases’ and a fund for ‘Science Fiction.’ It is an optional way to further organize your finances.
Budget Planning
When viewing the list of funds click the ‘Planning’ button and choose how you would like to plan to spend your budget.
Planning pull down menu
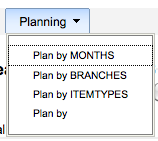
If you choose ‘Plan by MONTHS’ you will see the budgeted amount broken down by months:
Budget Planning Formula
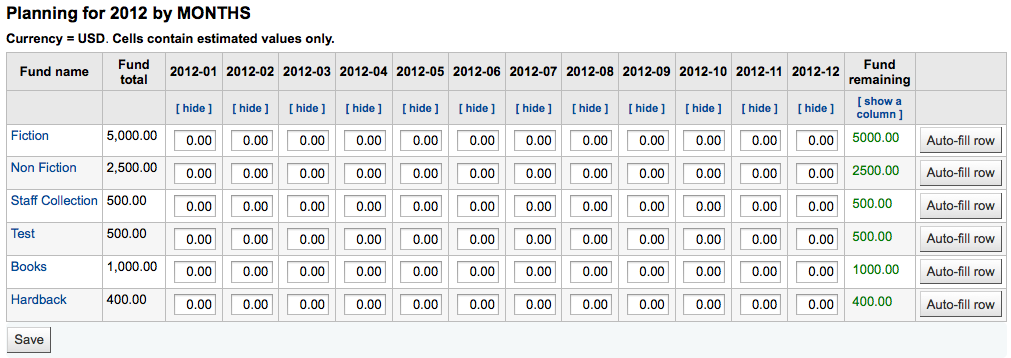
To hide some of the columns you can click the minus sign (-) to the right (or below as in the screenshot above) the dates. To add more columns you can click the ‘Show a column’ link found below the ‘Fund Remaining’ heading.
Choose columns to add
From here you can plan your budget spending by manually entering values or by clicking the ‘Auto-fill row’ button. If you choose to auto-fill the form the system will try to divide the amount accordingly, you may have to make some edits to split things more accurately.
Auto-filled columns

Once your changes are made, click the ‘Save’ button. If you would like to export your data as a CSV file you can do so by entering a file name in the ‘Output to a file named’ field and clicking the ‘Output’ button.
Export planning as CSV

Additional Parameters
- Get there: More > Administration > Additional Parameters
Stop Words
Important
If NoZebra is set to ‘Use’ this option will not appear on the administration menu
Stop words are words that you want the search system to ignore.
- >Get there: More > Administration > Additional Parameters > Stop Words
Koha comes with a standard list of stop words that can be edited by visiting the Stop Word administration area.
Stop word list
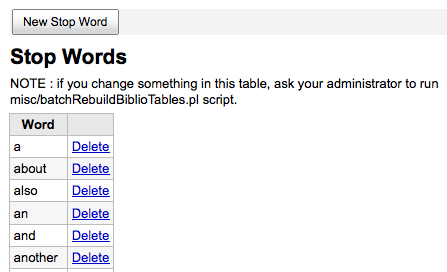
To add a new stop word to the list, click the ‘New Stop Word’ button and add the word you’d like ignored
New stop word
Important
If you change something in this table, ask your administrator to run misc/batchRebuildBiblioTables.pl script.
Z39.50 Servers
Koha has a powerful copy cataloging tool. Using Koha you can connect to any Z39.50 target that is publicly available or that you have the log in information to.
- Get there: More > Administration > Additional Parameters > Z39.50 Servers
Koha comes with a default list of Z39.50 targets set up that you can add to, edit or delete
List of Z39.50 Servers in Koha
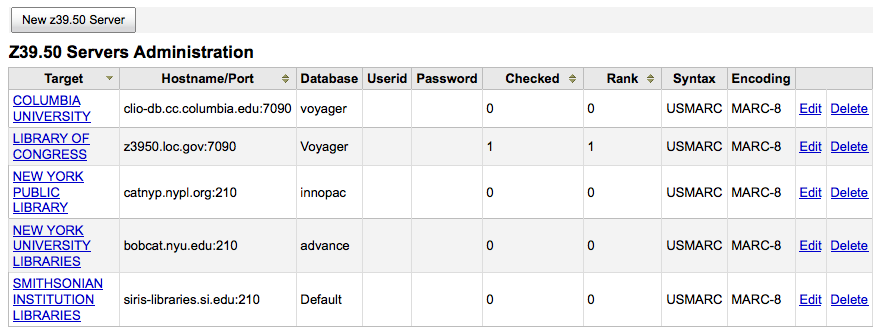
To find additional targets you use IndexData’s IRSpy: http://irspy.indexdata.com
Add a Z39.50 Target
From the main Z39.50 page, click ‘New Z39.50 Server’ - Userid and Password are only required for servers that
are password protected
New Z39.50 Server Form .. image:: images/admin/additional/newz39.png
Suggested Z39.50 Targets
The following targets have been used successfully by other Koha libraries (in the Americas):
- BIBLIOS z3950.biblios.net:210 bibliographic
- BIG COUNTRY KOHA bcls.kohalibrary.com:210 bcls_koha
- CUYAHOGA COUNTY PUBLIC webcat.cuyahoga.lib.oh.us:210 INNOPAC
- GREATER SUDBURY PUBLIC 216.223.90.51:210 INNOPAC
- HALIFAX PUBLIC catalogue.halifaxpubliclibraries.ca:210 horizon
- HALTON HILLS PUBLIC cat.hhpl.on.ca:210 halton_hills
- LIBRARY OF CONGRESS z3950.loc.gov:7090 Voyager
- LONDON PUBLIC LIBRARY catalogue.londonpubliclibrary.ca:210 INNOPAC
- MANITOBA PUBLIC library.gov.mb.ca:210 horizon
- MILTON PL cat.mpl.on.ca:210 horizon
- NATIONAL LIBRARY OF WALES cat.llgc.org.uk:210 default
- TORONTO PUBLIC symphony.torontopubliclibrary.ca:2200 unicorn
- TRI-UNI 129.97.129.194:7090 voyager
- VANCOUVER PUBLIC LIBRARY z3950.vpl.ca:210 Horizon
Tools
Tools in Koha all perform some sort of action. Often many of the items listed under Tools in Koha are referred to as ‘Reports’ in other library management systems.
- Get there: More > Tools
Patrons and Circulation
Comments
- Get there: More > Tools > Patrons and Circulation > Comments
All comments added by patrons via the OPAC to bibliographic records require moderation by the librarians. If there are comments awaiting moderation they will be listed on the main staff dashboard under the Tools label:
Comments pending approval
To moderate comments click on the notification on the main dashboard or go directly to the Comments Tool and click ‘Approve’ or ‘Delete’ to the right of the comments awaiting moderation.
Comment awaiting moderation
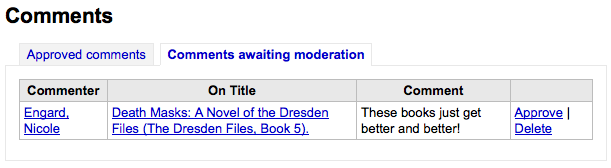
If there are no comments to moderate you will see a message saying just that
No comments to moderate
You can also review and unapprove comments you have approved in the past by choosing the ‘Approved comments’ tab
Approved comments
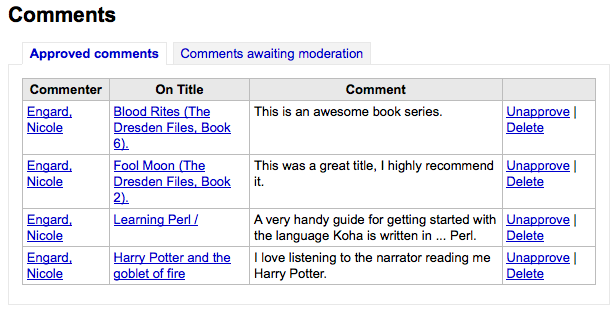
Patron Import
- Get there: More > Tools > Patrons and Circulation > Import Patrons
The patron import tool can be used at any time to add patrons in bulk. It is commonly used in universities and schools when a new batch of students registers.
Creating Patron File
Your Koha installation comes with a blank CSV file that you can use as a template for your patron records. If you would like to create the file yourself, make sure that your file has the following fields in this order as the header row:
borrowernumber, cardnumber, surname, firstname, title, othernames, initials, streetnumber, streettype, address, address2, city, zipcode, country, email, phone, mobile, fax, emailpro, phonepro, B_streetnumber, B_streettype, B_address, B_address2, B_city, B_zipcode, B_country, B_email, B_phone, dateofbirth, branchcode, categorycode, dateenrolled, dateexpiry, gonenoaddress, lost, debarred, contactname, contactfirstname, contacttitle, guarantorid, borrowernotes, relationship, ethnicity, ethnotes, sex, password, flags, userid, opacnote, contactnote, sort1, sort2, altcontactfirstname, altcontactsurname, altcontactaddress1, altcontactaddress2, altcontactaddress3, altcontactzipcode, altcontactcountry, altcontactphone, smsalertnumber, patron_attributes
Important
The ‘password’ value should be stored in plain text, and will be converted to a md5 hash (which is an encrypted version of the password). - If your passwords are already encrypted, talk to your
systems administrator about options
Important
Date formats should match your system preference, and must be zero-padded, e.g. ‘01/02/2008’.
Important
The fields ‘branchcode’ and ‘categorycode’ are required and must match valid entries in your database.
Tip
If loading patron attributes, the ‘patron_attributes’ field should contain a comma-separated list of attribute types and values. - The attribute type code and a colon should precede each
value. - For example: INSTID:12345,LANG:fr or *STARTDATE:January 1
2010,TRACK:Day*
If an input record has more than one attribute, the fields should either be entered as an unquoted string (previous examples), or with each field wrapped in separate double quotes and delimited by a comma: - *“STARTDATE:January 1,
2010”,”TRACK:Day”*
- This syntax would be required if the data might have a comma in it, like a date string.
Importing Patrons
Once you have created your file, you can use the Patron Import Tool to bring the data into Koha.
Import Patron Form
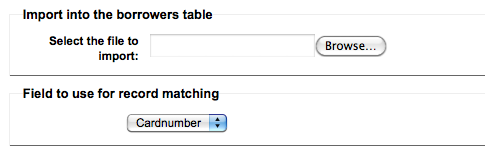
Choose your CSV file and choose to match on ‘Cardnumber’ to prevent adding of duplicate card numbers to the system
Next you can choose default values to apply to all patrons you are importing - ex. If you’re importing patrons specific to one branch
you can use the field on the Import form to apply the branch code to all those you are importing.
Finally you need to decide on what data you want to replace if there are duplicates. Record matching options .. image:: images/tools/importpatrons/patronmatching.png - A matching record is found using the field you chose
for matching criteria to prevent duplication
- If you included patron attributes in your file you can decide whether to add your values to existing values or erase existing values and enter only your new values.
Notices & Slips
- Get there: More > Tools > Patrons and Circulation > Notices & Slips
All notices and circulation receipts (or slips) generated by Koha can be customized using the Notices & Slips Tool. The system comes with several predefined templates that will appear when you first visit this tool.
Notices & Slips Tool
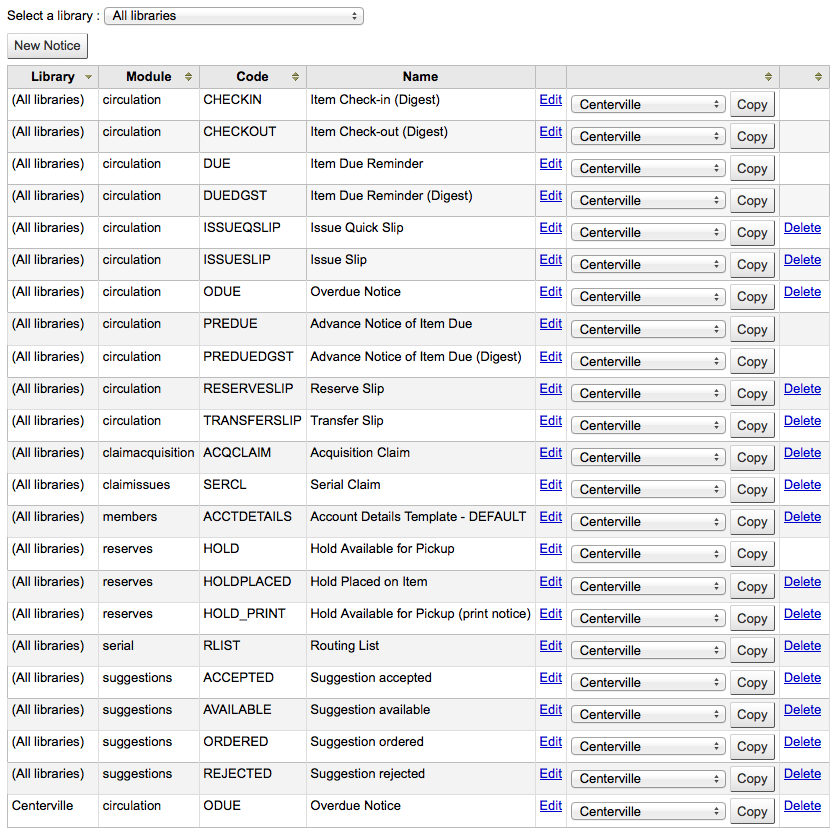
Each notice can be edited, but only a few can be deleted, this is to prevent system errors should a message try to send without a template. Each notice and slip can be edited on a per library basis, by default you will see the notices for all libraries.
If you have a style you’d like applied to all slips you can point the SlipCSS preference to a stylesheet. The same is true for notices, using the NoticeCSS preference to define a stylesheet.
Adding Notices & Slips
To add a new notice or slip
Click ‘New Notice’ New Notice Form .. image:: images/tools/notices/newnotice.png
Choose which library this notice or slip is for
Choose the module this notice is related to
The Code is limited to 20 characters - .. important:: When working with the overdue notices you want each
notice at each branch to have a unique code. Think about using the branch code in front of the notice code for each branch.
Use the name field to expand on your Code - .. tip:: With overdue notices, be sure to put your branch
name in the description as well so that it will be visible when setting up your triggers.
If you plan on writing the notice or slip in HTML check the ‘HTML Message’ box, otherwise the content will be generated as plain text
Message Subject is what will appear in the subject line of the email
In the message body feel free to type whatever message you feel is best, use the fields on the left hand side to enter individualized data from the from database. - .. important:: Overdue notices can use
<<items.content>> tags by themselves, or use <item></item> to span all of the tags. Learn more about the Overdue Notice Markup - On overdue notices make sure to use
<<items.content>> tags to print out the data related to all items that are overdue.
- The other option, only for overdue notices, is to use the <item></item> tags to span the line so that it will print out multiple lines One example for the <item></item> tag option is: <item>”<<biblio.title>>” by <<biblio.author>>, <<items.itemcallnumber>>, Barcode: <<items.barcode>> , Checkout date: <<issues.issuedate>>, Due date: <<issues.date_due>> Fine: <fine>USD</fine> Due date: <<issues.date_due>> </item>
Important
Only the overdue notices take advantage of the <item></item> tags, all other notices referencing items need to use <<items.content>>
Overdue Notice Markup
When creating your overdue notices there are two tags in addition to the various database fields that you can use in your notices.
Important
These new tags only work on the overdue notices, not other circulation related notices at this time.
<item></item> which should enclose all fields from the biblio, biblioitems, and items tables.
<fine></fine> which should be enclosed by the item tag and should enclose a currency identifier per ISO 4217. If this tag is present with a proper identifier, the fine for that item will be displayed in the proper currency format. - Note: ISO 4217 changes from time to time therefore
all currencies may not be supported. If you find one that is not supported, please file a bug with the Locale::Currency::Format author Tan D Nguyen <tnguyen at cpan doe org>.
An example of using these two tags in a notice template might be like:
The following item(s) is/are currently overdue:
<item>”<<biblio.title>>” by <<biblio.author>>, <<items.itemcallnumber>>, Barcode: <<items.barcode>> Fine: <fine>GBP</fine></item>
Which, assuming two items were overdue, would result in a notice like:The following item(s) is/are currently overdue:
“A Short History of Western Civilization” by Harrison, John B, 909.09821 H2451, Barcode: 08030003 Fine: £3.50 “History of Western Civilization” by Hayes, Carlton Joseph Huntley, 909.09821 H3261 v.1, Barcode: 08030004 Fine: £3.50
Existing Notices & Slips
Among the default notices are notices for several common actions within Koha. All of these notices can be customized by altering their text via the Notices & Slips tool and their style using the NoticeCSS preference to define a stylesheet. Here are some of what those notices do
ACCTDETAILS - Sent to patrons when their account is set up if the
AutoEmailOPACUser preference is set to ‘Send’
ACQCLAIM (Acquisition Claim) - Used in the claim acquisition module - Get there: More > Acquisitions
> Late issues
HOLD (Hold Available for Pickup) - This notice is used if two criteria are met:
- When this notice references the branches table it is referring to the pickup branch information.
HOLDPLACED (a notice to the library staff that a hold has been placed) - This notice requires the emailLibrarianWhenHoldIsPlaced
system preference to be set to ‘Enable’
- When this notice references the branches table it is referring to the pickup branch information.
HOLD_PRINT (Printed notice when hold available for pickup) - This notice is used for hold confirmation notices that
are sent out in print format. This will not effect what the email notice looks like.
- When this notice references the branches table it is referring to the pickup branch information.
ODUE (Overdue Notice) - This notice is used to send Overdue Notices to
Patrons
- See a Sample Overdue Notice
- Requires that you set Overdue Notice/Status Triggers
RLIST (Routing List) - Used in the serials module to notify patrons/staff of
new issues of a serial - Get there: More > Serials
You have the option to select the ‘Routing List’ notice when creating a new subscription (Choose from the ‘Patron notification’ drop down).
Tip
Notice also that if you’d like to notify patrons of new serial issues, you can click on ‘define a notice’ which will take you to the ‘Notices’ tool
There are also a set of predefined slips (or receipts) listed on this page. All of these slips can be customized by altering their text via the Notices & Slips tool and their style using the SlipCSS preference to define a stylesheet. Here is what those slips are used for:
ISSUEQSLIP - Used to print the quick slip in circulation - The quick slip only includes items that were checked
out today
ISSUESLIP - Used to print a full slip in circulation - The slip or receipt will show items checked out today
as well as items that are still checked out
RESERVESLIP - Used to print a holds slip - The holds slip is generated when a hold is
confirmed
TRANSFERSLIP - Used to print a transfer slip - The transfer slip is printed when you confirm a
transfer from one branch to another in your system
Overdue Notice/Status Triggers
- Get there: More > Tools > Patrons and Circulation > Overdue Notice/Status Triggers
In order to send the overdue notices that you defined using the Notices tool, you need to first set the triggers to have these messages.
Important
In order to have overdue notices sent to your patrons, you need to set that patron category to require overdue notices.
The Overdue Notice/Status Triggers tool gives the librarian the power to send up to three notices to each patron type notifying them of overdue items
Overdue Notice/Status Triggers Tool
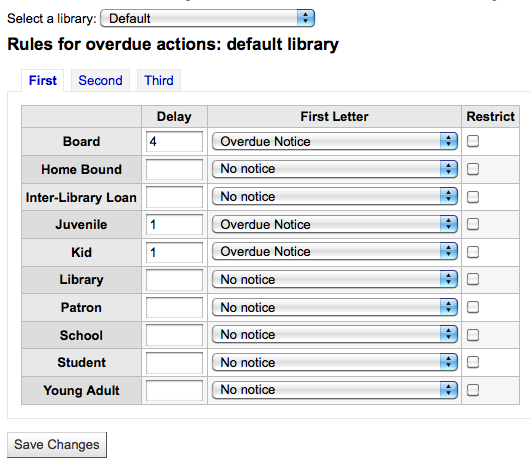
Delay is the number of days after an issue is due before an action is triggered. - .. important:: If you want Koha to trigger an action (send a letter
or restrict member), a delay value is required.
To send additional notices, click on the tabs for ‘Second’ and ‘Third’ notice
If you would like to prevent a patron from checking items out because of their overdue items, check the ‘Restrict’ box, this will put a notice on the patron’s record at checkout informing the librarian that the patron cannot check out due to overdue items.
See a Sample Overdue Notice
Patron Card Creator
- Get there: More > Tools > Patrons and Circulation > Patron Card Creator
The Patron Card Creator allow you to use layouts and templates which you design to print a nearly unlimited variety of patron cards including barcodes. Here are some of the features of the Patron Card Creator module:
- Customize patron card layouts
- Design custom card templates for printed patron cards
- Build and manage batches of patron cards
- Export single or multiple batches
- Export single or multiple patron cards from within a batch
- Export card data as a PDF readable by any standard PDF reader, making patron cards printable directly on a printer
At the top of each screen within the Patron Card Creator, you will see a toolbar allowing quick access to relevant functions. The menu to the left of each screen also allows easy access to the different sections of the Patron Card Creator. The bread crumb trail near the top of each screen will give specific indication as to where you are within the Patron Card Creator module and allow quick navigation to previously traversed sections. And finally, you can find more detailed information on each section of the Patron Card Creator by clicking the online help link at the upper left-hand corner of every page.
Templates
- Get there: More > Tools > Patron Card Creator > Templates
A template is the label/card stock you are using. This might be Avery 5160 for address labels, Gaylord 47-284 for spine labels or Avery 28371 for your patron cards, just to give a couple of examples. These labels will include all of the information you will need for setting up a Koha, this information may be on the packaging, and if not it can usually be found on the vendor’s website.
Add a Template
To add a new template, you want to click on the ‘Templates’ button at the top of your page and choose ‘New Template’
New Template Button

Using the form that appears you can define the template for your sheet of labels or cards.
Add Patron Card Template
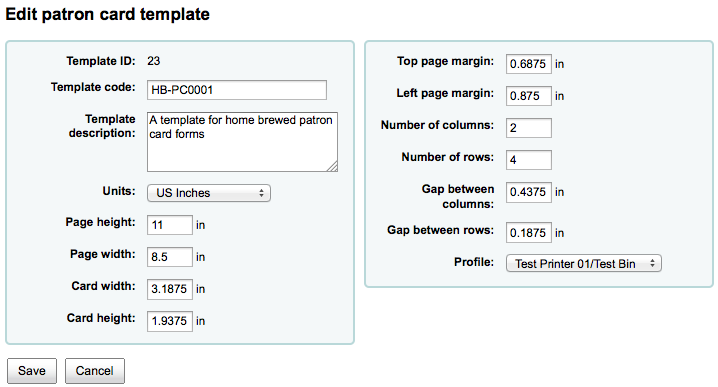
Template ID will be automatically generated after saving your template, this is simply a system generated unique id
Template Code should be something you can use to identify your template on a list of templates
You can use the Template Description to add additional information about the template
The Units pull down is used to define what measurement scale you’re going to be using for the template. This should probably match the unit of measurement used on the template description provided by the product vendor. Measurement Units .. image:: images/tools/patroncards/units.png
The measurements can be found on the vendor product packaging or website.
A profile is a set of “adjustments” applied to a given template just prior to printing which compensates for anomalies unique and peculiar to a given printer (to which the profile is assigned). - Before picking a profile try printing some sample
cards so that you can easily define a profile that is right for your printer/template combination.
- After finding any anomalies in the printed document, create a profile and assign it to the template.
After saving, your templates will appear on the ‘Manage Templates’ page.
Manage Templates
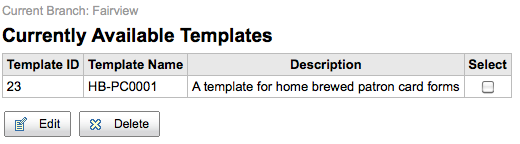
Profiles
- Get there: More > Tools > Patron Card Creator > Profiles
A profile is a set of “adjustments” applied to a given template just prior to printing which compensates for anomalies unique and peculiar to a given printer (to which the profile is assigned). This means if you set a template up and then print a sample set of data and find that the items are not all aligned the same on each card, you need to set up a profile for each printer to make up for the differences in printing styles, such as the shifting of text to the left, right, top or bottom.
If your cards are printing just the way you want, you will not need a profile.
Add a Profile
To add a new profile, you want to click on the ‘Profiles’ button at the top of your page and choose ‘New Profile’
New Profile Button

Using the form that appears you can create a profile to fix any problems with your template.
Add Printer Profile
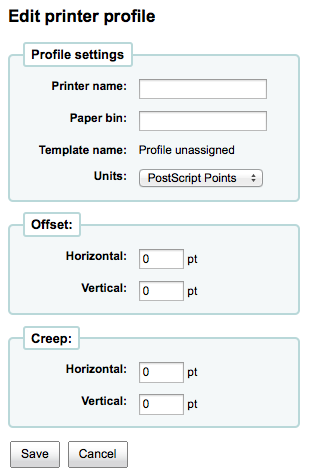
The Printer Name and Paper Bin do not have to match your printer exactly, they are for your reference so you can remember what printer you have set the profile for. So if you want to use the Printer model number in printer name or you can call it ‘the printer on my desk’
Template will be filled in once you have chosen which template to apply the profile to on the template edit form
The Units pull down is used to define what measurement scale you’re going to be using for your profile. Units of Measurement .. image:: images/tools/patroncards/units.png
Offset describes what happens when the entire image is off center either vertically or horizontally and creep describes a condition where the distance between the labels changes across the page or up and down the page - For these values, negative numbers move the error up
and to the left and positive numbers move the error down and to the right
- Example: the text is .25” from the left edge of the first label, .28” from the left edge of the second label and .31” from the left edge of the third label. This means the horizontal creep should be set to .03” to make up for this difference.
After saving, your profiles will appear on the ‘Manage Profiles’ page.
Manage Profiles
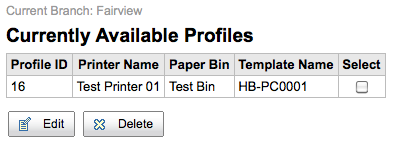
Once you have saved your new profile, you can return to the list of templates and choose to edit the template that this profile is for.
Layouts
- Get there: More > Tools > Patron Card Creator > Layouts
A layout defines the text and images that will be printed on to the card and where it will appear.
Add a Layout
To add a new layout, you want to click on the ‘Layouts’ button at the top of your page and choose ‘New Layout’
New Layout Button
Using the form that appears you can create a profile to fix any problems with your template.
Add New Layout
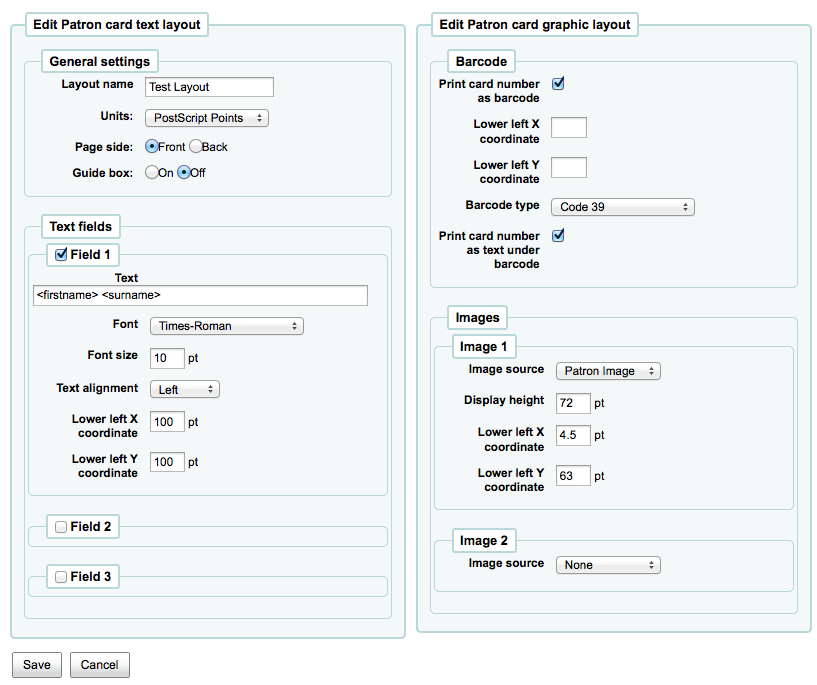
The name you assign to the layout is for your benefit, name it something that will be easy to identify at a later date
The Units pull down is used to define what measurement scale you’re going to be using for your layout. Units of Measurement .. image:: images/tools/patroncards/units.png
Next note if this layout is for the front or the back of the patron card - You will need a layout for both the front and back
of your card if you have 2-sided library cards
You have the option of adding up to 3 lines of text to your card. Your text can be static text of your choosing and/or fields from the patron record. If you want to print fields from the patron record you want to put the field names in brackets like so - <firstname>
For each line of text, you can choose your font, font size and the location of the text on the card using the lower X and Y coordinates
In order to show the barcode and the patron card number you will need to check the ‘Print Card Number as Barcode’ option. This will turn the patron card number into a barcode. If you want the number to print in human readable format you will need to check the ‘Print Card Number as Text Under Barcode’ option.
Finally you can choose up to two images to print on the card. - One can be the patron image which you
can resize to meet your needs.
- The other image can be something like a library logo or symbol that you uploaded using the ‘Manage Images‘ module of the Patron Card Creator Tool.
After saving, your layouts will appear on the ‘Manage Layouts’ page.
Manage Layouts
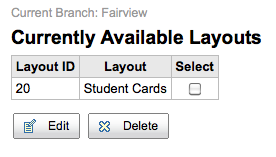
Batches
- Get there: More > Tools > Patron Card Creator > Batches
A batch is a collection of patrons for whom you want to generate cards.
Add a Batch
To add a new batch, you want to click on the ‘Batches’ button at the top of your page and choose ‘New Batch’
New Batch Button

Manage Images
- Get there: More > Tools > Patron Card Creator > Manage Images
Images uploaded using this tool will appear on the menu when creating patron card layouts. You are limited in how many images you can upload (not counting patron images) by the ImageLimit system preference.
Important
Images must be under 500k in size.
Tip
Pictures uploaded with this tool should be at least 300dpi which is the minimum quality for a printable image.
In the center of the screen is a simple upload form, simply browse for the file on your computer and give it a name you’ll recognize later.
Upload Images
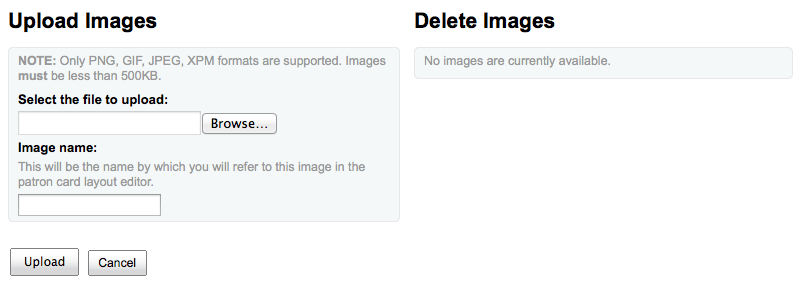
Once the file is uploaded you will be presented with a confirmation message.
Image Uploaded
And the image will be listed with all of your others on the right hand side of the page.
Images
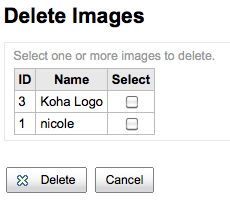
To delete one or multiple of these images, click the checkbox to the right of each image you want to delete and click the ‘Delete’ button.
Patrons (anonymize, bulk-delete)
- Get there: More > Tools > Patrons and Circulation > Patrons (anonymize, bulk-delete)
This tool allows you to bulk anonymize circulation histories (this means that you keep records of how many times items were checked out - but not the patrons who checked the items out) or bulk delete patrons (remove them from the system completely).
Important
Patrons with outstanding fines or items checked out are not saved. They are not completely removed from the system (moved to the delete_borrowers table), but this tool does not provide as many checks as one may desire.
Patron Anonymize/Bulk Delete Tool
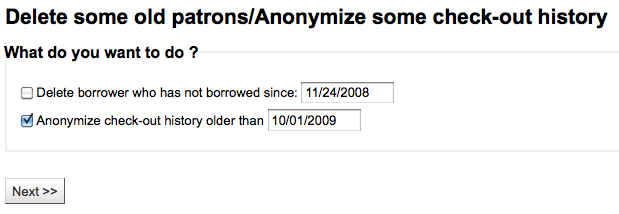
To either delete or anonymize patrons
- Check the task you would like to perform (Delete or Anonymize)
- Enter a date before which you want to alter the data
- Click ‘Next’
- A confirmation will appear asking if you’re sure this is what you want to happen Patron Anonymize/Bulk Delete Confirmation .. image:: images/tools/anonymize/patronanonconfirm.png
- Clicking ‘Finish’ will delete or anonymize your data Completed Process .. image:: images/tools/anonymize/patronanoncomplete.png
Batch patron modifiction
- Get there: More > Tools > Patrons and Circulation > Batch patron modification
With this tool you can make edits to a batch of patron records. Simply load in a file of cardnumbers (one per line) or scan patron card numbers in to the box provided.
Batch patron modification
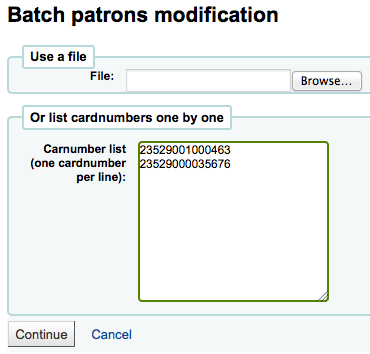
Once you have the file loaded or the barcodes scanned click ‘Continue.’ You will be presented with a list of the patrons and the changes you can make.
Patrons to modify
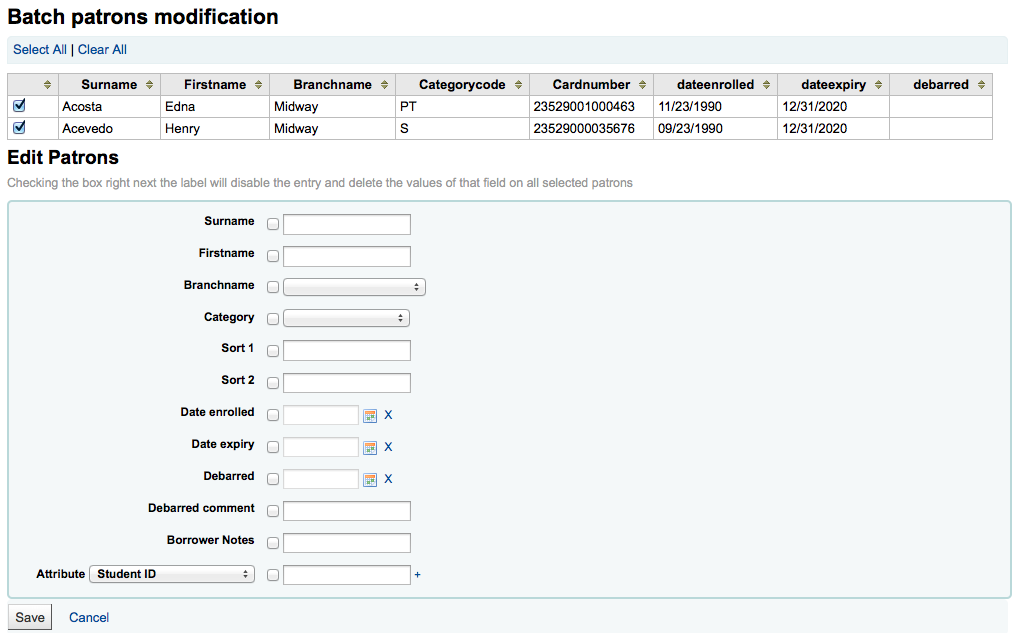
To the left of each text box there is a checkbox. Clicking that checkbox will clear our the field values.
Important
If the field is mandatory you will not be able to clear the value in it.
If you have multiple patron attributes you can change them all by using the plus (+) sign to the right of the text box. This will allow you to add another attribute value.
Editing patron attributes
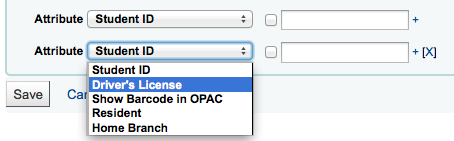
Once you have made the changes you want, you can click ‘Save’ and Koha will present you with the changed patron records.
Tag Moderation
- Get there: More > Tools > Patrons and Circulation > Tags
Depending on your tagging system preferences, librarians may need to approve tags before they are published on the OPAC. This is done via the Tag Moderation Tool. If there are tags awaiting moderation they will be listed on the main staff dashboard under the Tools label:
Tags pending approval
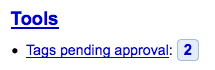
To moderate the tags visit the Tags tool. When first visiting the tool, you will be presented with a list of tags that are pending approval or rejection by a librarian
Tags pending moderation
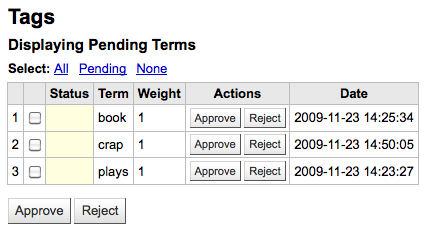
- To approve a tag, you can either click the ‘Approve’ button in line with the term, or check all terms you want to approve and click ‘Approve’ below the table.
- To reject a tag, you can either click the ‘Reject’ button in line with the term, or check all terms you want to approve and click ‘Reject’ below the table.
Once a tag has been approved or rejected it will be moved to the appropriate list of tags. A summary of all tags will appear on the right of the screen.
Summary of tags
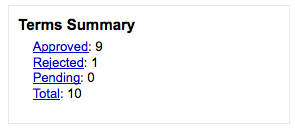
Even though a tag is approved or rejected, it can still be moved to another list. When viewing approved tags each tag has the option to reject:
Approved Tags
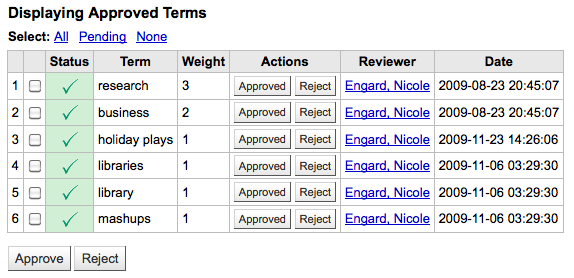
To check terms against the approved and rejected lists (and possibly against the dictionary you have assigned for tag moderation) simply enter the term into the search box on the bottom right of the screen to see the status of the term
Sample Blacklist/Whitelist test search
Upload Patron Images
- Get there: More > Tools > Patrons and Circulation > Upload Patron Images
Patron images can be uploaded in bulk if you are allowing patron images to be attached to patron records. These images can also be used when creating patron cards.
Create a txt file and title it “DATALINK.TXT” or “IDLINK.TXT”
On each line in the text file enter the patron’s card number followed by comma (or tab) and then the image file name Sample file and image .. image:: images/tools/patronphotos/uploadphotosfile.png - Make sure that your TXT file is a plain text document,
not RTF.
Zip up the text file and the image files
Go to the Upload Patron Images Tool Upload Image Tool for Single Image .. image:: images/tools/patronphotos/uploadimagetool.png
For a single image, simply point to the image file and enter the patron card number
For multiple images, choose to upload a zip file
After uploading you will be presented with a confirmation Image Upload Confirmation .. image:: images/tools/patronphotos/imageuploadconfirm.png
Important
There is a limit of 520K on the size of the picture uploaded and it is recommended that the image be 200x300 pixels, but smaller images will work as well.
Catalog
Batch item modification
- Get there: More > Tools > Catalog > Batch item modification
This tool will allow you to modify a batch of item records in Koha.
Batch Modification Tool
From the tool you can choose to upload a file of barcodes or item ids, or you can scan items one by one into the box below the upload tool. Once you have your file uploaded or the barcodes listed you can click ‘Continue.’
Batch Modify Summary
You will be presented with a summary of the items you want to modify. From here you can uncheck the items you don’t want to modify before making changes in the form below. You can also hide columns you don’t need to see to prevent having to scroll from left to right to see the entire item form.
Using the edit form you can choose which fields to make edits to. By checking the checkbox to the right of each field you can clear the values in that field for the records you are modifying.
Choose fields you want to change in bulk
Once you have made you changes you will be presented with the resulting items.
Item results summary
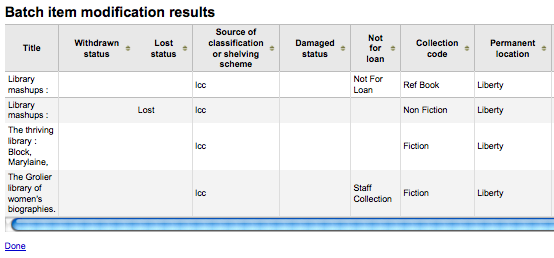
Tip
You can also edit items on one bib record in a batch by going to the bib record and clicking Edit > Edit items in batch
Edit items in a batch
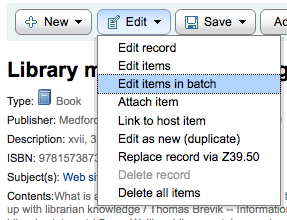
Batch item deletion
- Get there: More > Tools > Catalog > Batch item deletion
This tool will allow you to delete a batch of item records from Koha.
From the tool you can choose to upload a file of barcodes or item ids, or you can scan items one by one into the box below the upload tool.
Batch Deletion Tool
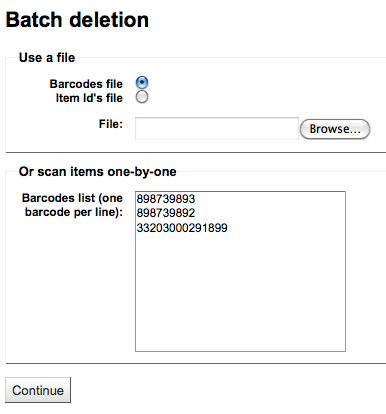
Once you have your file uploaded or the barcodes scanned you can click ‘Continue.’
You will be presented with a confirmation screen. From here you can uncheck the items you don’t want to delete and decide if Koha should delete the bib record if the last item is being deleted before clicking ‘Delete selected items.’
Confirm Deletion
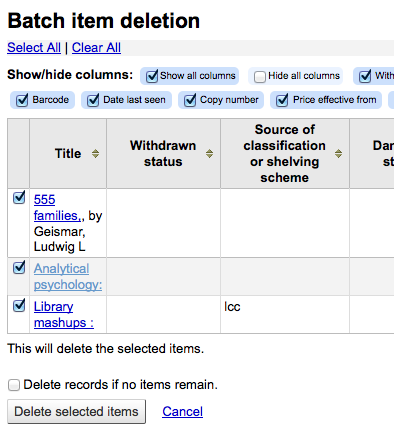
If your file (or list of scanned barcodes) has more than 1000 barcodes, Koha will be unable to present you with a list of the items. You will still be able to delete them, but not able to choose which items specifically to delete or delete the biblio records.
More than 1000 records in the file
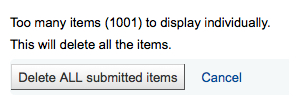
If the items are checked out you will be presented with an error after clicking ‘Delete selected items’ and the items will not be deleted.
Items not Deleted
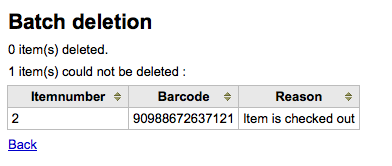
If the items can be deleted they will be and you will be presented with a confirmation of your deletion.
Batch Deletion Confirmation
Export Data (MARC & Authorities)
- Get there: More > Tools > Catalog > Export Data
Koha comes with a tool that will allow you to export your bibliographic, holdings and/or authority data in bulk. This can be used to send your records to fellow libraries, organizations or services; or simply for backup purposes.
Export Bibliographic Records
At the top of the screen you need to pick what data you’re exporting. If you’re exporting bibliographic records with or without the holdings information you want to click the ‘Export bibliographic records’ tab.
Fill in the form in order to limit your export to a specific range (all fields are optional) Select Records to Export .. image:: images/tools/exportmarc/marcexport-pt1.png - Choose to limit your export by any one or more of the
following options - Limit to a bib number range - Limit to a specific item type - Limit to a specific library - Limit to a call number range - Limit to an acquisition date range
Next choose what to skip when exporting Export options .. image:: images/tools/exportmarc/marcexport-pt2.png - By default items will be exported, if you would
like to only export bibliographic data, check the ‘Don’t export items’ box
- To limit your export only to items from the library you’re logged in as (if you leave the ‘Library’ field set to ‘All’) or to the library you selected above check the ‘Remove non-local items’ box
- You can also choose what fields you don’t want to export. This can be handy if you’re sharing your data, you can remove all local fields before sending your data to another library
Finally choose the file type and file name File export format .. image:: images/tools/exportmarc/marcexport-pt3.png - Choose to export your data in marc or marcxml
format
- Choose the name you want your file to save as
Click ‘Export bibliographic records’
Export Authority Records
At the top of the screen you need to pick what data you’re exporting. If you’re exporting authority records you want to click the ‘Export authority records’ tab.
Fill in the form in order to limit your export to a specific range or type of authority record (all fields are optional) Export authorities .. image:: images/tools/exportmarc/authexport-pt1.png
Next choose fields that you would like to exclude from the export separated by a space (no commas) Authority export options .. image:: images/tools/exportmarc/authexport-pt2.png - If you’d like to exclude all subfields of the 200 for
example just enter 200
- If you’d like to exclude a specific subfield enter it beside the field value 100a will exclude just the subfield ‘a’ of the 100
Finally choose the file type and file name Export format .. image:: images/tools/exportmarc/authexport-pt3.png - Choose to export your data in marc or marcxml
format
- Choose the name you want your file to save as
Click ‘Export authority records’
Inventory/Stocktaking
- Get there: More > Tools > Catalog > Inventory/Stocktaking
Koha’s Inventory Tool can be used in one of two ways, the first is by printing out a shelf list that you can then mark items off on, or by uploading a text files of barcodes gathered by a portable scanner.
If you do not have the ability to use your barcode scanner on the floor of the library, the first option available to you is to generate a shelf list based on criteria you enter.
Inventory & Stocktaking Tool
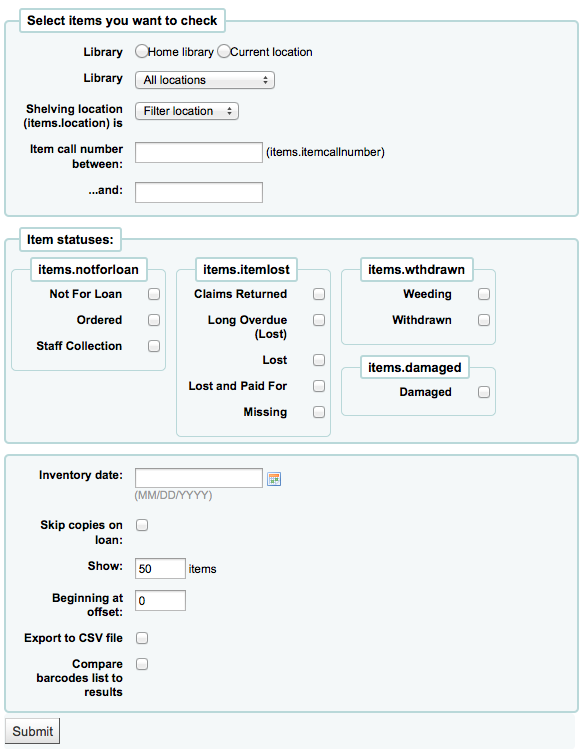
Choose which library, shelving location, call number range, item status and when the item was last seen to generate a shelf list that you can then print to use while walking around the library checking your collection
Shelf List
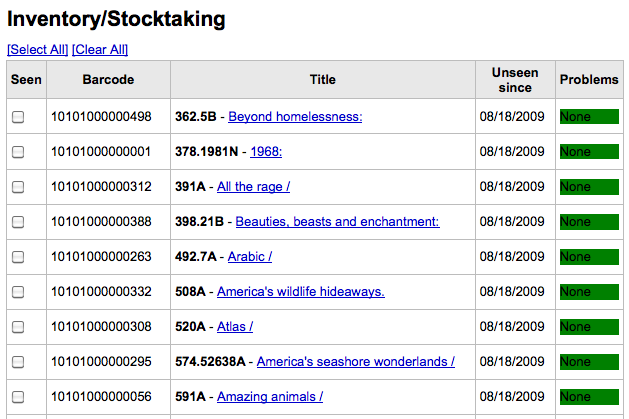
Alternatively you can export the list to a CSV file for altering in an application on your desktop. Simply check the box next to ‘Export to csv file’ to generate this file.
Once you have found the items on your shelves you can return to this list and check off the items you found to have the system update the last seen date to today.
If you have a portable scanner (or a laptop and USB scanner) you can walk through the library with the scanner in hand and scan barcodes as you come across them. Once finished you can then upload the text file generated by the scanner to Koha
Barcode Import for Inventory Tool
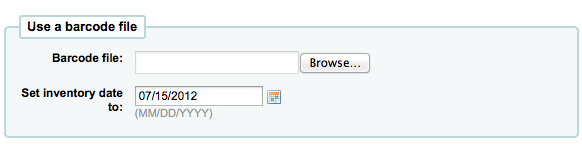
Choose the text file and the date you want to mark all items as seen and click ‘Submit.’
Label Creator
- Get there: More > Tools > Catalog > Label Creator
The Label Creator allow you to use layouts and templates which you design to print a nearly unlimited variety of labels including barcodes. Here are some of the features of the Label Creator module:
Customize label layouts
Design custom label templates for printed labels
Build and manage batches of labels
Export single or multiple batches
Export single or multiple labels from within a batch
Export label data in one of three formats: - PDF - Readable by any standard PDF reader, making labels
printable directly on a printer
- CSV - Export label data after your chosen layout is applied allowing labels to be imported in to a variety of applications
- XML - Included as an alternate export format
At the top of each screen within the Label Creator, you will see a toolbar allowing quick access to relevant functions. The menu to the left of each screen also allows easy access to the different sections of the Label Creator. The bread crumb trail near the top of each screen will give specific indication as to where you are within the Label Creator module and allow quick navigation to previously traversed sections. And finally, you can find more detailed information on each section of the Label Creator by clicking the online help link at the upper left-hand corner of every page.
Templates
- Get there: More > Tools > Label Creator > Templates
A template is based on the label/card stock you are using. This might be Avery 5160 for address labels, Gaylord 47-284 for spine labels or Avery 28371 for your patron cards, just to give a couple of examples. These labels will include all of the information you will need for setting up a Koha, this information may be on the packaging, and if not it can usually be found on the vendor’s website.
Add a Template
To add a new template, you want to click on the ‘Templates’ button at the top of your page and choose ‘New Template’
New Label Template Option
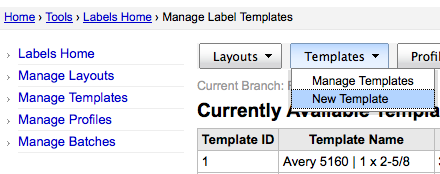
Using the form that appears you can define the template for your sheet of labels or cards.
Label Template Form
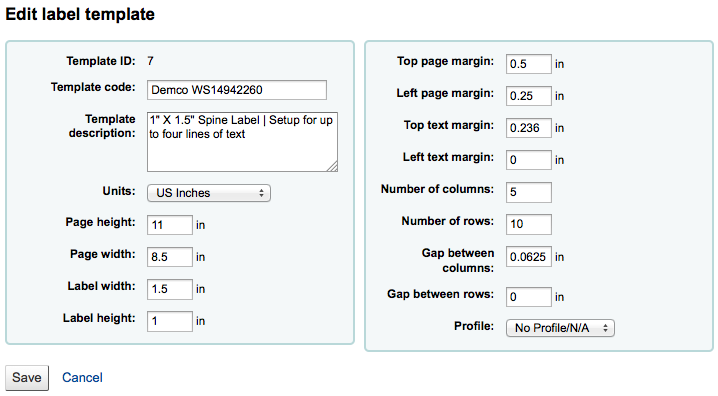
Template ID will be automatically generated after saving your template, this is simply a system generated unique id
Template Code should be something you can use to identify your template on a list of templates
You can use the Template Description to add additional information about the template
The Units pull down is used to define what measurement scale you’re going to be using for the template. This should probably match the unit of measurement used on the template description provided by the product vendor. Measurement Units .. image:: images/tools/patroncards/units.png
The measurements, number of columns and number of rows can be found on the vendor product packaging or website. - .. important:: If you do not supply a left text margin in the
template, a 3/16” (13.5 point) left text margin will apply by default.
A profile is a set of “adjustments” applied to a given template just prior to printing which compensates for anomalies unique and peculiar to a given printer (to which the profile is assigned). - Before picking a profile try printing some sample
labels so that you can easily define a profile that is right for your printer/template combination.
- After finding any anomalies in the printed document, create a profile and assign it to the template.
After saving, your templates will appear on the ‘Manage Templates’ page.
List of label templates
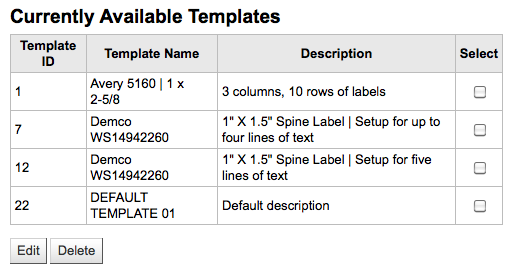
Profiles
- Get there: More > Tools > Label Creator > Profiles
A profile is a set of “adjustments” applied to a given template just prior to printing which compensates for anomalies unique and peculiar to a given printer (to which the profile is assigned). This means if you set a template up and then print a sample set of data and find that the items are not all aligned the same on each label, you need to set up a profile for each printer to make up for the differences in printing styles, such as the shifting of text to the left, right, top or bottom.
If your labels are printing just the way you want, you will not need a profile.
Add a Profile
To add a new profile, you want to click on the ‘Profiles’ button at the top of your page and choose ‘New Profile’
New Profile Button
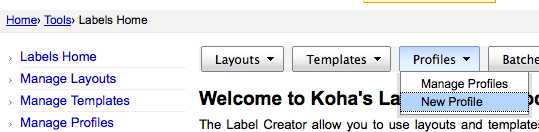
Using the form that appears you can create a profile to fix any problems with your template.
Create a Printer Profile
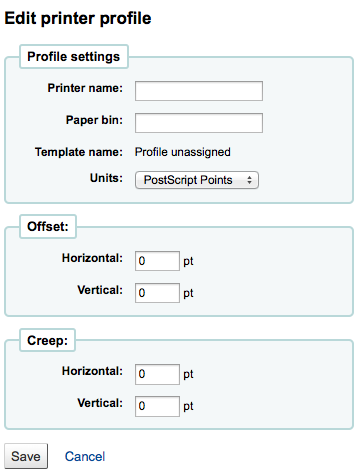
The Printer Name and Paper Bin do not have to match your printer exactly, they are for your reference so you can remember what printer you have set the profile for. So if you want to use the Printer model number in printer name or you can call it ‘the printer on my desk’
Template will be filled in once you have chosen which template to apply the profile to on the template edit form
The Units pull down is used to define what measurement scale you’re going to be using for your profile. Units of Measurement .. image:: images/tools/patroncards/units.png
Offset describes what happens when the entire image is off center either vertically or horizontally and creep describes a condition where the distance between the labels changes across the page or up and down the page - For these values, negative numbers move the error up
and to the left and positive numbers move the error down and to the right
- Example: the text is .25” from the left edge of the first label, .28” from the left edge of the second label and .31” from the left edge of the third label. This means the horizontal creep should be set to .03” to make up for this difference.
After saving, your profiles will appear on the ‘Manage Profiles’ page.
List of Profiles
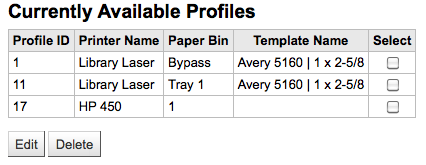
Once you have saved your new profile, you can return to the list of templates and choose to edit the template that this profile is for.
Layouts
- Get there: More > Tools > Label Creator > Layouts
A layout is used to define the fields you want to appear on your labels.
Add a Layout
To add a new layout, you want to click on the ‘Layouts’ button at the top of your page and choose ‘New Layout’
New Layout Button
Using the form that appears you can create a profile to fix any problems with your template.
Add New Layout
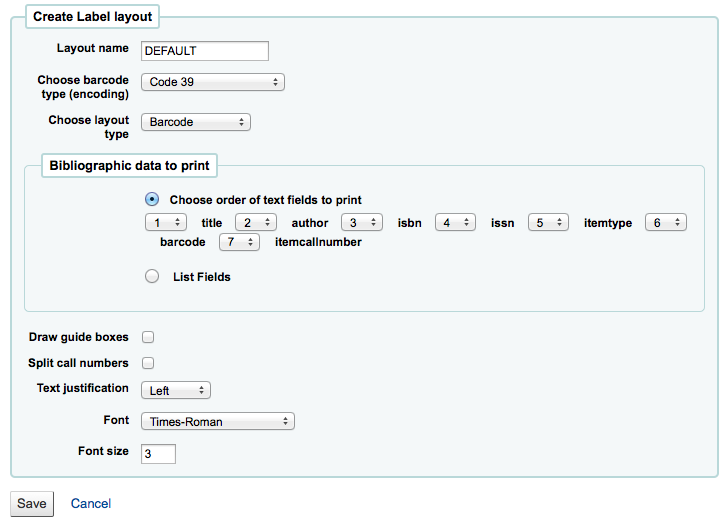
The name of your layout can be anything you’d like to help you identify it later.
If this is a barcode label you’ll want to choose the encoding (Code 39 is the most common)
The layout type can be any combination of bibliographic information and/or barcode. For example a spine label would just be Biblio whereas a label for your circulation staff to use to checkout the book would probably be Biblio/Barcode.
The Bibliographic Data to Print includes any of the data fields that may be mapped to your MARC frameworks. You can choose from the preset list of fields or you can click on ‘List Fields’ and enter your own data. In ‘List Fields’, you can specify MARC subfields as a 4-character tag-subfield string: (ie. 254a for the title field), You can also enclose a whitespace-separated list of fields to concatenate on one line in double quotes. (ie. “099a 099b” or “itemcallnumber barcode”). The fields available are from the database tables list below. Finally you could add in static text strings in single-quote (ie. ‘Some static text here.’) - You can use the schema viewer (http://schema.koha-community.org)
with the following tables to find field names to use: - Currently all fields in the following tables are
used: items, biblioitems, biblio, branches List fields .. image:: images/tools/labelcreator/listlabelfields.png
Choose if the label maker should print out the guidelines around each label
Choose if you’d like Koha to try to split your call numbers (usually used on Spine Labels)
Finally choose your text settings such as alignment, font type and size.
After saving, your layouts will appear on the ‘Manage Layouts’ page.
Batches
- Get there: More > Tools > Label Creator > Batches
Batches are made up of the barcodes you would like to print. Once in this tool you can search for the item records you would like to print out labels for.
Add a Batch
Batches can be created in one of two ways. The first is to click the ‘Create Label Batch’ link on the ‘Staged MARC Management‘ page:
Create Label Batch Link on Staged Records List
The other is to choose to create a new batch from the label creator tool
Create New Batch
You will be brought to an empty batch with an ‘Add item(s)’ button at the top of the page and a box to scan barcodes in to.
Add Items
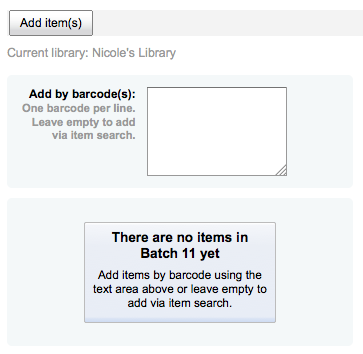
You can either scan barcodes in to the box provided and click the ‘Add item(s)’ button or you can click the ‘Add item(s)’ button with the barcodes box empty. Clicking ‘Add item(s)’ with nothing in the barcodes box will open a search window for you to find the items you want to add to the batch.
Search for items for a Batch
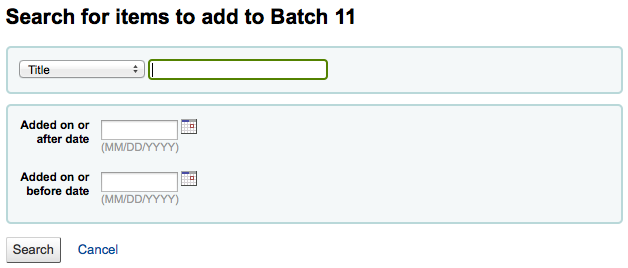
From the search results, click the check box next to the items you want to add to the batch and click the ‘Add checked’ button. You can also add items one by one by clicking the ‘Add’ link to the left of each item.
Batch search results
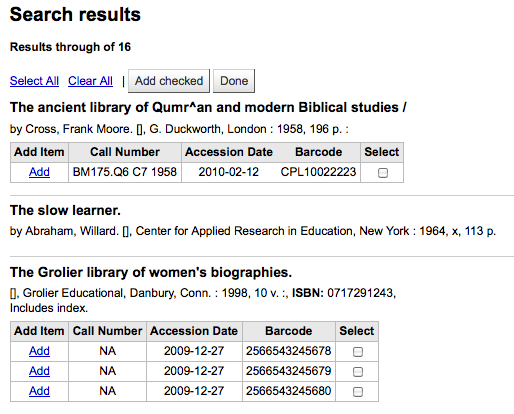
Once you have added all of the items click the ‘Done’ button. The resulting page will list the items you have selected.
List of items in the batch
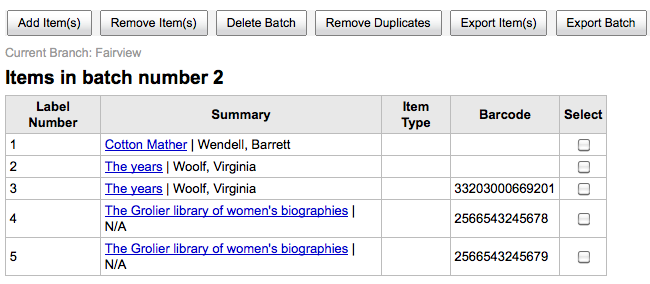
To print your labels, click the ‘Export Batch’ button. To print only some of the labels, click the ‘Export Item(s)’ button. Either way you will be presented with a confirmation screen where you can choose your template and layout.
Start batch export
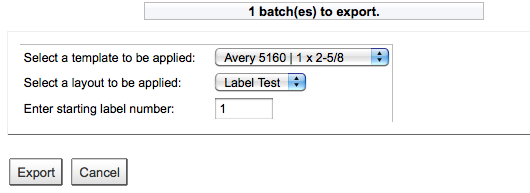
You will then be presented with three download options: PDF, Excel, and CSV.
Batch save options

After saving your file, simply print to the blank labels you have in your library.
Quick Spine Label Creator
- Get there: More > Tools > Catalog > Quick Spine Label Creator
Tip
This tool does not use the label layouts or templates, it simply prints a spine label in the first spot on the label sheet. - Define the fields you want to print on the spine label in
the SpineLabelFormat system preference
- Format your label printing by editing spinelabel.css found in koha-tmpl/intranet-tmpl/prog/en/css/
To use this tool you simply need the barcode for the book you’d like to print the spine label for.
Quick Spine Label Creator
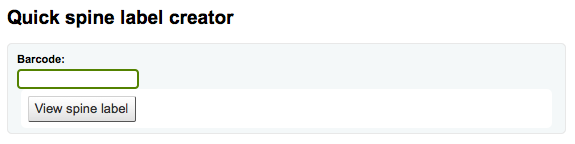
Stage MARC Records for Import
- Get there: More > Tools > Catalog > Stage MARC records for import
Importing records into Koha includes two steps. The first is to stage records for import.
First find the MARC file on your computer Stage MARC Records for Import .. image:: images/tools/marcimport/stagemarc-pt1.png
Next you will be presented with options for record matching and item imports Upload options .. image:: images/tools/marcimport/stagemarc-pt2.png - Enter ‘Comments about this file’ to identify your upload
when going to the ‘Manage Staged MARC Records‘ tool
Choose the character encoding
Choose whether or not you want to look for matching records - You can set up record matching rules
through the administration area
Next choose what to do with matching records if they are found
Finally choose what to do with records that are unique
Next you can choose whether or not to import the item data found in the MARC records
Click ‘Stage for import’
You will be presented with a confirmation of your MARC import MARC Import Confirmation .. image:: images/tools/marcimport/stagemarc-results.png
To complete the process continue to the Managed Staged MARC Records Tool
Staged MARC Record Management
- Get there: More > Tools > Catalog > Staged MARC Record Management
Once you have staged your records for import you can complete the import using this tool.
List of Staged MARC Records
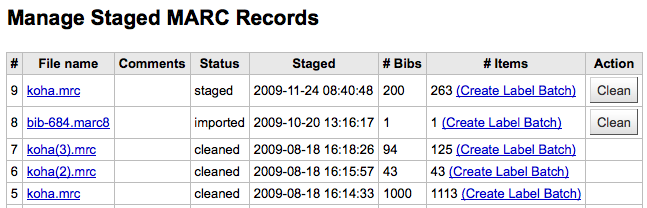
From the list of staged records, click on the file name that you want to finish importing - You will note that records that have already been
imported will say so under ‘Status’
A summary of your import will appear along with the option to change your matching rules Manage Staged Records Batch .. image:: images/tools/marcimport/managestagedrecords.png
Below the summary is the option to import the batch of bib records using a specific framework Choose Framework to Import Into .. image:: images/tools/marcimport/importframework.png - Choosing a framework other than ‘Default’ isn’t
necessary, but it’s helpful for running reports and having the right bib level item type selected on import.
Below the framework selection there will be a list of the records that will be imported List of Staged Records .. image:: images/tools/marcimport/stagedrecords.png - Review your summary before completing your import to
make sure that your matching rule worked and that the records appear as you expect them to
Click ‘Import into catalog’ to complete the import Import summary .. image:: images/tools/marcimport/importedrecords.png
Once your import is complete a link to the new bib records will appear to the right of each title that was imported
You can also undo your import by clicking the ‘Undo import into catalog’ button
Records imported using this tool remain in the ‘reservoir’ until they are cleaned. These items will appear when searching the catalog from the Cataloging tool:
Reservoir Results
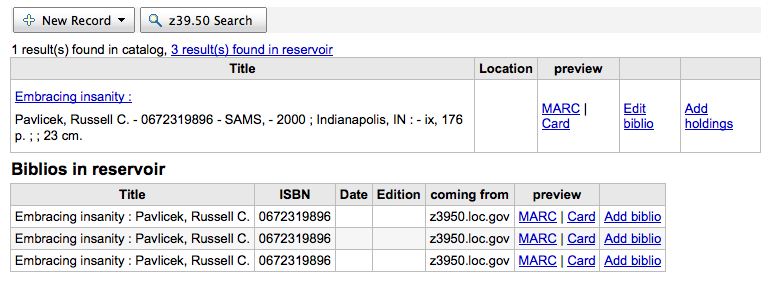
To clean items out of the ‘reservoir’:
Visit the main screen of the Manage Staged MARC Records tool List of Staged MARC Records .. image:: images/tools/marcimport/managestaged.png
To clean a batch, click the ‘Clean’ button to the right
You will be presented with a confirmation message Clean MARC Records Confirmation .. image:: images/tools/marcimport/cleanbatch.png - Accept the deletion and the records will be removed from
the reservoir and the status will be changed to ‘cleaned’
Upload Local Cover Image
- Get there: More > Tools > Catalog > Upload Local Cover Image
This tool will allow you to upload cover images for the materials in your catalog. To access this tool, staff will need the upload_local_cover_images permission. In order for images to show in the staff client and/or OPAC you will need to set your LocalCoverImages and/or OPACLocalCoverImages preferences to ‘Display.’ Images can be uploaded in batches or one by one.
Tip
Koha does not have a maximum file size limit for this tool, but Apache may limit the maximum size of uploads (talk to your sys admin).
If uploading a single image:
Visit the tool and click the ‘Browse’ button to browse to the image on your local machine. Upload single cover image .. image:: images/tools/uploadlocalimg/uploadsingle.png
Click ‘Upload file’
Choose ‘Image file’ under the ‘File type’ section
Enter the biblionumber for the record you’re attaching this image to. This is not the same as the barcode, this is the system generated number assigned by Koha. - Find the biblionumber by looking at the end of the URL
in the address bar when on the detail page Biblionumber in URL .. image:: images/tools/uploadlocalimg/bibnumurl.png
- or by clicking on the MARC tab on the detail page in the staff client Biblionumber on MARC Record .. image:: images/tools/uploadlocalimg/bibnummarc.png
If you would like to replace any other cover images you may have uploaded in the past, check the ‘Replace existing covers’ box under the ‘Options’ section
Click ‘Process images’
You will be presented with a summary of the upload and a link to the record you have just added the image to
If uploading a batch of images at once you will need to prepare a ZIP file first.
Enter in to the ZIP file all the images you are uploading
Also include a text file (*.TXT) named either datalink.txt or idlink.txt listing the biblionumber followed by the image name for each image one per line - ex. 4091,image4091.jpg
ZIP File Contents .. image:: images/tools/uploadlocalimg/zipfiles.png
Browse your local computer to the ZIP file
Click ‘Upload file’
Choose ‘Zip file’ under the ‘File type’ section
If you would like to replace any other cover images you may have uploaded in the past, check the ‘Replace existing covers’ box under the ‘Options’ section
Click ‘Process images’
You will be presented with a summary of the upload Upload Summary .. image:: images/tools/uploadlocalimg/uploadsummary.png
Tip
Large cover images will be resized down to 800x600. Smaller images will not be made larger.
You will be able to see your cover images in the staff client on the detail page under the ‘Image’ tab in the holdings table at the bottom
Cover images in the staff client
In the OPAC the cover images will also appear in the images tab, as well as next to the title and on the search results.
Additional Tools
Calendar
- Get there: More > Tools > Additional Tools > Calendar
Libraries can define library closings and holidays to be used when calculating due dates. You can make use of the Calendar by turning on the proper system preferences:
*Get there:*More > Administration > Global System Preferences > Circulation > useDaysMode - Choose the method for calculating due date - either
include days the library is closed in the calculation or don’t include them.
Get there: More > Administration > Global System Preferences > Circulation > finescalendar - This will check the holiday calendar before charging
fines
Calendar & Holidays Tools
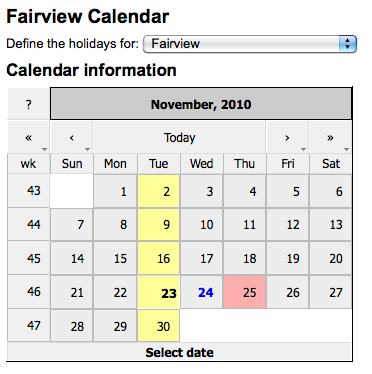
Adding Events
Before adding events, choose the library you would like to apply the closings to. When adding events you will be asked if you would like to apply the event to one branch or all branches. To add events, simply
Click on the date on the calendar that you would like to apply the closing to Calendar Add Form .. image:: images/tools/calendar/calendaradd.png
In the form that appears above the calendar, enter the closing information (for more info on each option click the question mark [?] to the right of the option) - Library will be filled in automatically based on the
library you chose from the pull down at the top of the page
The day information will also be filled in automatically based on the date you clicked on the calendar
In the description enter the reason the library is closed
Next you can choose if this event is a one time event or if it is repeatable. - If this is a one day holiday choose ‘Holiday only
on this day’
- If this is a weekly closing (like a weekend day) then you can choose ‘Holiday repeated every same day of the week’
- If this is an annual holiday closing choose ‘Holiday repeated yearly on the same date’
- If the library is going to be closed for the week or a range of time choose ‘Holiday on a range’ and enter a ‘To Date’ at the top
- If the library is going to be closed for a range of time each year (such as summer holidays for schools) choose ‘Holiday repeated yearly on a range’ and enter a ‘To Date’ at the top
Finally decide if this event should be applied to all libraries or just the one you have originally selected - If you’d rather enter all the holidays and then
copy them all to another branch all at once you can use the copy menu below the calendar Copy holidays .. image:: images/tools/calendar/copyholidays.png
After saving you will see the event listed in the summary to the right the calendar Calendar Summary .. image:: images/tools/calendar/calendarsummary.png
Editing Events
To edit events
Click on the event on the calendar that you want to change (do this by clicking on the date on the calendar, not the event listed in the summary) Edit holiday form .. image:: images/tools/calendar/calendaredit.png
From this form you can make edits to the holiday or delete the holiday completely. Both actions require that you click ‘Save’ before the change will be made.
Clicking on repeatable events will offer slightly different options Edit repeatable event .. image:: images/tools/calendar/calendarexception.png - In the form above you will note that there is now an
option to ‘Generate an exception for this repeated holiday,’ choosing this option will allow you to make it so that this date is not closed even though the library is usually closed on this date.
Additional Help
When adding or editing events you can get additional help by clicking on the question mark next to various different options on the form
Additional Calendar Help Buttons
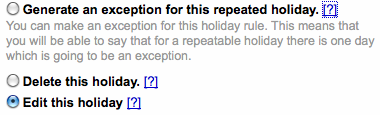
CSV Profiles
- Get there: More > Tools > Additional Tools > CSV Profiles
CSV Profiles are created to define how you would like your cart or list to export.
Add CSV Profiles
To add a CSV Profile
Click ‘CSV Profiles’ from the Tools menu Add CSV Profile .. image:: images/tools/csvprofiles/addcsv.png - The ‘Profile name’ will appear on the export pull down
list when choosing ‘Download’ from your cart or list
The ‘Profile description’ is for your own benefit
The ‘CSV separator’ is the character used to separate values and value groups
The ‘Field separator’ is the character used to separate duplicate fields - Example: You may have multiple 650 fields
The ‘Subfield separator’ is the character used to separate duplicate subfields - Example: You may have multiple $a subfields in a
field
The ‘Encoding’ field lets you define the encoding used when saving the file
Finally format your CSV file using the ‘Profile marcfields’ fields - Define which fields or subfields you want to
export, separated by pipes. Example : 200|210$a|301
Tip
You can also use your own headers (instead of the ones from Koha) by prefixing the field number with an header, followed by the equal sign. Example : Personal name=200|Entry element=210$a|300|009
Modify CSV Profiles
Once you have created at least one CSV Profile an ‘Edit profile’ tab will appear next to the ‘New profile’ button.
Modify CSV Profiles
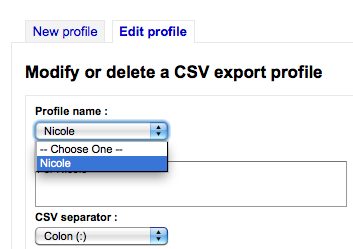
- Choose the profile you would like to edit and alter the necessary fields.
- To delete a profile, check the ‘Delete selected profile’ option before clicking ‘Submit Query’ Delete an existing CSV Profile .. image:: images/tools/csvprofiles/deletecsv.png
Using CSV Profiles
Your CSV Profiles will appear on the export list or cart menu under the ‘Download’ button
CSV Profiles on Download Menu
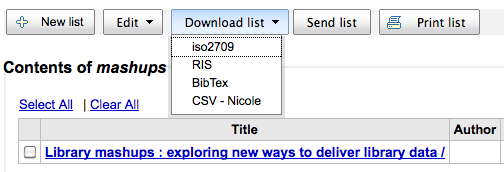
Log Viewer
- Get there: More > Tools > Additional Tools > Log Viewer
Actions within the Koha system are tracked in log files. Your system preferences can be changed to prevent the logging of different actions. These logs can be viewed using the Log Viewer Tool.
Log Viewer
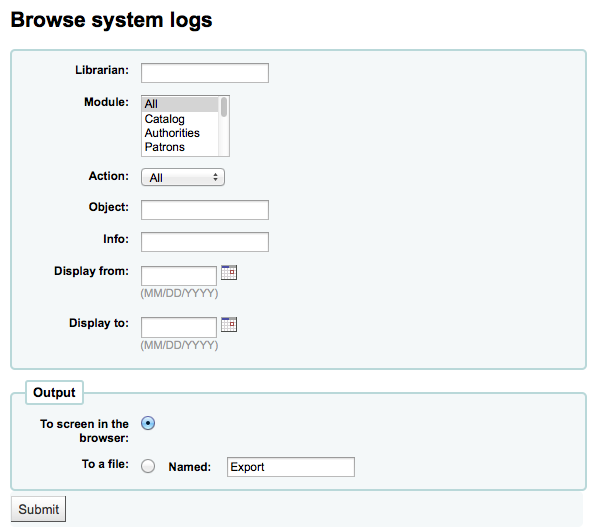
Choosing different combinations of menu options will produce the log file for that query.
A query for all logs related to the Circulation module produces a result like this
You will note that real names do not appear on the log, only identifying numbers. You need to use the identifying numbers when searching the logs as well.
News
- Get there: More > Tools > Additional Tools > News
Koha’s news module allows librarians to post news to the OPAC, staff interface and circulation receipts.
Koha News Module
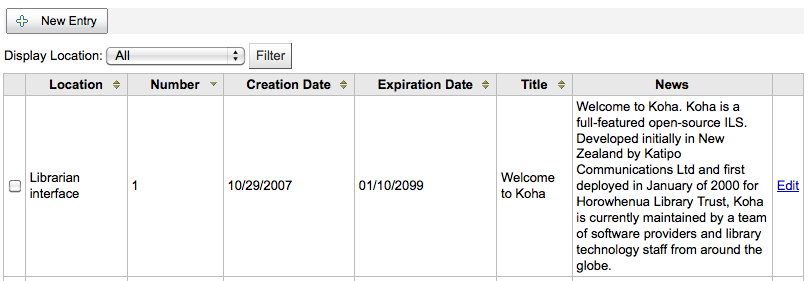
To add news to either the OPAC, the Staff Client or a Circulation receipt:
Click ‘New Entry’ Add Koha News Form .. image:: images/tools/news/addnews.png - Under ‘Display Location’ choose whether to put the news
on the OPAC, Slip (circulation receipt) or the Librarian (Staff) Interface.
- Choose a title for your entry
- Using the publication and expiration date fields you can control how long your item appears
- ‘Appear in position’ lets you decide what order your news items appear in
- The ‘News’ box allows for the use of HTML for formatting of your news item
After filling in all of the fields, click ‘Submit’
News in the OPAC will appear above the OpacMainUserBlock News in the OPAC .. image:: images/tools/news/opacnews.png
News in the Staff Client will appear on the far left of the screen News in the Staff Client .. image:: images/tools/news/librariannews.png
News on the circulation receipts will appear below the items that are checked out News at the bottom of the circulation receipt .. image:: images/tools/news/slipnews.png
Task Scheduler
- Get there: More > Tools > Additional Tools > Task Scheduler
The task scheduler is a way to schedule reports to run whenever you want.
To schedule a task, visit the Task Scheduler and fill in the form
Task Scheduler
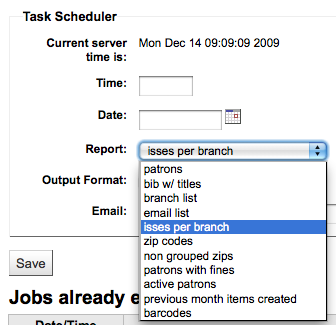
- Current Server Time shows the time on your server (schedule all of your reports to run based on that time - not on your local time)
- Time should be entered as hh:mm (2 digit hour, 2 digit minute)
- Date should be entered using the calendar pop up
- From Report choose the report you want to schedule
- Choose whether to receive the text of or a link to the results
- In the Email filed enter the email of the person you want to receive your report
Below the task scheduler form, there is a list of scheduled reports
Scheduled Tasks

You can also schedule reports directly from the list of saved reports by clicking the ‘Schedule’ link
Saved Reports List
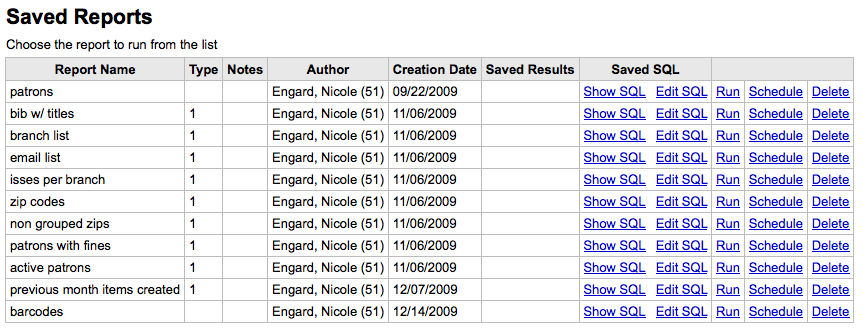
Troubleshooting
Task scheduler will not work if the user the web server runs as doesn’t have the permission to use it. To find out if the right user has the permissions necessary, check /etc/at.allow to see what users are in it. If you don’t have that file, check etc/at.deny. If at.deny exists but is blank, then every user can use it. Talk to your system admin about adding the user to the right place to make the task scheduler work.
Patrons
Before importing and/or adding patrons be sure to set up your patron categories.
Add a new patron
Patrons are added by going to the ‘Patrons’ module.
Click ‘New’ Choose patron type .. image:: images/patrons/newpatron.png
The fields that appear on the patron add form can be controlled by editing the BorrowerUnwantedField system preference.
First enter the identifying information regarding your patron Add Patron Form .. image:: images/patrons/addpatronform.png - Required fields are defined in the BorrowerMandatoryField
system preference
- Salutation is populated by the BorrowersTitles system preference
Next enter the contact information Patron Contact Information .. image:: images/patrons/addcontact.png - For contact information, note that the primary phone and
email addresses are the ones that appear on notices and slips printed during circulation (receipts, transfer slips and hold slips). The primary email is also the one that overdue notices and other messages go to.
If this patron is a child, you will be asked to attach the child patron to an adult patron Guarantor Linking .. image:: images/patrons/addGuarantor.png - Click ‘Set to Patron’ to search your system for an
existing patron
- If the Guarantor is not in the system, you can enter the first and last name in the fields available
- The relationships are set using the borrowerRelationship system preference
If this patron is a professional, you will be asked to attach the patron to an organizational patron Organization Linking .. image:: images/patrons/addOrg.png - Click ‘Set to Patron to search your system for an existing
patron
Each patron can have an alternate contact Alternate Contact .. image:: images/patrons/addaltcontact.png - An alternate contact could be a parent or guardian. It can
also be used in academic settings to store the patron’s home address.
The library management section includes values that are used within the library Library Management .. image:: images/patrons/addlibmanagement.png - The card number field is automatically calculated if you
have the autoMemberNum system preference set that way - .. note:: For a newly installed system this preference will
start at 1 and increment by 1 each time after. To have it start with the starting number of your barcodes, enter the first barcode by hand in the patron record and save the patron. After that the field will increment that number by 1.
- If you accidentally chose the wrong patron category at the beginning you can fix that here
- Sort 1 and 2 are used for statistical purposes within your library
Next, the Library Setup section includes additional library settings Library set-up options .. image:: images/patrons/addlibsetup.png - The registration date will automatically be filled in with
today’s date
If your patron cards expire (based on your patron category settings) the Expiry date will automatically be calculated
The OPAC Note is a note for the patron - it will appear in the OPAC on the patron’s record
The Circulation Note is meant solely for your library staff and will appear when the circulation staff goes to check an item out to the patron Sample Circulation Note .. image:: images/patrons/circnote.png
The Staff/OPAC asks for the username and password to be used by the patron (and/or staff member) to log into their account in the OPAC and for staff to log in to the staff client. - Staff will only be able to use this log in info to log
in to the staff client if they have the necessary permissions.
If you have set additional patron attributes up, these will appear next Additional Patron Attributes .. image:: images/patrons/addattributes.png
Finally, if you have EnhancedMessagingPreferences set to ‘allow,’ you can choose the messaging preferences for this patron. Patron Messaging Settings .. image:: images/patrons/addpatronmsg.png - .. important:: These preferences will override any you set via the
Important
These preference can be altered by the patron via the OPAC
Once finished, click ‘Save’
If the system suspects this patron is a duplicate of another it will warn you.
Patron Duplicate Suspected

If you have set a minimum or upper age limit on the patron category and are requiring that the birth date be filled in, Koha will warn you if the patron you’re adding is too old or young for the patron category you have selected:
Patron age warning
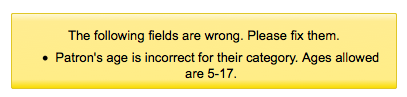
Add a Staff Patron
All staff members must be entered into Koha as patrons of the ‘Staff’ type. Follow the steps in Add a Patron to add a staff member. To give the staff member permissions to access the staff client, follow the steps in Patron Permissions
Important
Remember to assign your staff secure usernames and passwords since these will be used to log into the staff client.
Add a Statistical Patron
One way to track use of in house items is to “check out” the materials to a statistical patron. The “check out” process doesn’s check the book out, but instead tracks an in house use of the item. To use this method for tracking in house use you first will need a patron category set up for your Statistical patron.
In House Patron Category

Next, you will need to create a new patron of the statistical type
New In House Patron
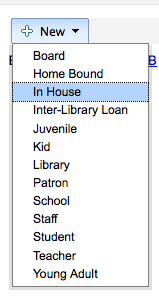
Next, follow the steps put forth in the ‘Add a new Patron‘ section of this manual. Since this patron is not a real person, simply fill in the required fields, the correct library and nothing else.
To learn about other methods of tracking in house use visit the Tracking inhouse use section of this manual.
Duplicate a Patron
Sometimes when you’re adding a new family to your system you don’t want to type the contact information over and over. Koha allows for you to duplicate a patron and change only the parts you want to (or need to) change.
Open the patron you want to use as your base (the patron you want to duplicate information from)
Click the ‘Duplicate’ button at the top of their record The Duplicate Button is the 3rd one in .. image:: images/patrons/duplicatepatron.png
All of the fields with the exception of first name, card number, username and password have been duplicated. Fill in the missing pieces and click ‘Save’ Duplicating Patron Form .. image:: images/patrons/duplicatedpatron.png - .. tip:: Clicking in a field that is already populated with data
will clear that field of all information (making it easier for you to type in something different)
You will be brought to your new patron Newly created patron .. image:: images/patrons/duplicatedpatronfinal.png
Editing Patrons
Patrons in Koha can be edited using one of many edit buttons.
To edit the entire patron record simply click the ‘Edit’ button at the top of the patron record. Main Patron Edit Menu .. image:: images/patrons/patronedit.png
Patron passwords are not recoverable. The stars show on the patron detail next to the Password label are always there even if a password isn’t set. If a patron forgets their password the only option is to reset their password. To change the patron’s password, click the ‘Change Password’ button Patron Password Change Form .. image:: images/patrons/patronpassword.png - Koha cannot display existing passwords. Leave the field
blank to leave password unchanged.
- This form can automatically generate a random password if you click the link labeled “Click to fill with a randomly generated suggestion. Passwords will be displayed as text.”
To edit a specific section of the patron record (for example the Library Use section) click the ‘Edit’ link below the section Library Use Section of Patron Record .. image:: images/patrons/patroneditsection.png
A patron image can be added by browsing for the image on your machine from the ‘Manage Patron Image’ section Manage Patron Image Form .. image:: images/patrons/patronaddimage.png - This form will not appear if you have the patronimages system preference to
not allow patron images
- To add patron images in bulk, use the Upload Patron Images Tool
Patrons can also be blocked from checking items out by setting Patron Flags Patron Warning Flags .. image:: images/patrons/patronflags.png - If you would like your circulation staff to confirm a
patron’s address before checking items out to the patron, you can see the ‘Gone no Address’ flag Patron’s address in doubt .. image:: images/patrons/patronaddress.png
If you would like to bar a patron from the library you can set the ‘Restricted’ flag - This flag can automatically be set with the :ref:`Overdue/Notice Status
Triggers <noticetriggers>` Patron restricted .. image:: images/patrons/patronrestricted.png
If you enter in a date and/or note related to the restriction you will see that in the restricted message as well Restricted until message .. image:: images/patrons/restricteduntil.png
If the patron reports that they have lost their card you can set the ‘Lost Card’ flag to prevent someone else from using that card to check items out Patron lost card .. image:: images/patrons/patroncardlost.png
Children patrons do not become adults automatically in Koha. To upgrade a child patron to and adult patron category click on the ‘More’ menu and choose ‘Update Child to Adult Patron’ Update Child to Adult Patron .. image:: images/patrons/updatetoadult.png - You will then be presented with a pop up window asking
which one of your adult patron categories this Child should be updated to Choose Adult Category to Update To .. image:: images/patrons/choosadulttype.png
Patron Permissions
Patron Permissions are used to allow staff members access to the staff client.
Important
In order for a staff member to log into the staff interface they must have (at the very least) ‘catalogue’ permissions which allow them to view the staff interface.
Setting Patron Permissions
To set patron permissions, you must first have a patron of the ‘Staff’ type open
- On the patron record click More and choose Set Permissions to alter patron permissions Set Patron Permissions .. image:: images/patrons/editpatronpermissions.png
- You will be presented with a list of preferences, some of which can be expanded by clicking the plus sign to the left of the section title. Patron Permissions .. image:: images/patrons/GranularPermissions.png
Patron Permissions Defined
superlibrarian - Access to all functions within the staff client
Tip
With this selected there is no need to choose any other permissions
circulate - Ability to check (issue) books out and in and access the
‘Circulation’ page in the staff client
- This section can be expanded (Learn more)
catalogue - Allows staff members to search the catalog via the staff
client
- Must be given to all staff members to allow them to login to the staff client
parameters - Provides access to all areas of the Administration
menu
- This secton can be expanded (Learn more)
borrowers - Allows staff members to add or modify patrons (with the
exception of setting permissions)
permissions - Ability to set patron permissions
reserveforothers - Ability to place holds on books for patrons via the
staff interface
- This section can be expanded (Learn more)
borrow - Grants staff members the rights to borrow books from the
library
editcatalogue - Ability to catalog items (add and edit bibliographic and
holdings data)
- This section can be expanded (Learn more)
updatecharges - Manage patron accounts (including paying fines, adding
credits, and creating invoices)
acquisition - Provides access to the acquisitions and patron purchase
suggestion modules
- This section can be expanded (Learn more)
management - No longer in use
tools - Access to all items in the Tools section of the staff
client
- This section can be expanded (Learn more)
editauthorities - Provides access to edit the authority record
serials - Allows access to the serials module - This section can be expanded (Learn more)
reports - Allow access to the Reports module (ability to create,
edit and run all reports)
- Reports found on the Circulation page are not controlled by this permission
- This section can be expanded (Learn more)
staffaccess - Provides the ability to modify login / permissions for
staff users
Important
Requires the borrowers permission above
Granular Circulate Permissions
If the staff member has ‘circulate’ permissions they have the ability to perform all of these actions. If you would like to control circulation permissions on a more granular level choose from these options:
circulate_remaining_permissions - All circulation rights except the ability to override
renewals
override_renewals - Override blocked renewals - Requires that the staff member also has
circulate_remaining_permissions
Granular Parameters Permissions
If the staff member has ‘parameters’ permissions they have the ability to perform all of these actions. If you would like to control parameter permissions on a more granular level choose from these options:
manage_circ_rules - The ability to edit circulation and fine rules in the
administration area
parameters_remaining_permissions - Access to all other areas under Administration
Granular Holds Permissions
If the staff member has ‘reserveforothers’ permissions they have the ability to perform all of these actions. If you would like to control holds permissions on a more granular level choose from these options:
modify_holds_priority - Allow staff members to alter the holds priority
(moving patrons up and down the queue)
place_holds - Allows staff members to place holds for patrons via
the staff interface
Granular Cataloging Permissions
If the staff member has ‘editcatalogue’ permissions they have the ability to perform all of these actions. If you would like to control cataloging permissions on a more granular level choose from these options:
edit_catalogue - Ability to access all cataloging functions via the
Cataloging page
edit_items - Ability to make :ref:`edits to
item records <editingitems>`, but not bib records
fast_cataloging - The ability to catalog using only the Fast Add Framework found on the
Circulation page
Granular Acquisitions Permissions
If the staff member has ‘acquisition’ permissions they have the ability to perform all of these actions. If you would like to control acquisitions permissions on a more granular level choose from these options:
budget_add_del - Ability to add and delete budgets (not modify)
budget_manage - Manage budgets
budget_modify - Ability to edit existing budgets (not to add or
delete)
contracts_manage - Manage contracts
group_manage - Manage orders and basket groups
order_manage - Manage orders and baskets
order_receive - Manage orders and baskets
period_manage - Manage periods
planning_manage - Manage budget planning
vendors_manage - Manage vendors
Granular Serials Permissions
If the staff member has ‘serials’ permissions they have the ability to perform all of these actions. If you would like to control serials permissions on a more granular level choose from these options:
check_expiration - Check the expiration of a serial
claim_serials - Claim missing serials
create_subscription - Create a new subscription
delete_subscription - Delete an existing subscription
edit_subscription - Edit (but not delete or create) an existing
subscription
receive_serials - Receive serials on existing subscriptions
renew_subscription - Renew an existing subscription
routing - Manage routing lists
Granular Tools Permissions
If the staff member has ‘tools’ permissions they have the ability to access and use all items under the Tools menu. If you would like to control which tools staff members have access to on a more granular level choose from these options:
batch_upload_patron_images - Upload patron images in batch or one at a time (Access
to the Image Upload Tool)
delete_anonymize_patrons - Delete old borrowers and anonymize circulation/reading
history (Access to the Anonymize Patron Tool)
edit_calendar - Define days when the library is closed (Access to the
edit_news - Write news for the OPAC and staff interfaces (Access
to the News Tool)
edit_notice_status_triggers - Set notice/status triggers for overdue items (Access
edit_notices - Define notices (Access to the Notices Tool)
export_catalog - Export bibliographic and holdings data (Access to the
import_patrons - Import patron data (Access to the Import Patrons Tool)
inventory - Perform inventory (stocktaking) of your catalog
(Access to the Inventory Tool)
items_batchdel - Perform batch deletion of items (Access to the :ref:`Delete a queryset of items
Tool <batchdeleteitems>`)
items_batchmod - Perform batch modification of items (Access to the
label_creator - Create printable labels and barcodes from catalog and
patron data (Access to the Label Creator and Quick Label Creator Tools)
manage_csv_profiles - Create and edit CSV profiles (Access to the CSV Profiles Tool)
manage_staged_marc - Managed staged MARC records, including completing and
reversing imports (Access to the Manage Staged MARC Records Tool)
moderate_comments - Moderate patron comments (Access to the Comments and Tags Tools)
schedule_tasks - Schedule tasks to run (Access to the Task Scheduler Tool)
stage_marc_import - Stage MARC records into the reservoir (Access to the
upload_local_cover_images - Upload local cover images (Access to the :ref:`Upload Local Cover Image
Tool <uploadlocalimages>`)
view_system_logs - Browse the system logs (Access to the Log Viewer Tool)
Granular Reports Permissions
If the staff member has ‘reports’ permissions they have the ability to perform all of these actions. If you would like to control reports permissions on a more granular level choose from these options:
create_reports - The ability to create and edit but not run SQL
reports
execute_reports - The ability to run but not create or edit SQL
reports
Patron Information
When viewing a patron record you have the option to view information from one of many tabs found on the left hand side of the record.
Check Out
For instruction on checking items out, view the Checking Out section of this manual.
Details
All patron information will appear on the Details tab. This includes all the contact information, notes, custom patron attributes, messaging preferences, etc entered when adding the patron.
In the case of patrons who are marked as ‘Child’ or ‘Professional’ and their Guarantors additional information will appear on their record.
- A child patron will list their Guarantor Guarantor listed and linked from the child record .. image:: images/patrons/child.png
- On the Guarantor’s record, all children and/or professionals will be listed Guarantees listed on the Guarantor’s profile .. image:: images/patrons/parent.png
Circulation Summary
Below the patron’s information on the details screen is a tabbed display of the items they have checked out, overdue, and on hold.
Checkout summary
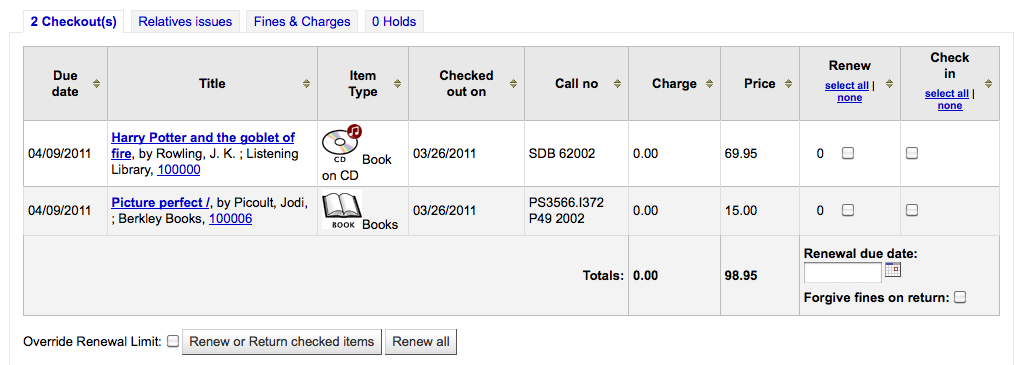
If they have family at the library staff can see what the other family members have checked out.
Relative checkouts
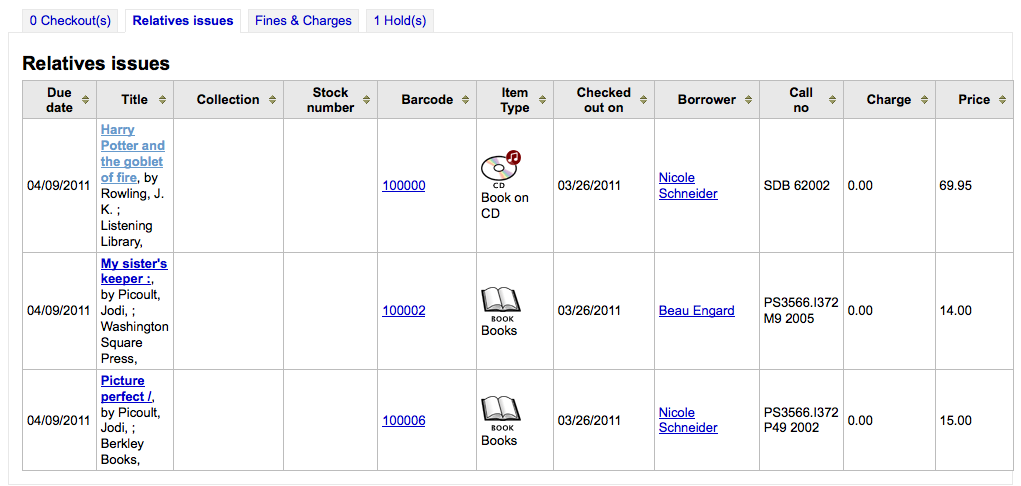
Fines
The patron’s complete accounting history will appear on the Fines tab. Contrary to its name, the Fines tab does not just show fine data, it also shows membership fees, rental fees, reserve fees and any other charge you may have for patrons.
Patron Accounting Summary
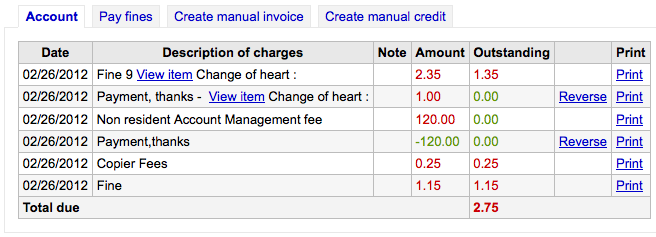
Charging Fines/Fees
Most fees and fines will be charged automatically if the fines cron job is running:
- Fines will be charged based on your Circulation & Fines Rules
- Hold fees will be charged based on the rules you set in the Patron Types & Categories administration area
- Rental fees will be charged based on the settings in your Item Types administration area
- Marking an item ‘Lost’ via the cataloging module will automatically charge the patron the replacement cost for that item
Pay/Reverse Fines
Each line item can be paid in full (or written off) using the ‘Pay Fines’ tab.
Paying Fines
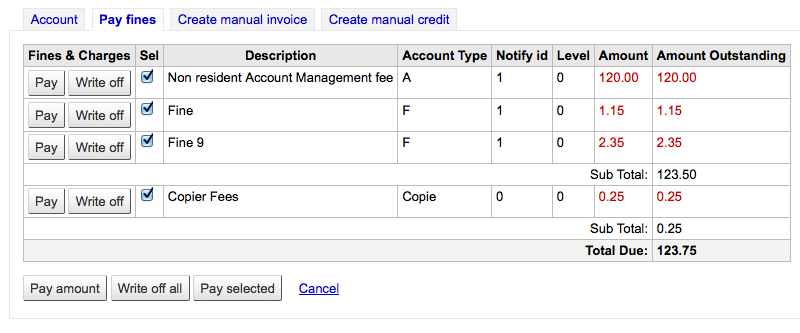
Each line item can be paid in full, partially paid, or written off.
Pay a fine in full - Click “Pay” next to the fine you want to pay in
full
- The full amount of the fine will be populated for you in the “Collect From Patron” box Pay fine .. image:: images/patrons/payfine.png
- Click “Confirm”
- The fine will be removed from outstanding fines, and displayed as fully paid.
Pay a partial fine - Click “Pay” next to the fine you want to partially
pay
- Enter the amount you are collecting from the patron in the “Collect From Patron” box Pay partial fine .. image:: images/patrons/paypartial.png
- Click “Confirm”
- The fine will be updated to show the original Amount, and the current Amount Outstanding
Pay an amount towards all fines - Click the “Pay Amount” button - Enter the amount you are collecting from the patron in
“Collect from Patron.” The sum of all fines is shown in “Total Amount Outstanding” Pay Amount .. image:: images/patrons/payamount.png
- Click “Confirm”
- The fine totals will be updated with the payment applied to oldest fines first.
Pay Selected fines - Check the selection boxes next to the fines you wish
to pay, click “Pay Selected” Select lines to pay .. image:: images/patrons/payselected-select.png
- Enter an amount to pay towards the fines. Pay Selected .. image:: images/patrons/payselected.png
- Click “Confirm”
- The fine totals will be updated with the payment applied to the oldest selected fines first.
Writeoff a single fine - Click “Writeoff” next to the fine you wish to
writeoff.
- The fine will be removed from outstanding fines, and displayed as written off.
Writeoff All fines - Click the “Writeoff All” button - All fines will be removed from outstanding fines, and
displayed as written off.
If you accidentally mark and item as paid, you can reverse that line item by clicking ‘Reverse’ to the right of the line Reverse Link .. image:: images/patrons/reverselink.png - Once clicked a new line item will be added to the
account, showing the payment as reversed Reversed Payment .. image:: images/patrons/reversed.png
Creating Manual Invoices
For fees that are not automatically charged, librarians can create a manual invoice
Create Manual Invoice
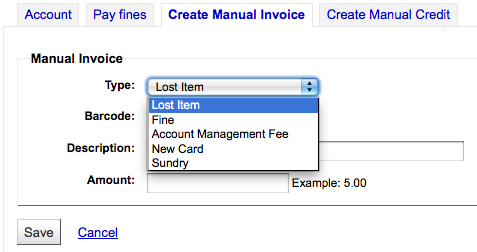
First choose the type of invoice you would like to create - To add additional values to the manual invoice type
pull down menu, add them to the MANUAL_INV Authorized Value
If the fee is associated with an item you can enter its barcode so that the line item shows a link to that item
The description field is where you will enter the description of the charge
In the amount field, do not enter currency symbols, only numbers and decimals
Creating Manual Credits
Manual credits can be used to pay off parts of fines, or to forgive a fine amount.
Create Manual Credit
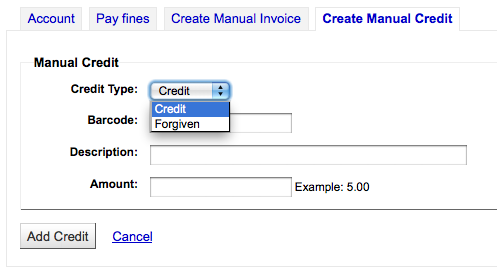
- First choose the type of credit you’d like to apply
- If this credit is associated with an item you can enter that item’s barcode so that the line item links to the right item
- The description field is where you will enter the description of the credit
- In the amount field, do not enter currency symbols, only numbers and decimals
Printing Invoices
To the right of each account line there is a print link. Clicking that link will print an invoice for the line item that includes the date and description of the line item along with the total outstanding on the account.
Sample Invoice
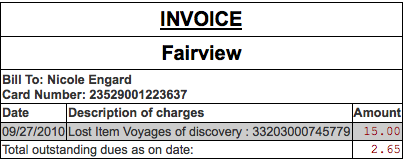
Routing Lists
A list of all of the serial routing lists the patron belongs to will be accessible via the ‘Routing Lists’ tab on the patron record.
Routing Lists
On this tab you will be able to see and edit all of the routing lists that this patron is on.
Patron’s routing lists
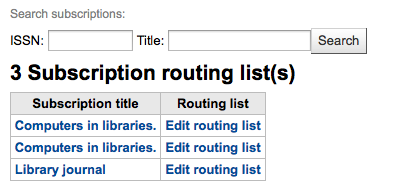
Circulation History
The circulation history tab will appear if you have set the intranetreadinghistory preference to allow it to appear. If you have the OPACPrivacy system preference set to ‘Allow’ and the patron has decided that the library cannot keep this information this tab will only show currently checked out items.
Patron Circulation History
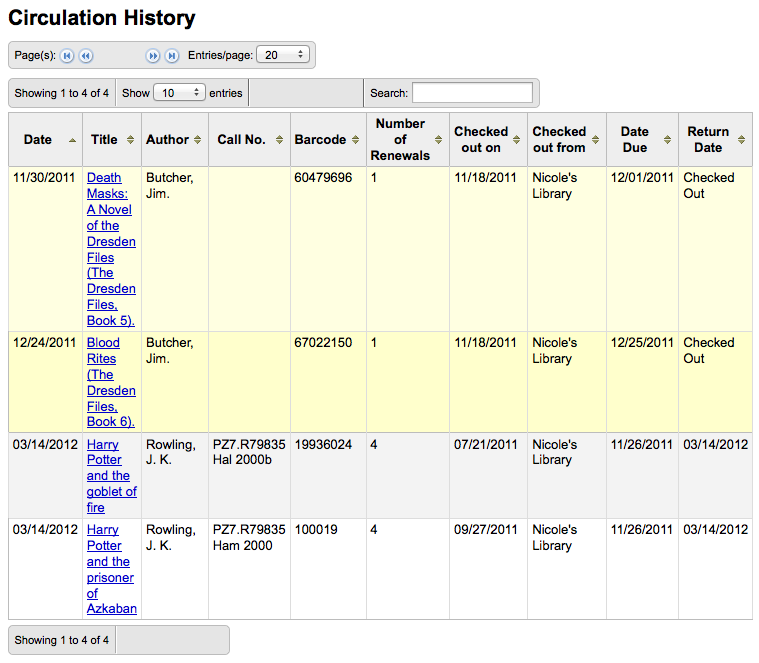
If you would like to export a list of barcodes for the items checked in today you can find that option under the More menu on the top right of the page.
Export today’s checkins
This will generate a text file with one barcode per line.
Modification Log
If you have set your BorrowersLog to track changes to patron records, then this tab will appear. The Modification Log will show when changes were made to the patron record. If you also have turned on the IssueLog and ReturnLog you will see checkins and outs on this screen as well.
Changes to Patron
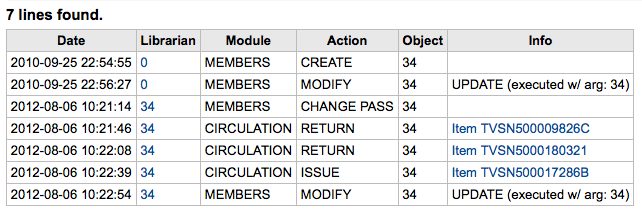
- The Librarian field shows the patron number for the librarian who made the changes
- The module lists ‘MEMBERS’ for the patron module
- The action will tell you what action was being logged
- The Object field lists the borrowernumber that is being modified (in the example above, it was my changing my own record)
Notices
The patron’s messaging preferences are set when adding or editing the patron. This tab will show the messages that have been sent and those that are queued to be sent:
Patron Notices Tab
Clicking on the message title will expand the view to show you the full text of the message that was sent.
Full message text
Statistics
Depending on what you set for the values of your StatisticsFields system preference, you can see statistics for one patron’s circulation actions.
Patron’s Statistics
Files
If you set the EnableBorrowerFiles preference to ‘Do’ the Files tab will be visible on the patron information page.
Patron Files Tab
From here you can upload files to attach to the patron record.
Upload patron files
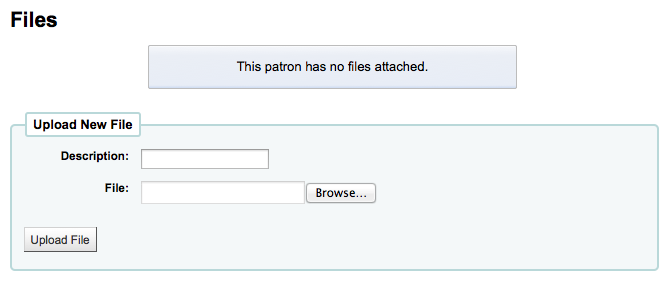
All files that are uploaded will appear above a form where additional files can be uploaded from.
List of files on the patron record
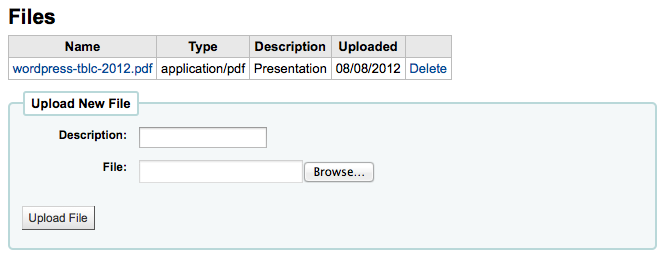
Patron Search
Clicking on the link to the Patron module will bring you to a search/browse screen for patrons. From here you can search for a patron.
Patron Search

Depending on what you have chosen for the ‘Search fields’ you can search for patrons in various different ways.
Patron Search Fields

Standard: - Enter any part of their name, username, email address or
barcode
Email: - Enter any part of their email address.
Borrower number: - Enter the Koha borrower number
Phone number: - Enter the phone number exactly as it is in the system or
by using spaces between each batch of numbers.
- Example: To find (212) 555-1212 you can search for it exactly as it was entered or by searching for 212 555 1212
If you want to filter your results to a specific branch or category, you can click the plus sign [+] to the right of the search box.
Advanced Patron Search

You can also browse through the patron records by clicking on the linked letters across the top.
Patron Browse

Circulation
Circulation functions can be accessed in several different ways. On the main page of the staff client there are some quick links in the center of the page to check items out, in or transfer them. For a complete listing of Circulation functions you can visit the Circulation page which is linked from the top left of every page or from the center of the main page.
Before circulating your collection you will want to set your Global System Preferences, Basic Parameters and Patrons & Circulation Rules.
While in Circulation you can jump between the tabs on the quick search box at the top of the screen by using the following hot keys:
- jump to the catalog search with Alt+Q
- jump to the checkout with Alt+U - this will not work for Mac users
- jump to the checkin with Alt+R
Tip
Mac users use the OPTION button in place of ALT
Check Out (Issuing)
To begin the checkout process you must enter the patron barcode or part of their name. The checkout option appears in three main places:
- Check out option on the top of the main staff client Check out box on main Koha Staff Client page .. image:: images/circ/checkoutmain.png
- Check out option on the patron record Check out tab on a patron record .. image:: images/circ/checkoutpatron.png
- Check out option on the quick search bar on the circulation page Check out tab on quick search bar .. image:: images/circ/circquickbox.png
Checking Items Out
To check an item out to a patron, first search for that patron using one of the many options listed above.
Check Out Screen
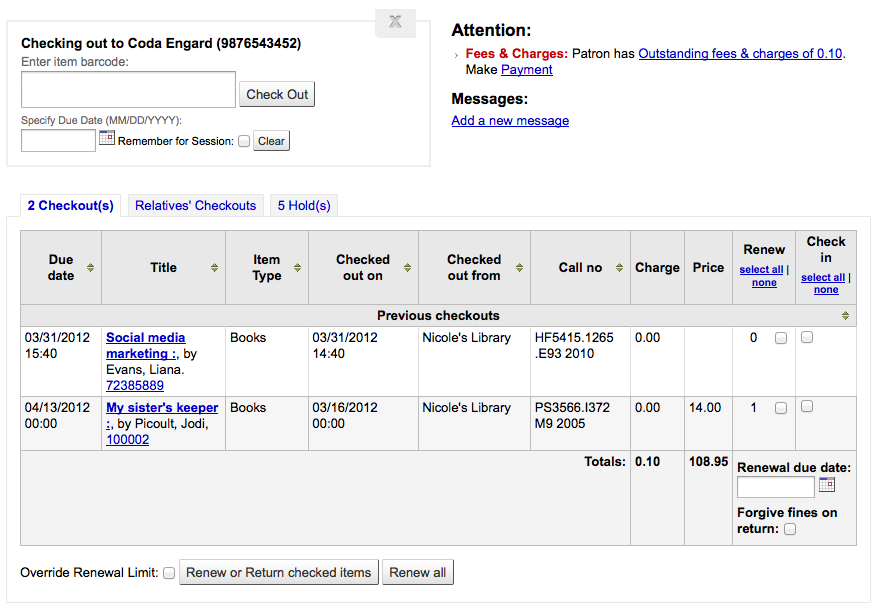
At the top of the Check Out screen is a box for you to type or scan the item’s barcode into.
Important
Many modern barcode scanners will send a ‘return’ to the browser, making it so that the ‘Check Out’ button is automatically clicked
If the barcode is not found you will be prompted to use fast cataloging to add the item. Learn more about fast cataloging later in this manual.
Below the box for the barcode there may be options for you to override the default due date for the item.
- This option will only appear if you have set the SpecifyDueDate system preference to allow staff to override the due date
At the bottom of the page there is a summary of the patron’s current checked out items along with the due date (and time if the item is an hourly loan), items checked out today will appear at the top.
Tip
If the checked out time is listed as 00:00 then the item is a daily loan item. The due time for daily checkouts will show 23:59 which is the last minute of the day.
Patron’s checkout summary
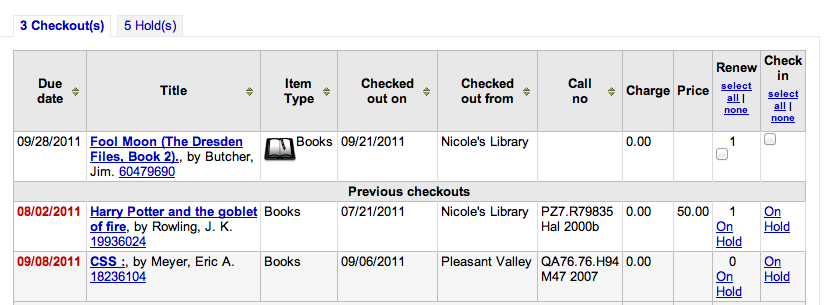
Also at the bottom of the page is the list of items the patron has on hold
Holds summary on check out screen
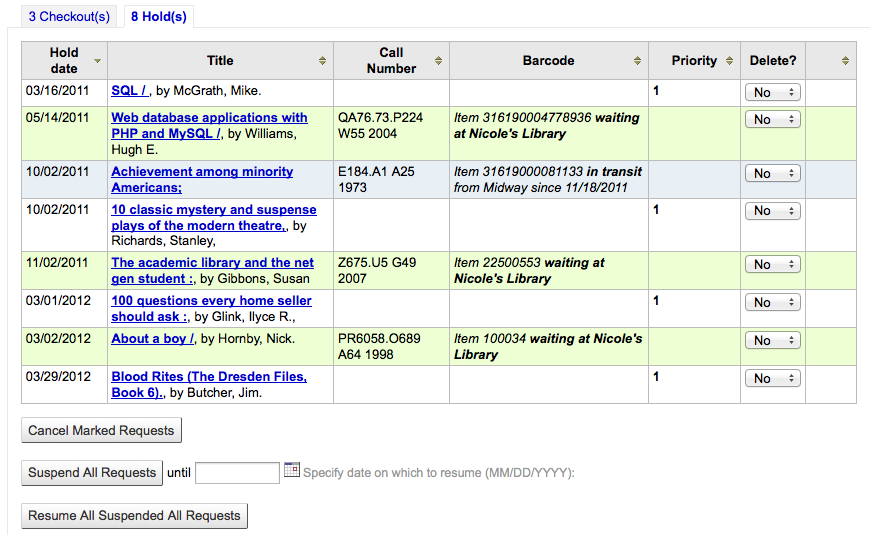
From the holds list you can suspend or resume patrons holds using the options at the bottom of the list if you have the SuspendHoldsIntranet preference set to ‘allow.’
Note
If you have your AutoResumeSuspendedHolds preference set to “Don’t allow” then you will not have the option to put an end date on the hold suspension
If there are notes on the patron record these will appear to the right of the checkout box
Patron notes on check out screen
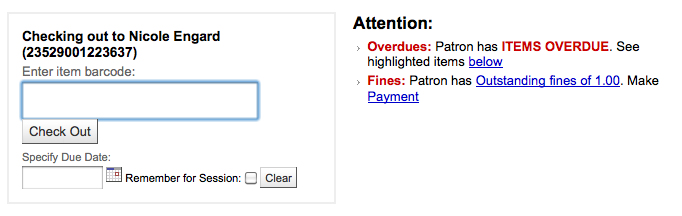
If the patron has a hold waiting at the library that too will appear to the right of the check out box making it easy for the circulation librarian to see that there is another item to give the patron
Hold waiting message on check out screen
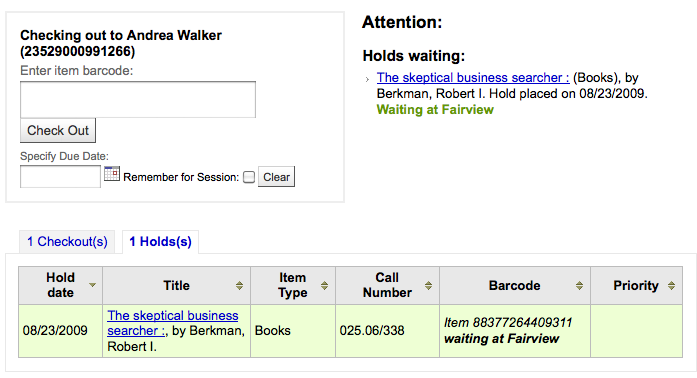
Printing Receipts
Once you have checked out all of the items for the patron you can print them a receipt by choosing one of two methods.
If you have the CircAutoPrintQuickSlip preference set to ‘open a print quick slip window’ you can simply hit enter on your keyboard or scan a blank piece of paper with your barcode scanner. The idea being that you’re “checking out” a blank barcode which triggers Koha to print the ‘Quick slip.’
You can also click the Print button at the top of the screen and choose ‘Print slip’ or ‘Print quick slip’.
Print receipt to slip printer
If you choose ‘Print slip’ it will print all of the items the patron has checked out, including those they checked out at an earlier date. Choosing ‘Print quick slip’ will print only the items that were checked out today.
What prints on the slips can be customized by altering the slip templates under the Notices & Slips tool.
Clear Patron Information
When you’re done checking an item out if you have the DisplayClearScreenButton preference set to ‘Show’ you can clear the current patron by clicking the X in the top right of the patron’s info to remove the current patron from the screen and start over.
Clear Screen Button
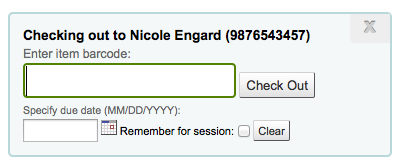
If you have the CircAutoPrintQuickSlip preference set to ‘clear the screen’ then you simply need to hit enter or scan a blank barcode and the screen will be cleared of the current patron.
Check Out Messages
If you check out an item that has multiple pieces and you have cataloged that information in subfield 3 of the item record (in MARC21) a message will pop up when you check out that item telling you how many pieces should be there.
Materials in the checked out item

There are times when Koha will prevent the librarian from being able to check out items to a patron. When this happens a warning will appear notifying the librarian of why the patron cannot check items out.
Patron owes too much in fines Patron owes too much in fines .. image:: images/circ/fineswarning.png - You can set the amount at which patron checkouts are
blocked with the noissuescharge system preference
Patron has been barred from the library Patron account barred .. image:: images/circ/debarwarning.png - This can be set by the librarian editing a patron record
and adding a flag or by the Overdue/Notice Status Triggers
Patron needs to confirm their address Patron’s address warning .. image:: images/circ/addresswarning.png - This can be set by the librarian editing a patron record
and adding a flag
Patrons has lost their library card Lost patron card warning .. image:: images/circ/lostcardwarning.png - This can be set by the librarian editing a patron record
and adding a flag
Check Out Warnings
Sometimes checkouts will trigger warning messages that will appear in a yellow box above the check out field. These warnings need to be acknowledged before you will be able to continue checking items out.
Patron has outstanding fines Patron has a debt .. image:: images/circ/warnings/patrondebt.png
Item on hold for someone else Item is on hold for someone else .. image:: images/circ/warnings/onhold.png
Item should be on the hold shelf waiting for someone else Item is on hold shelf waiting for someone else .. image:: images/circ/warnings/holdwaiting.png
Item already checked out to this patron Item is currently checked out to this patron .. image:: images/circ/warnings/alreadycheckedout.png
Item checked out to another patron Item checked out to another patron .. image:: images/circ/warnings/checkedoutelse.png
Item not for loan Item is not normally for loan .. image:: images/circ/warnings/notforloan.png
Patron has too many things checked out Too many checkouts .. image:: images/circ/warnings/toomanycheckouts.png
Item cannot be renewed No more renewals .. image:: images/circ/warnings/norenewals.png - This can be overridden with the AllowRenewalLimitOverride
system preference
Barcode not found Barcode not found .. image:: images/circ/barcodefastadd.png - Learn more about :ref:`fast
cataloging <fastaddcat>` later in this manual.
Item being checked out is marked as ‘lost’ - Depending on the value in your IssueLostItem preference, you
may just see a warning Warning that item is lost .. image:: images/circ/lostitemmsg.png or a confirmation box Confirm checkout of lost item .. image:: images/circ/lostitemconfirm.png
Renewing
Checked out items can be renewed (checked out for another period of time) based on your circulation rules and renewal preferences. If you allow it, patrons can renew their own items via the OPAC, but sometimes you’ll need to help them by renewing their items via the staff client. To renew items checked out to a patron, visit their details page or checkout page and review their checkout summary at the bottom.
Circulation Summary
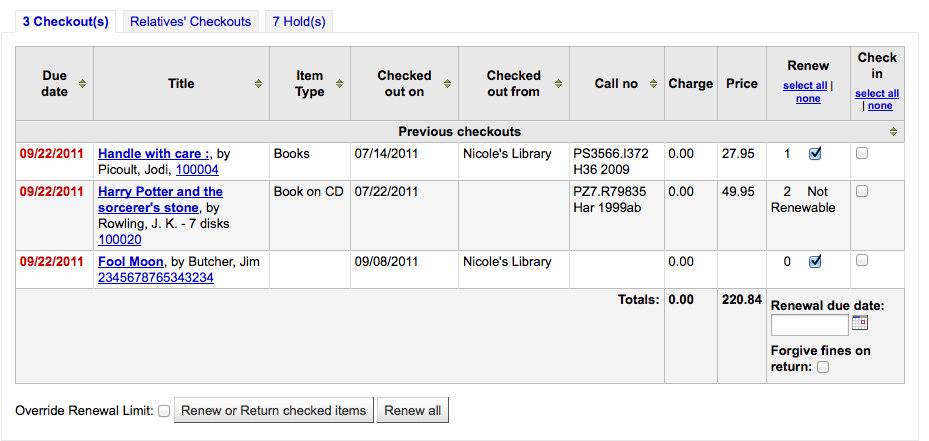
In the Renew column you will see how many times each item has been renewed and a checkbox to renew the item for the patron. Check the boxed of the items you would like to renew and click the ‘Renew or Return checked items’ button, or to renew all items checked out to the patron simply click the ‘Renew all’ button.
Renew buttons

Sometimes renewals will be blocked based on your circulation rules, to override this block you must have your AllowRenewalLimitOverride preference set to ‘Allow’. If you allow renewal limit overrides, you will see a checkbox at the bottom left of the circulation summary. Check that box and then choose the items you would like to renew.
Override renewal limit

Checking that box will add checkboxes in the renew column above where before the item was not renewable.
Check In (Returning)
Checking in items can be performed from various different locations
- The check in box on the top of the main staff client Check out box on main Koha Staff Client page .. image:: images/circ/checkinmain.png
- The check in option on the quick search bar on the Circulation page Check in tab on quick search bar .. image:: images/circ/checkinquickbox.png
- The check in link on the patron’s checkout summary (and on the checkout summary page) Patron checkout summary includes ‘Check In’ link .. image:: images/circ/checkinlink.png
- The Check in page under the Circulation menu Check in link on Circulation Module .. image:: images/circ/checkincirc.png
Checking Items In
To check an item in scan the barcode for the item into the box provided. A summary of all items checked in will appear below the checkin box
Check In Summary
If you are checking items in that were put in the dropbox while the library was closed you can check the ‘Dropbox mode’ box before scanning items. This will effectively roll back the returned date to the last date the library was open.
- This requires that you have your closings added to the Holidays & Calendar Tool
You can also choose to forgive all overdue charges for items you are checking in by checking the ‘Forgive overdue charges’ box before scanning items.
Check In Messages
There are several messages that can appear when checking items in:
If you are checking an item in at a library other than the home branch, a message will appear asking you to transfer the book to the home library Check in Transfer Message .. image:: images/circ/checkintransfer.png - After this item is checked in the status of the item
will be changed in the catalog to ‘in transit’ In Transit Status .. image:: images/circ/transferstatus.png
To mark an item as back at the home branch, check the item in at the home branch Check In Transferred Item .. image:: images/circ/transfercheckin.png - A message will appear tell you that the item is not
checked out, but the status will now say available in the catalog. This step is necessary to mark items as received by the home branch.
If you are checking in an item that should have multiple parts or pieces a message will appear warning you about the number of pieces you should have in your hand Materials Specified .. image:: images/circ/materialspecified.png
If you’re checking an item in that has a hold on it, you will be prompted to confirm the hold Hold Found Check In Message .. image:: images/circ/holdfound.png - Clicking the Confirm hold button will mark the item as
waiting for pickup from the library Hold waiting at the library .. image:: images/circ/waitingstatus.png
- Clicking the Print Slip and Confirm button will mark the item as waiting for pickup at the library and present the library with a receipt to print and place on the book with the patron’s information
- Ignoring the hold will leave the item on hold, but leave its status as Available (it will not cancel the hold)
If you’re checking in an item that has a hold on it at another branch you will be prompted to confirm and transfer the item Hold found for another branch .. image:: images/circ/holdconfirmtransfer.png - Clicking the Confirm hold and Transfer button will mark
the item as in transit to the library where the hold was placed In transit hold status .. image:: images/circ/intransithold.png
- Clicking the Print Slip, Transfer and Confirm button will mark the item as in transit to the library where the hold was placed and present the library with a receipt to print and place on the book with the patron’s information
- Ignoring the hold will leave the item on hold, but leave its status as Available (it will not cancel the hold)
If you have the system showing you fines at the time of checkin (FineNotifyAtCheckin) you will see a message telling you about the fine and providing you a link to the payment page for that patron FineNotifyAtCheckin .. image:: images/admin/globalprefs/FineNotifyAtCheckin.png
Circulation Messages
Circulation messages are short messages that librarians can leave for their patrons or their colleagues that will appear at the time of circulation.
Setting up Messages
Circulation messages are set up as Authorized Values. To add or edit Circulation Messages you want to work with the BOR_NOTES value.
BOR_NOTES Authorized Values
The ‘Description’ field can hold a canned message that you would like to appear on the patron’s record.
Important
The ‘Description’ field is limited to 80 characters, but the patron message field can hold more than that. Enter 80 characters in the ‘Description’ field and then type the rest on the patron record.
Adding a Message
When on the patron’s check out tab you will see a link to ‘Add a new message’ to the right of the check out box.
Circulation Message in Staff Client
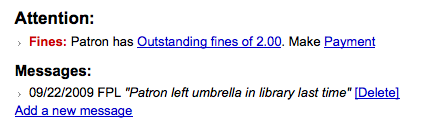
When you click ‘Add a new message’ you will be asked to choose if the message is for the librarians or the patron and the message you would like to leave.
Leave a Circulation Message
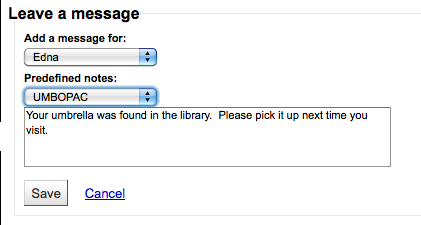
Note
A message for the patron will also show to the library staff.
Viewing Messages
Circulation messages meant for the staff and/or the patron will appear on the patron’s checkout screen to the right of the checkout box. Messages in bold and red are meant for the library staff only, whereas messages in regular italics font are meant for the patron and the librarian.
Circulation Message in Staff Client
Circulation messages meant for the patron will also appear when they log into the OPAC.
Circulation Message in OPAC
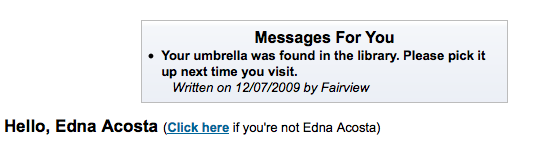
Holds
Placing Holds in Staff Client
There are several ways to place holds from the staff client. The most obvious is using the ‘Place Hold’ button at the top of any bibliographic record.
Place Hold Button on Bib Record

You can also click the smaller ‘Place Hold’ link found at the top of your catalog search results, or the ‘Holds’ link found below each result.
Hold options on search results
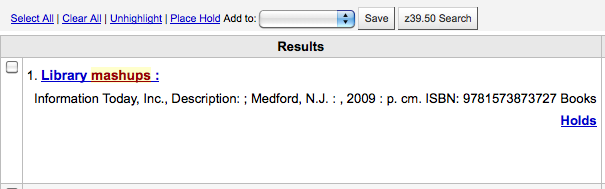
You will be asked to search for a patron by barcode or any part of their name to start the hold process.
Find Patron For Hold
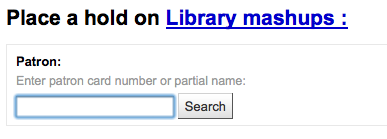
If you’d like to search for the patron first and then the bib record for the hold, you can open the patron record and click on the ‘Search to Hold’ button at the top of the patron record.
Search to Hold on Patron Record
After clicking the button you will be brought to the catalog search page where you can find the book(s) you want to place a hold on. Under each title on the results you’ll see an option to ‘Hold for Patron Name.’
Hold for Patron links on Search Results
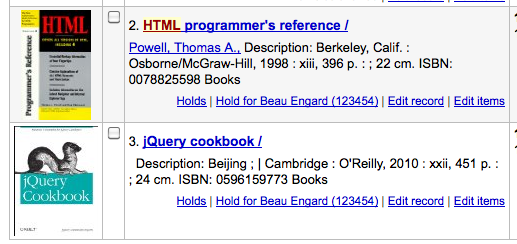
If you want to place a hold on multiple items, simply check the boxes to the left of them and click the arrow to the right of the ‘Place Hold’ button.
Hold Multiple Items for Patron
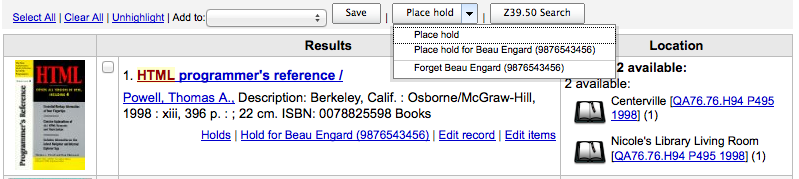
Depending on how many items you choose to place a hold on at once you will see a different place hold form. If you are placing a hold on one bibliographic record you will see a list of all of the items you can place a hold on.
Place Hold Form
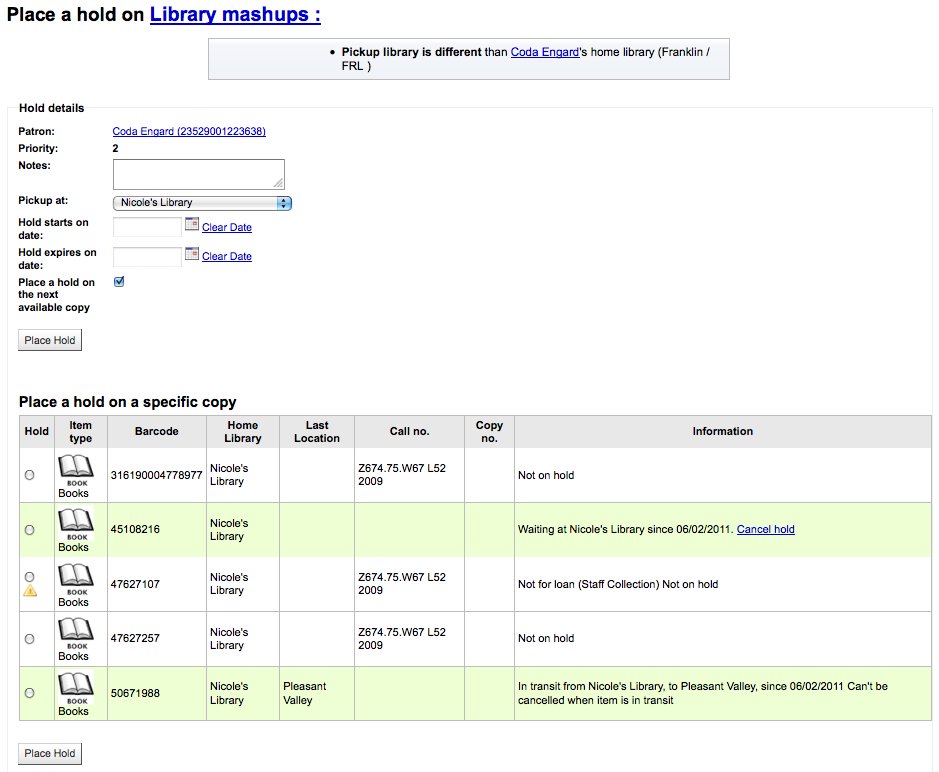
Enter any notes that might apply to this hold
Choose the library where the patron will pick up the item
If the patron wants the hold to start on a date other than today, enter that in the ‘Hold starts on date’ field - This option will only appear if the AllowHoldDateInFuture
system preference is set to ‘Allow’
If the patron has specified that they don’t want the item after a certain date, or if you have limits on hold lengths, you can enter an expiration date for the hold in the ‘Hold expires on date’ - To have expired holds canceled automatically you will
need to have the Expired Holds cron job set to run on a regular basis.
Next choose if you want to place a hold on the next available item or a specific item by clicking the radio button next to an individual item.
If you’re placing a hold on multiple items you will be presented with the next available option for all titles. If no items are available for hold it will say so on the confirmation screen.
Place multiple items on hold
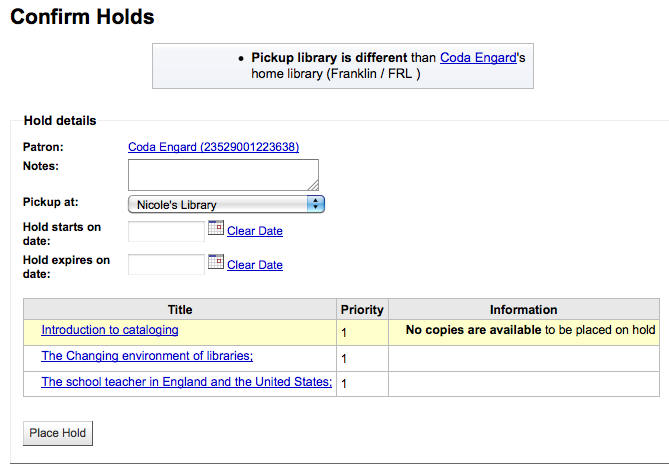
Once your hold is placed, if you’d like to have Koha forget that you used the ‘Search to Hold’ function, you can choose to have Koha ‘forget’ the patron’s name by clicking the arrow to the right of the ‘Place Hold’ button on the search results and choosing the ‘Forget’ option.
Forget Search to Hold Option
Managing Holds
Holds can be altered and canceled from the Holds tab found on the left of the bibliographic record.
Bibliographic Record Tabs
From the list of holds you can change the order of the holds, the pickup location, suspend and/or cancel the hold.
Lists of Holds
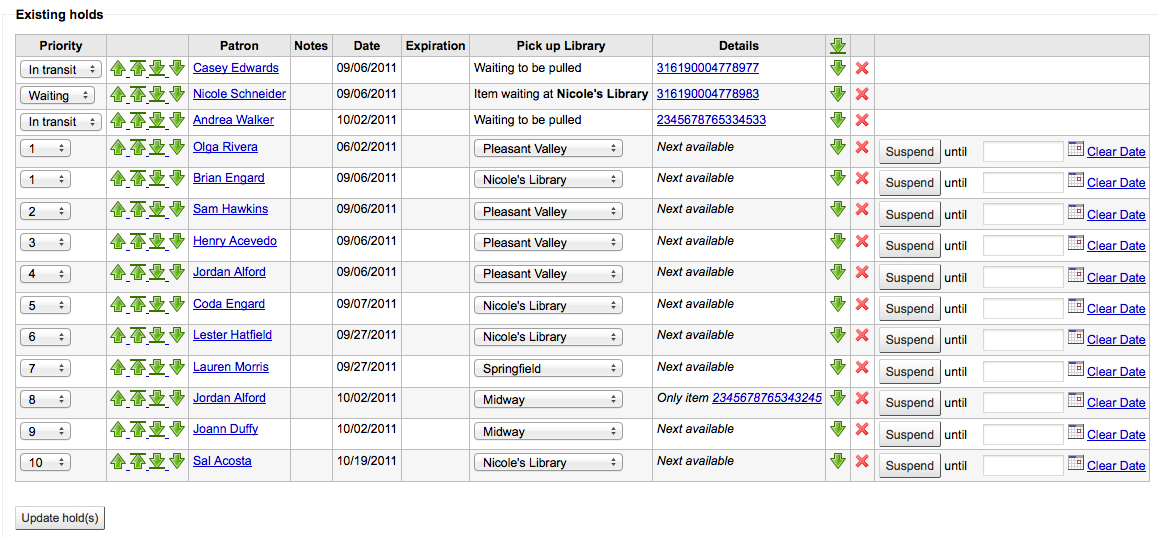
Note
If you have your AutoResumeSuspendedHolds preference set to “Don’t allow” then you will not have the option to put an end date on the hold suspension
Note
Depending on how you have your HidePatronName system preference set the list may show card numbers instead of names in the Patron column like in the image above.
To rearrange or delete holds, simply make a selection from the ‘Priority’ pull down or click the arrows to the right of the priority pull down.
Hold Priority Menu
If you use the priority pull down to rearrange or delete holds you will need to click the ‘Update hold(s)’ button to save your changes.
Clicking the down arrow to the right of the hold will stick the hold at the bottom of the list even if more requests are made.
For example, your library has home-bound patrons that are allowed to keep books out for months at a time. It would not be fair to other patrons if a home-bound patron were able to check out a brand new book and keep it for months. For this reason, the home-bound patron’s hold request would stay at the bottom of the queue until everyone else who wanted to read that book has already done so.
Lowest Priority & Delete Options for Holds
If a patron asks to have their hold suspended and you have the SuspendHoldsIntranet system preference set to ‘allow’ you can do so by clicking the Suspend button to far right. If the patron gives you a date for the items to become unsuspended you can enter that in the date box and click the ‘Update hold(s)’ button to save your changes.
Hold suspension column
To delete or cancel a hold click the red ‘X’ to the right of the hold line. To delete/cancel a bunch of holds you can choose ‘del’ from pull down to the left of each line and then click ‘Update hold(s)’ at the bottom of the list.
Cancel Holds
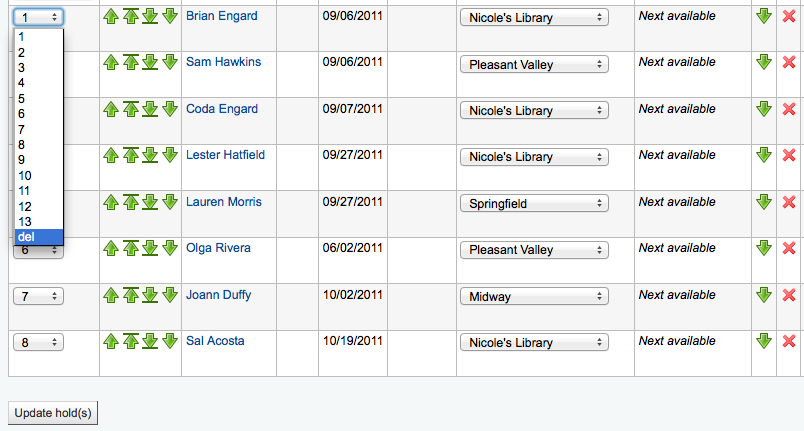
Receiving Holds
When items that are on hold are checked in or out the system will remind the circulation librarian that the item is on hold and offer them options for managing the hold.
When you check in an item that has a hold on it the system will ask you to either confirm and transfer the item
Confirm Hold & Transfer
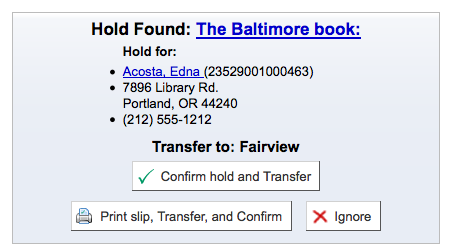
or just confirm the hold
Confirm Hold
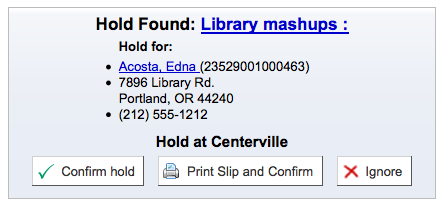
Clicking the Confirm button will mark the item as on hold for the patron. If the item needs to be transferred the item will also be marked as in transit to the proper branch. Clicking ‘Ignore’ will retain the hold, but allow you to check the item out to another patron. Choosing to confirm and print will present you with a printable page that you can slip inside the book with the necessary hold and/or transfer information.
Once confirmed the hold will show on the patron record and on the checkout screen under the ‘Hold’ tab.
Hold on Patron Record

The item record will also show that the item is on hold.
Hold on Item Record

In some cases a patron may come in to pick up a hold for their partner (or someone else in their household). In this case you want to make sure that the hold is cancelled when you check the item out to someone else. When trying to check out an item that is already waiting for someone else you will be presented with a warning message.
Hold waiting for someone else

From here you can check the item out to the patron at the desk and cancel the hold for the patron.
Transfers
If you work in a multi-branch system you can transfer items from one library to another by using the Transfer tool. To transfer an item
Click ‘Transfer’ on the Circulation page Transfer Tool .. image:: images/circ/transfer.png - Enter the library you would like to transfer the item
to
- Scan or type the barcode on the item you would like to transfer
Click ‘Submit’ Transfer Summary .. image:: images/circ/itemtransferred.png
The item will now say that it is in transit Item in Transit .. image:: images/circ/itemintransit.png
When the item arrives at the other branch the librarian must check the item in to acknowledge that it is no longer in transit
The item will not be permanently moved to the new library Item record .. image:: images/circ/itemlocations.png - The item shows the same ‘Home Library’ but has updated the
‘Current Location’ to note where it resides at this time
Set Library
By default you will enter the staff client as if you are at your home library. This library will appear in the top right of the Staff Client.
My Library

This is the library that all circulation transactions will take place at. If you are at another library (or on a bookmobile) you will want to set your library before you start circulating items. To do this you can click ‘Set’ at the top right or on the Circulation page.
Set Library Form
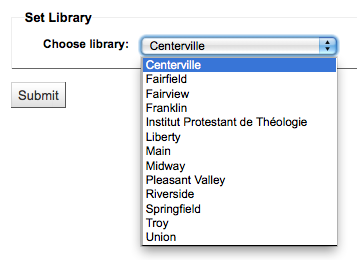
Once you have saved your changes you new library will appear in the top right.
Fast Add Cataloging
Sometimes circulation librarians need to quickly add a record to the system for an item they are about to check out. This is called ‘Fast Add.’ To allow circulation librarians access to the Fast Add Cataloging tool, simply make sure they have the fast_cataloging permissions. There are two ways to add titles via fast add. If you know that you’re about to check out an item that isn’t in you catalog you can go to the Circulation module and click ‘Fast cataloging.’
Circulation Menu
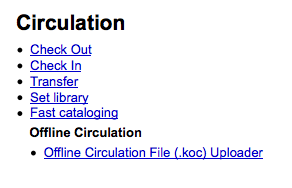
The cataloging interface will open up with the short cataloging record:
Fast Add Framework
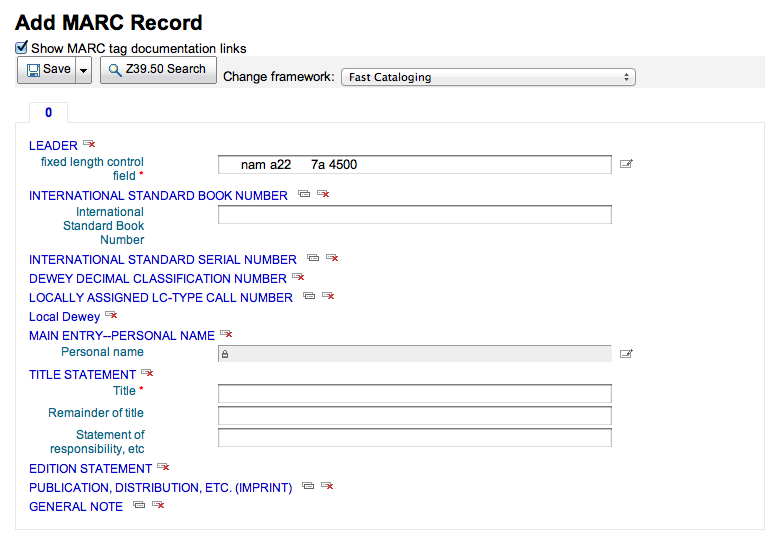
After adding your cataloging data you will be asked to enter item data. Enter the items barcode, collection code, etc and save the item before checking it out.
The other way to fast catalog is from the checkout screen. When you enter a barcode at checkout that Koha can’t find, it will prompt you to use fast cataloging to add the item to Koha and check it out.
Barcode not found

Clicking ‘Fast cataloging’ will bring you to the fast cataloging form where you can enter the title information
Fast cataloging
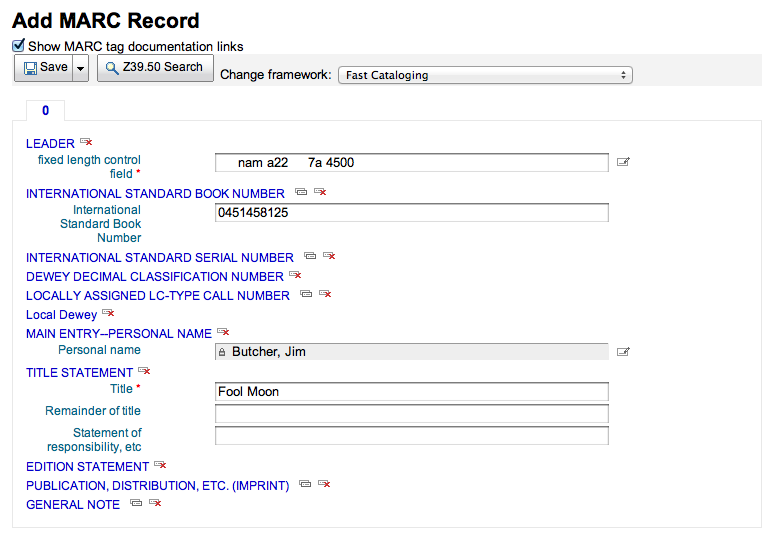
After clicking ‘Save’ you will be brought to the item record where the barcode will already be filled in with the barcode you’re trying to check out.
Fast cataloging item record
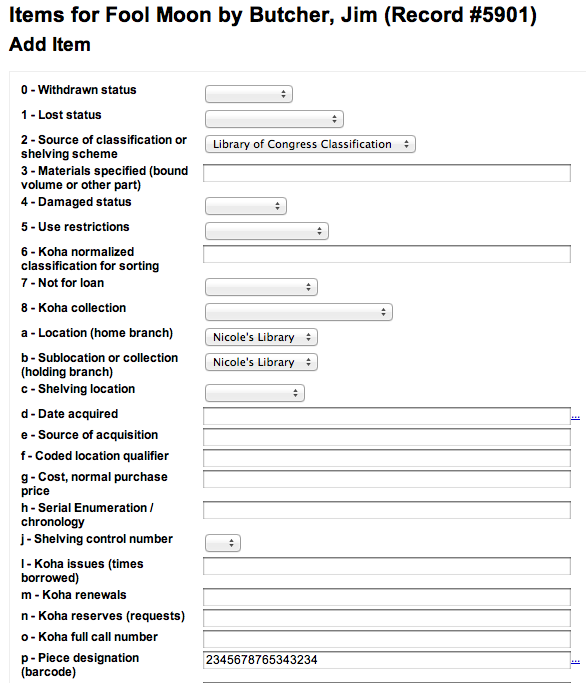
After clicking the ‘Add item’ button the item will automatically be checked out the patron you were trying to check the book out to originally.
Checked out item

Circulation Reports
Holds Queue
This report will show you all of the holds at your library.
Sample Holds Queue
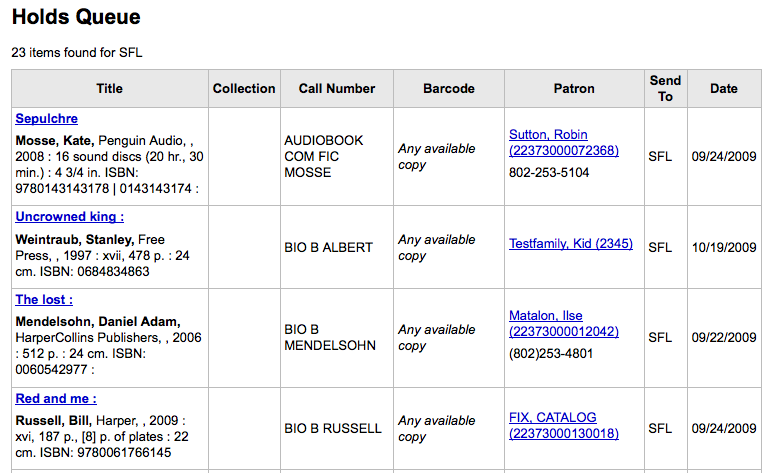
To generate this report, you must have the Build Holds Queue cron job running. This cron job is a script that should be run periodically if your library system allows borrowers to place on-shelf holds. This script decides which library should be responsible for fulfilling a given hold request.
It’s behavior is controlled by the system preferences StaticHoldsQueueWeight and RandomizeHoldsQueueWeight.
If you do not want all of your libraries to participate in the on-shelf holds fulfillment process, you should list the the libraries that *do* participate in the process here by inputting all the participating library’s branchcodes, separated by commas ( e.g. “MPL,CPL,SPL,BML” etc. ).
By default, the holds queue will be generated such that the system will first attempt to hold fulfillment using items already at the pickup library if possible. If there are no items available at the pickup library to fill a hold, build_holds_queue.pl will then use the list of libraries defined in StaticHoldsQueueWeight. If RandomizeHoldsQueueWeight is disabled ( which it is by default ), the script will assign fulfillment requests in the order the branches are placed in the StaticHoldsQueueWeight system preference.
For example, if your system has three libraries, of varying sizes ( small, medium and large ) and you want the burden of holds fulfillment to be on larger libraries before smaller libraries, you would want StaticHoldsQueueWeight to look something like “LRG,MED,SML”.
If you want the burden of holds fulfillment to be spread out equally throughout your library system, simply enable RandomizeHoldsQueueWeight. When this system preference is enabled, the order in which libraries will be requested to fulfill an on-shelf hold will be randomized each time the list is regenerated.
Leaving StaticHoldsQueueWeight empty is contraindicated at this time. Doing so will cause the build_holds_queue script to ignore RandomizeHoldsQueueWeight, causing the script to request hold fulfillment not randomly, but by alphabetical order.
Holds to pull
This report will show you all of the items that have holds on them that are available at the library for pulling. If the items are available at multiple branches then all branches with that item available will see the hold to pull until one library triggers the hold.
Holds to Pull
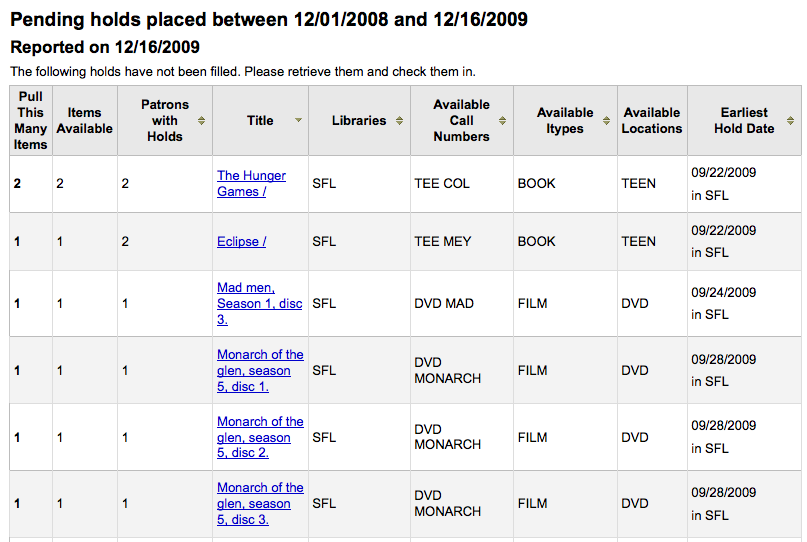
You can limit the results you see by using the Refine box on the left side of the page:
Refine Holds to Pull Report
Holds awaiting pickup
This report will show all of the holds that are waiting for patrons to pick them up.
Holds Awaiting Pickup
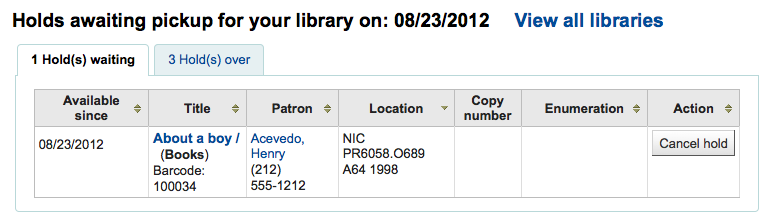
Items that have been on the hold shelf longer than you normally allow (based on the ReservesMaxPickUpDelay preference value) will appear on the ‘Holds Over’ tab, they will not automatically be cancelled unless you have set the cron job to do that for you, but you can cancel all holds using the button at the top of the list.
Items waiting on the hold shelf too long
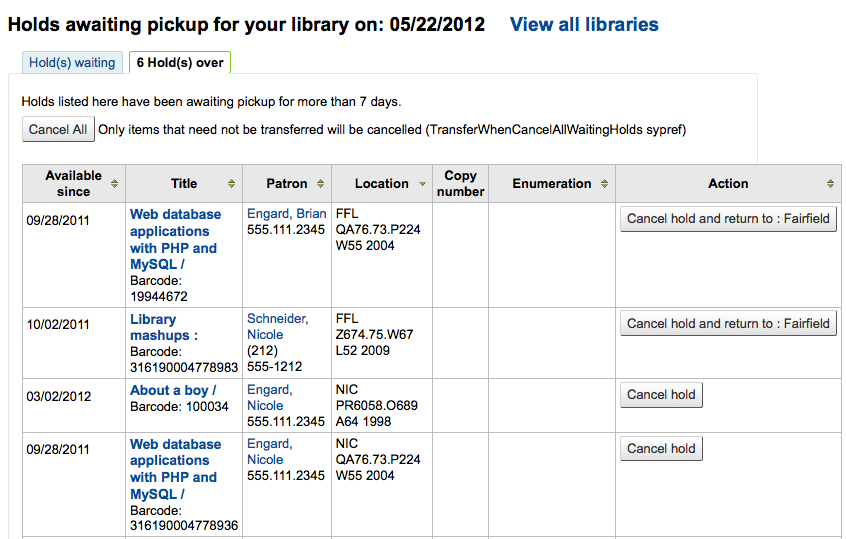
Hold ratios
Hold ratios help with collection development. Using this report you will be able to see how many of your patrons have holds on items and whether you should buy more. By default it will be set to the library needing 3 items per hold that has been placed. The report will tell you how many additional items need to be purchased to meet this quota.
Hold Ratios
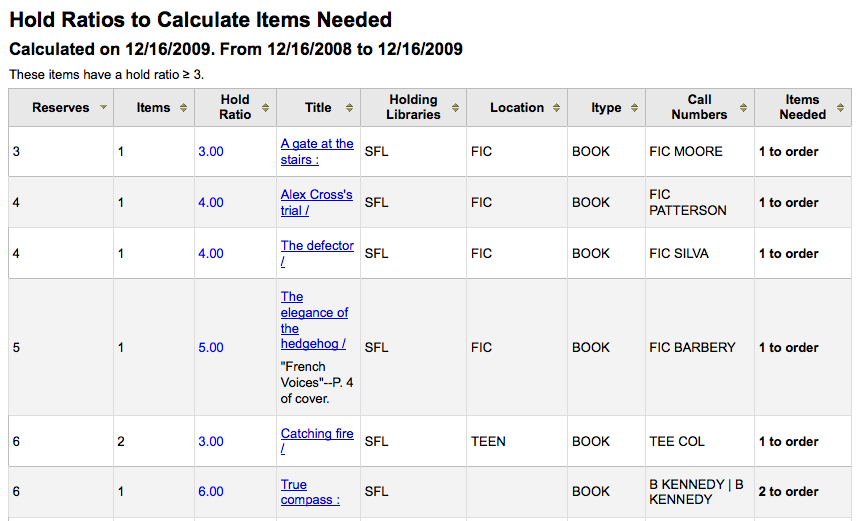
Transfers to receive
This report will list all of the items that Koha thinks are in transit to your library.
Transfers to Receive
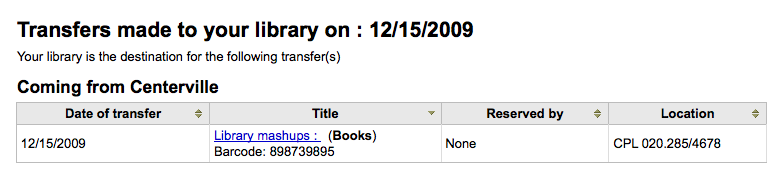
If your transfers are late in arriving at your library you will see a message stating how late your items are.
Late transfers include warning messages
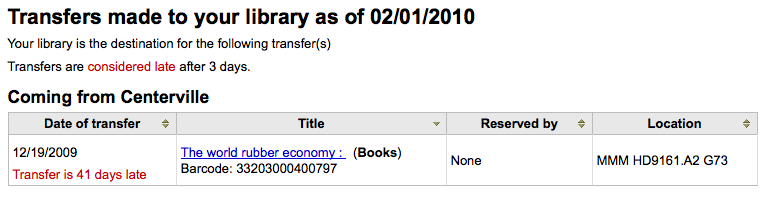
Important
An item is considered late based on the number of days you have entered in the TransfersMaxDaysWarning system preference.
Overdues
Important
For libraries with a large patron base, this report may take a significant amount of time to run.
Tip
Large libraries can choose to filter the report before it runs by setting the FilterBeforeOverdueReport system preference to ‘Require’.
This report will list all items that are overdue at your library.
Overdues List
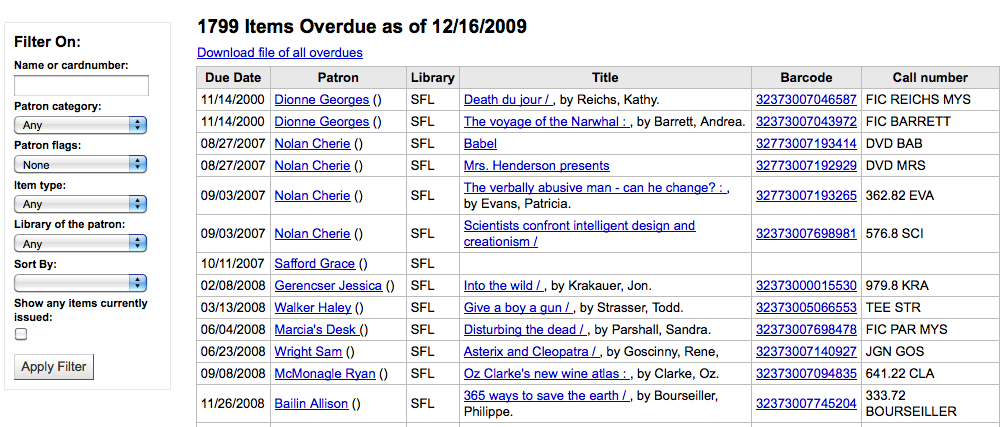
The report can be filtered using the menu options found on the left of the report.
Overdues with fines
This report will show you any overdues at your library that have accrued fines on them.
Overdues with fines
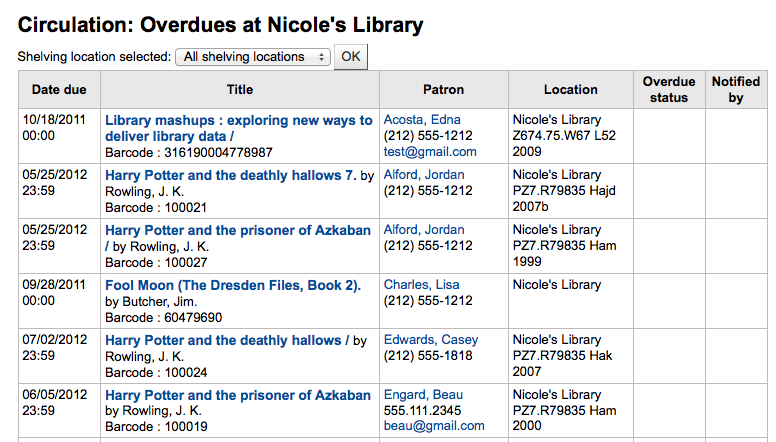
If you would like to limit the report you can use the pull down menu at the top to limit to a specific shelving location at your branch. To see overdues with fines at other branches you will have to change your branch or log in at that branch.
Important
If you do not charge fines and/or don’t have the fines cron job running you will see no data on this report.
Tracking In house Use
Many libraries track the use of items within the library. This can be done in Koha one of two ways. The first is to create one or more Statistical Patrons. When collecting items that have been used within the library, you will want to check them out to your statistical patron:
Check Out Items to Stats Patron
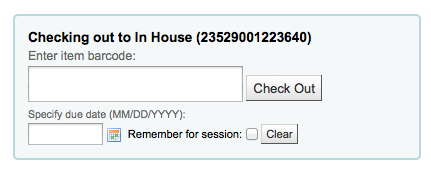
Instead of marking the item as ‘checked out’ the system will record that the item was used in house:
Local Use Recorded

Repeat these steps for all items that have been used within the library to keep accurate statistics for item use.
The other way to record local use of items is to set your RecordLocalUseOnReturn preference to ‘Record.’ Then whenever you check an item in that is not checked out and not on hold a local use will be recorded.
Local Use Recorded

Tip
If you have RecordLocalUseOnReturn set to ‘Record’ you can still use your statistical patrons to record local use as well.
In Processing / Book Cart Locations
Koha allows for handling temporary locations like the processing center and/or book carts throughout the library. For this feature to work you must first make sure you have authorized values set in the LOC category for PROC (Processing Center) and CART (Book Cart).
CART & PROC values in LOC
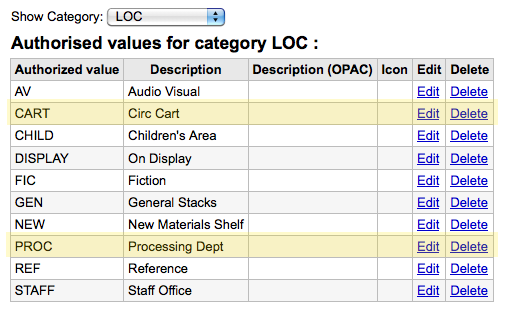
Next you need to set the NewItemsDefaultLocation system preference to PROC. This will set the new items to the Processing Center as their default location.
Create items with their desired final shelving location.
These newly cataloged items will be temporarily set to the PROC location and will display with whatever description PROC has. The original location code entered at item creation is stored in the new items column ‘permanent_location’, for future use. Items will stay in the PROC location until they are checked in. To have those items then move to the shelving cart: # Turn on the InProcessingToShelvingCart
system preference
- # Check in those newly-created items and they will be moved
to the location code of CART and display with whatever description CART has.
- # A cron job runs at
specified intervals to age items from CART to the permanent shelving location. (For example, an hourly cron entry of cart_to_shelf.pl –hours 3 where –hours is the amount of time an item should spend on the cart before aging to its permanent location.) - .. tip:: If the ReturnToShelvingCart
system preference is turned on, any newly checked-in item is also automatically put into the shelving cart, to be covered by the same script run.
Important
Checkins with confirmed holds will not go into the shelving cart. If items on the shelving cart are checked out, the cart location will be cleared.
Self Checkout
Koha comes with a very basic self checkout module. To enable this module you need to set the WebBasedSelfCheck preference to ‘Enable.’ To use this module you have to log in as a staff member with circulation permissions.
Tip
Create a staff patron specifically for this action so that you don’t leave a real staff client logged into a computer all day
There is no link to the Self Checkout module, but a simple addition to the intranetuserjs system preference can add one.
$(document).ready(function(){ $(“#login #submit”).parent().after(“<p><a href=\”http://YOUR_KOHA_OPAC_URL/cgi-bin/koha/sco/sco-main.pl\” target=\”_blank\”>Self-Checkout</a></p>”); });
Important
The code above has line breaks added to make it more readable, please be sure to enter the above as one line in when putting it in the system preference.
The link will then appear at the bottom of the log in page:
Self Checkout Link on Staff Login
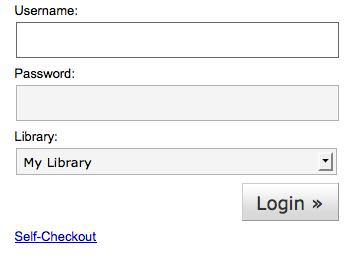
You can also access this module by going to : http://YOUR_KOHA_OPAC_URL/cgi-bin/koha/sco/sco-main.pl
When on the self checkout page depending on your value in the SelfCheckoutByLogin preference you will be asked to enter you cardnumber
Self Checkout Patron Card Number
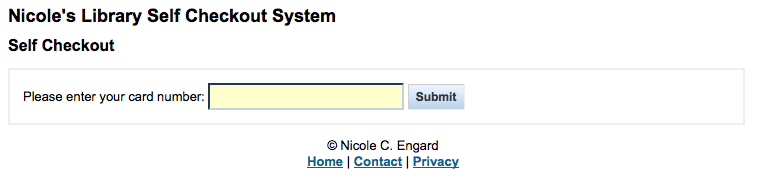
or your username and password:
Shelf checkout by login
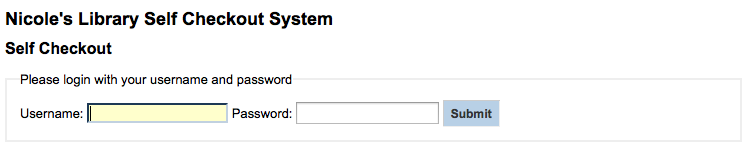
Once you’re logged in to the self check module you will be asked to scan the items you are checking out
Self Checkout
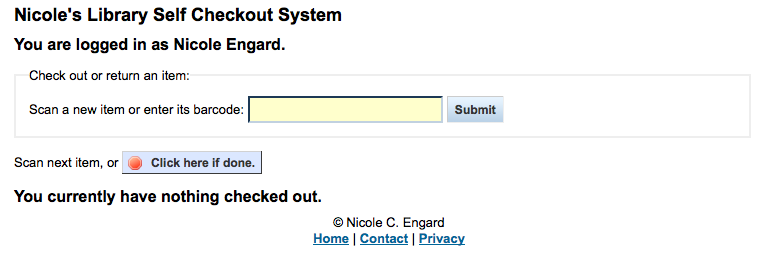
As you scan items they will appear below the barcode box
Self Checkout Summary

When you are finished scanning items it is important to click the ‘Click here if done’ button to log the patron out and prepare for the next patron.
When attempting to check items out there are some instances where error messages will appear and the patron will be directed to the librarian. This will happen even if you are allowing overrides on circulation functions. Only a librarian can override a circulation block and so patrons must go to the librarian for help in these situations.
Self Checkout Error Message
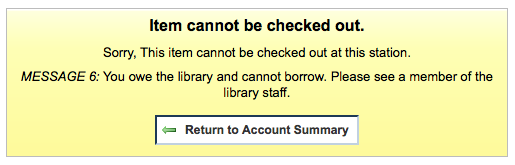
Offline Circulation Utility
Franois Charbonnier
BibLibre
Nicole C.
Engard
Changed content where necessary.
2012
Firefox Plugin
There is an offline circulation tool that you can add to your Firefox browser as a plugin/addon. To do so, just go to https://addons.mozilla.org/en/firefox/addon/koct/ page and click on the “install now” button. You may have to confirm the installation, just click on “install now” and then restart Firefox to complete the installation.
Once you have installed the plugin and restarted Firefox, you will see the Koha logo in the add-on bar at the bottom right of Firefox.
Koha Icon on Add-on Bar

A click on the logo will open the tool in its own window.
Koha Offline Circ Tool
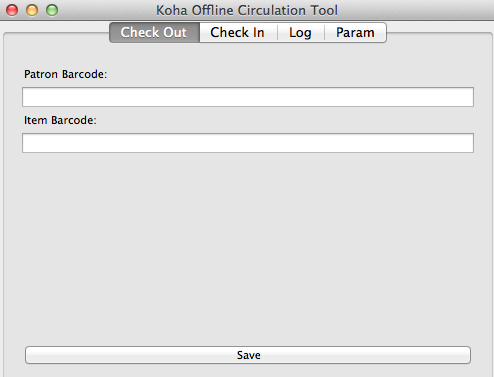
The plugin consists of four tabs:
The Check Out tab is where you check out items
The Check In tab is where you check in items
The Log tab keeps track of every transaction done while in offline mode - The log will keep information until you empty it. Each
time you open the plugin and it contains data in the log it will warn you Koha Offline Circ Warning .. image:: images/circ/koctwarn.png If you’d like to clear the log, check the ‘I want to delete rows’ box before hitting the ‘OK’ button. Otherwise clicking ‘OK’ will keep the items in the log and let you continue working with the tool.
The Param tab is to set up the plugin
The first thing you want to do then is to set up the plugin. Go to the Param tab to set up the plugin
Koha Offline CIrc Params
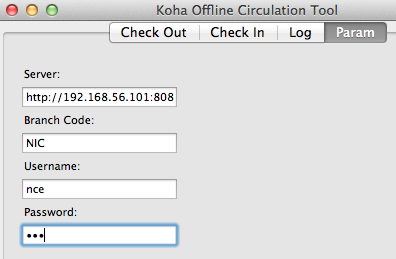
Answer the 4 questions presented:
- Server = the URL of the librarian interface
- Branch Code = the code for the branch where you are located
- Username = your staff account login
- Password = your staff account password
Important
To save the settings, you will have to close the plugin window and re-open it by clicking again on the Koha logo in the add-on bar.
Tip
You can create a staff account dedicated to the offline circulation. So that, no matter who is at the circulation desk, they can all use the same login. Along those lines, you can use a group login that you already have in place for circulation as well.Once you have everything set up you can start checking items
in and out.
Checking out:
Koha Offline Circulation Check Out
- Go to the Check Out tab
- Scan the patron barcode
- Scan the item barcode
- Click ‘Save’
Checking in:
Koha Offline Circulation Check In
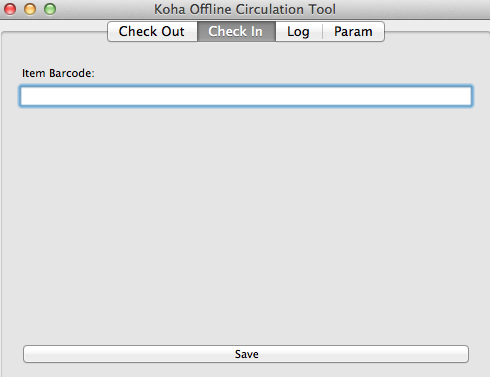
- Go to the Check In tab
- Scan the item barcode
- Click Save
Each time, you check out or check in an item, a new transaction is recorded in the local plugin database and you will see, at the bottom of the plugin how many transactions has been made during the offline circulation. For example, “10 Row(s) Added” means you did 10 transactions.
Koha Offline Circulation Tool Count

Then, if you want an overview of every transaction, go to the Log tab. This tab will show you the transactions in the plugin database
Koha Offline Circulation Log
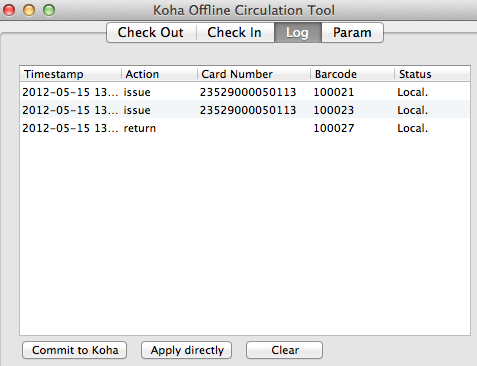
Tip
The status will be “Local.” as long as you are offline and don’t process the transactions into Koha.When your Internet connection comes back up you will want to
get these transactions in to Koha. Before processing these transactions you should be aware of a few issues.
Because you are not connected to your Koha database when using this plugin holds will need additional processing. If an item you check in while offline has a hold, the hold is kept on the item. Since, you can’t confirm holds found during the processing of every check in, the holds stay on the item and will need to be managed later. If you only checked in a few items you can just keep a record of them all. If you checked in a lot of items you can use the Holds Queue once it rebuilds to see what holds made it to the shelf erroneously.
Similarly, if an patron card was expired, the offline circulation tool won’t know about it, so the checkout will be recorded regardless of the patron’s account being blocked normally.
You have two options for adding this data to Koha
Commit to Koha - If you checked in/out on more than one computer at the
same time, what you want is to process every transaction consistently. Let’s say for instance that one patron checked a book out on one computer and then checked the same book in on another computer. To be consistent, you need to record the check out first and then the check in. Not the opposite! To do so, you need to group every transaction in one place, sort them all and then, process everything. So, you need to use the “Commit to Koha” option from every plugin/computer you worked with. This way, the log will go to Koha and be accessible from the Offline Circulation page. Circulation Menu .. image:: images/circ/offlinecirclink.png
Get there: Circulation > Offline Circulation (Firefox add-on) Offline Circulation .. image:: images/circ/offlinecirclog.png
Once all of the logs from all of the circulation computers are loaded you will be able to check them all or select just those you want to process into Koha.
Click on the Process button and Koha will record every sorted transaction one by one. For each transaction, the status will change to: - “Success.” if the transaction was processed
correctly
- “Borrower not found.” if the borrower card number is incorrect
- “Item not found.” if the item barcode is wrong
- “Item not issued.” if you checked in an available item
Once finished you will have a summary of all of your transactions Offline Circulation Summary .. image:: images/circ/offlinecircsuccess.png
Apply directly - If you performed all of the circulation actions on one
computer then everything is sorted already so you can choose to “Apply directly”
The status column will be updated to let you know if the transactions were applied - “Success.” if the transaction was processed
correctly
- “Borrower not found.” if the borrower card number is incorrect
- “Item not found.” if the item barcode is wrong
- “Item not issued.” if you checked in an available item
Once you’re finished you can review all of the items right in the Log tab Koha Offline Circulation Apply Directly .. image:: images/circ/koctdirectly.png
Once you are done you can clear the log by clicking Clear. If you don’t you will be warned the next time you open the Offline Circulation tool.
Koha Offline Circulation Tool Warning
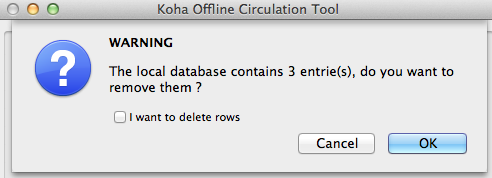
Offline Circ Tool for Windows
The Offline Circulation Utility can be downloaded at: http://millruntech.com/koha/koha-offline-circulation
Upload Offline Circ File
The offline circulation tool for Windows will generate a KOC file that you can upload into Koha once your system comes back up.
On the Circulation menu click ‘Offline Circulation File (.koc) Uploader’
Circulation menu
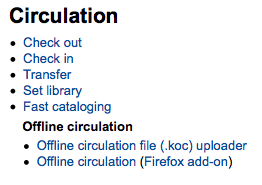
Browse your computer for the *.koc file
Upload KOC File
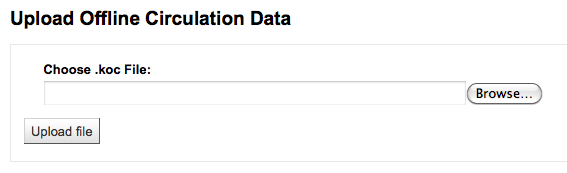
Once the file is uploaded, click the process the file
Process offline circulation file
When this is complete you’ll see the summary of actions from when you were offline (including any errors).
Summary of offline actions
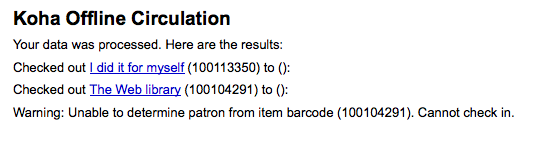
Cataloging
Before you start cataloging in Koha you’re going to want to do some basic setup. Refer to the Implementation Checklist for a full list of these things. Most importantly you’re going to want to make sure that your Frameworks are all defined the way you want. Once in the cataloging module you will not be able to add or remove fields and subfields so your frameworks must be ready before you start cataloging.
- Get there: More > Cataloging
Bibliographic Records
In Koha the bibliographic record contains the main information related to the material. This includes things like the title, author, ISBN, etc. This information is stored in Koha in Marc (different flavors of Marc are supported in Koha). Once this information is saved, items or holdings can be attached.
Adding Records
Records can be added to Koha via original or copy cataloging. If you would like to catalog a record using a blank template
Click ‘New Record’ New Record Menu .. image:: images/cataloging/newfromframework.png - Choose the framework you would like to base your record
off of
If you want to catalog a record based on an existing record at another library
Click ‘z39.50 Search’ Z39.50 Search .. image:: images/cataloging/zsearch.png - Search for the item you would like to catalog
Tip
If no results are found, try searching for fewer fields, not all Z39.50 targets can search all of the fields above.
Search targets can be altered by using the Z39.50 Admin area.
From the results you can view the MARC or Card view for the records or choose to Import them into Koha Z39.50 Search Results .. image:: images/cataloging/zsearchresults.png - In addition to the Import link to the right of each
title, you can click on the title you’re interested in and a menu will pop up with links to preview the record and import it Import Link Popup on Z39.50 Search Results .. image:: images/cataloging/importz39.png
- If you don’t find the title you need in your Z39.50 search results you can click the ‘Try Another Search’ button at the bottom left of your results Try another search .. image:: images/cataloging/tryanotherzsearch.png
Once you’ve opened a blank framework or imported a record via Z39.50 you will be presented with the form to continue cataloging
Add MARC Record
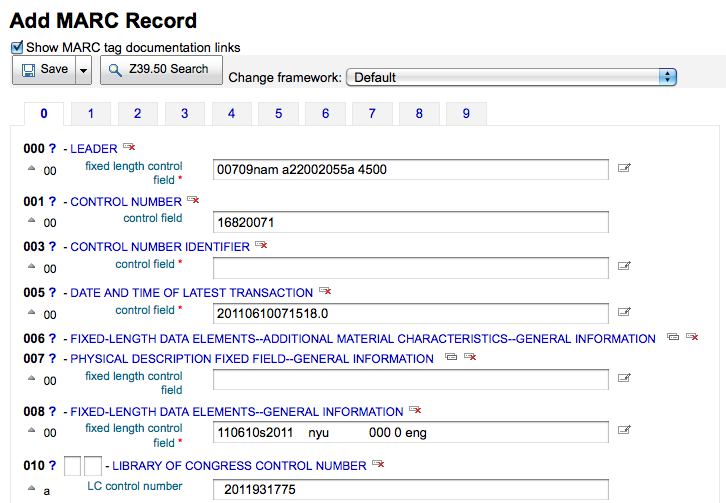
To expand a collapsed tag click on the tag description
To get help from the Library of Congress on a Marc tag click the question mark (?) to the right of each field number - If you feel that this clutters the screen you can hide
the question marks by unchecking the box next to the ‘Show MARC tag documentation links’ note at the top right of the editor Show MARC tag documentation links checkbox .. image:: images/cataloging/marcdoclinks.png
Sometimes fields may not be editable due to the value in your BiblioAddsAuthorities system preference. If you have this preference set to not allow catalogers to type in fields controlled by authorities you may see a lock symbol to the left of the field. Authority fields locked against editing .. image:: images/cataloging/lockedauthority.png - If this icon appears you must click the icon to the
right of the field to search for an existing authority. Search for authority .. image:: images/cataloging/catauthoritysearch.png
- From the results list click ‘Choose authority’ to bring that into your catalog record Authority search results .. image:: images/cataloging/catauthoritysearchresults.png
To duplicate a field click on the ‘repeat this tag’ icon to the right of the tag Duplicate a Field .. image:: images/cataloging/dupfield.png - To move subfields in to the right order, click the up
arrow to the left of the field
- To duplicate a subfield click on the clone icon (to remove a copied field, click the delete clone icon) to the right of the field Clone Subfield .. image:: images/cataloging/clonesubfield.png
- To remove a subfield (if there is more than one of the same type), click the - (minus sign) to the right of the field
To use a plugin click on the icon to the right of the filed Leader Builder Plugin .. image:: images/cataloging/leaderbuilder.png - Some fixed fields have editors that will change based on
the material type you’re cataloging (for example the 006 and the 008 fields) 008 Plugin .. image:: images/cataloging/008plugin.png
Once you’ve finished, click the ‘Save’ button at the top and choose whether you want to save and view the bib record you have created or continue on to add/edit items attached to the record Record save options .. image:: images/cataloging/savecataloging.png - If you are about to add a duplicate record to the system
you will be warned before saving Duplicate Record Warning .. image:: images/cataloging/duprecordwarn.png
Adding Analytic Records
Libraries sometimes make journal articles and articles within monographs and serials accessible to library patrons through analytics cataloging. Analytics cataloging creates separate bibliographic records for these articles, chapters, sections, etc. found within a larger resource such as a book, an article within a journal, newspaper or serial. In analytics cataloging, although a separate bib record is created for the title, it is not physically separated from the host item. Learn more about Analytics in Chapter 13 of AACR2.
If you would like to catalog analytic records in Koha you first need to update the EasyAnalyticalRecords preference to ‘Display.’
After cataloging your analytic record (see Adding Records for more on creating records) click ‘Edit’ from the normal view and choose to ‘Link to Host Item’
Link to Host Item
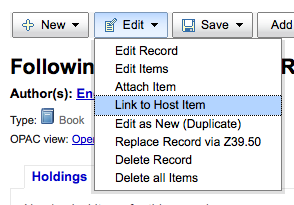
This will prompt you to enter the barcode for the item this record should be linked to.
Barcode for Analytic Linking
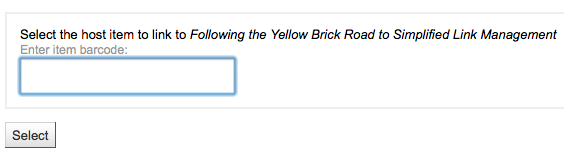
After entering the item’s barcode and clicking ‘Select’ you will receive a confirmation message.
Analytic Link Success

The record will now have the 773 field filled in properly to complete the link.
773
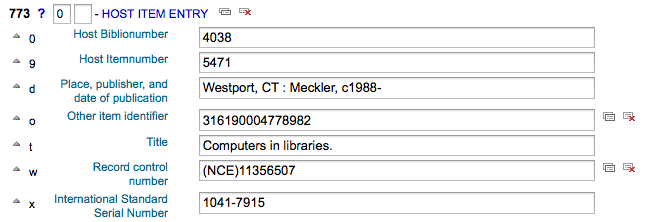
If you have linked an analytic record incorrectly you can remove that link by editing the item on the analytic record (not the host record). To do this, go to the analytic record and click the ‘Edit’ button and choose to ‘Edit items’. To the left of each item you will see two options.
Edit Analytic Item Record

- Clicking ‘Edit in Host’ will allow you to edit the item on the host record.
- Clicking ‘Delink’ will remove the 773 field and the link between the analytic and the host.
To view all of the items tied to the host record, do a search for the record, click the Analytics tab on the left and the analytics tied to each barcode will be shown under the “Used in” column.
Analytics Tab

Tip
It is also possible to create analytic records from this screen by clicking on “Create Analytics”
You can also see the analytics attached to this record by clicking the ‘Show Analytic’ link towards the top of the record in the normal view.
Show Analytics on Bib Record
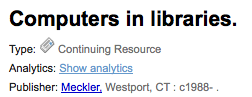
Editing Records
To edit a record you can click ‘Edit Biblio’ from the search results on the cataloging page
Edit Biblio Option on Search Results

or by clicking the Edit button on the Bibliographic Record and choosing ‘Edit Record’
Edit Record Option on Bibliographic Record
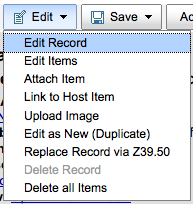
The record will open in the MARC editor
Editing MARC Record
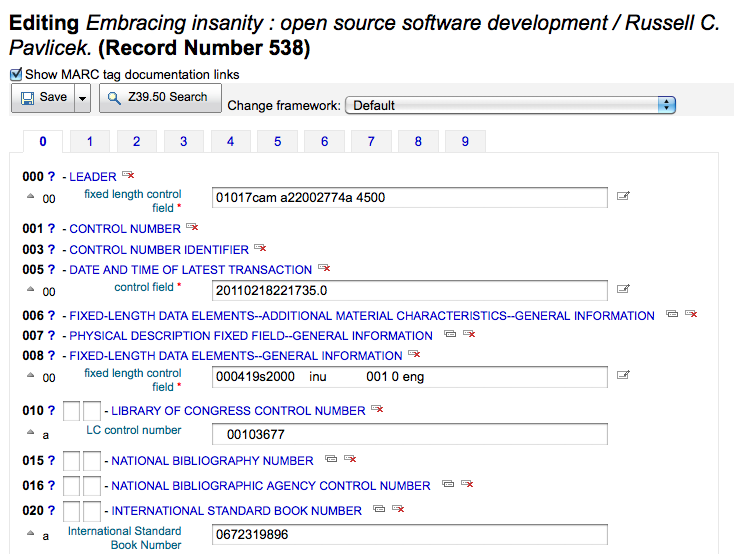
The alternative is to search via Z39.50 to overlay your record with a fuller record found at another library. You can do this by choosing ‘Replace Record via Z39.50’ from the Edit menu.
Replace via Z39.50
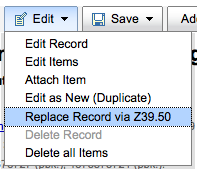
Once you choose that you will be brought to a Z39.50 search window to search other libraries for the record in question.
Once you have made your edits (via either method) you can click ‘Save’ at the top left of the editor.
You can also use the edit menu to add your own custom cover image if you have either OPACLocalCoverImages and/or LocalCoverImages set to ‘Display’ by choosing ‘Upload Image’ from the menu.
Upload Image
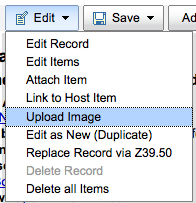
Choosing to ‘Upload Image’ will take you to the Upload Local Cover Image Tool.
Duplicating Records
Sometimes a copy of the record you need to catalog can’t be found via Z39.50. In these cases you can create a duplicate of similar record and edit the necessary pieces to create a new record. To duplicate an existing record click ‘Edit as New (Duplicate)’ from the Edit menu on the Bibliographic Record
Edit as New (Duplicate) Bibliographic Record
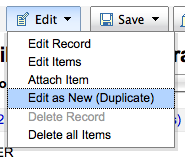
This will open a new MARC record with the fields filled in with the values from the original Bibliographic Record.
New Duplicate Record
Merging Records
If you would like to merge together multiple records you can do that via the Lists tool. Learn more here.
Item Records
In Koha each bibliographic record can have one or more items attached. These items are sometimes referred to as holdings. Each item includes information to the physical copy the library has.
Adding Items
After saving a new bibliographic record, you will be redirected to a blank item record so that you can attach an item to the bibliographic record. You can also click ‘Add/Edit Items’ from the cataloging search results
Add/Edit Items Option on Search Results
or you can add new item at any time by clicking ‘New’ on the bibliographic record and choosing ‘New Item’
New Item Button
The item edit form will appear:
Add item form
At the very least, if you plan on circulating the item, the following fields should be entered for new items:
2 - Source of classification
a - Permanent location
b - Current location
o - Full call number
p - Barcode
v - Cost, replacement price - This value will be charged to patrons when you mark an
item they have checked out as ‘Lost’
y - Koha item type
To make sure that these values are filled in you can mark them as mandatory in the framework you’re using and then they will appear in red with a ‘required’ label. The item will not save until the required fields are filled in.
Required Item Subfield

Tip
To make item subfields required in a framework you’ll want to edit the 952 field in the framework editor.
Below the add form there are 3 buttons for adding the item
Add Item Buttons

- Add Item will add just the one item
- Add & Duplicate will add the item and fill in a new form with the same values for your to alter
- Add Multiple Copies will ask how many copies and will then add that number of copies adding +1 to the barcode so each barcode is unique
Your added items will appear above the add form once submitted
Items

Your items will also appear below the bibliographic details on the bib record display.
List of Items on the Bib Record
If you have SpineLabelShowPrintOnBibDetails set to ‘Display’ then there will also be a link to print a quick spine label next to each item.
List of Items on the Bib Record with a Print Label link
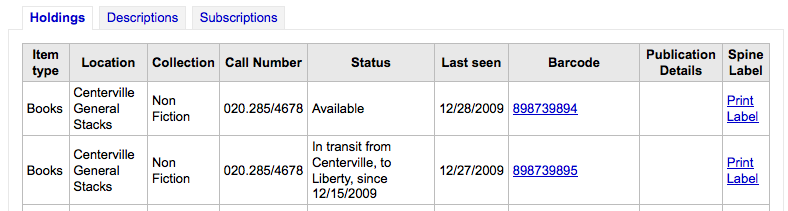
Editing Items
Items can be edited in several ways.
- Clicking ‘Edit’ and ‘Edit Items’ from the bibliographic record Edit Items Menu Option .. image:: images/cataloging/edititem.png Which will open up a list of items where you can click ‘Edit’ to the left of the specific item you would like to edit. Edit individual items .. image:: images/cataloging/edititemlink.png
- Clicking ‘Edit Items’ beside the item on the ‘Items’ tab Items Tab .. image:: images/cataloging/itemstab.png Which will open up a list of items where you can click ‘Edit’ to the left of the specific item you would like to edit. Edit individual items .. image:: images/cataloging/edititemlink.png
- Clicking ‘Edit’ and then ‘Edit items in batch’ Edit items in a batch .. image:: images/cataloging/editinbatch.png This will open up the batch item modification tool where you can edit all of the items on this record as a batch.
Quick Item Status Updates
Often circulation staff need to change the status of an item to Lost or Damaged. This doesn’t require you to edit the entire item record. Instead clicking on the item barcode on the checkout summary or checkin history will bring you to an item summary. You can also get to the item summary by clicking on the Items tab to the left of the bib detail page.
Item Edit
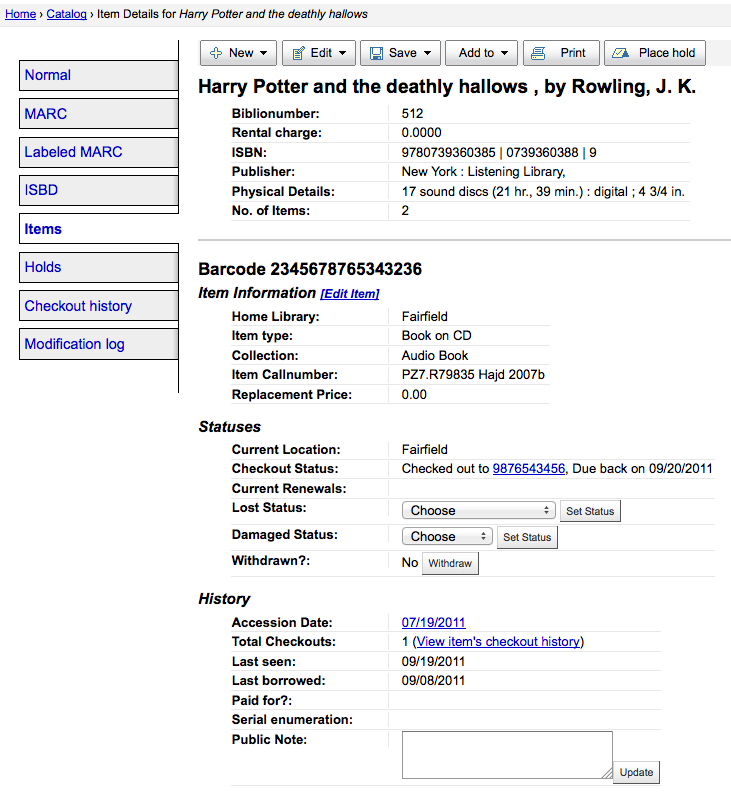
From this view you can mark an item lost by choosing a lost status from the pull down and clicking the ‘Set Status’ button.
Edit Lost Status
You can also mark an item as damaged by choosing a damaged status from the pull down and clicking the ‘Set Status’ button.
Edit Damaged Status
Item Information
To the left of every bibliographic record there is a tab to view the items.
Items Tab
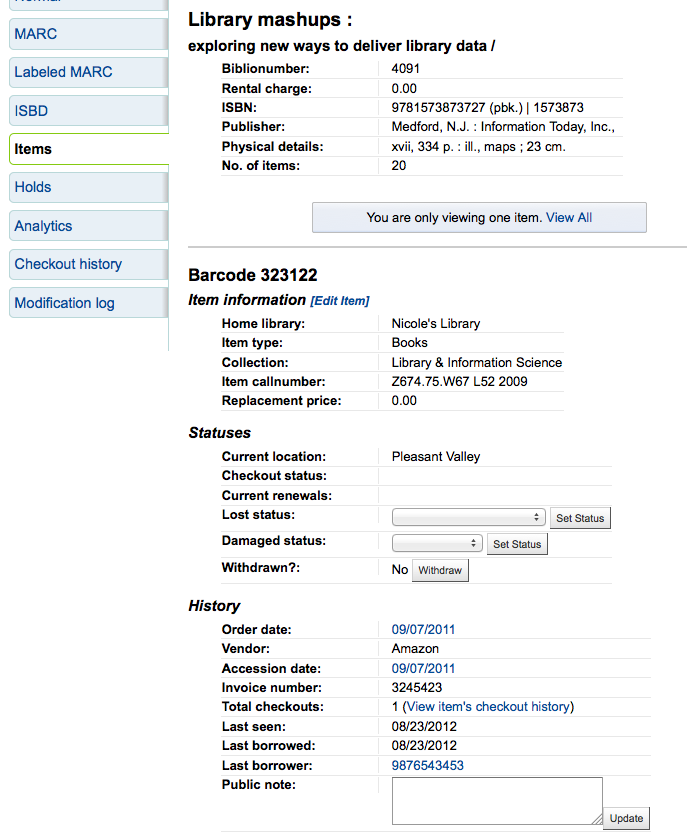
Clicking that tab will give you basic information about the items. If you ordered the item via the acquisitions module then the History section will include information about the order.
History with order info
If the Order or Accession date is linked, clicking it will bring you to the acquisitions information for that item.
Moving Items
Items can be moved from one bibliographic record to another using the Attach Item option
Attach Item Option
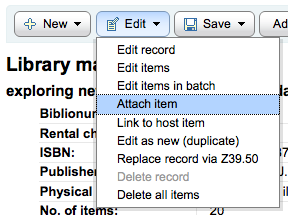
Visit the bibliographic record you want to attach the item to and choose ‘Attach Item’ from the ‘Edit’ menu.
Attach Item Form
Simply enter the barcode for the item you want to move and click ‘Select’
If you want to move all items to a new record creating only one bibliographic record you can use the Merge Records tool instead.
Deleting Items
There are many ways to delete item records. If you only need to delete one item you can do this by opening up the detail page for the bib record and clicking the ‘Edit’ button at the top. From there you can choose to ‘Edit items’.
‘Edit Items’ menu option
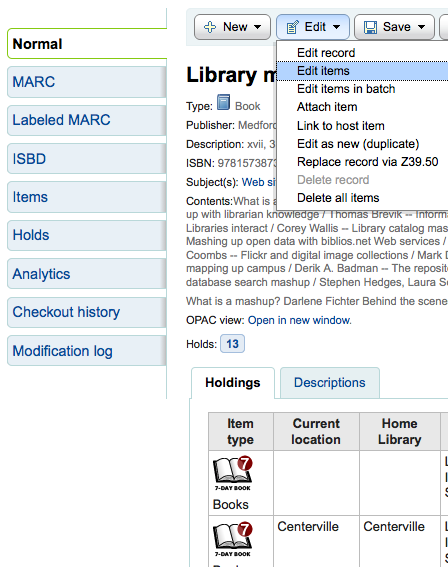
You will be presented with a list of items and next to each one will be a link labeled ‘Delete’. Click that link and if the item is not checked out it will delete that item.
Delete link on the left
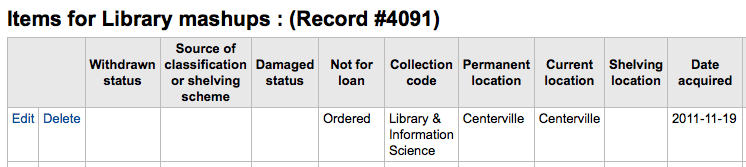
If you know that all of the items attached to your record are not currently checked out you can use the ‘Delete all items’ option under the ‘Edit menu’ and it will remove all items from the record.
Finally you can use the batch delete tool to delete a batch of items.
Item Specific Circulation History
Each bibliographic record keeps a circulation history (with or without the patron information depending on your settings), but each item also has its own circulation history page. To see this, click on the ‘Items’ tab to the left of the record you are viewing.
Items tab
Below the ‘History’ heading is a link to ‘View item’s checkout history,’ clicking that will open up the item’s history which will look slightly different from the bibliographic record’s history page.
Item Specific Circulation History
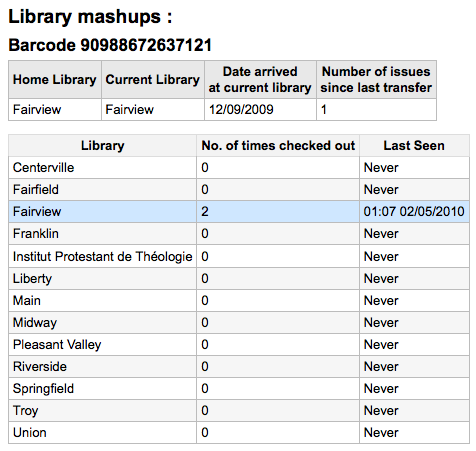
Authorities
Authority records are a way of controlling fields in your MARC records. Using authority records will provide you with control over subject headings, personal names and places.
Adding Authorities
To add a new authority record, choose the authority type from the ‘New Authority’ button.
New Authority Record Options
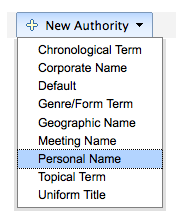
The form that appears will allow you to enter all of the necessary details regarding your authority record.
New Authority Record
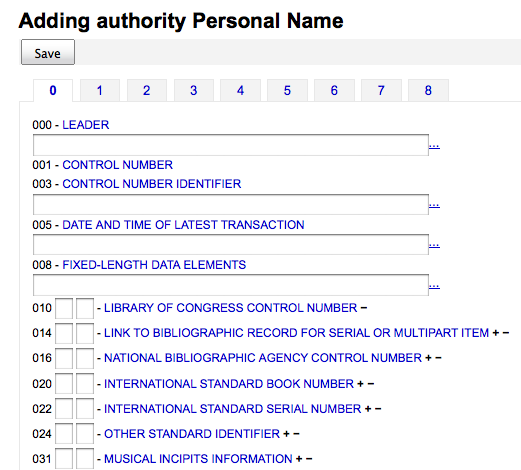
To expand collapsed values simply click on the title and the subfields will appear.
Searching Authorities
From the authorities page you can search for existing terms and the bibliographic records they are attached to.
Authority Search

From the results you will see the authority record, how many bibliographic records it is attached to, and a delete link (if there are not bibliographic records attached).
Authority Search Results
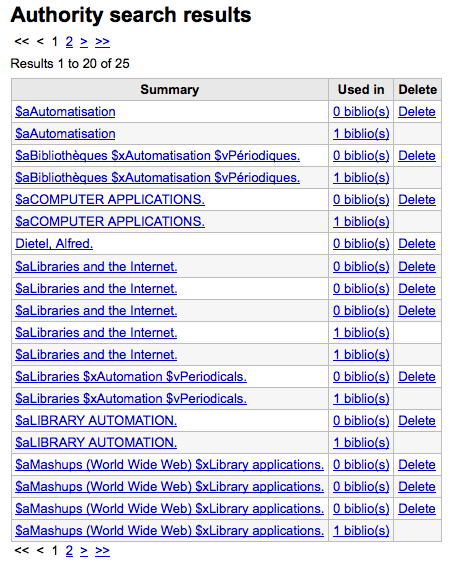
Clicking on the authority record summary will open the full record and the option to edit the record.
Authority Record
Editing Authorities
Authorities can be edited by clicking on the authority summary from the search results and then clicking the ‘Edit’ button above the record.
Edit Authority Record
Once you’ve made the necessary edits, simply click ‘Save’ and if you have the dontmerge system preference set to ‘Do’ the next time the merge_authorities.pl cronjob runs it will update all of the bib records that use that authority.
To delete an authority record you first must make sure it’s not linked to any bibliographic records. If it is not used by any bibliographic records a ‘Delete’ link will appear to the right of the record on the search results and as a button that appears after clicking on the summary of the authority record.
Cataloging Guides
Jared Camins-Esakov
American Numismatic Society
Nicole C.
Engard
Changed content where necessary.
2010
Bibliographic Record Cataloging Cheat Sheet
Cataloging Guide
Tag
Label
Description
Instructions
000
LEADER
Describes the record(i.e. surrogate) – is it a record for a monograph? A serial?
Click in this field to fill it in. Then set “Bibliographic level” to ‘a’ for articles or ‘s’ for serials. Otherwise, leave everything as is.
001
CONTROL NUMBER
Accession number.
Enter the accession number written inside the item here. For articles and items which do not have accession numbers, leave blank.
003
CONTROL NUMBER IDENTIFIER
Your MARC Organizational Code
Click in this field to fill it in (will auto fill if you have your MARCOrgCode preference set).
005
D & T LATEST TRANSACTION
Current date and time.
Click in this field to fill it in.
008
FIXED-LENGTH DATA ELEMENTS
Field containing computer-readable representations of a number of things.
Generally you will only use ‘s’ (single) or ‘m’ (multiple) options for position 06- use the former when the item was published in a single year, the latter when it was published over the course of several. If there is a single date, only enter a date in the first date field (positions 07-10). Enter the three-digit country code in positions 15-17, being sure to add spaces if the country code is fewer than three characters long. If there is an index, note that fact in position 31. Enter the three-letter language code in positions 35-37.
010
LCCN
A number assigned by the Library of Congress to uniquely identify the work.
Check on the copyright page of the book (if it was published in the US) or the LC catalog for this number. If you can’t find it, don’t worry about it.
020
ISBN
Unique number used by publishers to identify books.
If this number isn’t listed on the book, there probably isn’t one.
022
ISSN
Unique number used by publishers to identify serials.
If this number isn’t listed on the book, there probably isn’t one.
033
DATE/TIME OF EVENT
Used for auction dates. Required for auction catalogs.
For auctions that took place on only one day, enter the date of the auction in the format YYYYMMDD in the subfield ‘a’ and a ‘0’ in the first indicator. For auctions that took place over two consecutive days or any number of non-consecutive days, create a subfield ‘a’ for each day with the date in the format YYYYMMDD, and put a ‘1’ in the first indicator. For auctions that took place over more than two consecutive days, create a subfield ‘a’ (in format YYYYMMDD) for the first day and a subfield ‘a’ (also in format YYYYMMDD) for the last day, and put a ‘2’ in the first indicator.
040
CATALOGING SOURCE
Identifies which libraries created and modified the record.
For imported records, add a subfield ‘d’ with your OCLC code as the value. For new records, make sure that the subfield ‘c’ with your OCLC code as the value.
041
LANGUAGE CODE
Identifies all the languages used in an item, when two or more languages are present.
For significant portions of a text in a given language, there should be a subfield ‘a’ with that language code. If there are only summaries or abstracts in a specific language, create a subfield ‘b’ with that language code.
100
MAIN ENTRY–PERSONAL
Authorized form of the main author’s name
See Authorized headings sheet and AACR2. The first indicator should generally be a ‘1’, to indicate that the entry is surname first. If the name consists only of a forename, however, the first indicator should be ‘0’.
110
MAIN ENTRY–CORPORATE
Authorized form of the name of the main corporate author. Required for auction catalogs.
Auction catalogs should use a 110 field rather than a 100 field. See Authorized headings sheet and AACR2. Set the first indicator to ‘2’.
111
MAIN ENTRY–MEETING
Authorized form of the name of a meeting which acted as a main offer (e.g. conference proceedings)
See Authorized headings sheet and AACR2. Set the first indicator to ‘2’.
245
TITLE STATEMENT
Transcription of the title statement from the title page (or chief source of information)
Enter the title in subfield ‘a’, the subtitle in subfield ‘b’, and the statement of responsibility in subfield ‘c’. If you are creating a record for a single volume or part of a multi-part item, you should put the part number in subfield ‘n’ and the part title in subfield ‘p.’ For auction catalogs, the date (in ‘MM/DD/YYYY’ format) should be listed in square brackets in subfield ‘f’. See ISBD punctuation sheet. Set the first indicator to ‘0’ if there is no author, otherwise set it to ‘1’. Set the second indicator to the number of non-filing characters (i.e. characters in an initial articles plus the space... for “The ” set the second indicator to ‘4’).
246
VARYING FORM OF TITLE
Alternate form of title for searching and filing purposes
If the patron might look for the work under a different title, enter it here. Do not include initial articles. The first indicator should be ‘3’, unless the title is merely a variant spelling, in which case the first indicator should be ‘1’.
250
EDITION STATEMENT
Transcription of the edition statement from the title page (or chief source of information)
Transcribe the edition statement exactly as it appears on the title-page. You may abbreviate if the edition statement is very long.
260
PUBLICATION (IMPRINT)
Publication information.
Put the location of publication in subfield ‘a’, the publisher in subfield ‘b’, and the year (or probable year) in subfield ‘c’. See ISBD punctuation sheet.
300
PHYSICAL DESCRIPTION
Physical description
Enter the pagination statement in subfield ‘a’, a brief description of “special” contents such as illustrations or maps in subfield ‘b’ (see AACR2), and the size of the item in subfield ‘c’. See ISBD punctuation sheet.
490
SERIES STATEMENT
Shows the series statement exactly as it appears on the item.
Transcribe the series statement into subfield ‘a’ with the volume number in subfield ‘v’. See ISBD punctuation sheet. Set the first indicator to ‘1’ if you are using an 830. As a general rule, you should do so.
500
GENERAL NOTE
Notes that don’t fit anywhere else.
Enter notes as full sentences, with a separate 500 field for each distinct topic.
501
WITH NOTE
Notes whether the work is bound with the works described by other records.
Put description of relationship in subfield ‘a’.
504
BIBLIOGRAPHY, ETC. NOTE
Indicates whether the work includes a bibliography.
If the work includes a bibliography and index, put the text “Includes bibliographical references (p. XXX-XXX) and index.” in subfield ‘a’. If the work does not include an index, remove that part of the sentence. If the references are scattered throughout the work and not gathered into a distinct sentence, remove the parenthetical statement.
505
FORMATTED CONTENTS
List of contents in a standard format. Unformatted contents can be listed in a 500 (General Note) field.
See ISBD punctuation sheet. Set the first indicator to ‘0’. If you are separately coding authors and titles, set the second indicator to ‘0’. Otherwise, leave the second indicator blank.
518
DATE/TIME OF EVENT NOTE
Used for auction dates.
For auction catalogs, enter the date of the auction in the format ‘January 2, 1984’ in the subfield ‘a’
520
SUMMARY, ETC.
A brief summary or abstract of the book or article.
In general you do not need to write a summary. A summary might be called for, however, with items that cannot be easily reviewed by a patron, such as books with highly acidic paper or CD-ROMs.
546
LANGUAGE NOTE
Note describing the languages used in the work
Only needed for works in multiple languages. See ISBD punctuation sheet.
561
PROVENANCE INFORMATION
Describes the previous ownership of the item.
Used only for rare books.
563
BINDING INFORMATION
Describes the binding of the item.
Used only for rare books.
590
LOCAL NOTE
Local notes. Required for auction catalogs.
Used for auction catalogs to indicate what types of coins are sold in the auction- Roman, Greek, etc.
600
SUBJECT ADDED–PERSONAL
Authorized form of personal names for people discussed in the work
See Authorized headings sheet and AACR2. The first indicator should generally be a ‘1’, to indicate that the entry is surname first. If the name consists only of a forename, however, the first indicator should be ‘0’. If you found the name in the LC authority file, set the second indicator to ‘0’. Otherwise set the second indicator to ‘4’.
610
SUBJECT ADDED–CORPORATE
Authorized form of corporate names for organizations discussed in the work
See Authorized headings sheet and AACR2. Set the first indicator to ‘2’. If you found the name in the LC authority file, set the second indicator to ‘0’. Otherwise set the second indicator to ‘4’.
611
SUBJECT ADDED–MEETING
Authorized form of meeting names for meetings discussed in the work
See Authorized headings sheet and AACR2. Set the first indicator to ‘2’. If you found the name in the LC authority file, set the second indicator to ‘0’. Otherwise set the second indicator to ‘4’.
630
SUBJECT ADDED–UNIFORM TITLE
Authorized form of titles for other works discussed in the work
See Authorized headings sheet and AACR2. Set the first indicator to the number of non-filing characters (i.e. characters in an initial articles plus the space... for “The ” set the first indicator to ‘4’). If you found the name in the LC authority file, set the second indicator to ‘0’. Otherwise set the second indicator to ‘4’.
650
SUBJECT ADDED–TOPICAL
Library of Congress Subject Heading terms describing the subject of the work
See Authorized headings sheet and AACR2. If you found the name in the LC authority file, set the second indicator to ‘0’. Otherwise set the second indicator to ‘4’.
651
SUBJECT ADDED–GEOGRAPHICAL
Library of Congress Subject Heading geographical terms describing the subject of the work
See Authorized headings sheet and AACR2. If you found the name in the LC authority file, set the second indicator to ‘0’. Otherwise set the second indicator to ‘4’.
655
INDEX TERM–GENRE/FORM
Describes what an item is as opposed to what the item is about.
Generally used only for auction catalogs, which should have the genre heading “Auction catalogs.” (make sure to find the authorized heading!) If you found the name in the LC authority file, set the second indicator to ‘0’. If you are using a term from a specific thesaurus, set the second indicator to ‘7’ and put the code for the thesaurus in subfield ‘2’. Otherwise set the second indicator to ‘4’.
690
LOCAL SUBJECT ADDED–TOPICAL
Used for headings from any custom subject authority file.
If there is no appropriate LCSH term, you can use a 690 with subject headings you find on other items in the catalog.
691
LOCAL SUBJECT ADDED–GEOGRAPHICAL
Used for headings from any custom subject authority file.
If there is no appropriate LCSH term, you can use a 691 with subject headings you find on other items in the catalog.
700
ADDED ENTRY–PERSONAL
Used for second authors and other persons related to the production of the work.
See Authorized headings sheet and AACR2. The first indicator should generally be a ‘1’, to indicate that the entry is surname first. If the name consists only of a forename, however, the first indicator should be ‘0’.
710
ADDED ENTRY–CORPORATE
Used for corporate bodies related to the production of the work (e.g. publishers).
See Authorized headings sheet and AACR2. Set the first indicator to ‘2’.
711
ADDED ENTRY–MEETING
Used for meetings related to the production of the work (e.g. symposia that contributed to the work).
See Authorized headings sheet and AACR2. Set the first indicator to ‘2’.
730
ADDED ENTRY–UNIFORM TITLE
Used for uniform titles related to the production of the work (e.g. a work that inspired the present work)
See Authorized headings sheet and AACR2. Set the first indicator to the number of non-filing characters (i.e. characters in an initial articles plus the space... for “The ” set the first indicator to ‘4’).
773
HOST ITEM ENTRY
Describes the larger bibliographic unit that contains the work (e.g. book or journal containing the article being described in the current record)
If the host publication is author main entry, enter the authorized form of the author’s name in subfield ‘a’. Put the title in subfield ‘t’. If the host publication is an independent work, put publication information in subfield ‘d’. When available, ISSN and ISBN should always be used in, in subfields ‘x’ and ‘z’ respectively. Relationship information (e.g. volume number, page number, etc.) goes in subfield ‘g’. Subfield ‘q’ contains an encoded representation of the location of the item: volume, issue, and section numbers are separated by colons, and the first page is entered following a ‘<’ at the end of the subfield. See ISBD punctuation sheet. Set the first indicator to ‘0’. If you want the label “In:” to be generated, leave the second indicator blank. If you want something else displayed before the 773 text, set the second indicator to ‘8’ and add a subfield ‘i’ with the label you want at the beginning of the field (e.g. “$iOffprint from:”).
830
SERIES ENTRY–UNIFORM TITLE
Authorized form of the series name transcribed in the 490 field. Often this will just be the same as the 490.
See Authorized headings sheet and AACR2. Set the second indicator to the number of non-filing characters (i.e. characters in an initial articles plus the space... for “The ” set the second indicator to ‘4’).
852
LOCATION/CALL NUMBER
Provides the section name for pre-barcode books, pamphlets, and some articles and serials.
Do not put anything in this field if you are cataloging a volume which gets only one record and a barcode. If the item does not get a barcode, or you are currently creating a record for an article in a volume, put the section in subfield ‘a’ (see ANS cataloging documentation), and the call number in subfield ‘i’. Set the first indicator to ‘8’.
856
ELECTRONIC ACCESS
Links to material available online.
Put the URL of any electronic copies or summaries, etc. in subfield ‘u’ and a link title in subfield ‘y’. Set the first indicator to ‘4’.
942
ADDED ENTRY ELEMENTS (KOHA)
Used for Koha-specific data.
Set the subfield ‘c’ to the appropriate item type.
Item/Holdings Record Cataloging Guide
This table represents the default embedded holdings data in Koha 3.4. This information can be used for migration or importing data purposes
Koha Embedded Holdings Data
MARC21 Tag/subfield
Data Element
Description
Notes
952$0
Withdrawn status
Default values:
- 0 = Not withdrawn
- 1 = Withdrawn
Coded value, matching Authorized Value category (‘WITHDRAWN’ in default installation)
952$1
Lost status
Default values:
- 0 = Available
- 1 = Lost
- 2 = Long Overdue (Lost)
- 3 = Lost and Paid For
- 4 = Missing in Inventory
- 5 = Missing in Hold Queue
It’s possible to configure OPAC so that lost items don’t display with the hidelostitems system preference.
Coded value, matching Authorized Value category (‘LOST’ in default installation)
952$2
Classification
Classification scheme that defines filing rules used for sorting call numbers.
A choice of classification sources as they are defined in administration. If no classification scheme is entered, the system will use the value entered in the DefaultClassificationSource preference.
952$3
Materials specified
Specific issues of serials or multi-part items.
Displayed when items are checked out and in to tell the staff how many pieces the item has. Copy/volume data is stored in 952$h and $t for display in Normal views.
952$4
Damaged status
Default values:
- 0 = Not damaged
- 1 = Damaged
Coded value, matching Authorized Value category (‘DAMAGE’ in default installation)
952$5
Use restrictions
Default values:
- 0 = No use restrictions
- 1 = Restricted Access
Coded value, matching Authorized Value category (‘RESTRICT’ in default installation). This value has no effect on circulation.
952$7
Not for loan
Default values:
- -1 = Ordered
- 0 = Available for loans
- 1 = Not for Loan
- 2 = Staff Collection
Coded value, matching Authorized Value category (‘NOT_LOAN’ in default installation). Negative number values can still be placed on hold.
952$8
Collection code
Coded value
Coded value, matching Authorized Value category (‘CCODE’ in default installation)
952$9
Item number
System-generated item number.
Does not display in the item record.
952$a
Owning Library **
Branch code
Required. Code must be defined in Libraries, Branches and Groups
952$b
Holding library ** (usually the same as 952$a )
Branch code
Required. Code must be defined in Libraries, Branches and Groups
952$c
Shelving location code
Coded value, matching Authorized Value category (‘LOC’ in default installation)
952$d
Date acquired
YYYY-MM-DD
Date formats in the 952 subfields are required to be in the system internal format for data loading and subsequent item editing: YYYY-MM-DD
952$e
Source of acquisition
Coded value or vendor string
Filled in automatically with the Koha assigned vendor id by Acquisitions when an item is received.
952$g
Purchase price
Decimal number, no currency symbol (ex. 10.00)
Filled in automatically by Acquisitions when an item is received.
952$h
Serial enumeration
Filled in automatically by Serials if the issue is received there.
952$o
Koha full call number
Can be filled in automatically based on the itemcallnumber system preference.
952$p
Barcode *
Max 20 characters
952$t
Copy number
Max 32 characters
952$v
Replacement price
Decimal number, no currency symbol (ex. 10.00)
Filled in automatically by Acquisitions when an item is received.
952$w
Price effective from
YYYY-MM-DD
Date formats in the 952 subfields are required to be in the system internal format for data loading and subsequent item editing: YYYY-MM-DD. Filled in automatically by Acquisitions when an item is received.
952$y
Koha item type **
Coded value, required field for circulation
Required. Coded value, must be defined in Item types
952$z
Public note
- required for circulation
** - required by Koha
VOKAL
Nicole C. Engard
2010
http://docs.google.com/View?id=dcccx9zm_3htvhwzgc#Handling_On_Order_items_and_ho
Handling On Order Items and Holds
If you tend to import your MARC records when you have ordered the book (as opposed to when you receive the books), and allow patrons to place holds on those books, you may need to add item records to the *.mrc file before importing.
The easiest way to import your latest order is to first run your records through MARCEdit. Download your MARC records, saving them to your desktop or some other location you use/will remember. If you have MARCEdit already installed you should simply have to double click on your MARC records, and they will automatically open in MARCEdit.
Important
This tutorial was written with MARCEdit version 5.2.3769.41641 on Windows XP, instructions may be different if your version or operating system is different.
Your original file will automatically be in the input; ensure MarcBreaker is chosen, and then click “Execute” MarcBreaker .. image:: images/appendix-onorder/marcbreaker.png
You will be presented with a summary of the records processed at the bottom of the screen MarcBreaker Summary .. image:: images/appendix-onorder/marcbreaker-summary.png
Click ‘Edit Records’ to continue on to adding item records
Your screen will be replaced with a larger screen containing the MARC records MARC file for editing .. image:: images/appendix-onorder/editrecords.png
Click on Tools > Add/Edit Field Add/Delete Field .. image:: images/appendix-onorder/addfield.png
Enter in the Koha specific item info Add 942 Field .. image:: images/appendix-onorder/add942.png - In the Field box, type 942 - In the Field Data box, type \\$c and the item type code
(\\$cBOOK in this example)
- Check the ‘Insert last’ option
- Click ‘Add Field’
Enter in the item record data Add 952 Field .. image:: images/appendix-onorder/add952.png - In the Field box, type 952 - In the Field Data box, type
$7ORDERED_STATUS$aPERM_LOC$bCURR_LOC$cSHELVING_LOCATION$eSOURCE_OF_ACQ$yITEM_TYPE - ex. $7-1$aCPL$bCPL$cNEW$eBrodart$yBOOK
- In a default install of Koha -1 is the value for the Ordered status
- You may want to look at other subfields you would like data in – for example, changing the collection code to put all the items in the same collection (8), automatically fill in the acquisition date (d), or put in a public note (z).
- Be sure you use the $ to separate subfields; adding each subfield on a separate line will cause that many items to be imported with your MARC record (in the example above, four items, each with one of those subfields corrected)
- Make sure you look at the Administration > Authorized Values in Koha to put the correct code into the field
- Check the ‘Insert last’ option
- Click ‘Add Field’
Close the field editor window
Click on File > Compile into MARC Compile into MARC .. image:: images/appendix-onorder/compile.png
Choose where to save your file
Now you want to go into your Koha system and follow the instructions for importing MARC records.
Once the item has come in, you will need to go to the item record and individually change the item to have the correct barcode, and manually change the status from Ordered to the blank line in the Not for Loan field.
Tip
If you purchase your cataloged item records, you may want to request your vendor put in the information you need into the MARC records for you; that way, you could import the edited-by-the-vendor file, overwriting the current record, automatically replacing the data with what you need.
Serials
Serials actions can be accessed by going to the More menu at the top of your screen and choosing Serials or by clicking Serials on the main Koha staff client page. The Serials module in Koha is used for keeping track of journals, newspapers and other items that come on a regular schedule. As with all modules, make sure you go through the related Implementation Checklist before using the Serials module.
- Get there: More > Serials
Add a subscription
Subscriptions can be added by clicking the ‘New’ button on any bibliographic record
New Subscription Button
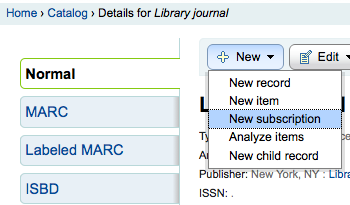
Or by visiting the Serials module and clicking ‘New Subscription’
New Subscription Button
If you are entering a new subscription from the Serials module you will be presented with a blank form (if creating new from a bibliographic record the form will include the bib info).
Add a new Subscription Form
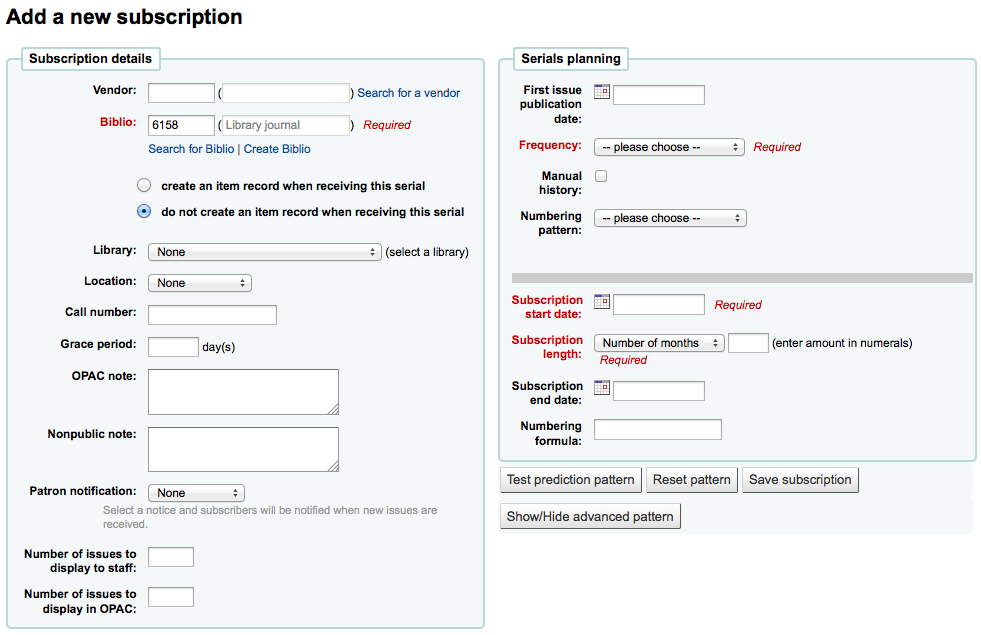
‘Librarian’ field will show the logged in librarian’s username
‘Vendor’ can be found by either searching vendors entered via the Acquisitions module or entering the vendor ID number - Vendor information is not required - In order to claim missing and late issues you need to
enter vendor information Vendor Missing Warning .. image:: images/serials/vendorwarning.png
‘Biblio’ is the MARC record you’d like to link this subscription to - This can be done by searching for an existing record by
clicking on the ‘Search for Biblio’ link below the boxes or by entering the bib number for a record in the first box. Only if you search with the field between the parenthesis.
Next you can choose whether a new item is created when receiving an issue
‘Location’ is for the shelving location
‘Call Number’ is for your item’s call number prefix
‘Library’ is the branch that owns this subscription. - If more than one library subscribes to this serial you
will need to create a subscription for each library
- This can be done easily by using the ‘Edit as New (Duplicate)’ option found on the subscription information page and changing only the ‘Library’ field New Duplicate Subscription .. image:: images/serials/newasdup.png
The ‘Grace Period’ is the number of days before an issue is automatically moved from ‘expected’ status to ‘waiting’ and how many days before an issue is automatically moved from ‘waiting’ status to ‘late’
Use the ‘Public Note’ for any notes you would like to appear in the OPAC for the patrons
‘Nonpublic Note’ should be used for notes that are only visible to the librarians via the staff client
To set up a routing list for serials, choose ‘Routing List’ from the ‘Patron notification’ field. - For this option to appear you need to make sure that you
have a Routing List notice set up in the Notices Tool
- Learn more about Routing Lists later in this manual
The Staff and OPAC Display options allow you to control how many issues appear by default on bibliographic records in the Staff Client and the OPAC - If no values are entered in these fields, they will use
the OPACSerialIssueDisplayCount and StaffSerialIssueDisplayCount system preference values
In ‘First issue publication date’ you want to enter the date of the issue you have in your hand, the date from which the prediction pattern will start
There are several pre-defined options for the ‘Frequency’ of publication - Without periodicy: some very specific (usually high level
science journals) don’t have a true periodicity. When you subscribe to the title, you subscribe for 6 issues, which can arrive in 1 year... or 2... There is no regularity or known schedule.
- Unknown select this if none of the other choices are relevant
- Irregular: The journal is not “regular” but has a periodicity. You know that it comes out on January, then in October and December, it is irregular, but you know when it’s going to arrive.
- 2/day: Twice daily
- 1/day: Daily
- 3/week: Three times a week
- 1/week: Weekly
- 1/ 2 weeks: Twice monthly (fortnightly)
- 1/ 3 weeks: Tri-weekly
- 1/month: Monthly
- 1/ 2 months (6/year): Bi-monthly
- 1/ 3 months (1/quarter): Quarterly
- 1/quarter (seasonal) : Quarterly related to seasons (ie. Summer, Autumn, Winter, Spring)
- 2/year: Half yearly
- 1/year: Annual
- 1/ 2 years: Bi-annual
Checking the ‘Manual history’ box will allow you to enter serials outside the prediction pattern.
‘Numbering pattern’ will help you determine how the numbers are printed for each issue - Start with the numbering on the issue you have in hand,
the numbering that matches the date you entered in the ‘First issue publication’ field
If you have chosen any ‘Numbering Format’ other than ‘Number’ in the ‘Rollover at’ field, enter the last issue number before the volume number changes - If you chose the ‘Number’ Numbering Format you will
see ‘issues expected’ in which you will enter the total number of issues you expect to receive. Number as Numbering Pattern .. image:: images/serials/numberonly.png
You can choose to create your own numbering pattern by choosing ‘None of the above’ and clicking the ‘Show/Hide Advanced Pattern’ button at the bottom of the form
‘Subscription start date’ is the date at which the subscription begins. This is used for setting up renewal alerts
‘Subscription length’ is the number of issues or months in the subscription. This is also used for setting up renewal alerts
‘Subscription end date’ should only be entered for subscriptions that have ended (if you’re entering in a backlog of serials)
The ‘Numbering formula’ is editable to match the way you’d like your numbering to print on the item record and subscription information pages
Click ‘Save Subscription’ to save the information you have entered. Find sample serial examples in the appendix.
Receive Issues
Issues can be marked as received from several locations. To find a subscription, use the search box at the top of the Serials page to search for the serial you’d like to receive issues for:
Subscription Search
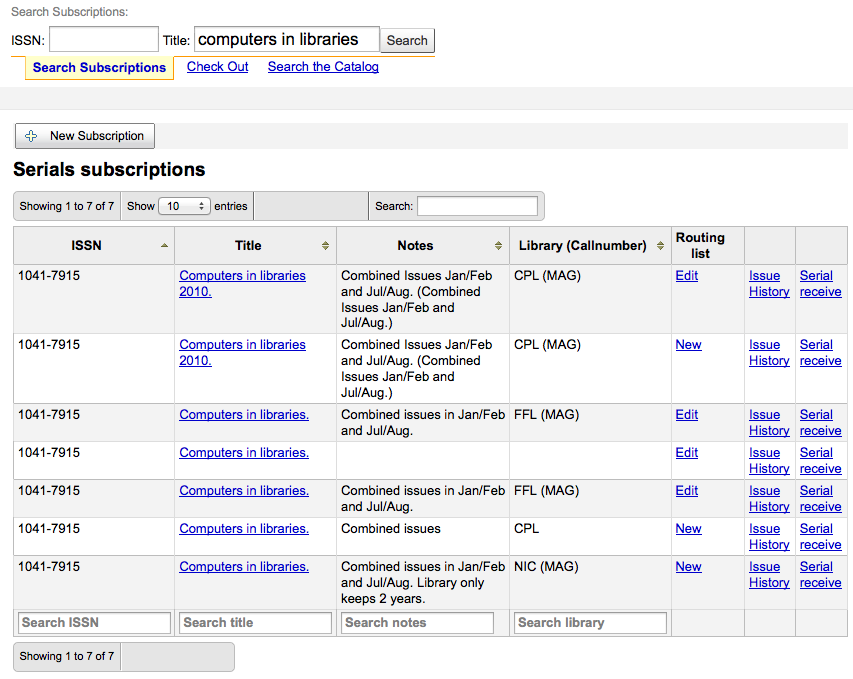
From the search results you can click the ‘Serial Receive’ link or you can click on the subscription title and then click the ‘Receive’ button.
Subscription Buttons
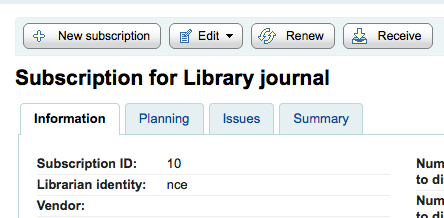
The final way to receive serials is from the ‘Serial Collection’ page. To the left of the Subscription summary page there is a menu with a link to ‘Serial Collection’
Serial Subscription Menu
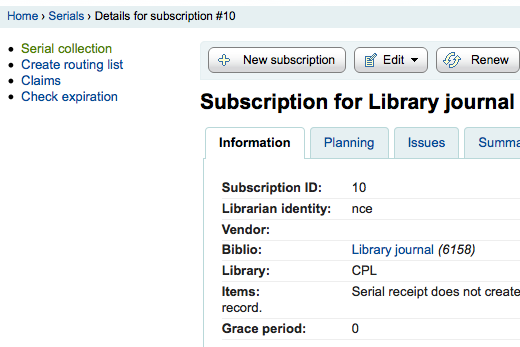
From the page that opens up you can click ‘Edit Serial’ with the issue you want to receive checked.
Edit Issues
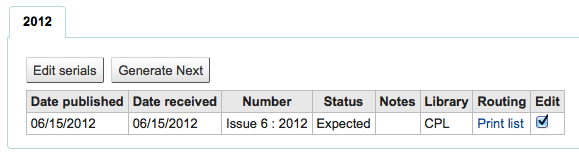
All three of these options will open up the issue receive form:
Receive Serials
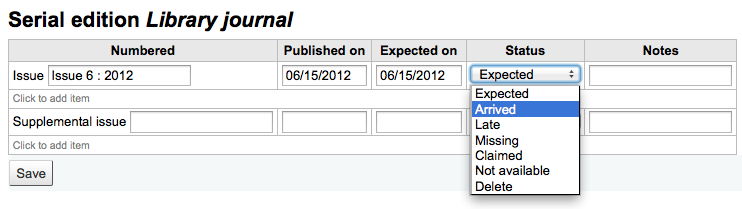
- Choose ‘Arrived’ from the status pull down to mark a serial as received.
- If you have decided to have an item record created for each issue an item add form will appear
- If your issue has a supplemental issue with it, fill in the Supplemental Issue information.
- If you have decided to have an item record created for each issue an item add form will appear for your supplement and for the issue itself
- Once you have entered your info you can click ‘Save’
If you are receiving multiple issues at once, or have marked an issue as ‘Late’ or ‘Missing’ there you can click the ‘Generate Next’ button below the list of issues.
Generate Next Button
Clicking this button will generate the next issue for you and mark the previously expected issue as ‘Late’ automatically. You can then check the ‘Edit’ box to the right of each issue and edit the status on multiple issues at once.
Create a Routing List
A routing list is a list of people who receive the serial before it goes to the shelf. When setting up your serial subscription you want to be sure to pick ‘Routing List’ from the ‘Patron Notification’ pull down.
Patron Notification Option

When on the subscription page you will see a link to the left that reads ‘Create Routing List’ or ‘Edit Routing List’
Subscription Routing List Link
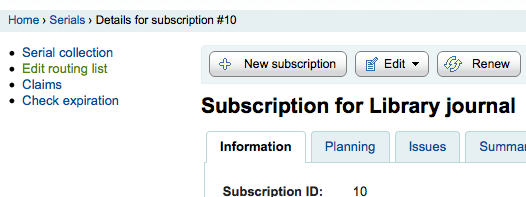
Clicking that link will bring you to the menu to add a new routing list.
Routing List Creation
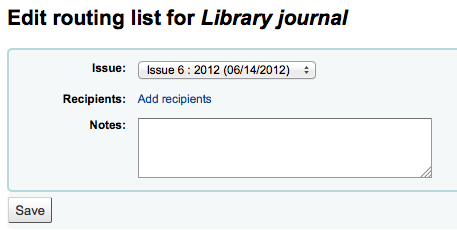
From here you want to click ‘Add recipients’ in order to add people to the routing list. In the menu that appears you can filter patrons by part of their name, their library and/or patron category.
Add Members to Routing List
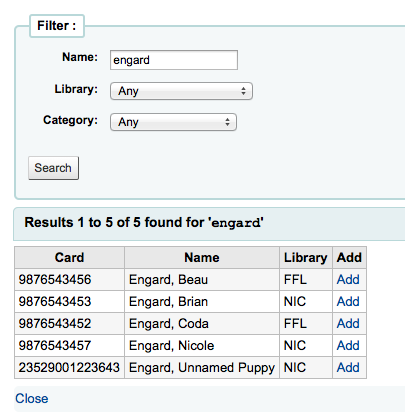
Clicking ‘Add’ to the right of each name will add them to the routing list. When you have chosen all of the people for the list, click the ‘Close’ link to be redirected to the routing list.
Routing List
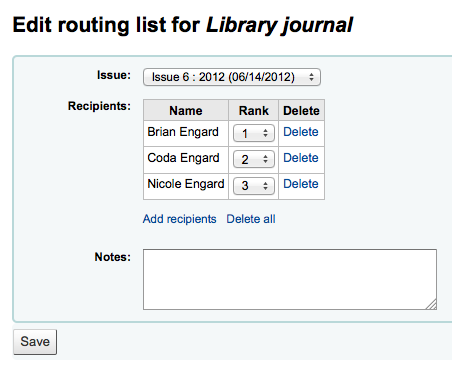
If the list looks the way you expect it to, then click ‘Save’. Next you will be brought to a preview of the routing list. To print the list click ‘Save and preview routing slip.’ This will open a printable version of the list.
Preview Routing List
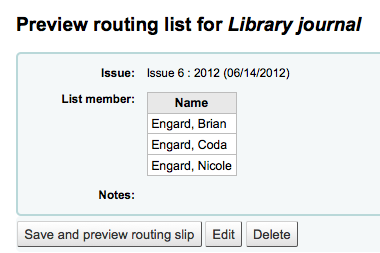
If RoutingListAddReserves is set to on then patrons listed in the routing list will automatically be added to the holds list for the issue.
To see a list of all of the routing lists a specific patron is on visit the Routing Lists tab on their patron record.
Subscriptions in Staff Client
Subscription information will appear on bibliographic records under the ‘Subscriptions’ tab
Subscription Tab on Bibliographic Record
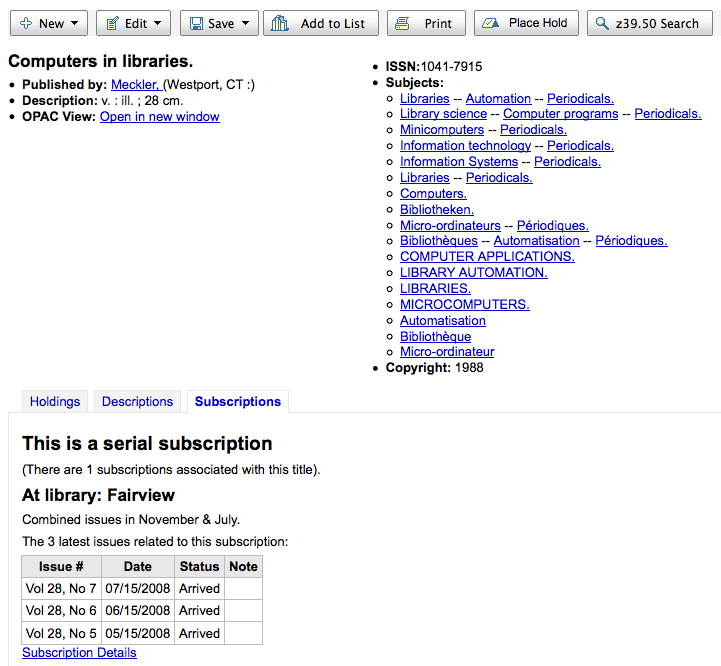
Clicking the ‘Subscription Details’ link will take you to the Subscription summary page in the staff client.
Subscription Detail
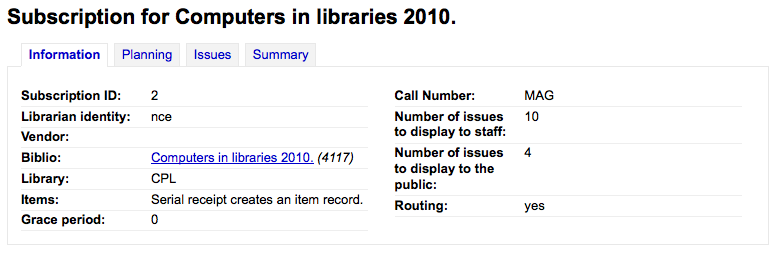
Subscriptions in OPAC
When viewing the subscription in the OPAC there will be several options.
Like in the staff client, there will be a Subscriptions tab on the bibliographic record.
Subscriptions Tab in OPAC
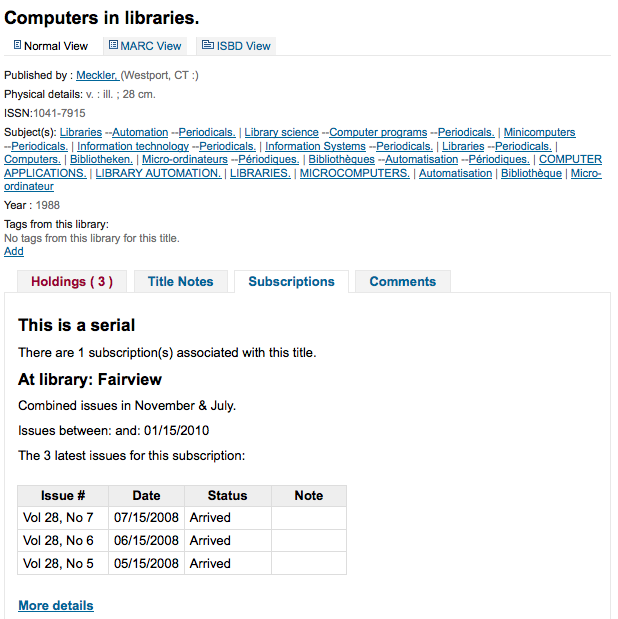
Under this tab will appear the number of issues you chose when setting up the subscription or in your OPACSerialIssueDisplayCount system preference. Clicking the ‘More details’ link will provide you with additional information about the serial history. You can set the default view of a serial in the OPAC with the SubscriptionHistory system preference.
There are two views, compact and full. The compact serial subscription will show basic information regarding the subscription
Compact Serial View
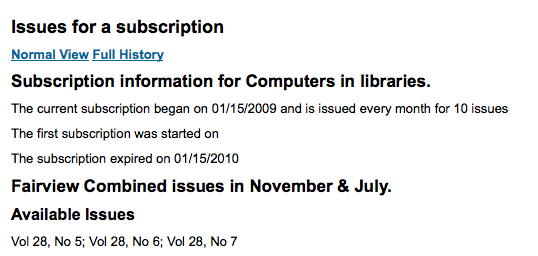
From this compact display patrons can subscribe to routing lists by clicking the subscribe link that appears below subscriptions that offer a routing list.
Subscribe link in the OPAC
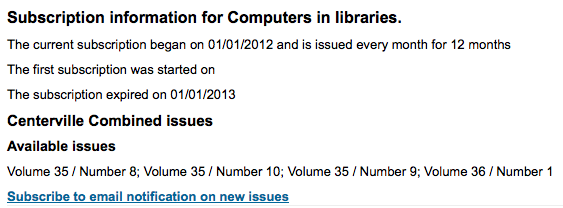
Whereas the full view shows extensive details, broken out by year, regarding the subscription
Full Serial View
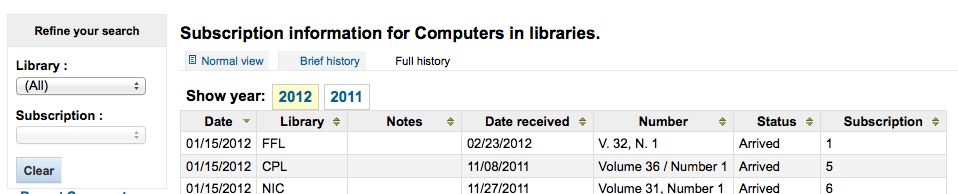
Claim Late Serials
Koha can send email messages to your serial vendors if you have late issues. To the left of the main serials page there is a link to ‘Claims’
Link to Claims on Serials Menu
The links to claims also appears to the left of the subscription detail page
Link to Claims on the Serials Menu
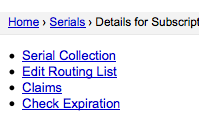
If you don’t have a claim notice defined yet you will see a warning message that you need to first define a notice.
Missing Claims Notice Warning

Clicking ‘Claims’ will open a report that will ask you to choose from your various serial vendors to generate claims for late issues.
Serial Claims
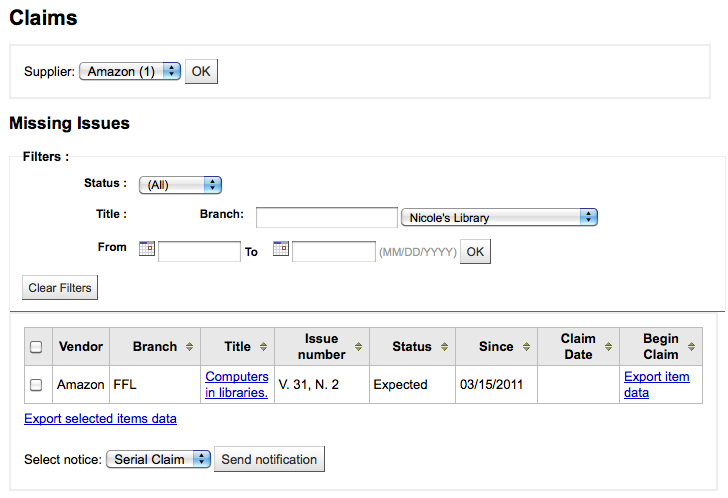
From the list of late issues you can choose which ones you want to send a claim email to by clicking the checkbox to the left of late issue, choosing the notice template to use and clicking the ‘Send notification’ button.
Check Serial Expiration
When adding serials you enter a subscription length, using the check expiration tool you can see when your subscriptions are about to expire. To use the tool click the link to ‘Check expiration’ on the serials menu.
Check Serial Expiration
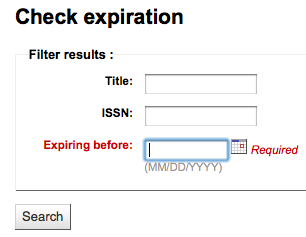
In the form that appears you need to enter at least a date to search by.
In your results you will see all subscriptions that will expire before the date you entered. From there you can choose to view the subscription further or renew it in one click.
Serial Expiration Search Results

Renewing Serials
If your serial subscription has expired you won’t be able to receive issues. To renew your subscription you can click the ‘Renew’ button at the top of your subscription detail page.
Renew option on subscription detail
Another option is to click the ‘Renew’ link to the right of the subscription on the Serial Collection page.
Renew option on serial collection

Once you click the ‘Renew’ link or button you will be presenting with renewal options.
Subscription renewal form
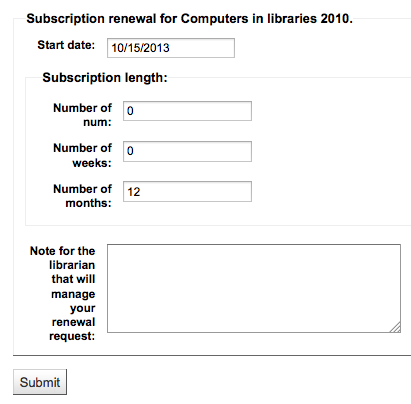
- The start date should be the date your subscription period starts.
- For the subscription length you’ll want to fill in one of the three fields presented: Number of num (issues), Number of months or Number of weeks.
- Finally enter any notes you might have about this renewal.
Acquisitions
The Koha Acquisitions module provides a way for the library to record orders placed with vendors and manage purchase budgets.
- Get there: More > Acquisitions
Setup
Before using the Acquisitions Module you will want to make sure that you have completed all of the set up.
First, set your Acquisitions System Preferences and Acquisitions Administration to match your library’s workflow.
On the main acquisitions page you will see your library’s funds listed.
Acquisitions Funds Summary
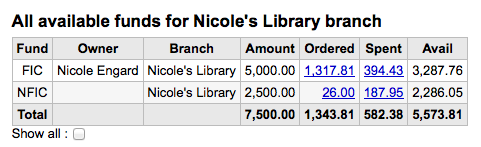
Tip
If the total line is confusing for the funds you have set up you can hide it by adding #funds_total {display:none;} to the IntranetUserCSS preference.
To see all active funds you can click the checkbox next to ‘Show all’ below the funds table.
To see a history of all orders in a fund you can click on the linked amount and it will run a search for you.
Breakdown of orders against the FIC Fund
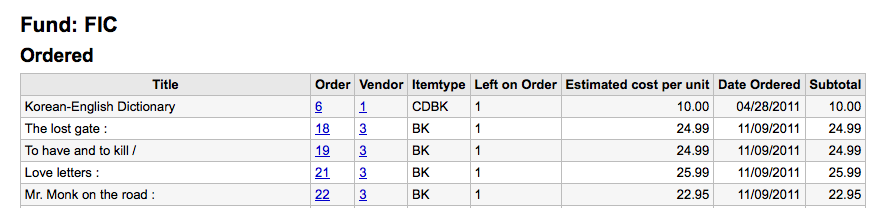
Learn more in the Budget/Fund Tracking section of this manual.
Vendors
Before any orders can be places you must first enter at least one vendor.
Add a Vendor
To add a vendor click the ‘New Vendor’ button on the Acquisitions page
New Vendor Button on Acquisitions
The vendor add form is broken into three pieces
The first section is for basic information about the Vendor Basic Vendor Information .. image:: images/acquisitions/newvendor1.png - Of these fields, only the Vendor name is required, the
rest of the information should be added to help with generating claim letters and invoices
The second section is for information regarding your contact at the Vendor’s office Vendor Contact Details .. image:: images/acquisitions/newvendor2.png - None of these fields are required, they should only be
entered if you want to keep track of your contact’s information within Koha
The final section is for billing information Vendor Ordering/Billing Information .. image:: images/acquisitions/newvendor3.png - To be able to order from a vendor you must make them
‘Active’
For List Prices and Invoice Prices choose the currency - Currencies are assigned in the :ref:`Currencies & Exchange
Rates <currexchangeadmin>` admin area
If your library is charged tax mark your Tax Number as registered
Note if you list prices and/or invoice prices include tax
If the vendor offers a consistent blank discount, enter that in the ‘Discount’ field - You can enter item specific discounts when placing
an order
Enter your tax rate if your library is charged taxes on orders
If you know about how long it usually takes orders to arrive from this vendor you can enter a delivery time. This will allow Koha to estimate when orders will arrive at your library on the late orders report.
Notes are for internal use
View/Edit a Vendor
To view a vendor’s information page you must search for the vendor from the Acquisitions home page. Your search can be for any part of the Vendor’s name:
Vendor Search Results
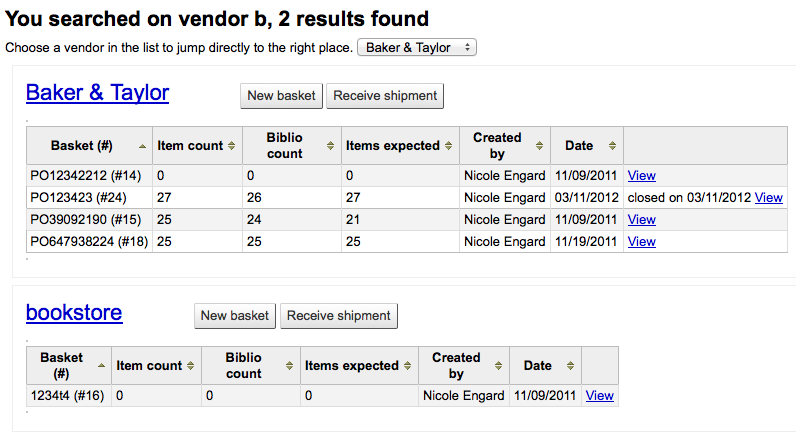
From the results, click on the name of the vendor you want to view or edit
Vendor Information Page
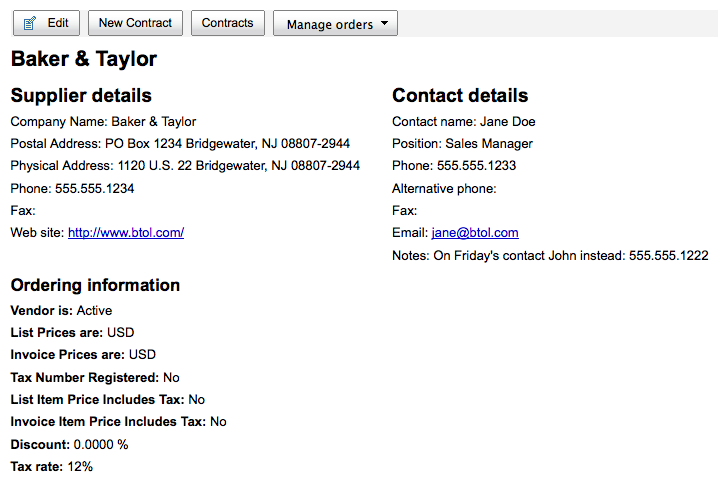
To make changes to the vendor, simply click the ‘Edit’ button.
If the vendor has no baskets attached to it then a ‘Delete’ button will also be visible and the vendor can be deleted.
Delete Vendor Button

Vendor Contracts
You can define contracts (with a start and end date) and attach them to a vendor. This is used so that at the end of the year you can see how much you spent on a specific contract with a vendor. In some places, contracts are set up with a minimum and maximum yearly amount.
Add a Contract
At the top of a Vendor Information Page, you will see a ‘New Contract’ button.
New Contract Button
The contract form will ask for some very basic information about the contract
New Contract Form
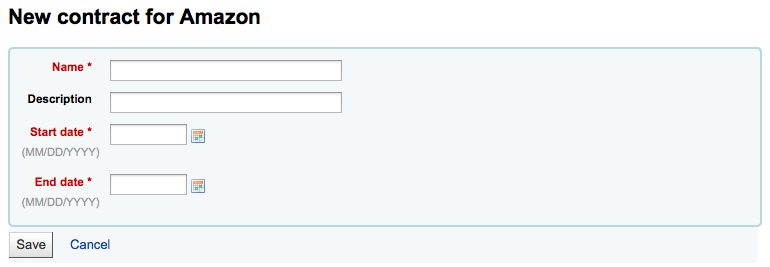
Important
You cannot enter a contract retrospectively. The end date must not be before today’s date.
Once the contract is saved it will appear below the vendor information.
Vendor with contracts
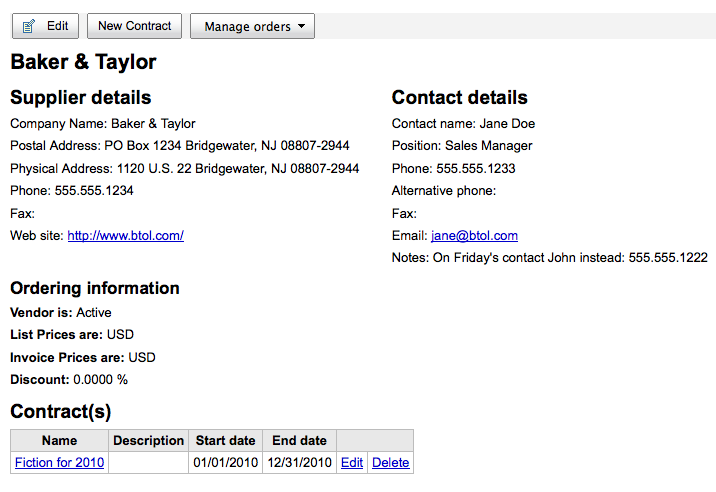
It will also be an option when creating a basket
Contract Pull Down on New Basket Form
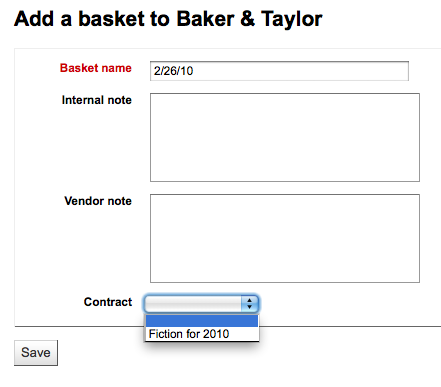
Managing Suggestions
Depending on your settings in the suggestion system preference, patrons may be able to make purchase suggestions via the OPAC. When a suggestion is waiting for library review, it will appear on the Acquisitions home page under the vendor search.
Pending suggestions on Acquisitions
It will also appear on the main staff dashboard under the module labels:
Pending suggestions on main page

Clicking ‘Manage suggestions’ will take you to the suggestion management tool. If there are no pending suggestions you can access the suggestion management tool by clicking the ‘Manage suggestions’ link on the menu on the left of the Acquisitions page.
Suggestion Management
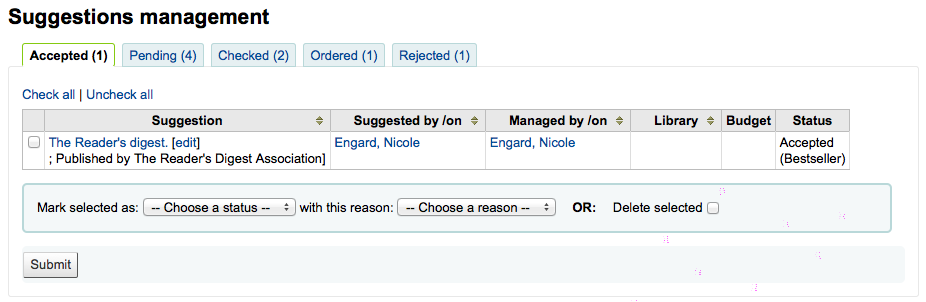
Your suggestions will be sorted into several tabs: Accepted, Pending, Checked, Ordered and/or Rejected. Each accepted or rejected suggestion will show the name of the librarian who managed the suggestion and the reason they gave for accepting or rejecting it (found under ‘Status’).
For libraries with lots of suggestions, there are filters on the left hand side of the Manage Suggestions page to assist in limiting the number of titles displayed on the screen.
Suggestion Filtering
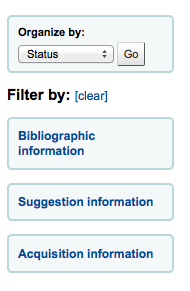
Clicking on the blue headings will expand the filtering options and clicking ‘[clear]’ will clear all filters and show all suggestions.
Tip
The suggestions page will automatically be limited to suggestions for your library. To see information for all (or any other) libraries click on the ‘Acquisition information’ filter and change the library. Branch filter .. image:: images/acquisitions/suggestbranchfilter.png
When reviewing ‘Pending’ suggestions you can choose to check the box next to the item(s) you want to approve/reject and then choose the status and reason for your selection. You can also choose to completely delete the suggestion by checking the ‘Delete selected’ box.
Pending Suggestions
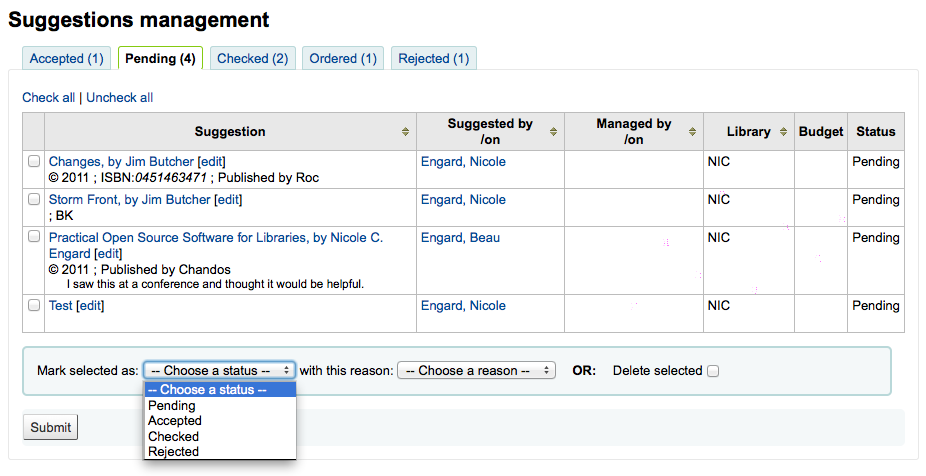
Another option for libraries with long lists of suggestions is to approve or reject suggestions one by one by clicking on the title of the suggestion to open a summary of the suggestion, including information if the item was purchased.
Suggestion Information
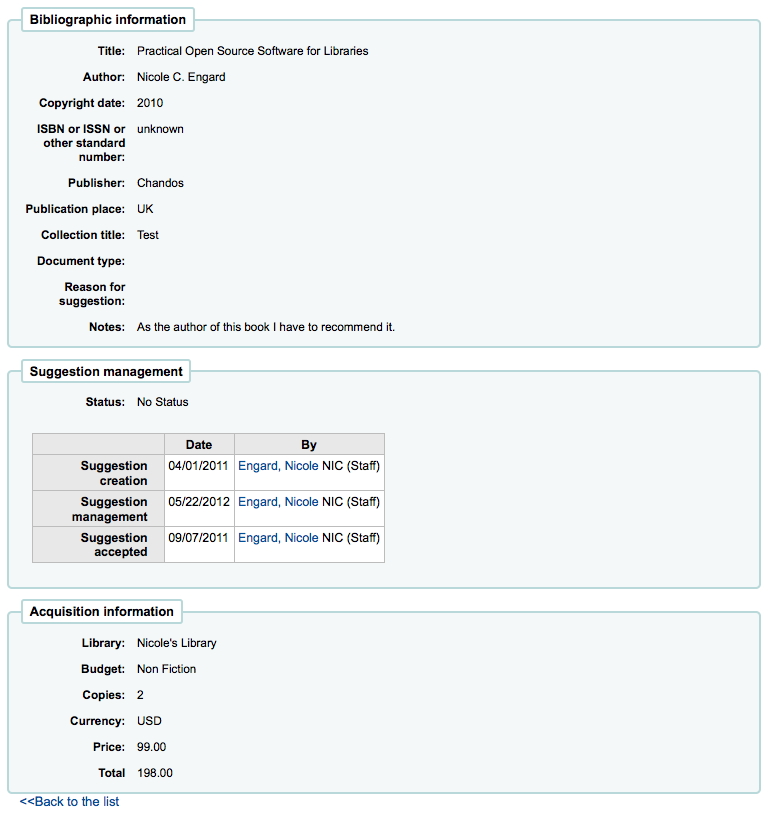
Clicking ‘edit’ to the right of the suggested title will open a suggestion editing page.
Edit Purchase Suggestion
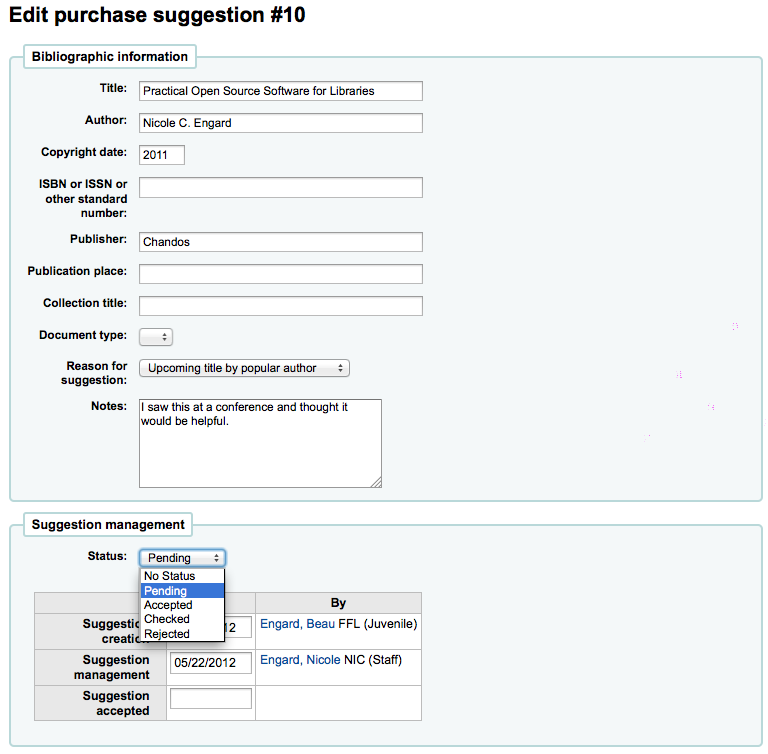
From this form you can make edits to the suggestion (adding more details or updating incorrect information provided by the patron). You can also choose to accept or reject the suggestion on an individual basis.
- Choosing to mark a request as ‘Pending’ will move the request back to the ‘Pending’ tab.
Reasons for accepting and rejecting suggestions are defined by the SUGGEST authorized value.
Reasons for approving or rejecting suggestions
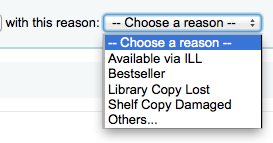
If you choose ‘Others...’ as your reason you will be prompted to enter your reason in a text box. Clicking ‘Cancel’ to the right of the box will bring back the pull down menu with authorized reasons.
Enter reason for ‘Others...’

Once you have clicked ‘Submit’ the suggestion will be moved to the matching tab. The status will also be updated on the patron’s account in the OPAC and an email notice will be sent to the patron using the template that matches the status you have chosen.
Purchase suggestions in the OPAC
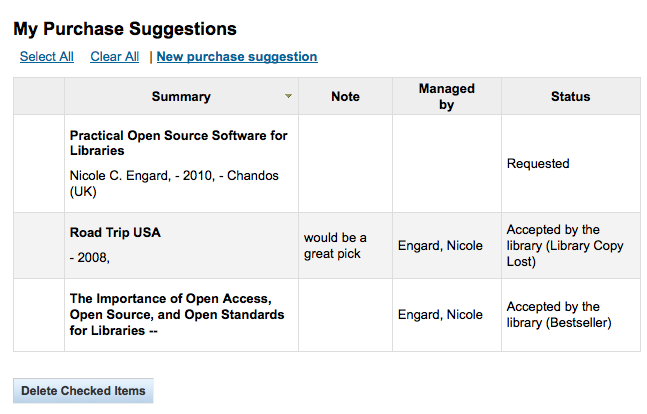
Placing Orders
To place an order you must first search for the vendor or bookseller you want to send the order to.
Create a basket
To create a basket you must first search for the vendor you’re ordering from:
New Basket / Add Basket Options
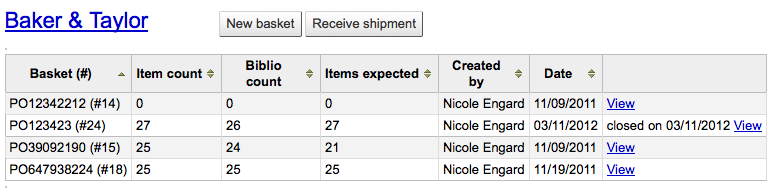
Next to the vendor name you will see a ‘New Basket’ button
Add Basket Form
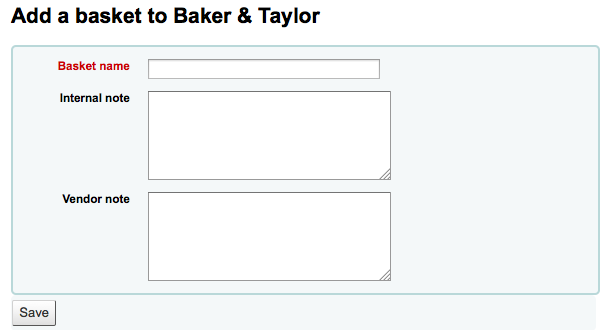
When adding a basket you want to give it a name that will help you identify it later. The notes fields are optional and can contain any type of information.
If you have added contracts to the vendor you’re ordering from, you will also have an option to choose which contract you’re ordering these items under.
Basket with contract options
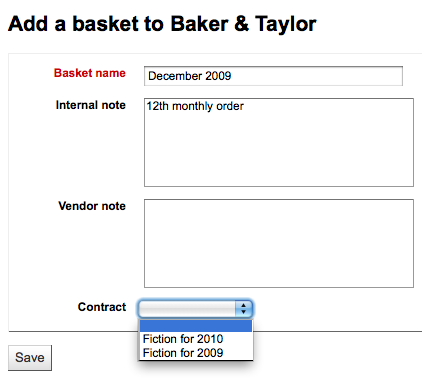
When finished, click ‘Save’
New Empty Basket
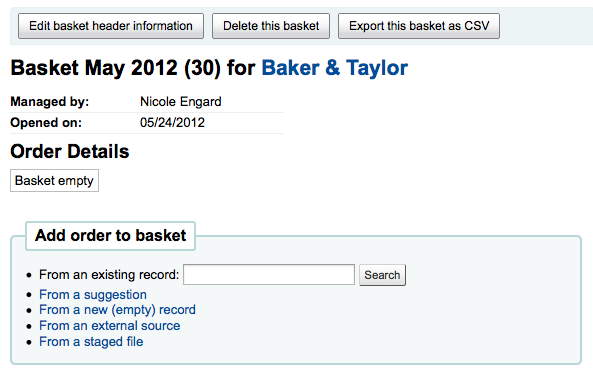
Once your basket is created you are presented with several options for adding items to the order.
If you are ordering another copy of an existing item, you can simply search for the record in your system. Search for existing records .. image:: images/acquisitions/orderfromexisting.png - From the results, simply click ‘Order’ to be brought to
the order form. Order form .. image:: images/acquisitions/existingitemorder.png - All of the details associated with the item will
already be listed under ‘Catalog details.’
If you allow patrons to make purchase suggestions (learn more in the Managing Suggestions section of this manual), then you can place orders from those suggestions. Approved Suggestions to Order From .. image:: images/acquisitions/orderfromsuggest.png - From the results, click ‘Order’ next to the item you
want to order and you will be presented with the order form including a link to the suggestion Order from a Suggestion .. image:: images/acquisitions/orderfromsuggestform.png - From this form you can make changes to the Catalog
Details if necessary.
- When the item appears in your basket it will include a link to the suggestion. Suggestion Link in basket .. image:: images/acquisitions/ordersuggestlink.png
To order from a record that can’t be found anywhere else, choose the ‘From a new (empty) record.’ Order a new record .. image:: images/acquisitions/fromnewemptyrecord.png - You will be presented with an empty form to fill in all
of the necessary details about the item you are ordering.
If you want to search other libraries for an item to purchase, you can use the ‘From an external source’ option that will allow you to order from a MARC record found via a Z39.50 search. Search for record to add .. image:: images/acquisitions/orderz39.png - From the results, click the Order link next to the item
you want to purchase. Search Results to Order From .. image:: images/acquisitions/orderz39results.png
If the item you’re ordering from an external source looks like it might be a duplicate, Koha will warn you and give you options on how to proceed. Duplicate order warning .. image:: images/acquisitions/dupwarning.png - From the warning, you can choose to order another
copy on the existing bib record, create a new bib record, or cancel your order of this item.
In the order form that pops up, you will not be able to edit the catalog details. New order from Z39.50 Search .. image:: images/acquisitions/orderz39form.png
The final option for ordering is to order from a staged record (learn more about staging records). Staged Files to Order From .. image:: images/acquisitions/stagedfiles.png - From the list of files you are presented with, choose
the ‘Add orders’ link. Records in the staged file .. image:: images/acquisitions/stagedrecords.png - From the list of records, click ‘Add order’ next to
the item that you want to add to your order. New order from Staged Record .. image:: images/acquisitions/stagedorder.png - From the order form, you will not be able to
edit the catalog details.
The other option is to import all records from the staged file by scrolling below the list of records in the staged file and filling in the item information. Import All .. image:: images/acquisitions/importallstaged.png - If you choose this option the Koha will look in
the 020$c and grab the pricing information from that field and put that on each order line.
After bringing in the bib information, if your AcqCreateItem system preference is set to add an item when ordering you will enter the item info next. You need to fill out at least one item record and then click the ‘Add’ button at the bottom left of the item form.
Item order
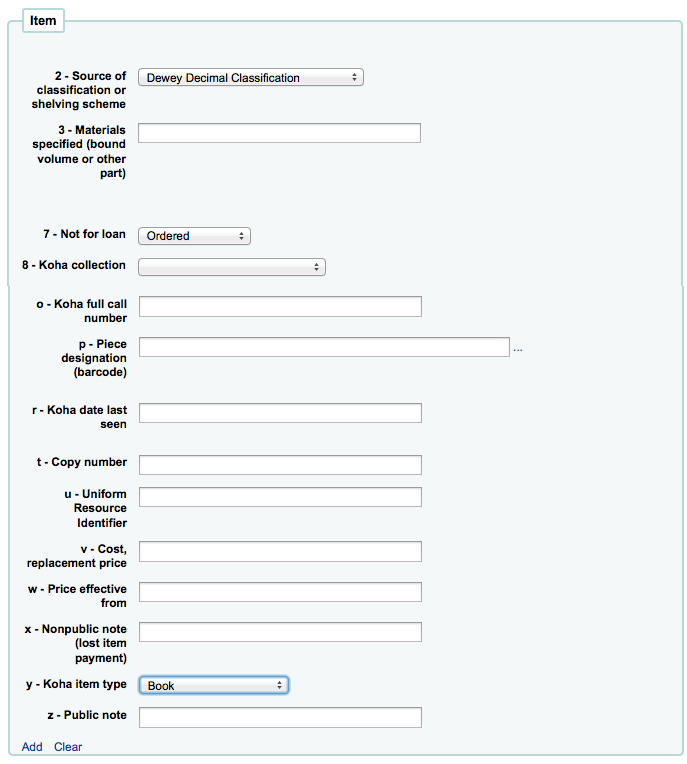
After clicking add the item will appear above the form and then you can enter your next item the same way (if ordering more than one item).
Item ordered
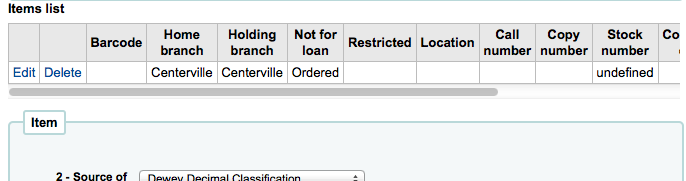
Once you have entered the info about the item, you need to enter the Accounting information.
Accounting Details
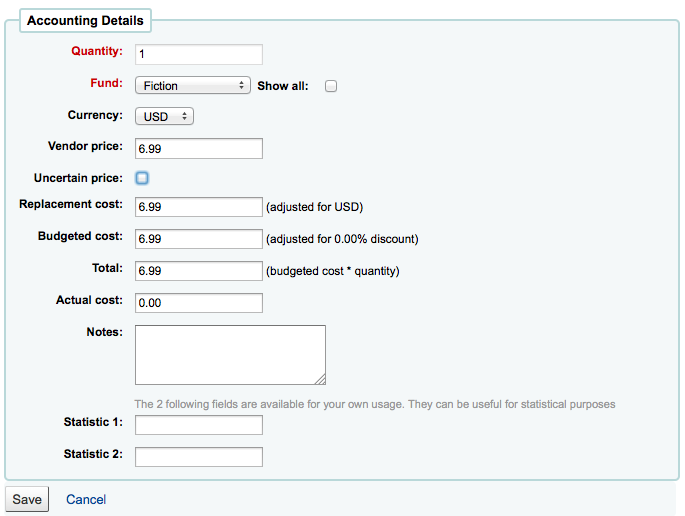
Quantity is populated by the number of items you’ve added to the order above.
The list of funds is populated by the funds you have assigned in the Acquisitions Administration area.
The currency pull down will have the currencies you set up in the Acquisitions Administration area.
The vendor price will be used to calculate the rest of the amount fields below.
If the price is uncertain, check the uncertain price box. - A basket with at least one uncertain price can’t be
closed.
If you added Planning Values when creating the Fund, those values will appear in the two Planning Value fields.
Once an item is added to the basket you will be presented with a basket summary.
Basket with item info
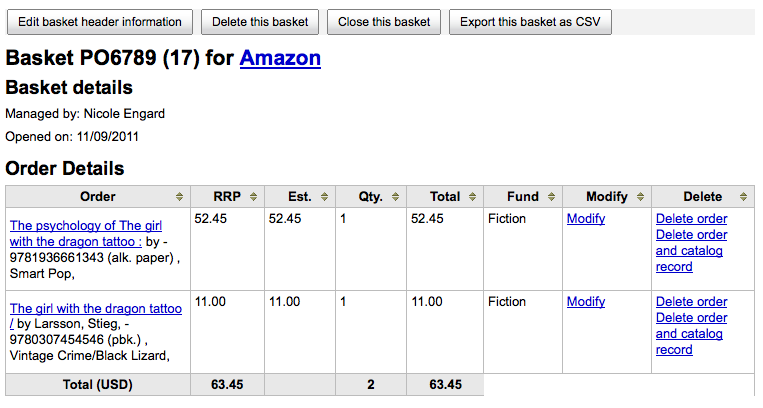
From here, you can edit or remove the items that you have added.
Choosing to ‘Delete the order’ will delete the order line but leave the record in the catalog.
Choosing to ‘Delete order and catalog record’ removes both the order line and the record in the catalog. - The catalog record cannot always be deleted. You might
see notes explaining why. Can’t delete order line .. image:: images/acquisitions/cantdeleteorderline.png
On the summary page, you also have the option to edit the information that you entered about the basket by clicking the ‘Edit basket header information’ button, to delete the basket altogether by clicking the ‘Delete this basket’ button, or to export your basket as a CSV file by clicking the ‘Export this basket as CSV’ button.
Basket Buttons
Once you’re sure your basket is complete, you can click ‘Close this basket’ button to indicate that this basket is complete and has been sent to the vendor. If you have your BasketConfirmations preference set to show a confirmation, you will be asked if you are sure about closing the basket.
Basket Closure Confirmation
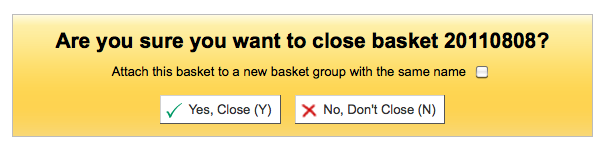
When closing the basket you can choose to add the basket to a group for easy printing and retrieval. If you check the box to ‘Attach this basket to a new basket group’ you will be brought to the group list where you can print a PDF of the order.
Closed Baskets
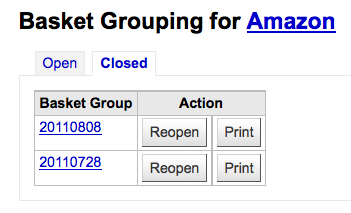
Important
A basket with at least one item marked as ‘uncertain price’ will not be able to be closed. A basket with items where the price is uncertain .. image:: images/acquisitions/basketuncertain.png
Clicking the ‘Uncertain Prices’ button will call up a list of items with uncertain prices to quick editing. From that list, you can quickly edit the items by entering new prices and quantities.
Uncertain Prices
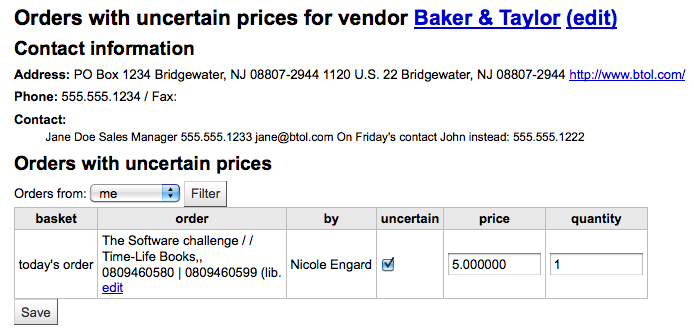
Important
The Uncertain Prices page is independent of the basket. It is linked to the vendor so you will see all items on order with uncertain prices for that vendor.
Create a basket group
A basket group is simply a group of baskets. In some libraries, you have several staff members that create baskets, and, at the end of a period of time, someone then groups them together to send to the vendor in bulk. That said, it is possible to have one basket in a basket group if that’s the workflow used in your library.
Printing baskets
When you are finished adding items to your basket, click ‘Close this Basket.’
Close Basket
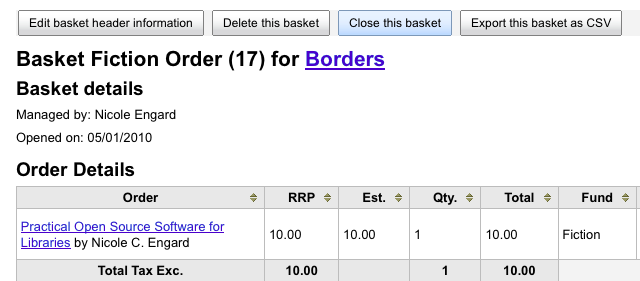
You will be asked if you want to create a purchase order at this time.
Create Purchase Order
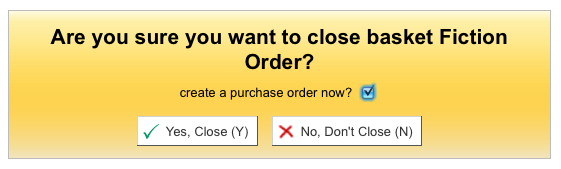
Your completed order will be listed on the Basket Grouping page for printing or further modification.
Basket Grouping
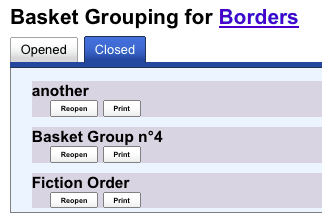
Clicking ‘Print’ below your order will generate a PDF for printing, which will have all of your library information followed by the items in your order.
Order found on PDF

Receiving Orders
Orders can be received from the vendor information page
Receive from Vendor Information
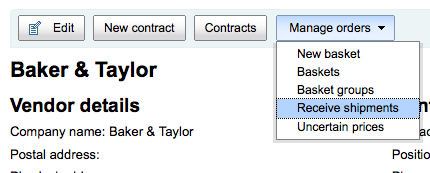
or the vendor search results page
Vendor Search Results
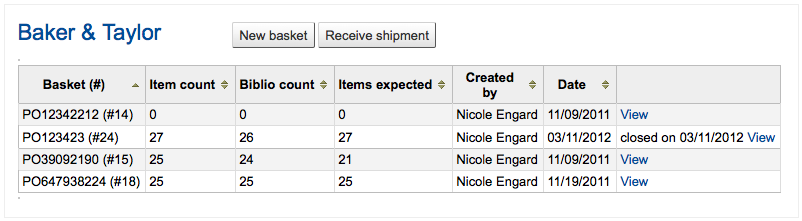
After clicking ‘Receive shipment’ you will be asked to enter a vendor invoice number and a shipment received date.
Receive Shipment
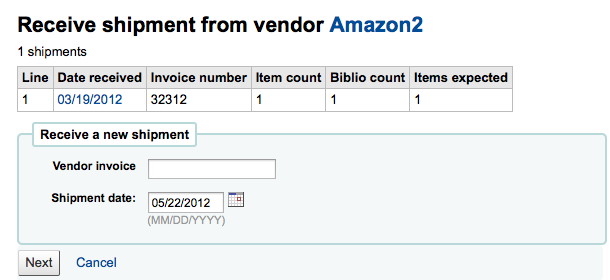
The receive page will list all items still on order with the vendor regardless of the basket the item is from.
Receipt Summary
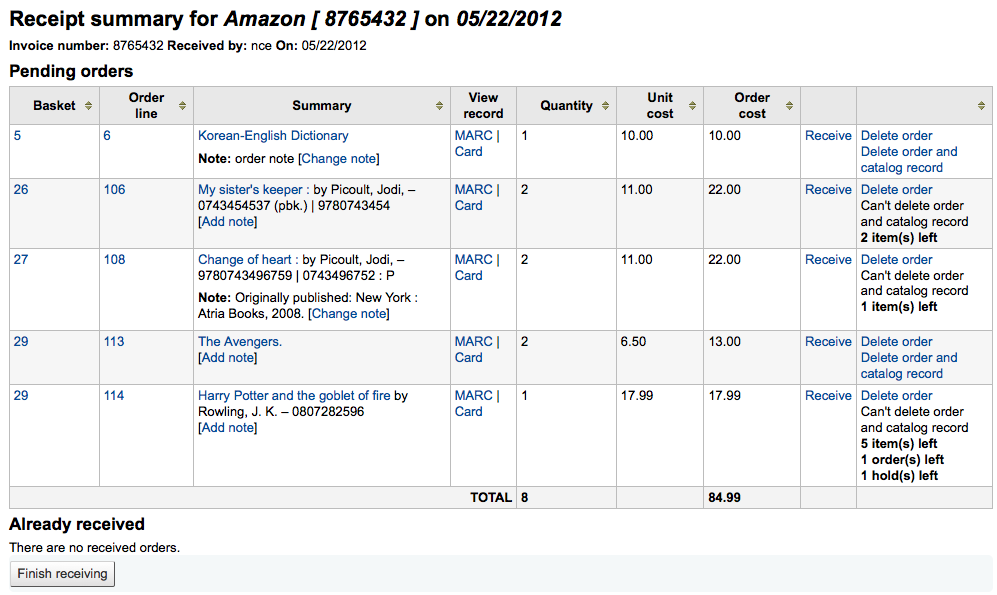
To receive a specific item, click the ‘Receive’ link to the right of the item.
Receive Item Form
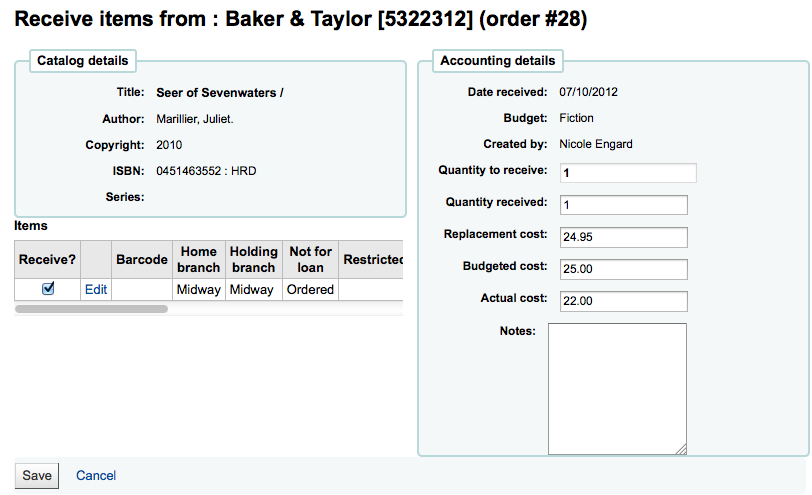
From this form you can alter the cost information. You can also choose to mark only part of the order as received if the vendor didn’t send your entire order by checking only the boxes next to the items on the left that you want to receive. The values you enter in the ‘Replacement cost’ and ‘Actual cost’ will automatically populate the item record by filling in subfield v (Cost, replacement price) and subfield g (Cost, normal purchase price) on the item record after saving.
Item record after receipt

You can also make edits to the item record from this form by clicking the ‘Edit’ link next to each item. This will allow you to enter in accurate call numbers and barcodes if you’d like to do that at the point of receipt. Once you have made any changes necessary (to the order and/or items, click ‘Save’ to mark the item(s) as received.
Already Received Items
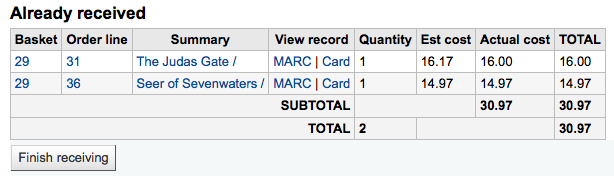
When you’re finished receiving items you can navigate away from this page or click the ‘Finish receiving’ button at the bottom of the screen.
You will also see that the item is received and/or cancelled if you view the basket.
One item marked (rcvd) in basket
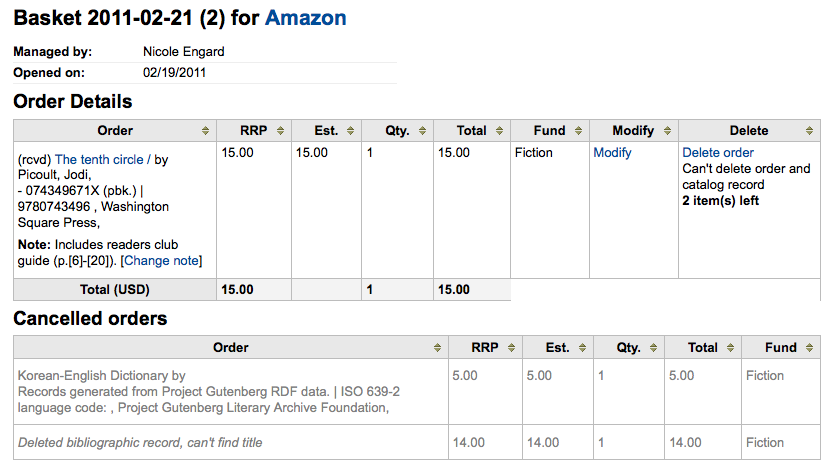
Claims & Late Orders
If you have entered in an email address for the vendors in your system you can send them claim emails when an order is late. Before you can send claims you will need to set up an acquisitions claim notice.
Upon clicking on the link to ‘Late Orders’ from the Acquisitions page you will be presented with a series of filter options on the left hand side. These filters will be applied only closed baskets.
Acquisitions Late Order Filters
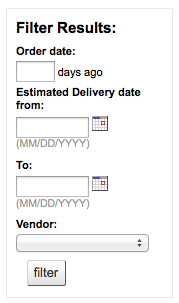
Note
The vendor pull down only shows vendors with closed baskets that are late.
Once you filter your orders to show you the things you consider to be late you will be presented with a list of these items.
Late Orders
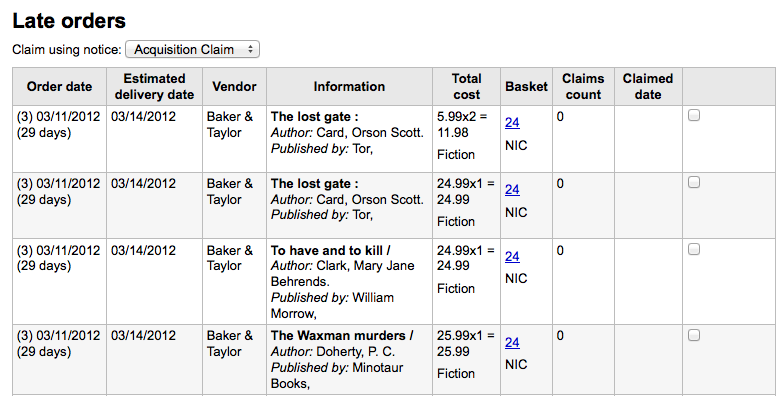
To the right of each late title you will be see a checkbox. Check off the ones you want a claim letter sent to and click ‘Claim Order’ at the bottom right of the list. This will automatically send an email to the vendor at the email address you have on file.
Note
The Estimated Delivery Date is based on the Delivery time value entered on the vendor record.
If you would rather use a different acquisition claim letter (other than the default) you can create that in the notices module and choose it from the menu above the list of late items.
Choose a Claim Letter

Acquisition Searches
At the top of the various Acquisition pages there is a quick search box where you can perform either a Vendor Search or an Order Search.
Acquisition Searches
In the Vendor Search you can enter any part of the vendor name to get results.
Vendor Search Results
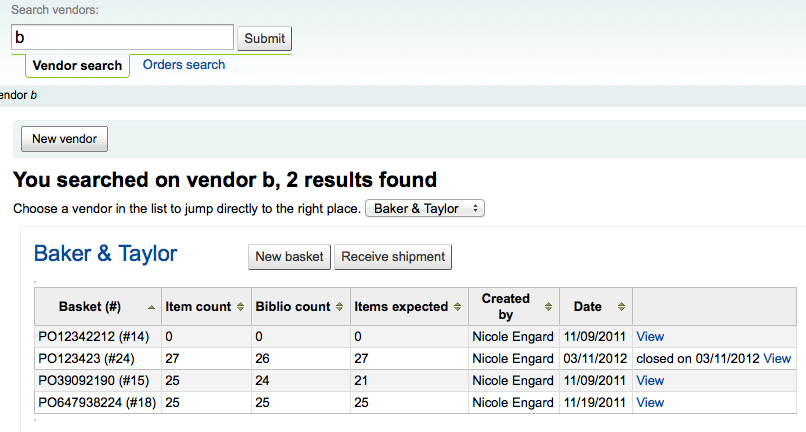
Using the Orders Search you can search for items that have been ordered with or without the vendor.
Order Search Box

You can enter info in one or both fields and you can enter any part of the title and/or vendor name.
Order Search Results
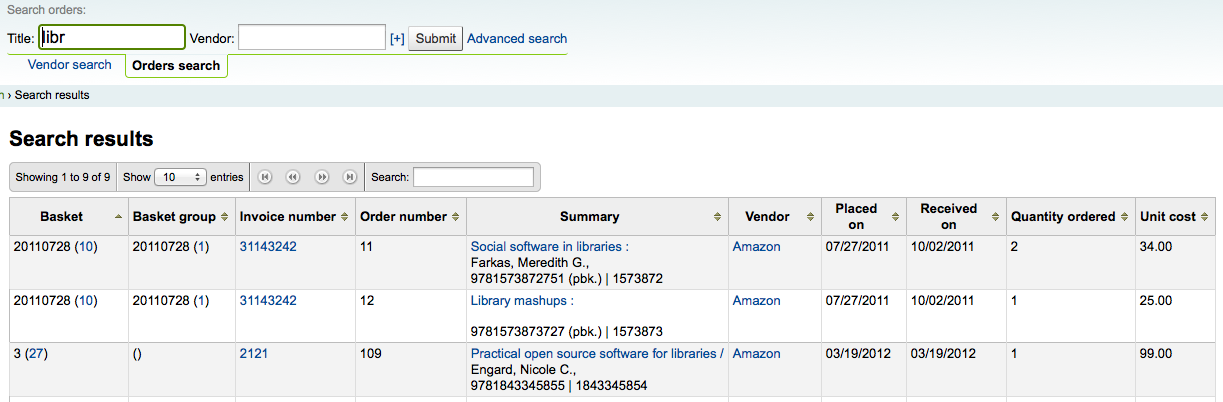
Clicking the plus sign to the right of the Vendor search box will expand the search and allow you to search for additional fields.
Expanded Orders Search
Clicking Advanced Search to the right of the search button will give you all of the order search options available.
Full Order Search
Budget/Fund Tracking
On the main acquisitions page there will be a table on the right showing you all of your active funds and a breakdown of what has been ordered or spent against them.
Fund Table
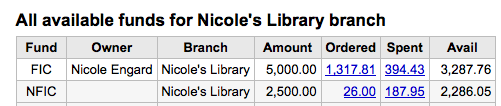
Clicking on the linked amounts under spent or ordered will show you a summary of the titles ordered on that budget.
Titles Spent
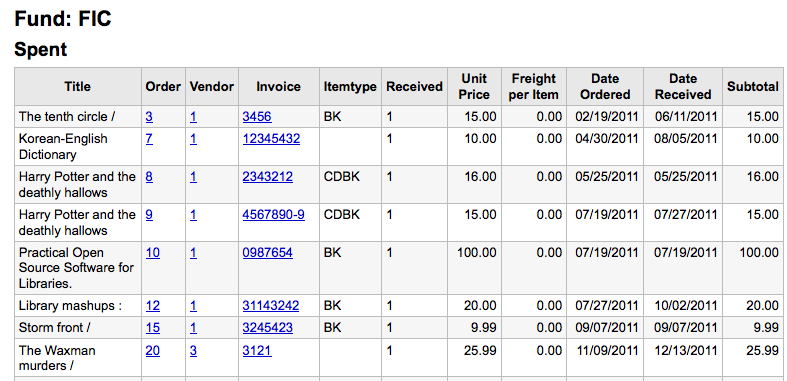
Lists & Cart
Lists are a way to save a collection of content on a specific topic or for a specific purpose. The Cart is a session specific storage space.
- Get there: More > Lists
Lists
Create a List
A list can be created by visiting the Lists page and clicking ‘New List’
New List Button
The new list form offers several options for creating your list:
New List Form
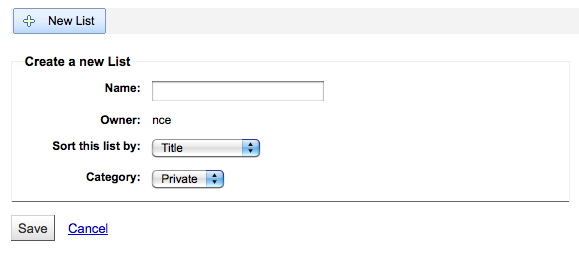
The name is what will appear on the list of Lists
You can also choose how to sort the list
Finally there are three types of lists you can choose from - A Private List is managed by you and can be seen only by
you
- A Public List can be seen by everybody, but managed only by you
A list can also be created from the catalog search results
New list from catalog search
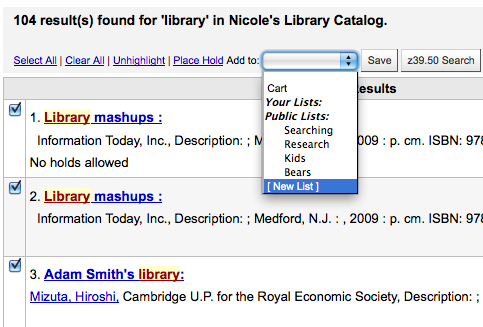
Check the box to the left of the titles you want to add to the new list
Choose [New List] from the ‘Add to:’ pull down menu New List from Search Results .. image:: images/lists/newlistfromsearch.png - Name the list and choose what type of list this
is - A Private List is managed by you and can be seen
only by you
- A Public List can be seen by everybody, but managed only by you
Once the list is saved it will accessible from the Lists page and from the ‘Add to’ menu at the top of the search results.
Add to a List
To add titles to an existing list click on the list name from the page of lists
List of Lists
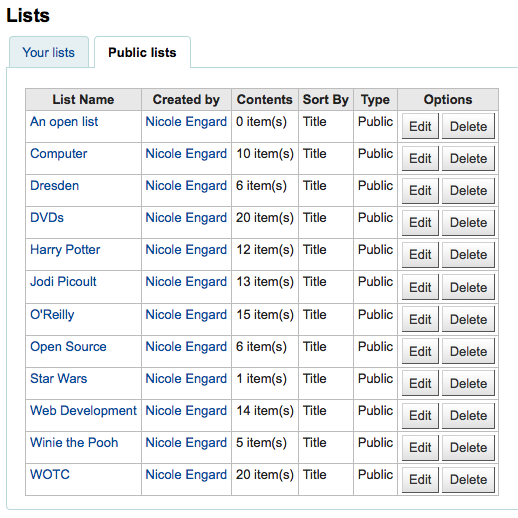
From the List page you can add titles by scanning barcodes into the box at the bottom of the page
Content of a List
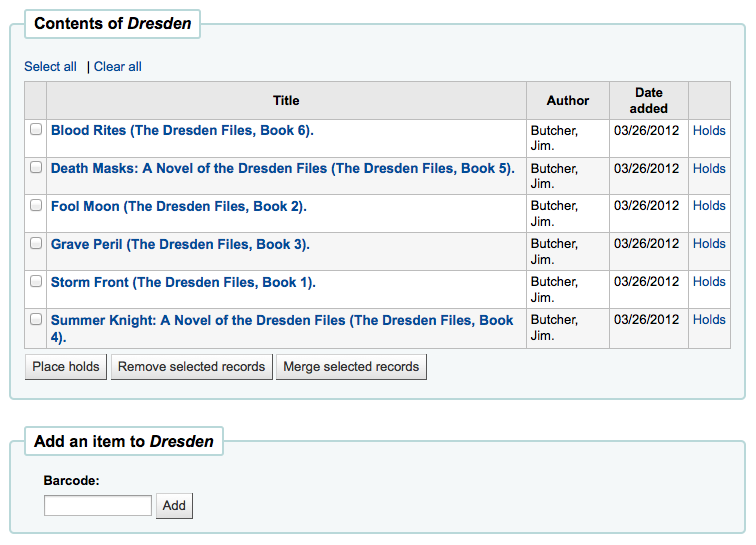
A title can also be added to a list by selecting titles on the search results page and choosing the list from the ‘Add to’ menu
Add to List
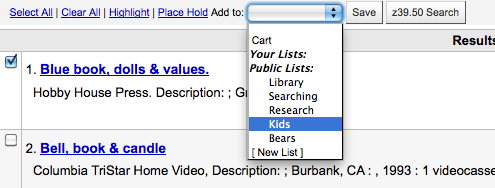
Viewing Lists
To see the contents of a list, visit the Lists page on the staff client
List of Lists
Clicking on the ‘List Name’ will show the contents of the list
Content of a List
Merging Bibliographic Records Via Lists
The easiest way to merge together duplicate bibliographic records is to add them to a list and use the Merge Tool from there.
List of Duplicate Records
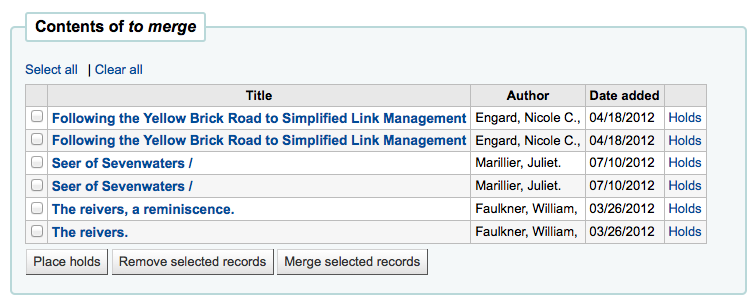
From the list, check the two items you want to merge. If you choose more than or fewer than 2, you will be presented with an error:
Merge Items Error
Once you have selected the records you want to merge, click the ‘Merge selected items’ button. You will be asked which of the two records you would like to keep as your primary record and which will be deleted after the merge. If the records were created using different frameworks, Koha will also ask you what Framework you would like the newly merged record to use.
Choose Primary Record for Merge
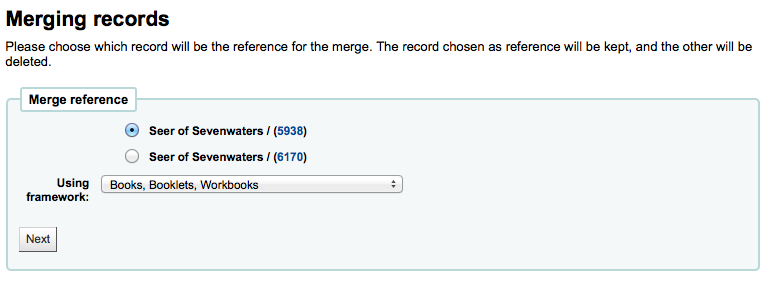
You will be presented with the MARC for both of the records (each accessible by tabs labeled with the bib numbers for those records). By default the entire first record will be selected, uncheck the fields you don’t want in the final (destination) record and then move on to the second tab to choose which fields should be in the final (destination) record.
Merging Records
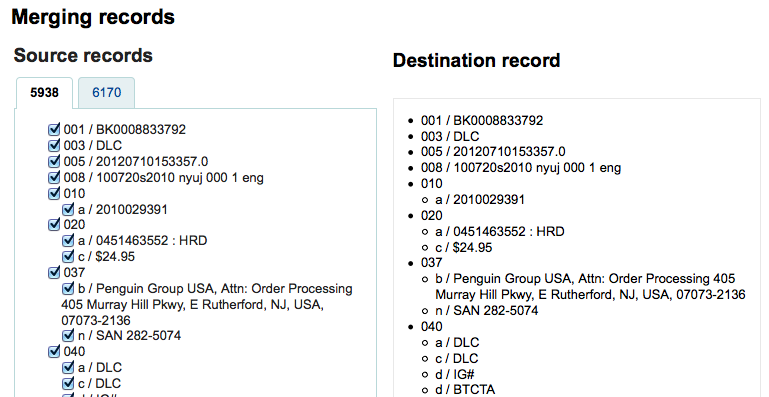
Should you try to add a field that is not repeatable two times (like choosing the 245 field from both record #1 and #2) you will be presented with an error
Non-repeatable Error
Once you have completed your selections click the ‘merge’ button. The primary record will now CONTAIN the data you chose for it as well as all of the items/holdings from both bib records, and the second record will be deleted.
Important
It is important to rebuild your zebra index immediately after merging records. If a search is performed for a record which has been deleted Koha will present the patrons with an error in the OPAC.
Cart
The cart is a temporary holding place for items in the OPAC and/or staff client. The cart will be emptied once the session is ended (by closing the browser or logging out). The cart is best used for performing batch operations (holds, printing, emailing) or for getting a list of items to be printed or emailed to yourself or a patron.
If you would like to enable the cart in the staff client, you need to set the intranetbookbag system preference to ‘Show.’ To add things to the cart, search the catalog and select the items you would like added to your cart and choose ‘Cart’ from the ‘Add to’ menu
Add to Cart
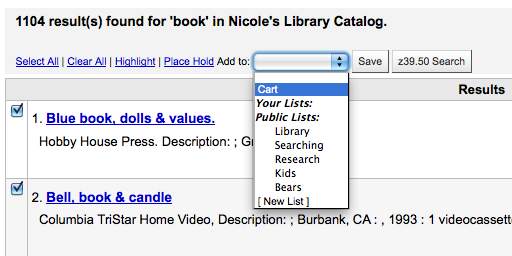
A confirmation will appear below the cart button at the top of the staff client
Items added to Cart
Clicking on the Cart icon will provide you with the contents of the cart
Cart Contents
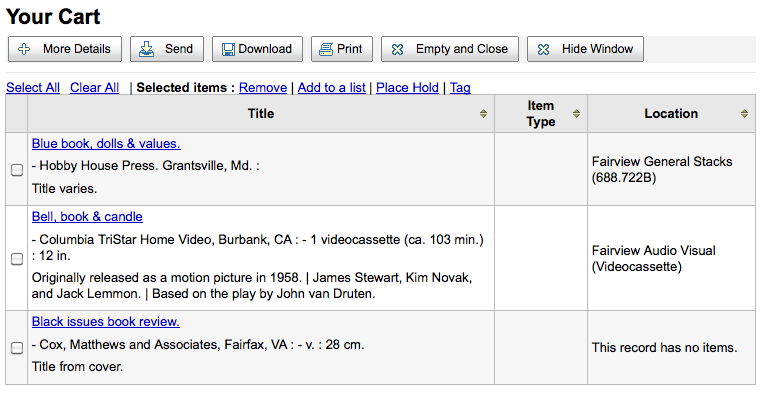
- From this list of items you can perform several actions
- ‘Send’ will send the list to the email address you enter
- ‘Download’ will allow you to download the cart using one of 3 default formats or your CSV Profiles
- ‘Print’ will present you with a printable version of the cart
- ‘Empty and Close’ will empty the list and close the window
- ‘Hide Window’ will close the window
Reports
Reports in Koha are a way to gather data. Reports are used to generate statistics, member lists, shelving lists, or any list of data in your database.
- Get there: More > Reports
Custom Reports
Koha’s data is stored in a MySQL database which means that librarians can generate nearly any report they would like by either using the Guided Reports Wizard or writing their own SQL query.
Add Custom Report
Guided Report Wizard
The guided report wizard will walk you through a six step process to generate a report.
Step 1: Choose the module you want to report on. This will determine what tables and fields are available for you to query.
‘Report is public’ should be left to the default of ‘No’ in most cases. A report can be made public if you intend to allow access to it through the JSON webservice interface. This is a system that can be used by developers to make custom presentations of the data from the report, for example displaying it using a graphing API. To learn more speak to your local developer.
- A public report is accessible via a URL that looks like this: http://MYOPAC/cgi-bin/koha/svc/report?id=REPORTID
Chose Module for Report
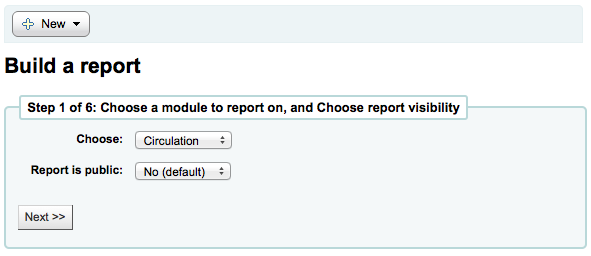
Step 2: Choose a report type. For now, Tabular is the only option available.
Report Type
Step 3: Choose the fields you want in your report. You can select multiple fields and add them all at once by using CTRL+Click on each item you want to add before clicking the Add button.
Select database fields to query
Step 4: Choose any limits you might want to apply to your report (such as item types or branches). If you don’t want to apply any limits, simply click Next instead of making an option.
Choose limits
Step 5: Perform math functions. If you don’t want to do any calculations, simply click Next instead of making an option.
Choose math functions
Step 6: Choose data order. If you want the data to print out in the order it’s found in the database, simply click Finish.
Choose ordering
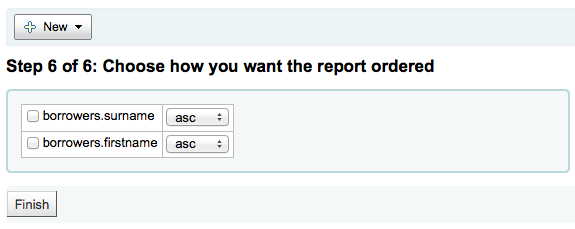
When you are finished you will be presented with the SQL generated by the report wizard. From here you can choose to save the report by clicking ‘Save’ or copy the SQL and make edits to it by hand.
Custom Report Confirmation
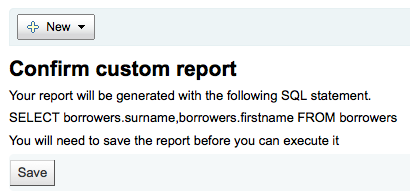
If you choose to save the report you will be asked to name your report and enter any notes regarding it.
Save custom report
Once your report is saved it will appear on the ‘Use Saved’ page with all other saved reports.
Saved Reports list
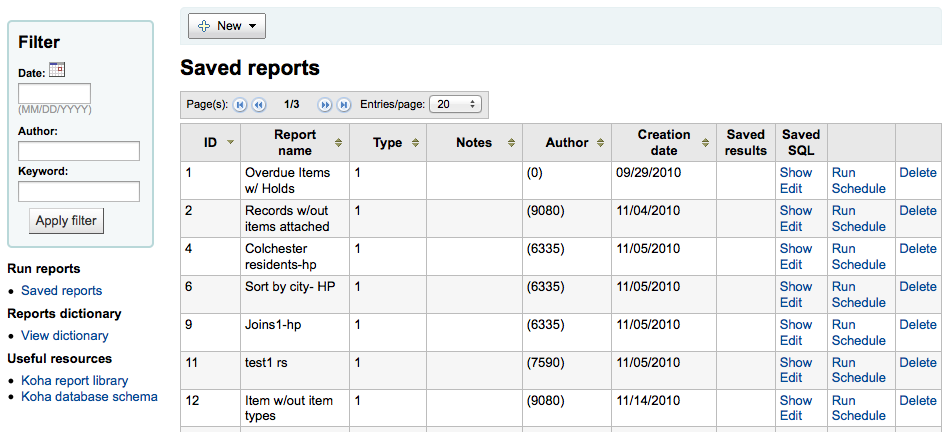
From here you can make edits, run the report, or schedule a time to have the report run. To find the report you created you can sort by any of the columns by clicking the on the column header (creation date is the best bet for finding the report you just added). You can also filter your results using the filter menu on the left.
Report from SQL
In addition to the report wizard, you have the option to write your own queries using SQL. To find reports written by other Koha users, visit the Koha Wiki: http://wiki.koha-community.org/wiki/SQL_Reports_Library. You can also find your database structure in /installer/data/mysql/kohastructure.sql or online at: http://schema.koha-community.org.
To add your query, click the link to ‘Create from SQL’ on the main reports module or the New button at the top of the Saved Reports page.
New SQL Report
Fill in the form presented
Create Report from SQL
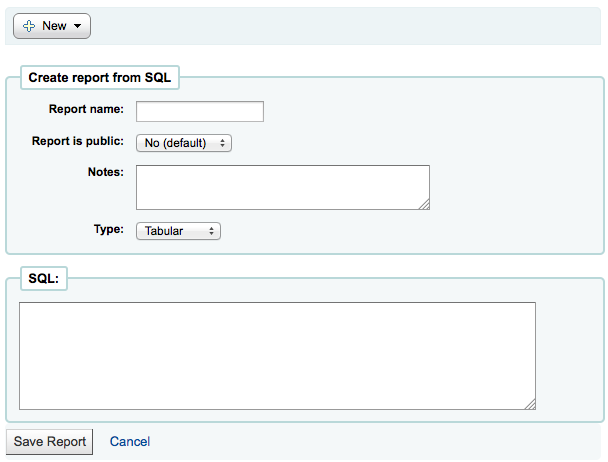
The ‘Name’ is what will appear on the Saved Reports page to help you identify the report later. It will also be searchable using the filters found the left of the Saved Reports page.
‘Report is public’ should be left to the default of ‘No’ in most cases. A report can be made public if you intend to allow access to it through the JSON webservice interface. This is a system that can be used by developers to make custom presentations of the data from the report, for example displaying it using a graphing API. To learn more speak to your local developer. - A public report is accessible via a URL that looks
‘Notes’ will also appear on the Saved Reports page, this can be used to provide more details about the report or tips on how to enter values when it runs
The type should always be ‘Tabular’ at this time since the other formats have not been implemented
In the ‘SQL’ box you will type or paste the SQL for the report
If you feel that your report might be too resource intensive you might want to consider using runtime parameters to your query. Runtime parameters basically make a filter appear before the report is run to save your system resources. There is a specific syntax that Koha will understand as ‘ask for values when running the report’. The syntax is <<Question to ask|authorized_value>>. - The << and >> are just delimiters. You
must put << at the beginning and >> at the end of your parameter
- The ‘Question to ask’ will be displayed on the left of the string to enter.
- The authorized_value can be omitted if not applicable. If it contains an authorized value category, or branches or itemtype or categorycode, a list with the Koha authorized values will be displayed instead of a free field Note that you can have more than one parameter in a given SQL Note that entering nothing at run time won’t probably work as you expect. It will be considered as “value empty” not as “ignore this parameter”. For example entering nothing for : “title=<<Enter title>>” will display results with title=’’ (no title). If you want to have to have something not mandatory, use “title like <<Enter title>>” and enter a % at run time instead of nothing
Examples: - SELECT surname,firstname FROM borrowers WHERE
branchcode=<<Enter patrons library|branches>> AND surname like <<Enter filter for patron surname (% if none)>>
- SELECT * FROM items WHERE homebranch = <<Pick your branch|branches>> and barcode like <<Partial barcode value here>>
Tip
To generate a date picker calendar to the right of the field when running a report you can use the ‘date’ keyword like this: <<Enter Date|date>> Date Picker .. image:: images/reports/datepicker.png
Tip
You have to put “%” in a text box to ‘leave it blank’. Otherwise, it literally looks for “” (empty string) as the value for the field.
Important
In addition to using any authorized value code to generate a dropdown, you can use the following values as well: Branches (branches), Item Types (itemtypes) and Patron Categories (categorycode). For example a branch pull down would be generated like this <<Branch|branches>> Branch pull down .. image:: images/reports/branchpulldown.png
Note
There is a limit of 10,000 records put on SQL statements entered in Koha. To get around this you want to add ‘LIMIT 100000’ to the end of your SQL statement (or any other number above 10,000.
Once everything is entered click the ‘Save Report’ button and you’ll be presented with options to run it. Once a report is saved you do not have to recreate it you can simply find it on the Saved Reports page and run or edit it.
Edit Custom Reports
Every report can be edited from the reports lists. To see the list of reports already stored in Koha, click ‘Use Saved.’
Saved Reports
To find the report you’d like to edit you can sort by any of the columns by clicking the on the column header. You can also filter your results using the filter menu on the left.
From this list you can edit any custom report by clicking ‘Edit SQL’
Edit SQL Form
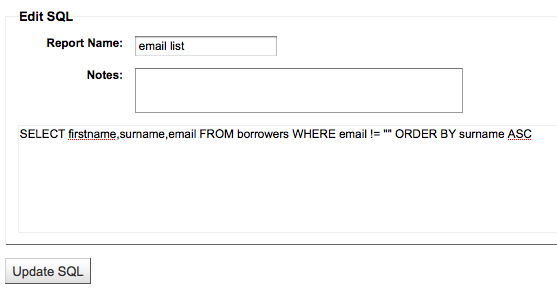
Running Custom Reports
Once custom reports are saved to Koha, you can run them by going to the Saved Reports page and clicking the Run link to the right of the report.
Run Report

When you report runs you will either be asked for some values
Enter report parameters
or you will see the results right away
Report results
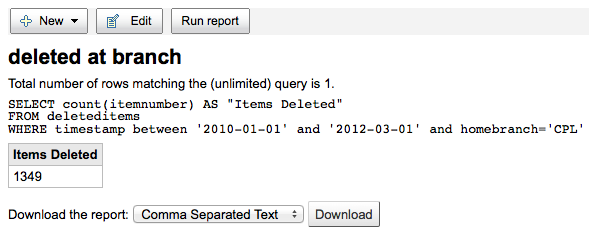
From the results you can choose to rerun the report by clicking ‘Run report’ at the top, edit the report by clicking the ‘Edit’ button or starting over and creating a new report by using the ‘New’ button. You can also download your results by choosing a file type at the bottom of the results next to the ‘Download the report’ label and clicking ‘Download.’
Tip
A Comma Separated Text file is a CSV file and it can be opened by any spreadsheet application.
Statistics Reports
Statistic reports will show you counts and sums. These reports are all about numbers and statistics, for reports that return more detailed data, use the Guided Report Wizard. These reports are limited in what data they can look at, so it’s often recommended to use custom reports for official end of the year statistics.
Acquisitions Statistics
Note
These reports are limited in what data they can look at, so it’s often recommended to use custom reports for official end of the year statistics.
Using the form provided, choose which value you would like to appear in the Column and which will appear in the Row.
Acquisitions Statistics
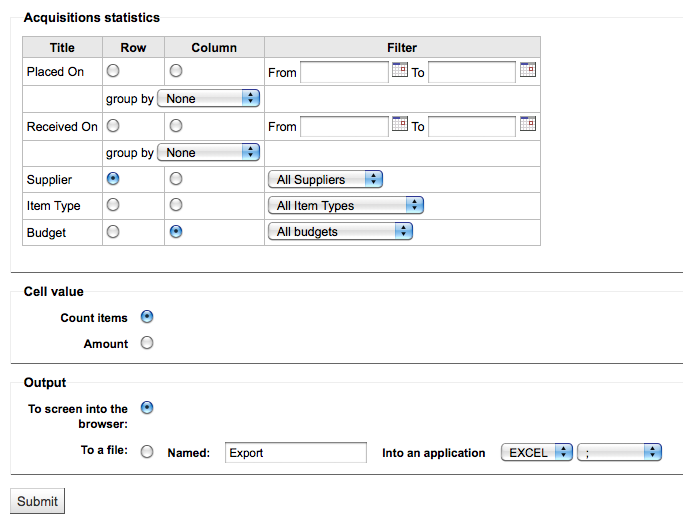
If you choose to output to the browser your results will print to the screen.
Acquisitions Statistics Results
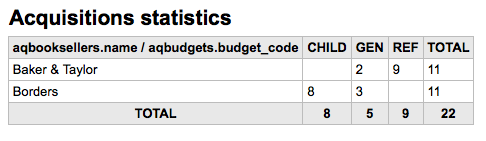
You can also choose to export to a file that you can manipulate to your needs.
When generating your report, note that you get to choose between counting or summing the values.
Acquisitions Stats Options
Choosing amount will change your results to appear as the sum of the amounts spent.
Acquisitions statistics with totals
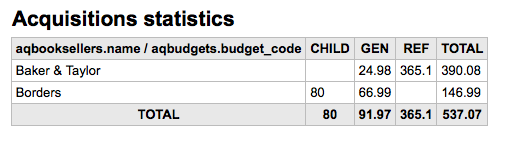
Patron Statistics
Note
These reports are limited in what data they can look at, so it’s often recommended to use custom reports for official end of the year statistics.
Using the form provided, choose which value you would like to appear in the Column and which will appear in the Row.
Patron Statistics Options
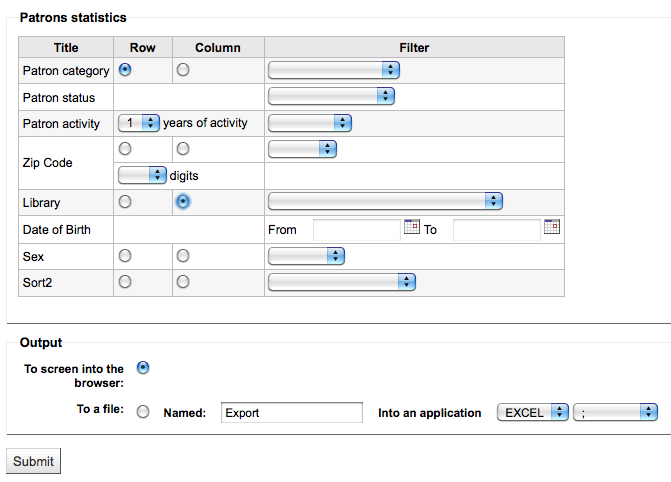
If you choose to output to the browser your results will print to the screen.
Patron Statistics Results
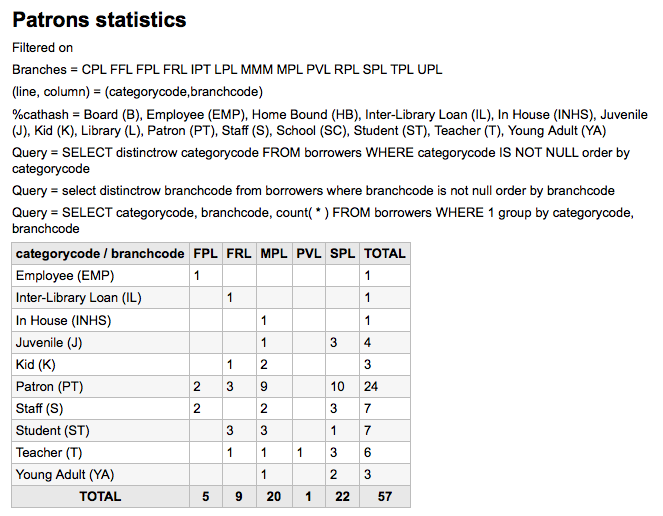
Based on your selections, you may see some query information above your results table. You can also choose to export to a file that you can manipulate to your needs.
Catalog Statistics
Note
These reports are limited in what data they can look at, so it’s often recommended to use custom reports for official end of the year statistics.
Using the form provided, choose which value you would like to appear in the Column and which will appear in the Row.
Catalog Statistics Form
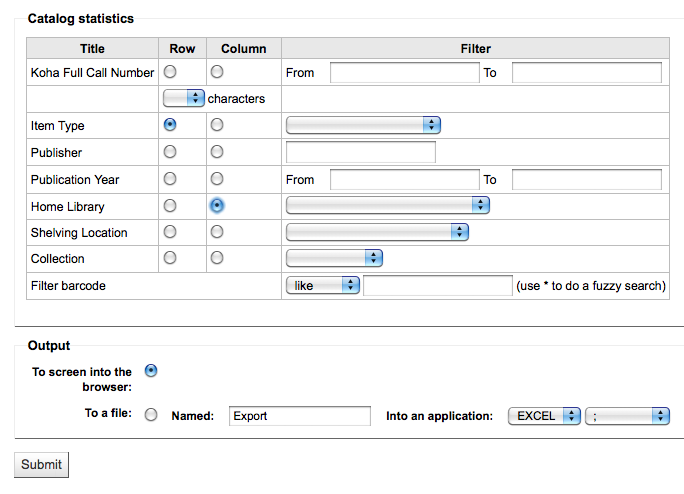
If you choose to output to the browser your results will print to the screen.
Catalog Statistic Results
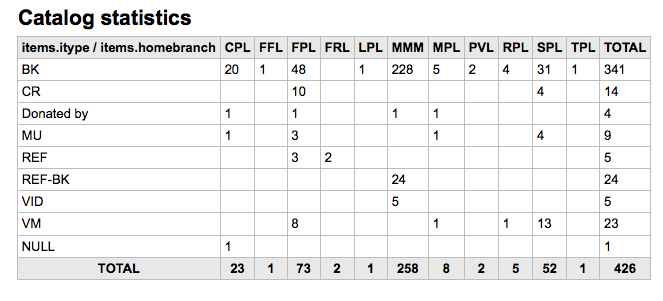
You can also choose to export to a file that you can manipulate to your needs.
Circulation Statistics
Note
These reports are limited in what data they can look at, so it’s often recommended to use custom reports for official end of the year statistics.
Using the form provided, choose which value you would like to appear in the Column and which will appear in the Row.
Circulation Statistics
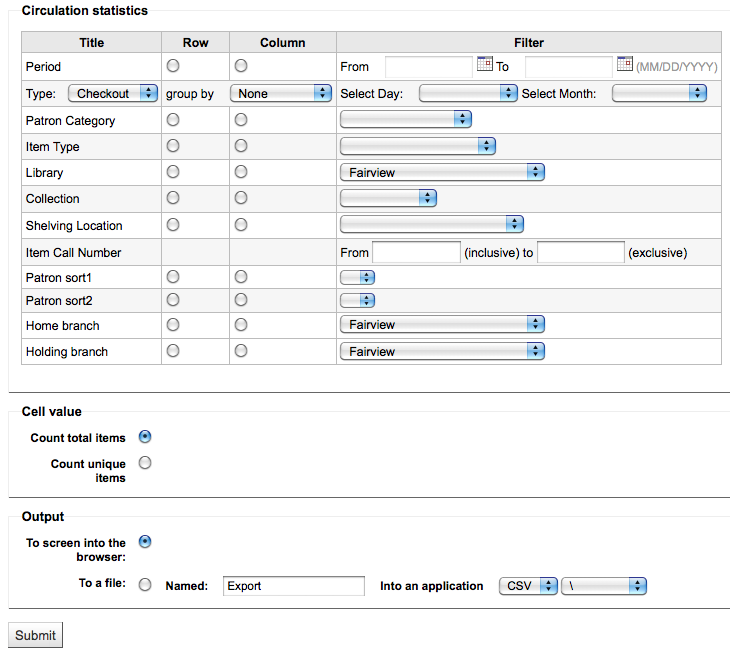
If you choose to output to the browser your results will print to the screen.
Circulation Statistic Results
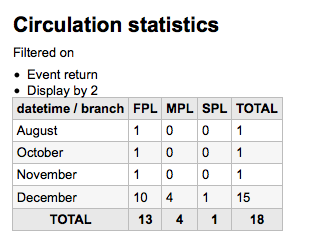
You can also choose to export to a file that you can manipulate to your needs.
Tip
To get a complete picture of your monthly or daily circulation, you can run the report twice, once for ‘Type’ of ‘Checkout’ and again for ‘Renewal.’ This report uses ‘Period,’ or date, filtering that allows you to limit to a month by simply selecting the first day of the first month through the first day of the next month. For example, 10/1 to 11/1 to find statistics for the month of October. - To find daily statistics, set your date
range.</br> Example: “I want circulation data starting with date XXX up to, but not including, date XXX.”
- For a whole month, an example range would be: 11/01/2009 to 12/01/2009
- For a whole year, an example range would be: 01/01/2009 to 01/01/2010
- For a single day, an example would be: 11/15/2009 to 11/16/2009 to find what circulated on the 15th
Tracking in house use
Using the Circulation statistics reporting wizard you can run reports on in house usage of items simply by choosing ‘Local Use’ from the ‘Type’ pull down:
In House Use Stats
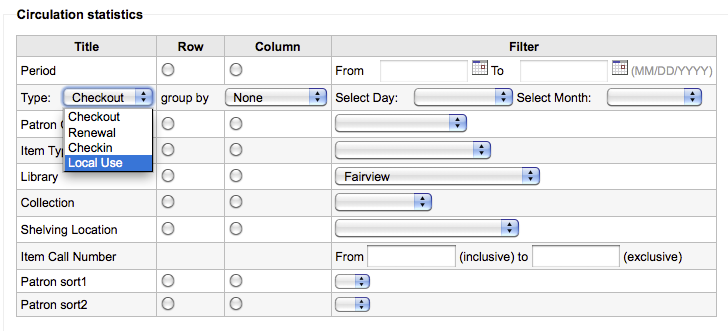
Serials Statistics
Note
These reports are limited in what data they can look at, so it’s often recommended to use custom reports for official end of the year statistics.
Using the form provided, choose how you would like to list the serials in your system.
Serials Statistics
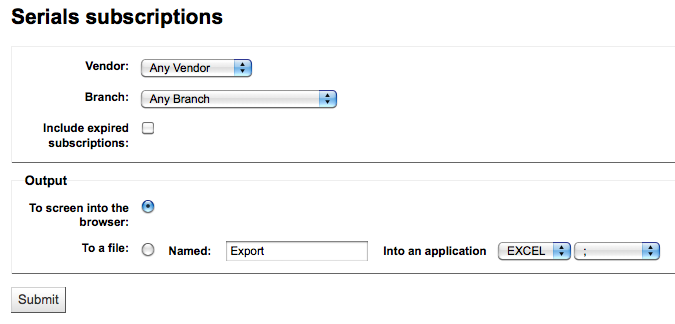
If you choose to output to the browser your results will print to the screen.
Serials Results
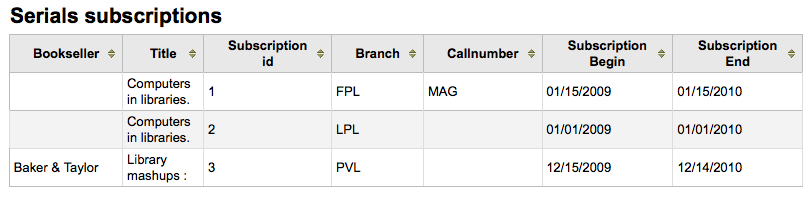
You can also choose to export to a file that you can manipulate to your needs.
Holds Statistics
Note
These reports are limited in what data they can look at, so it’s often recommended to use custom reports for official end of the year statistics.
Using the form provided you can see statistics for holds placed, filled, cancelled and more at your library. From the form choose what value you want to display in the column and what value to show in the row. You can also choose from the filters on the far right of the form.
Hold Statistics Form
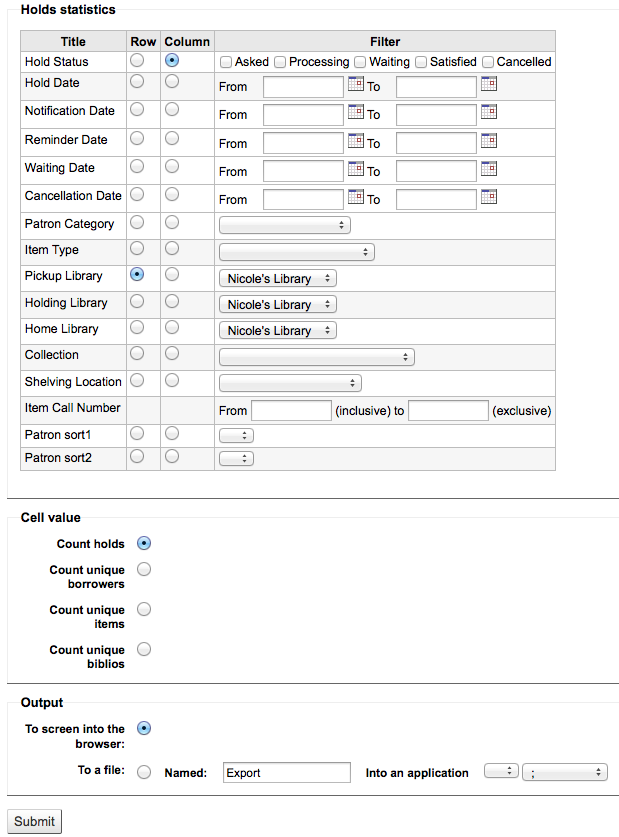
If you choose to output to the browser your results will print to the screen.
Hold Stats Results

You can also choose to export to a file that you can manipulate to your needs.
Patrons with the most checkouts
This report will simply list the patrons who have the most checkouts.
Patrons with the most checkouts form
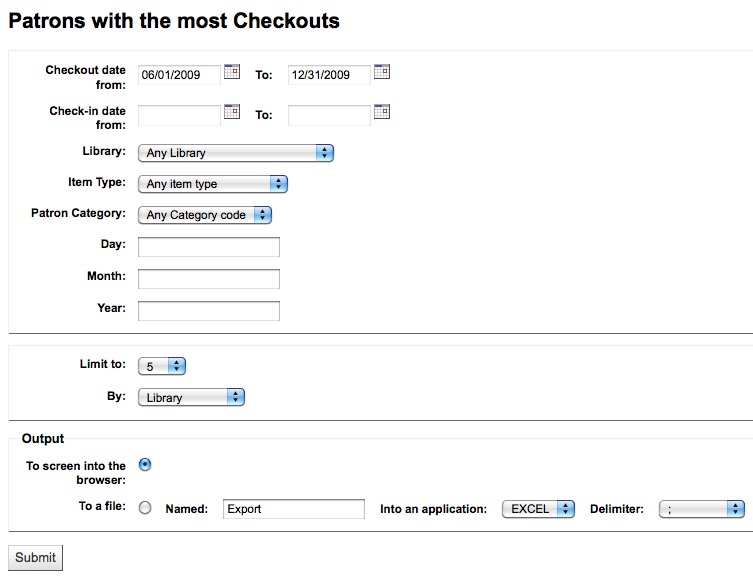
If you choose to output to the browser your results will print to the screen.
Top checkouts results
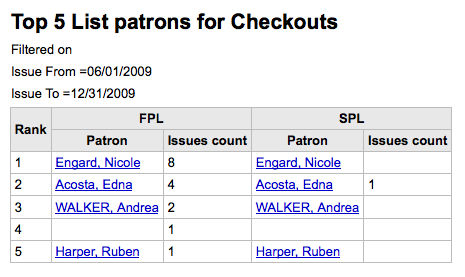
You can also choose to export to a file that you can manipulate to your needs.
Most Circulated Items
This report will simply list the items that have the been checked out the most.
Most Circulation Items Form
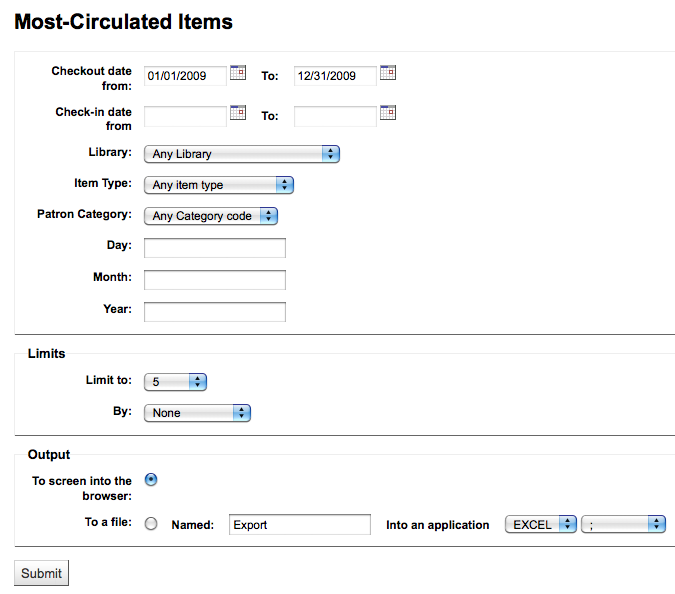
If you choose to output to the browser your results will print to the screen.
Top Circulation Items Results
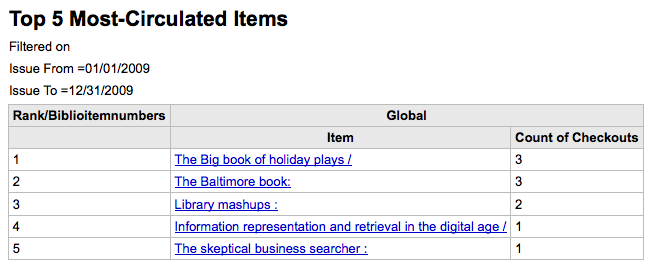
You can also choose to export to a file that you can manipulate to your needs.
Patrons with no checkouts
This report will list for you the patrons in your system who haven’t checked any items out.
Patrons with no Checkouts
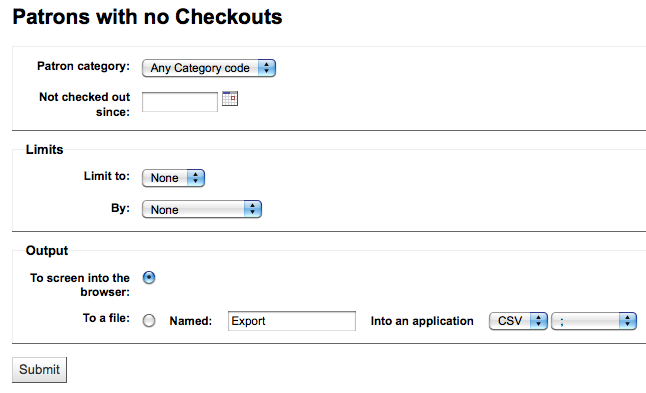
If you choose to output to the browser your results will print to the screen.
Results for Patrons with no Checkouts
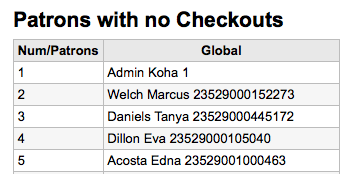
You can also choose to export to a file that you can manipulate to your needs.
Items with no checkouts
This report will list items in your collection that have never been checked out.
Items with No Checkouts
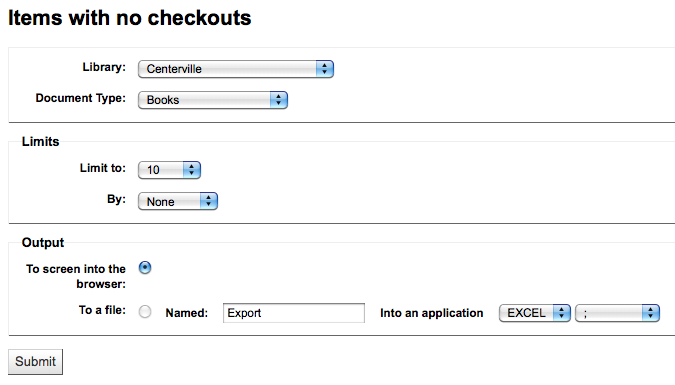
If you choose to output to the browser your results will print to the screen.
Items with no checkouts results
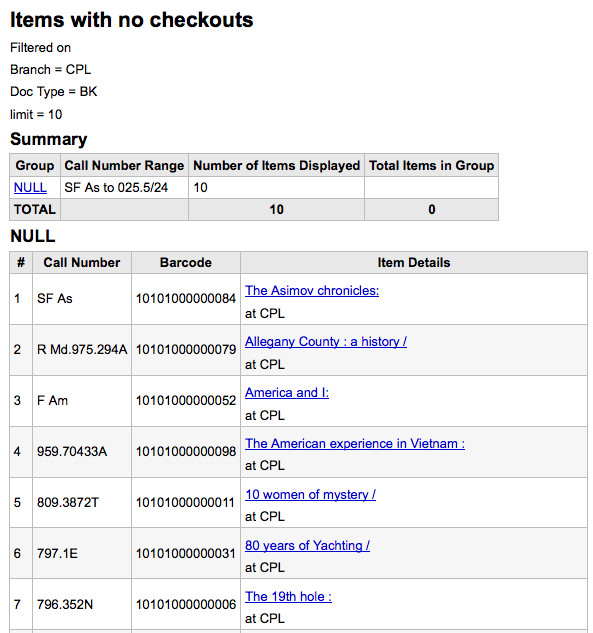
You can also choose to export to a file that you can manipulate to your needs.
Catalog by Item Type
This report will list the total number of items of each item type per branch.
Catalog by Item Type
If you choose to output to the browser your results will print to the screen.
Total of Items by Type and Branch
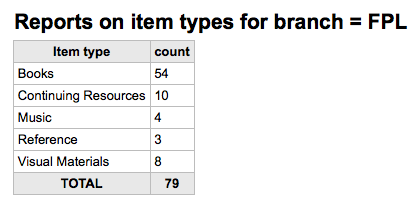
You can also choose to export to a file that you can manipulate to your needs.
Lost Items
This report will allow you to generate a list of items that have been marked as Lost within the system
Lost Items Report
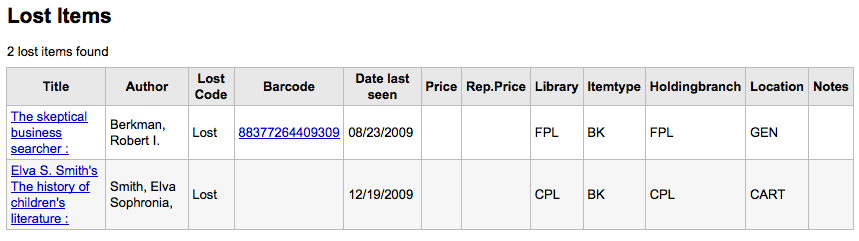
Average Loan Time
This report will list the average time items are out on loan based on the criteria you enter:
Average Checkout Period Form
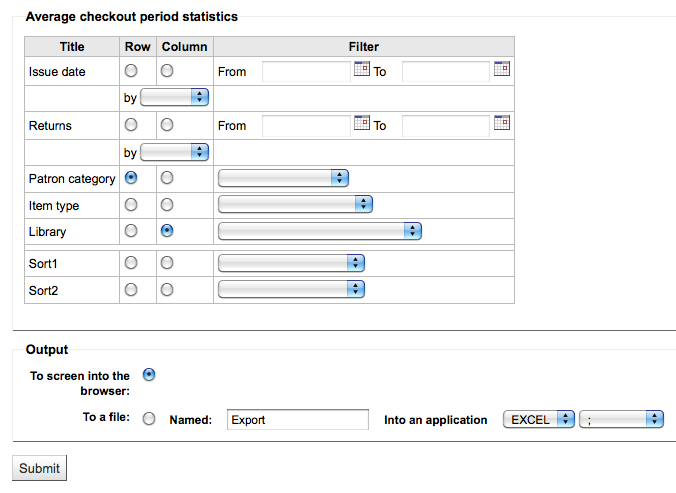
If you choose to output to the browser your results will print to the screen.
Average Checkout Period Results
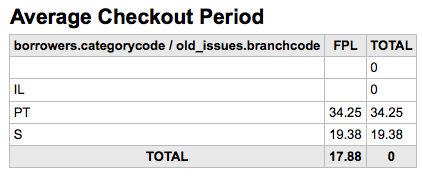
You can also choose to export to a file that you can manipulate to your needs.
Report Dictionary
The report dictionary is a way to pre-define common filters you’d like to apply to your reports. This is a good way to add in filters that the report wizard doesn’t include by default. To add a new definition, or filter, click ‘New Definition’ on the Reports Dictionary page and follow the 4 step process.
Step 1: Name the definition and provide a description if necessary
Create a Definition
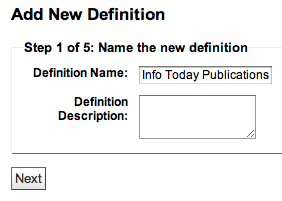
Step 2: Choose the module that the will be queried.
Select Koha Module
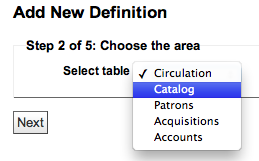
Step 3: Choose columns to query from the tables presented.
Choose columns
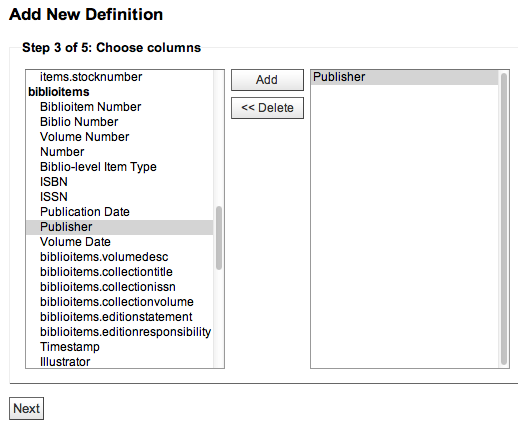
Step 4: Choose the value(s) from the field(s). These will be automatically populated with options available in your database.
Choose fields and values
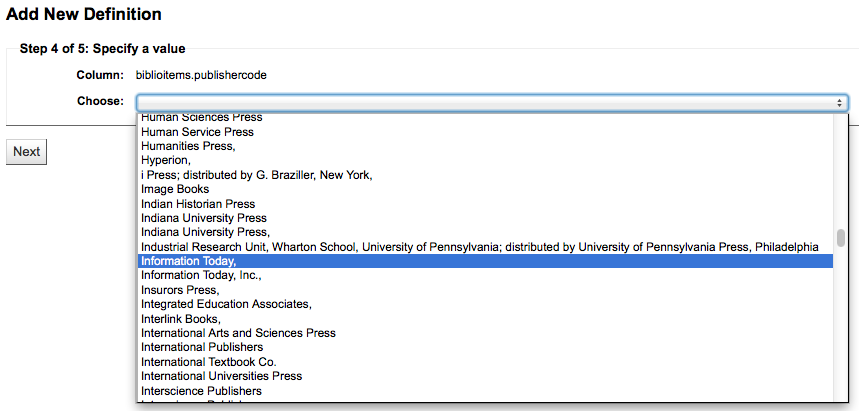
Confirm your selections to save the definition.
Confirm Definition
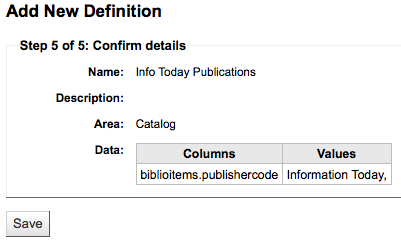
Your definitions will all appear on the Reports Dictionary page
Reports Dictionary Listing
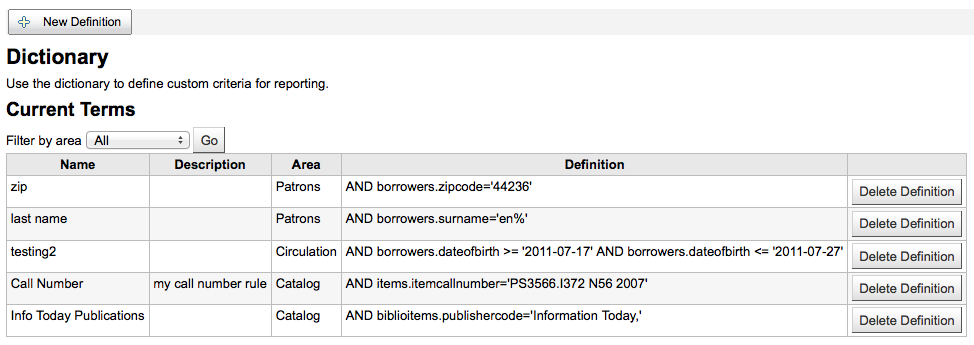
Then when generating reports on the module you created the value for you will see an option to limit by the definition at the bottom of the usual filters.
Dictionary Limit Option
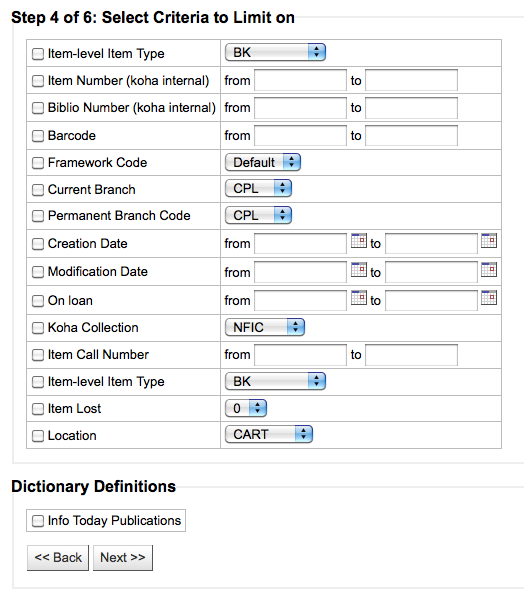
OPAC
This chapter assumes that you have the following preferences set as follows:
- OPACXSLTResultsDisplay = default
- OPACXSLTDetailsDisplay = default
- DisplayOPACiconsXSLT = show
- TagsEnabled = Allow
- TagsInputOnDetail =Allow
- TagsInputOnList = Allow
- reviewson = Allow
- ShowReviewer = Allow
- ShowReviewerPhoto =Allow
- OPACFRBRizeEditions = Show
- OPACAmazonEnabled = Use
- OPACAmazonCoverImages = Show
- XISBN = Use
- OPACSearchForTitleIn = Default set of links
- OPACShowCheckoutName = Don’t show
- RequestOnOpac = Allow
- AutoResumeSuspendedHolds = Allow
- OpacBrowseResults = Enable
- SuspendHoldsOpac = Allow
- OPACShowBarcode = Don’t show
If your system preferences are set differently your displays may differ.
Search Results
To search the OPAC you can either choose to enter your search words in the box at the top of the OPAC or click on the ‘Advanced Search’ link to perform a more detailed search.
OPAC Search Box

For more on searching check the ‘Searching‘ chapter in this manual.
Results Overview
After performing a search the number of results found for your search will appear above the results
Total Results
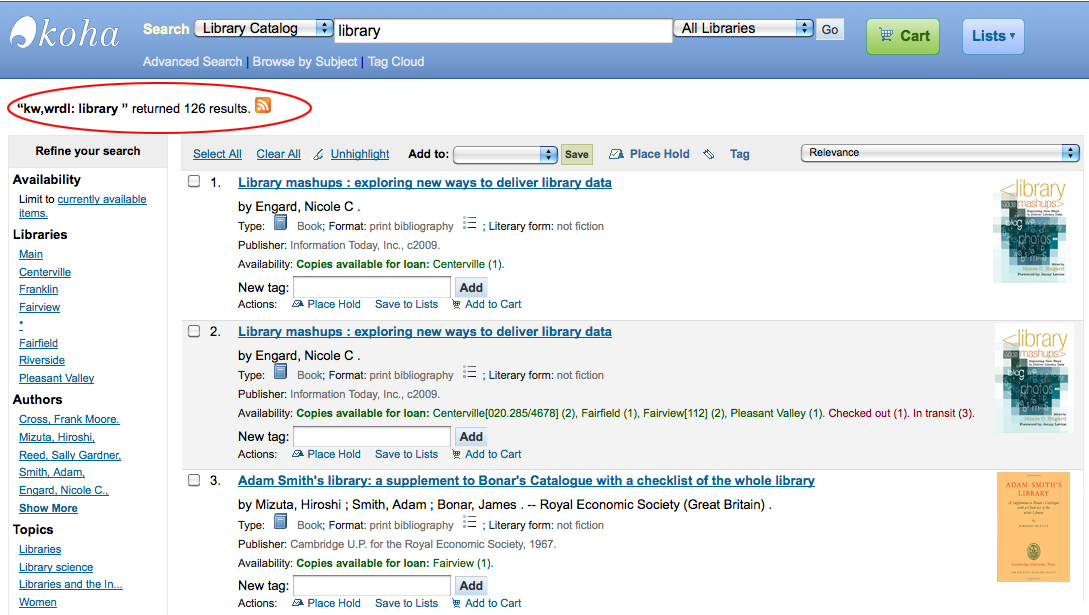
By default your search results will be sorted based on your OPACdefaultSortField and OPACdefaultSortOrder system preference values. To change this you can choose another sorting method from the pull down on the right.
Results Sorting Options
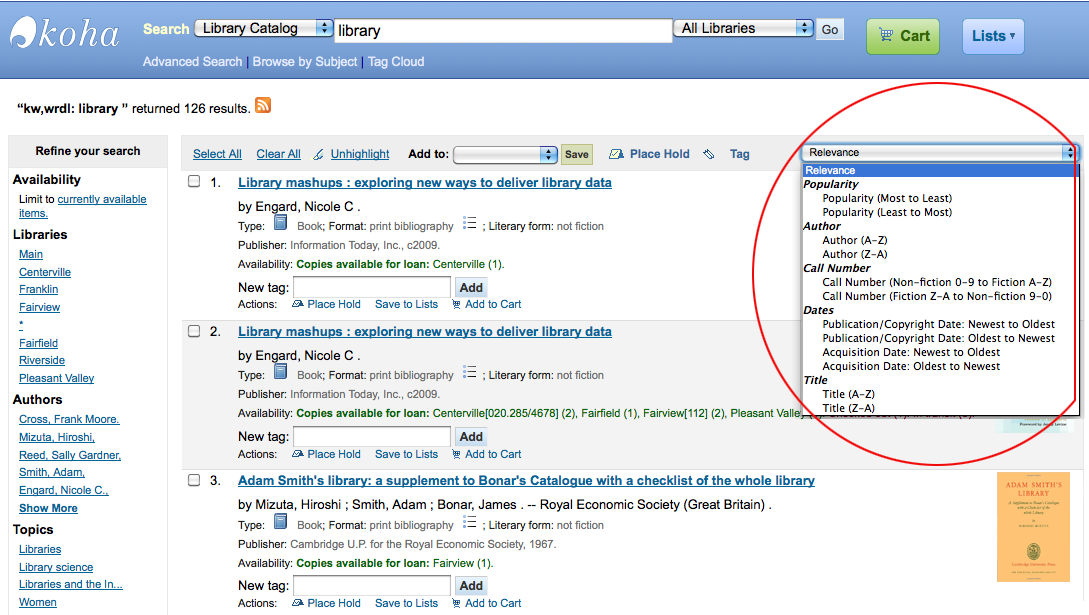
Under each title on your results list a series of values from your leader will appear. It is important to note that this has nothing to do with the item types or collection codes you have applied to your records, this data is all pulled from your leader.
Leader Visualization
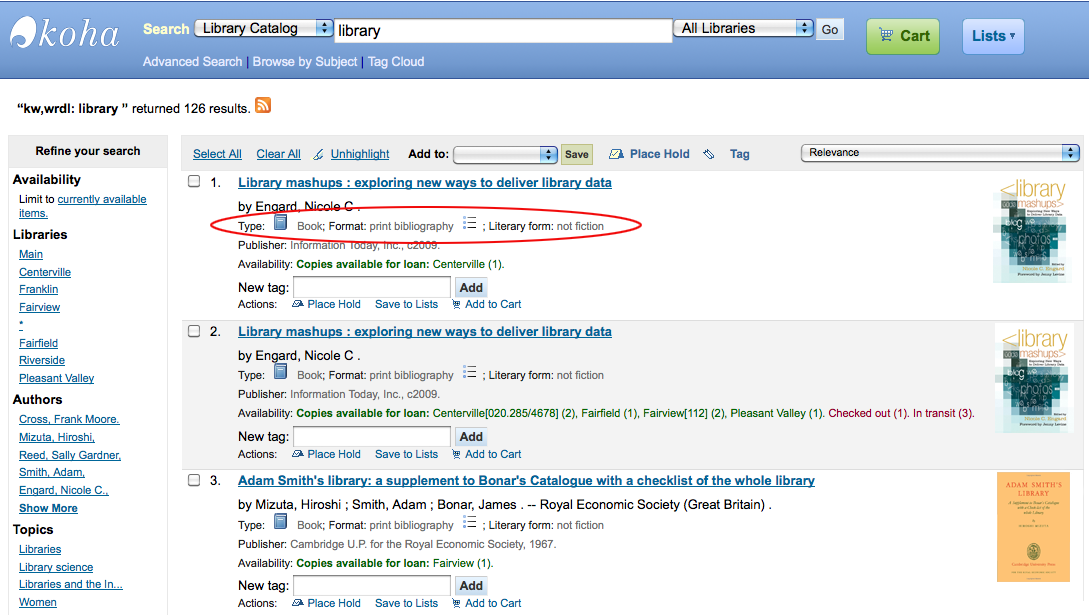
Below each title you will see the availability for the items attached to the record. Note that even if you filtered on one library location all locations that hold the item will appear on the search results.
Holdings Information
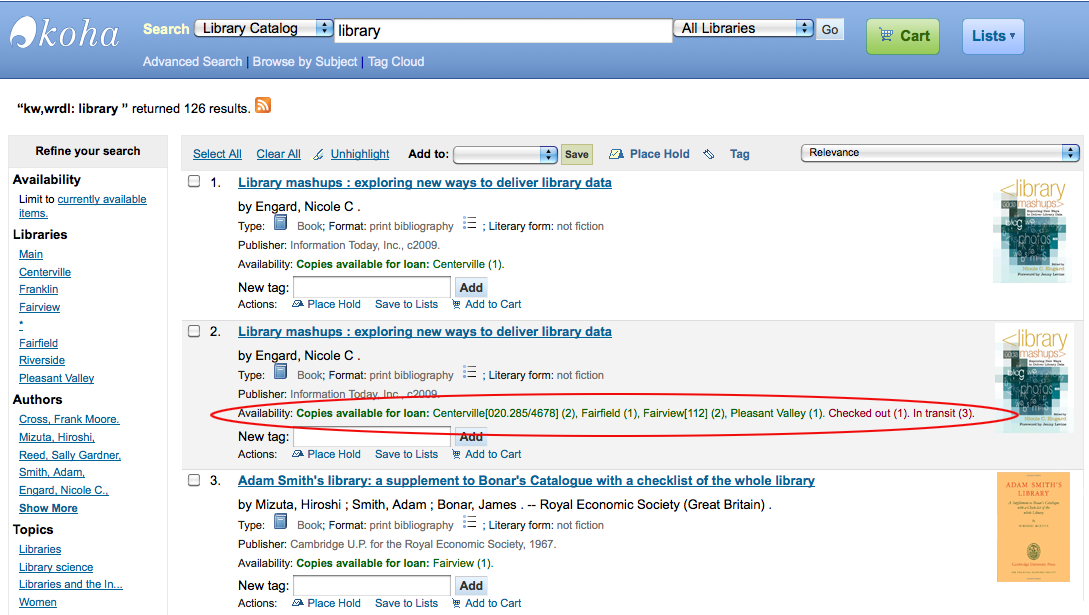
If you have turned on Enhanced Content preferences you may have book jackets on your search results.
Book Jacket on Results
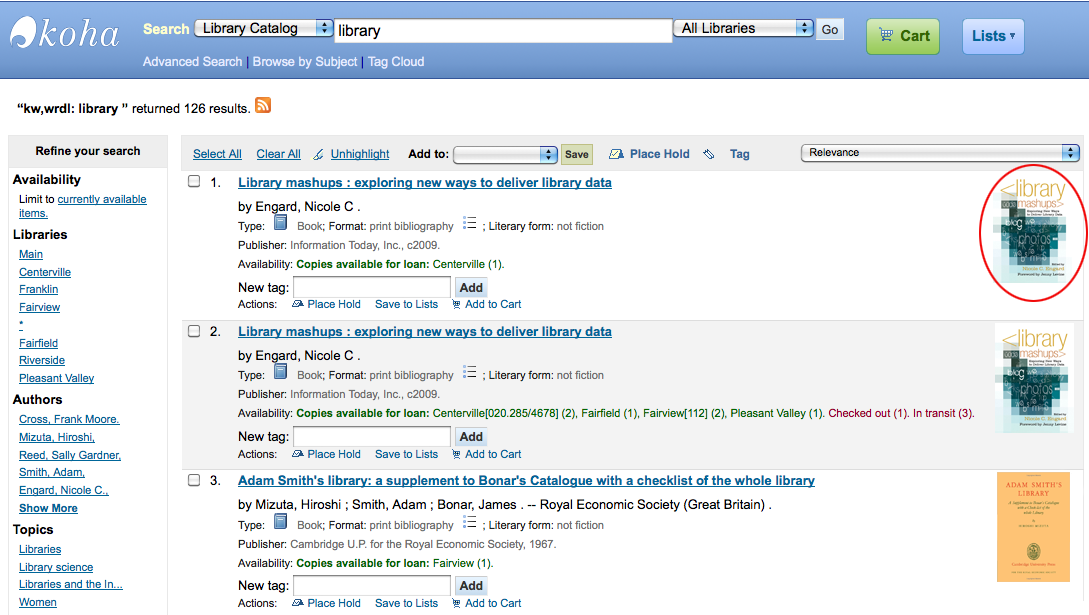
Filters
To filter your results click on the links below the ‘Refine Your Search’ menu on the left of your screen
Refine Your Results
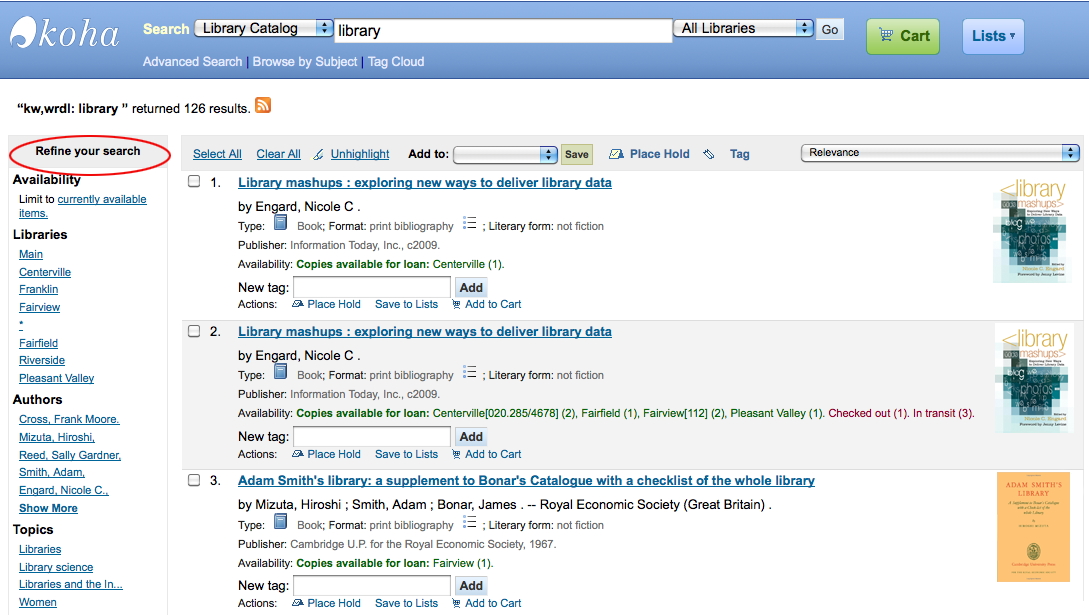
Search RSS Feeds
You will be able to subscribe to your search results as an RSS feed by clicking the RSS icon in your address bar or next to the number of results. To learn more about what RSS feeds are check out this tutorial video.
RSS Feed Icon
Subscribing to search results as RSS feeds will allow you to see when a new item is added to the catalog in your area of interest.
Bibliographic Record
When you click on a title from the search results, you’re brought to the bibliographic detail of the record. This page is broken down in several different areas.
At the top of your screen will be the title and the GMD:
Title
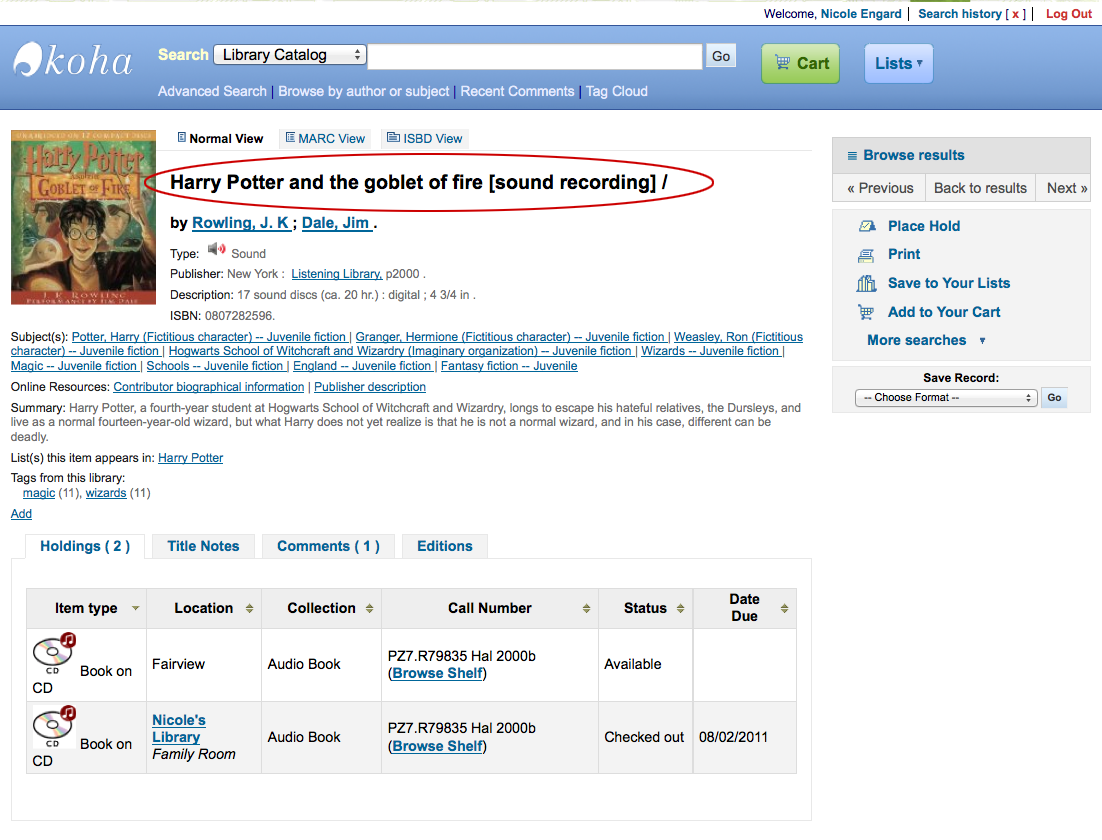
Below the title the authors will be listed. These come from your 1xx and 7xx fields:
Author Display
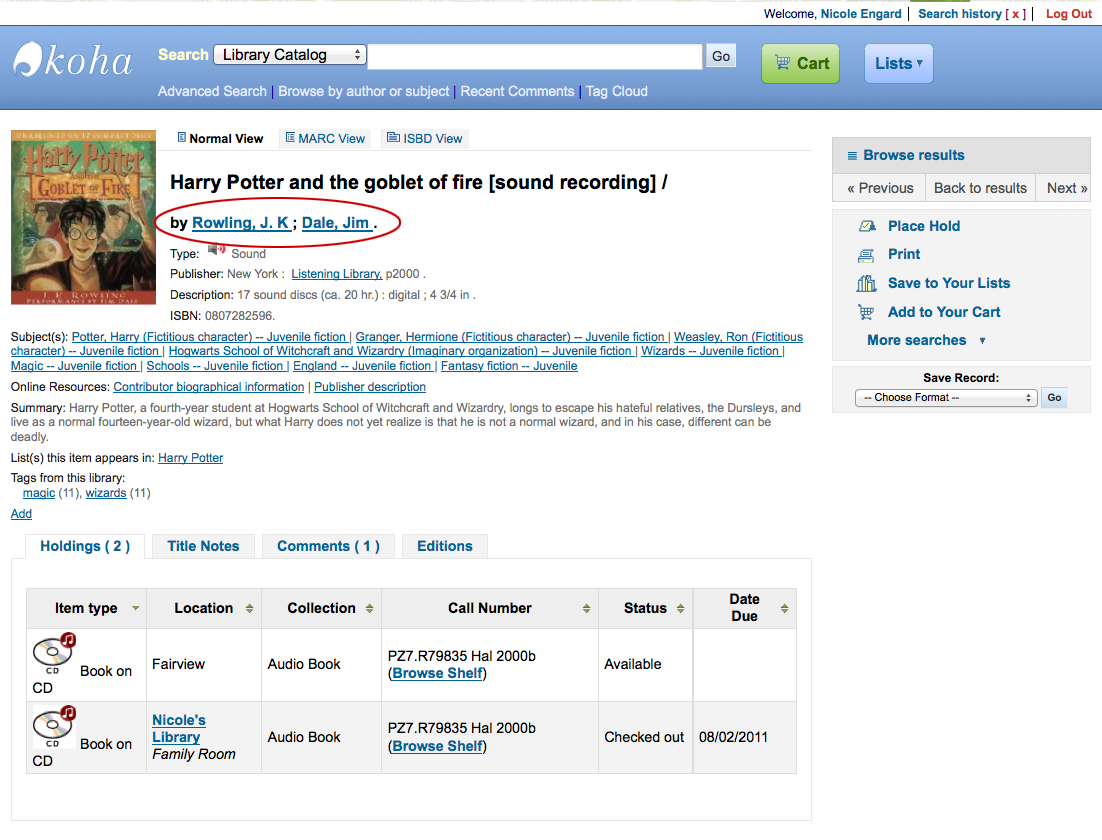
If you have your DisplayOPACiconsXSLT preference set to ‘show’ you will see a material type that is determined by values in your fixed fields (learn more in the XSLT Item Types Appendix).
XSLT Item Type
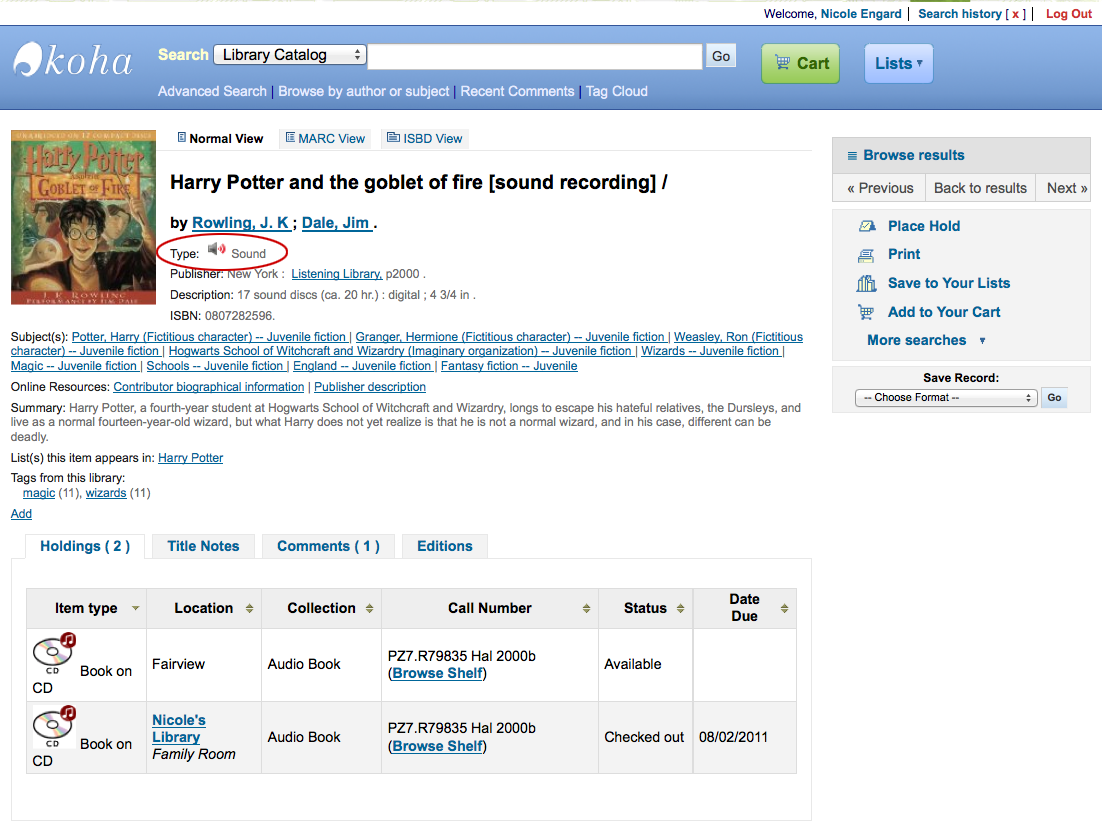
Next you’ll see the description of the record you’re viewing:
Basic Details
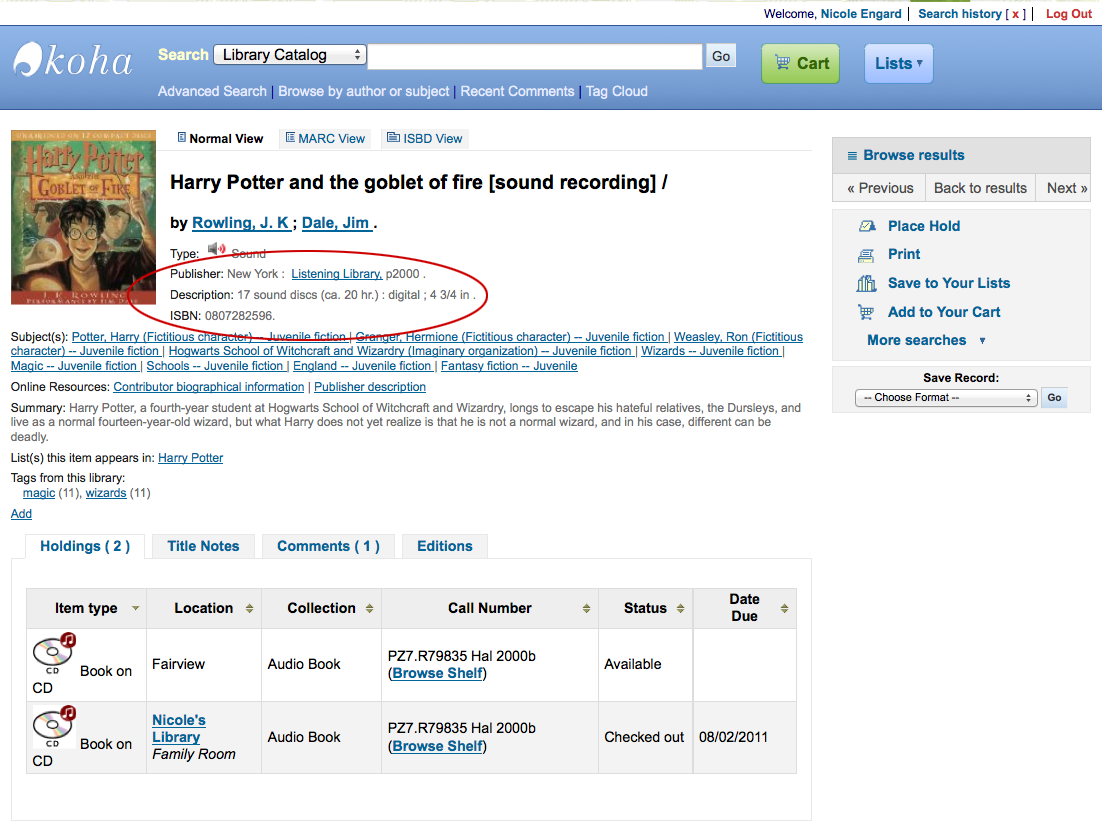
Following that information you’ll find the subject headings which can be clicked to search for other titles on similar topics
Bibliographic Subjects
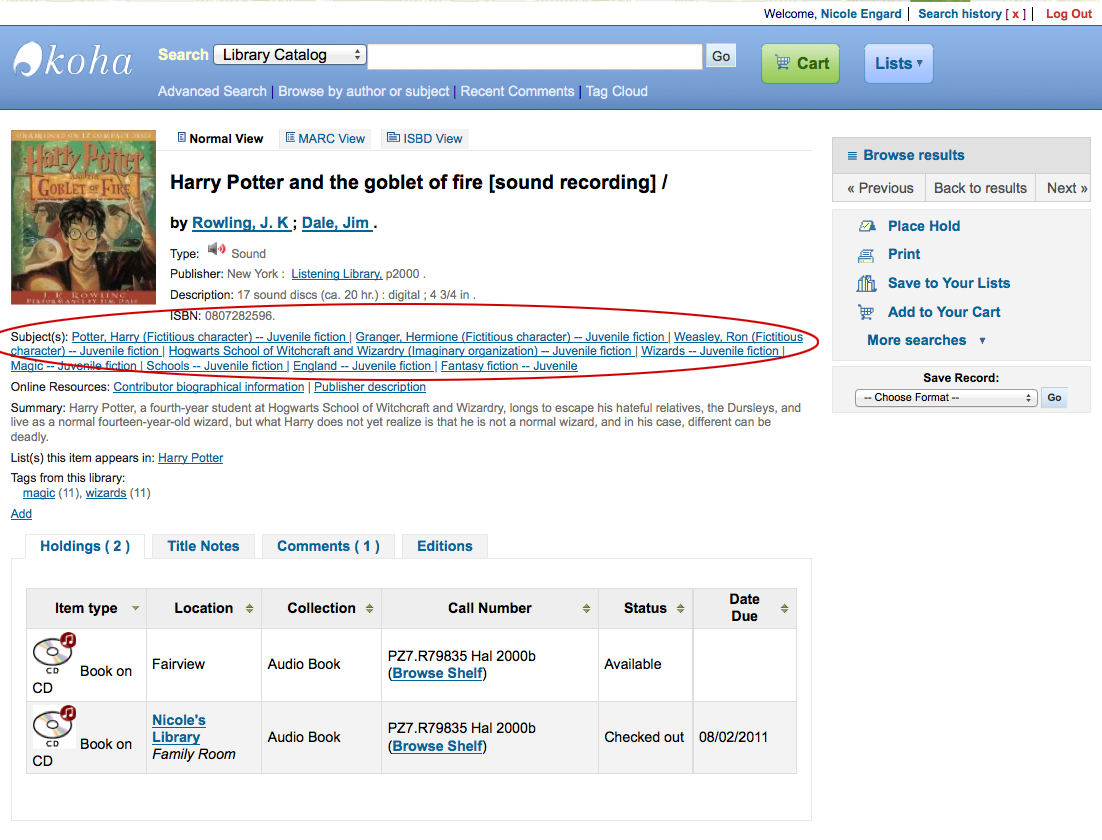
If your record has a table of contents or summary it will appear next to the ‘Summary’ or ‘Table of Contents’ label
Summary
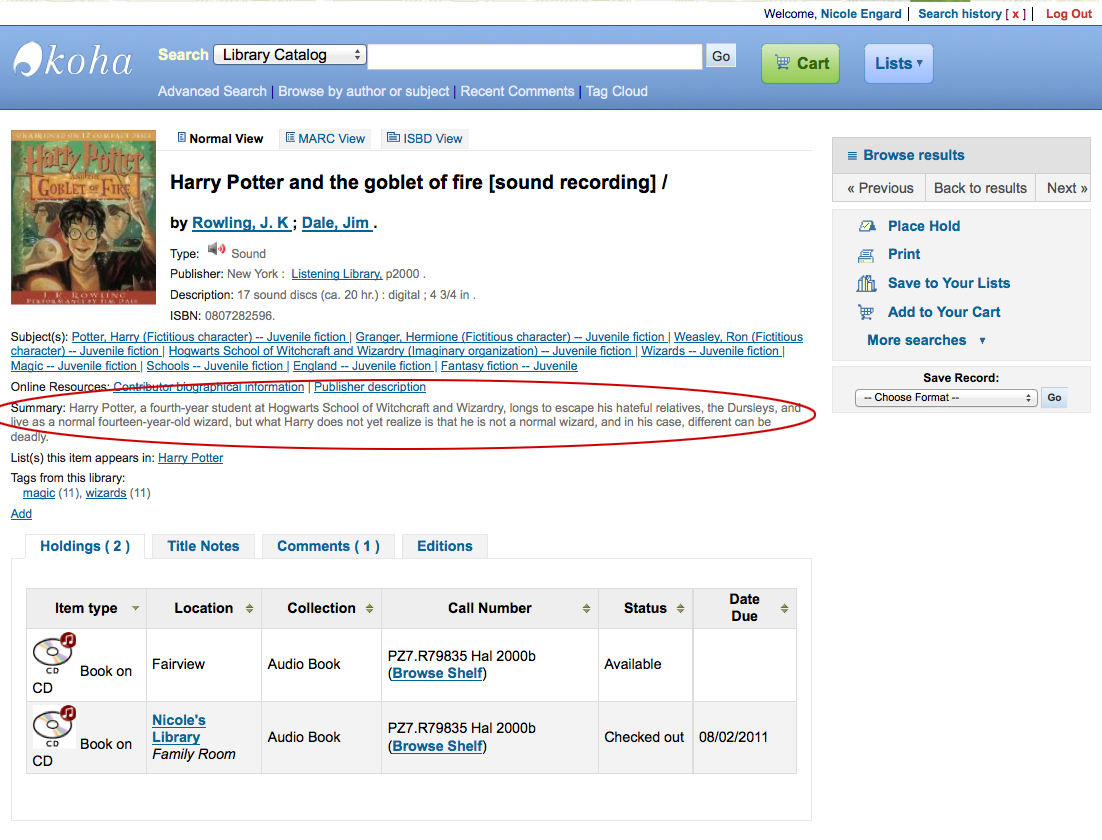
If your record has data in the 856 fields you’ll see the links to the right of the ‘Online Resources’ label
Online Resources
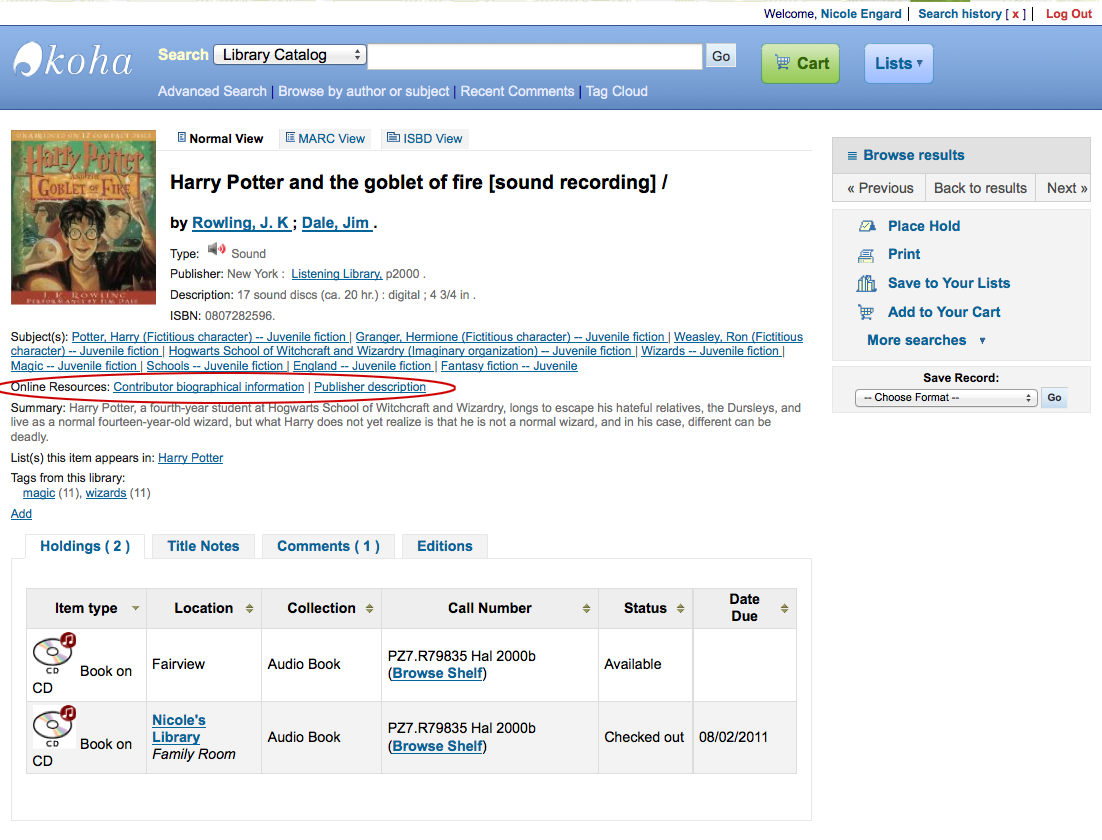
If the title you’re viewing is in a public list then you’ll see a list of those to the right of the ‘List(s) this item appears in’ label and if it has tags they will appear below the ‘Tags from this library’ label
Tags
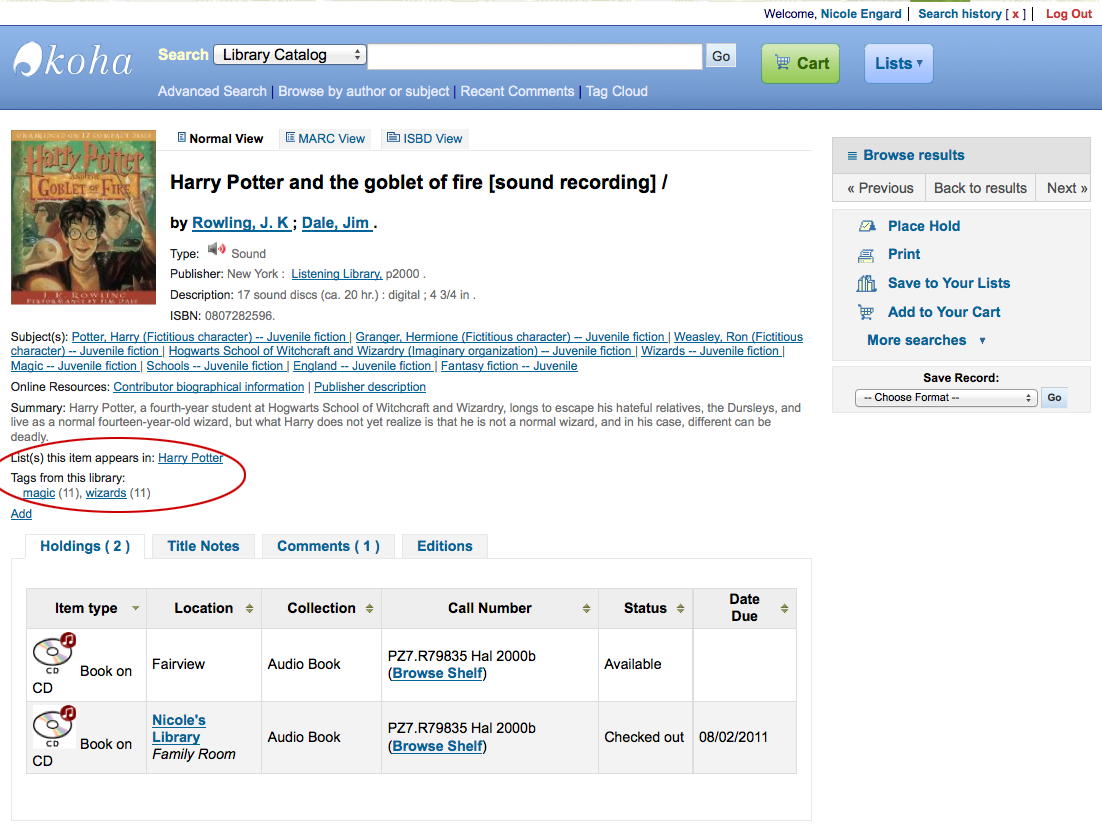
In the tabs below the details you will find your holdings data
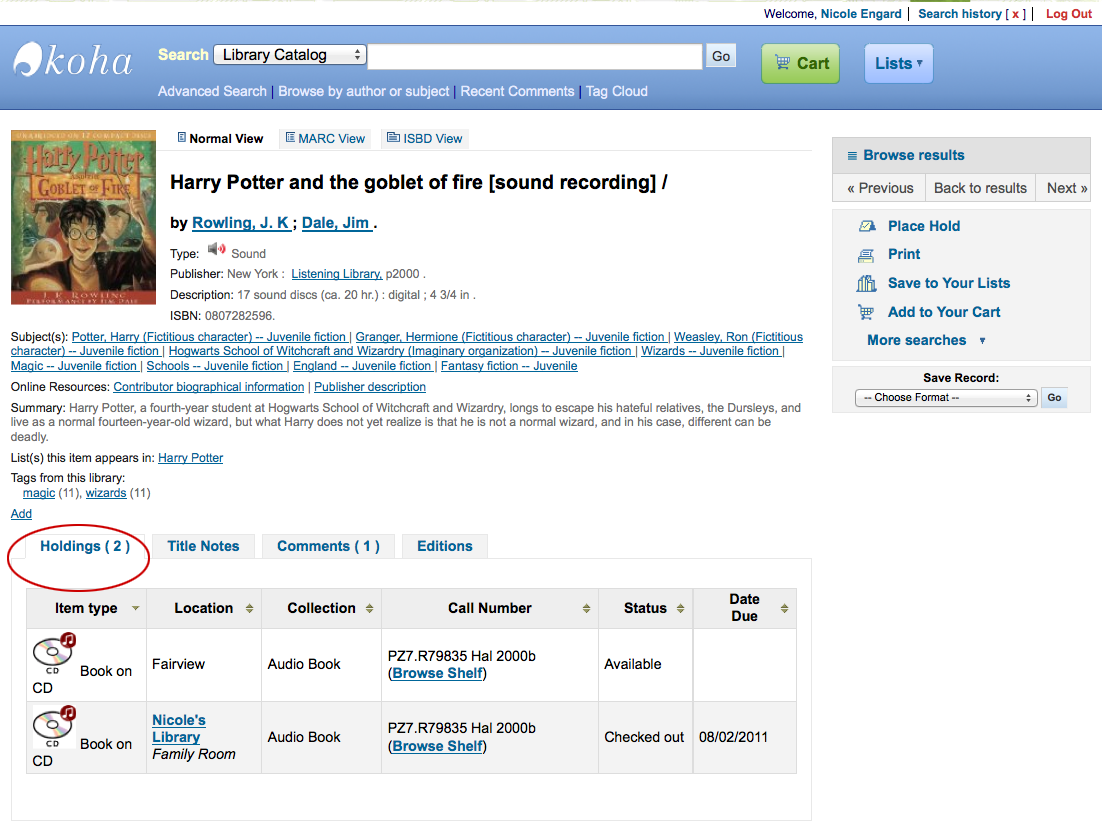
Any notes (5xx fields) that have been cataloged will appear under ‘Title Notes’
Title notes
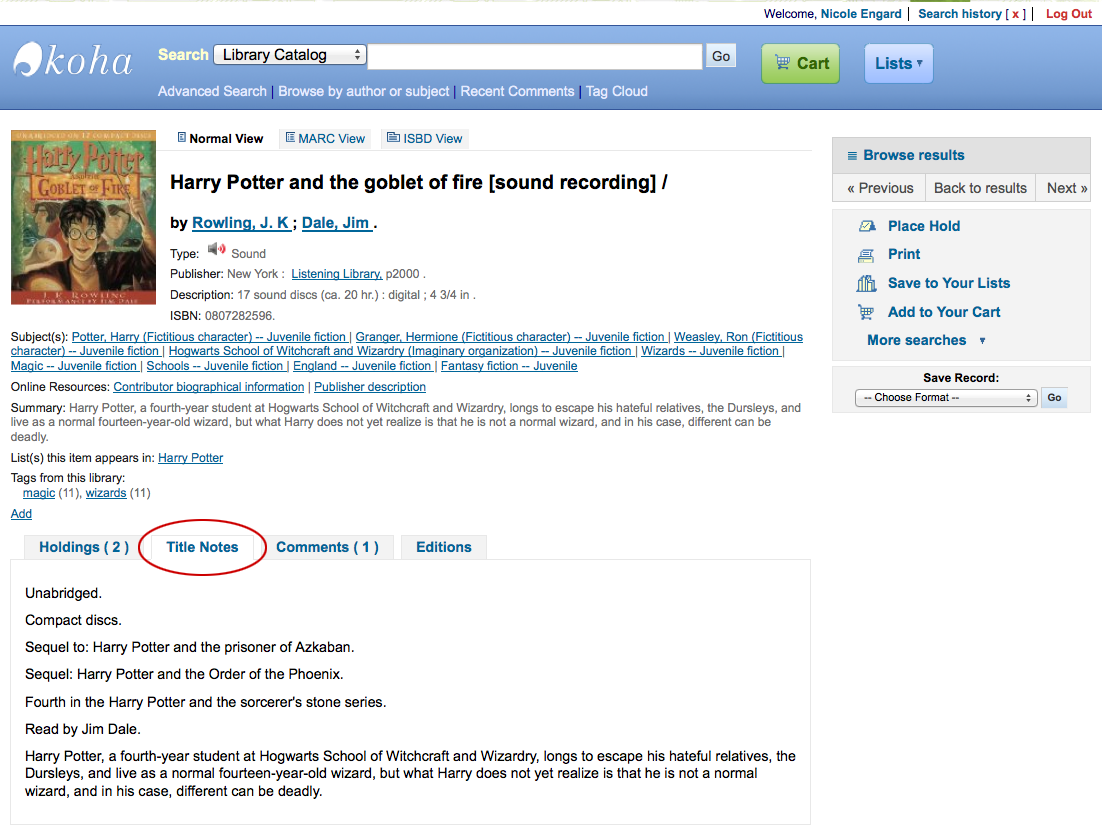
If you’re allowing comments they will appear in the next tab
Comments
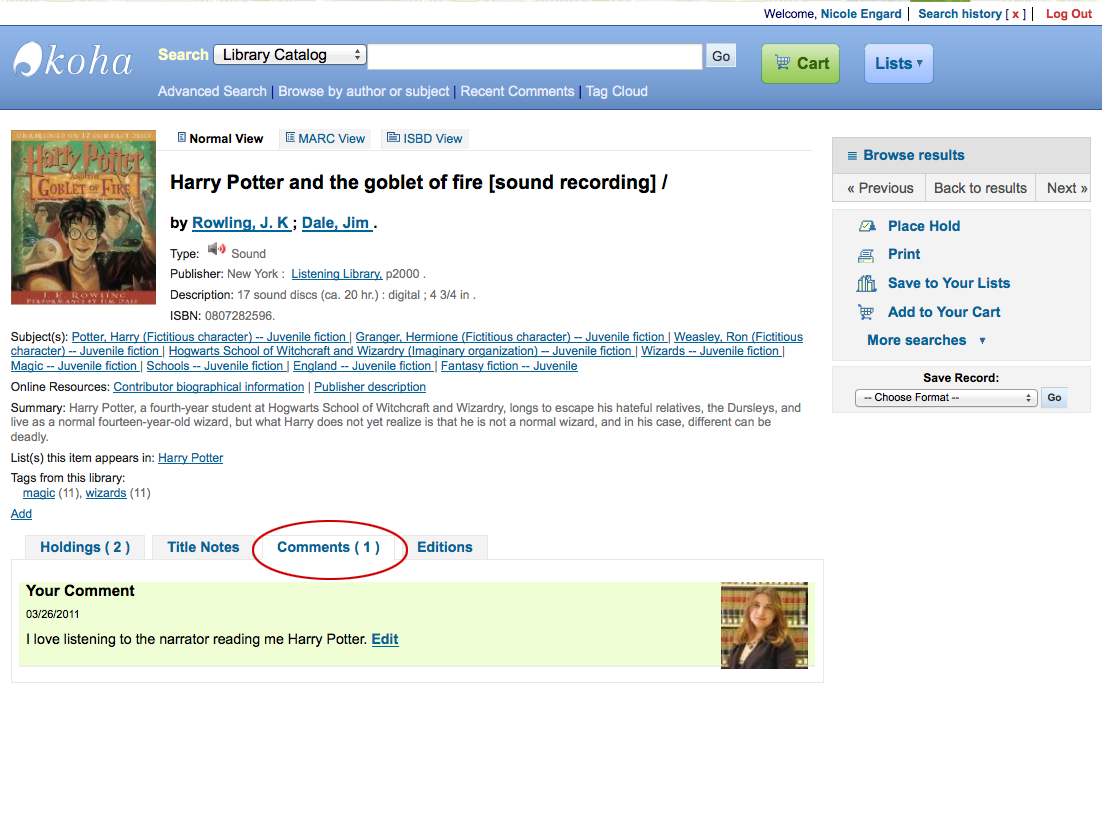
And finally if you have enabled FRBR and you have other editions of the title in your collection you will see the ‘Editions’ tab.
Editions
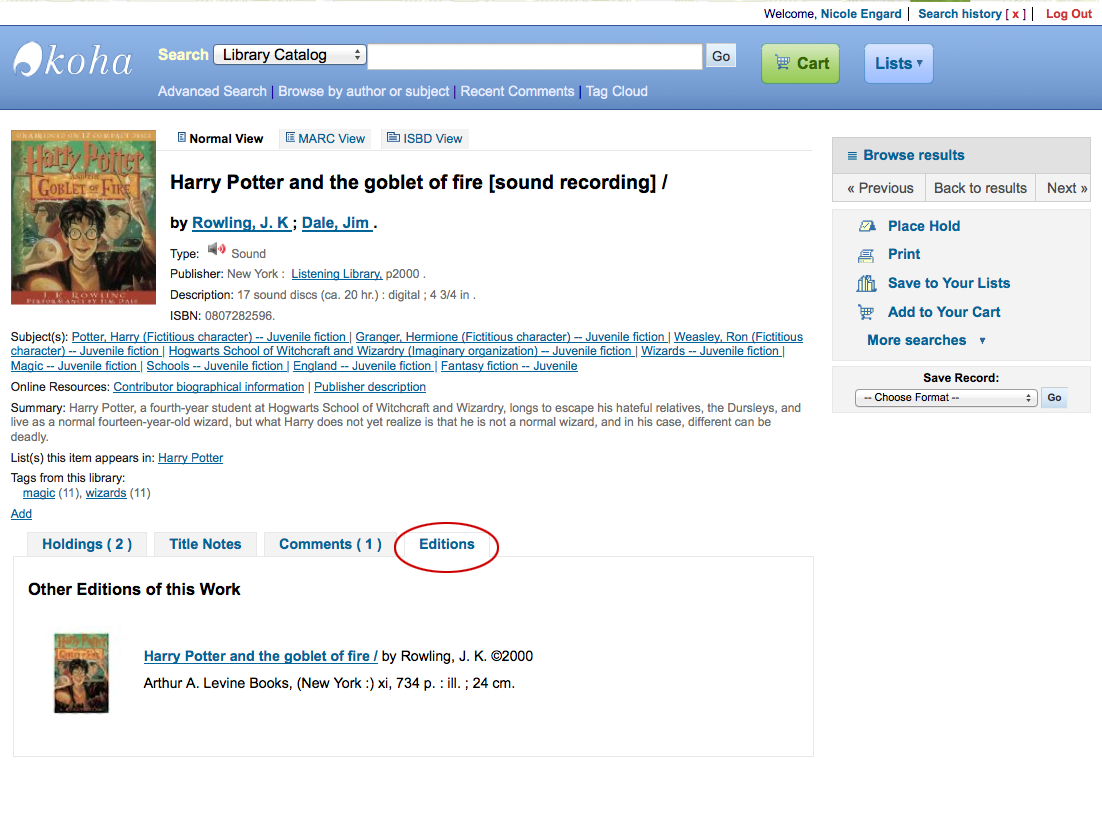
To the right of the details you’ll find a series of boxes. The first box is a list of buttons to help navigate the search results. From there you can see the next or previous result from your search or return to the results.
Search Options
Clicking Browse Results at the top of the right column will open up your search results on the detail page
Search Results
Below the search buttons you’ll find the links to place a hold, print the record, save the record to your lists, or add it to your cart
More options
Clicking ‘More Searches’ will show the list of libraries you entered in your OPACSearchForTitleIn preference
More Searches
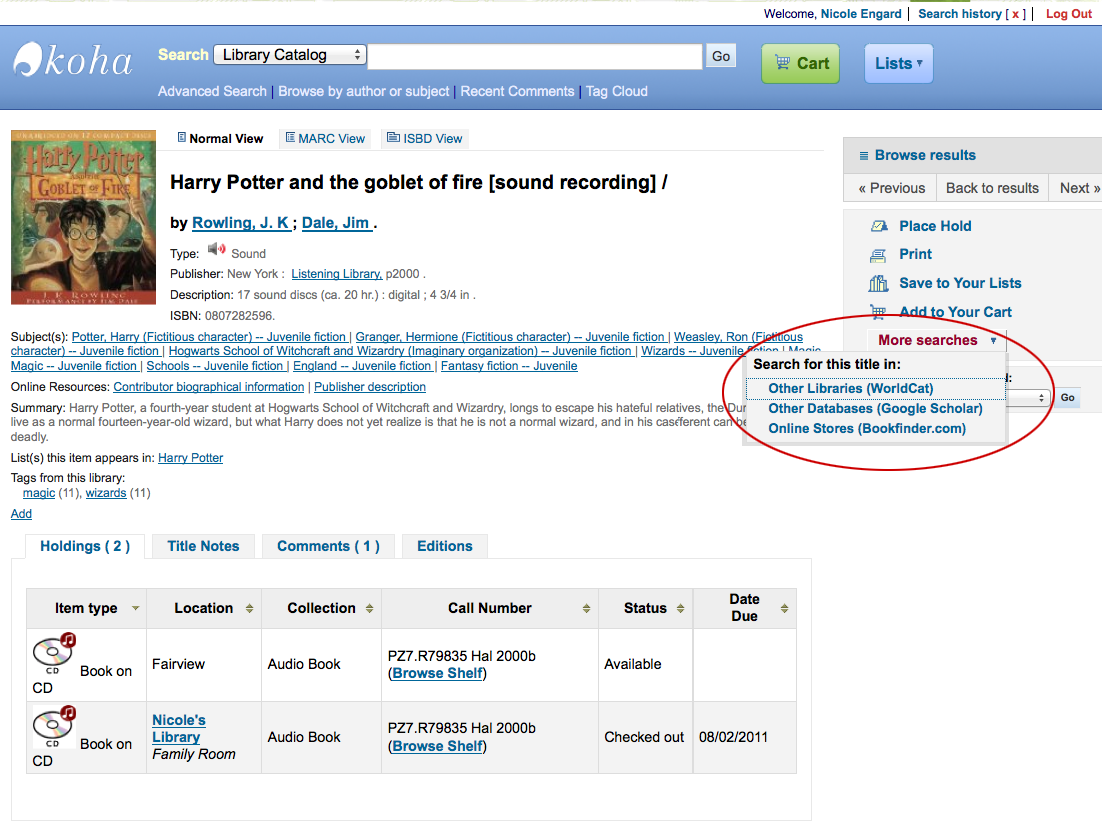
Under the ‘Save Record’ label you will find a series of file formats you can save the record as. This list can be customized by altering the OpacExportOptions system preference.
Save Record
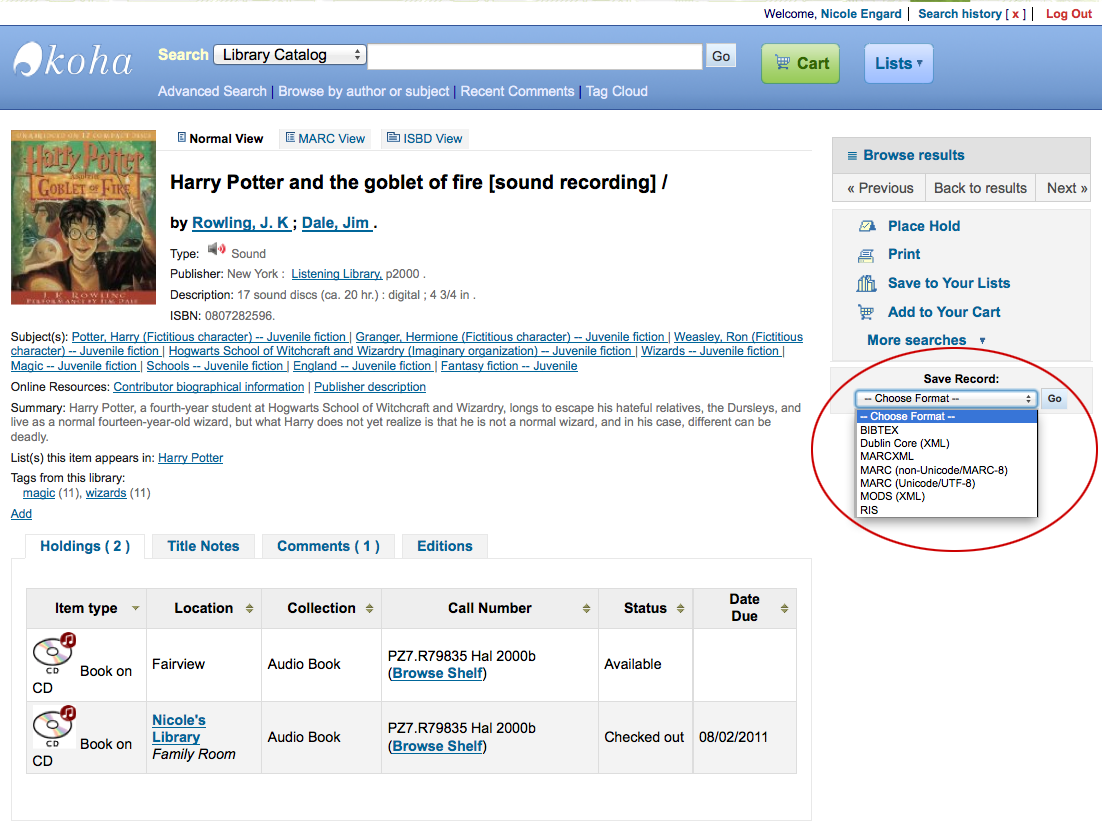
If at any time you want to change the view from the ‘Normal’ view to see the Marc or the ISBD you can click the tabs across the top of the record
Record Views
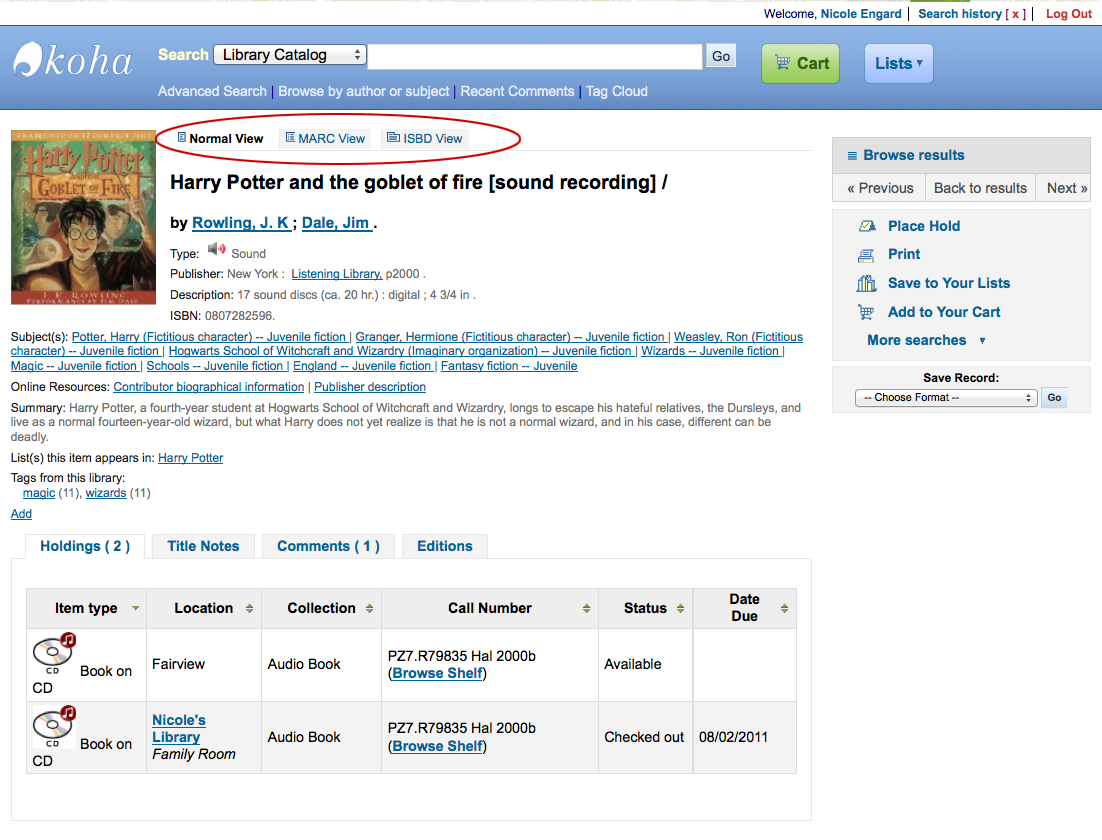
Lists & Cart
A cart is a temporary holding place for records you’re interested in finding during this session. That means that once you log out of the OPAC or close the browser you lose the items in your cart. A list is a more permanent location for saving items. To learn more about lists, check the Lists in the Staff Client chapter of this manual.
Lists
Patrons can manage their own private lists by visiting the ‘my lists’ section of their account.
Lists Management
Creating Lists
Lists can also be created by choosing the ‘New List’ option in the ‘Add to’ menu on the search results
Add to New List
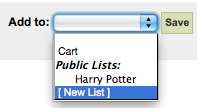
To create a list the patron simply needs to click the ‘New List’ link and populate the form that appears
Create a new list
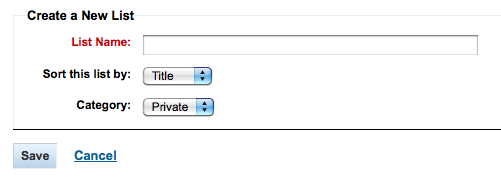
The only field required is the ‘List Name,’ but the patron can also choose how they want the list sorted and if the list is public or private.
Important
If you aren’t allowing patrons to create public lists with the OpacAllowPublicListCreation preference then patrons will only be able to create private lists.
Adding titles to Lists
Titles can be added to lists from the search results and/or from the bibliographic record. On the search results options to add items to the list appear below each result and across the top of the results page
Add to Lists from Results
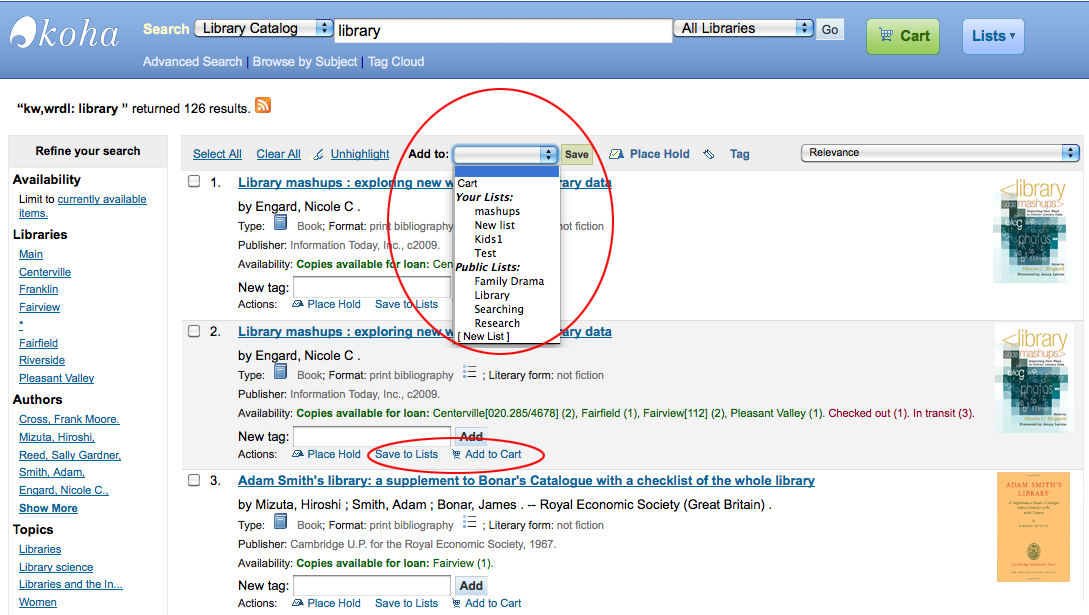
To add a single title to a list, click the ‘Save to Lists’ option and then choose the list you’d like to add the title to. To add multiple titles to a list check the boxes on the left of the titles you want to add and then choose the list you want to add the titles to from the ‘Add too’ pull down at the top of the screen.
Viewing Lists Contents
To view the contents of a list, click on the list name under the Lists button.
Lists
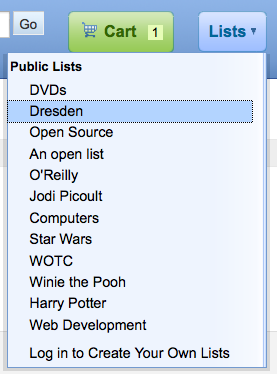
The contents of the list will look similar to your search results pages except that there will be different menu options across the top of the list.
List View
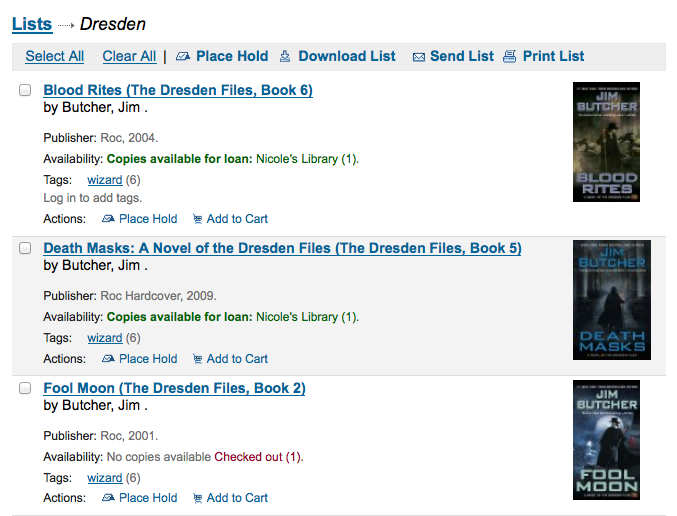
Using the menu options above the list you can place multiple items on hold, download the list contents, email the list or print the list out.
- To place a hold on one or more list items check the box to the left of the item and click the ‘Place Hold’ link at the top
- To download the list contents click the ‘Download List’ link and choose the format you’d like to download the list in - .. tip:: iso2079 is MARC format
- To email the list contents to someone, click the ‘Send List’ link and enter in your email details in the form that pops up Email List Contents .. image:: images/opac/emailist.png
- To print the contents of your list out click the ‘Print List’ link
Managing Lists
Once the list is saved patrons can begin adding items to it. From the ‘my lists’ tab on the patron record the patron can edit and delete the lists they have created by clicking the appropriate link to the right of the list name.
My Lists
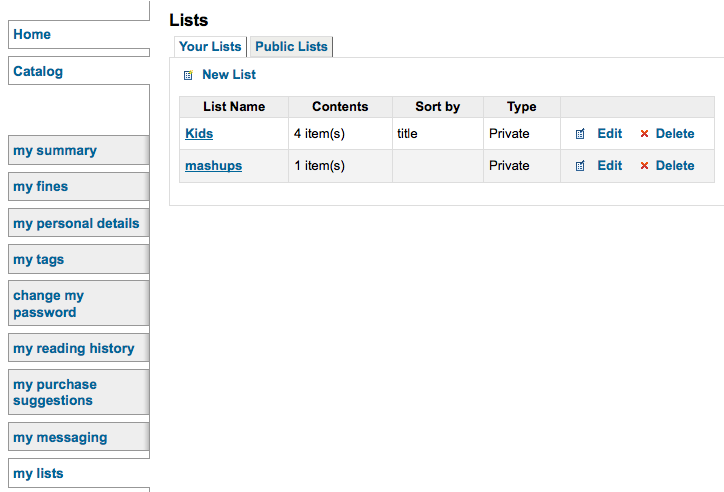
To edit the list’s title or sorting patrons click the ‘Edit’ link to the right of the list description.
Editing List
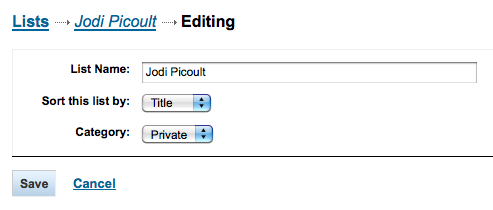
When clicking ‘Delete’ next to a list you will be asked to confirm that you want to delete the list.
Delete list confirmation
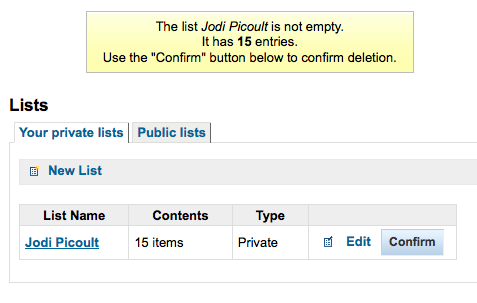
The list will not be deleted until the ‘Confirm’ button is clicked to the right of the list you’d like to delete.
Cart
Adding titles to the Cart
Titles can be added to the cart from the search results and/or from the bibliographic record. On the search results options to add items to the cart appear below each result and across the top of the results page
Add to Cart on Search Results
Clicking the ‘Add to Cart’ button will add the one title to your cart. To add multiple titles at once, check the box to the left of each result and then choose ‘Cart’ from the ‘Add to’ pull down at the top of the screen. Once titles are added to the cart you will be presented with a confirmation
Items added to Cart
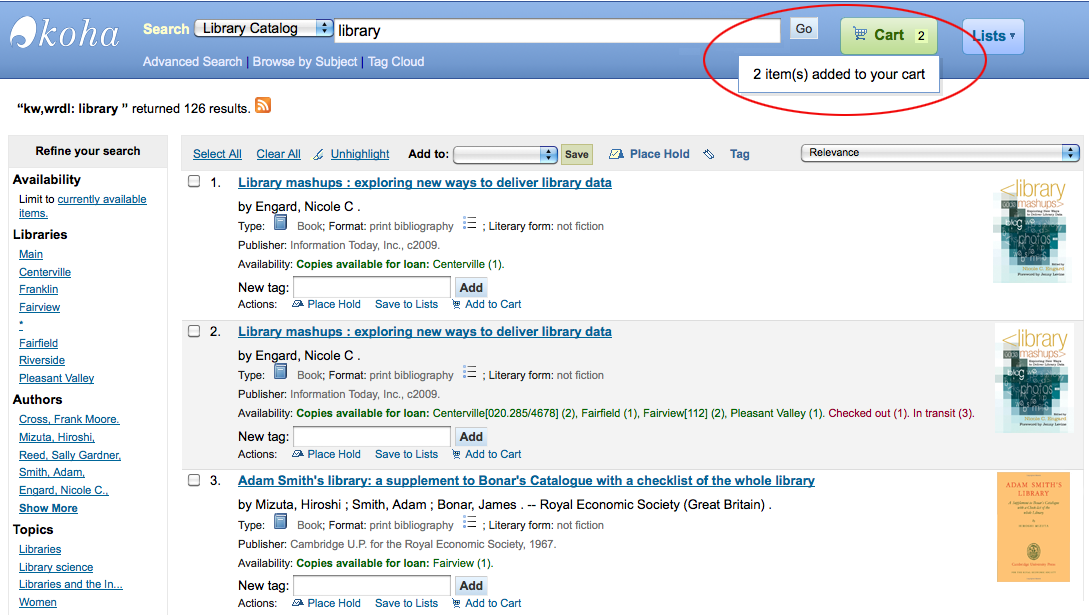
Managing the Cart
Once you have titles in your cart you can manage the contents by clicking on the ‘Cart’ button usually found at the top of the screen to the right of the search box. Your cart will open in a new window.
Contents of your cart
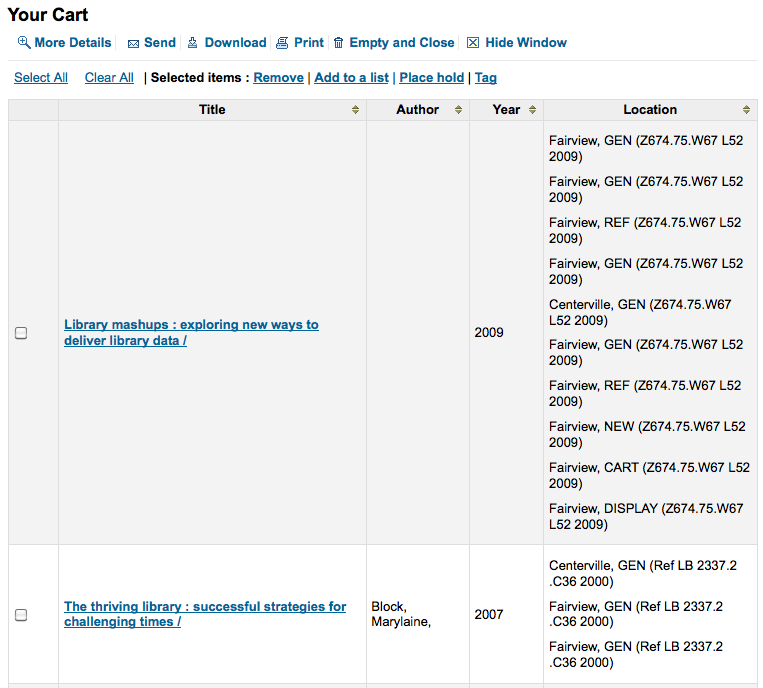
From this window you are presented with several options. Across the top of the cart are several buttons.
First is the ‘More details’ button. Clicking this will show you additional information about the titles in your cart (ISBNs, Subjects, Publisher Info, Notes and more).
Next is the option to send the contents of your cart to an email address. This is handy if you want to send the resources you found at the library to your home email account to refer to later or to send to a patron researching a specific topic. Clicking this link will open up a new window that asks for the email address and message to send.
Email Cart
In addition to sending your cart you can download the contents of your cart in several pre-defined formats or using a CSV Profile that you defined in the Tools module.
Download Cart
Finally you can print out the contents of your cart by choosing the ‘Print’ link.
In addition to the various different ways to save the contents of your cart, there are ways to add value to the data in your cart. By selecting one or more titles from the cart you can add them to a list (click ‘Add to a List’), place hold(s) (click ‘Place hold’), or tag them (click ‘Tag’). All of these operations follow the same procedure as they do when performing them in the OPAC.
Placing Holds
Patrons can place holds on items via the OPAC if they’re logged in and you have the RequestOnOpac preference set to ‘Allow’. If the item can be placed on hold the option to place it on hold will appear in several different places.
- When viewing a list or search results page you’ll see the option to place hold on multiple items by checking the boxes to the left of the results and clicking ‘Place Hold’ at the top Place Hold from Results .. image:: images/opac/opacplaceholdresults.png
- When viewing a list or search results page you’ll see the option to place the item on hold below the basic information about the title Place Hold .. image:: images/opac/opacplaceholdsindiv.png
- When viewing an individual title you’ll see the option to place a hold in the box on the right side of the screen Place Hold .. image:: images/opac/opacplaceholdsdetail.png
No matter which of the above links you click to place your hold you’ll be brought to the same hold screen.
Place Hold Form
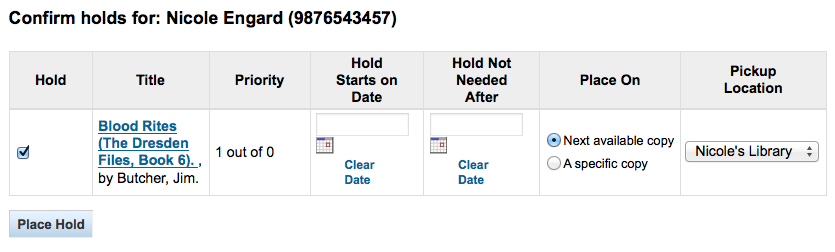
Check the box to the left of the items you’d like to place on hold
The title includes a link back to the detail page for the record
The priority shows where in the holds queue this hold will fall
If allowed by your OPACAllowHoldDateInFuture preference, the ‘Hold Starts on Date’ column will show. This field allows the patron to have their hold start on a future date.
By default holds placed in the system remain until canceled, but if the patron fills in a ‘Hold Not Needed After’ date then the hold has an expiration date. - .. important:: Expired holds are removed by the Expired Holds Cron Job, this
is not an automatic process and must be set up by your system administrator
If allowed by your OPACItemHolds preference the patron will be allowed to choose whether to place the hold on the next available copy or a specific copy Specific Copy Hold .. image:: images/opac/opacplaceholdspecific.png
If allowed by your OPACAllowUserToChooseBranch preference the patron can choose where they’d like to pick up their hold
After clicking the Place Hold button the patron will be brought to their account page where they’ll see all of the items they have on hold.
Enhanced Content
Tagging
Depending on your settings for the TagsEnabled, TagsInputOnList and TagsInputOnDetail preferences you may be able to add tags to bibliographic records from the search results and/or bibliographic records. If you are allowing patrons to add tags from the search results screen you will see an input box below each result and a ‘Tag’ option at the top of the screen.
Tagging Options on Results
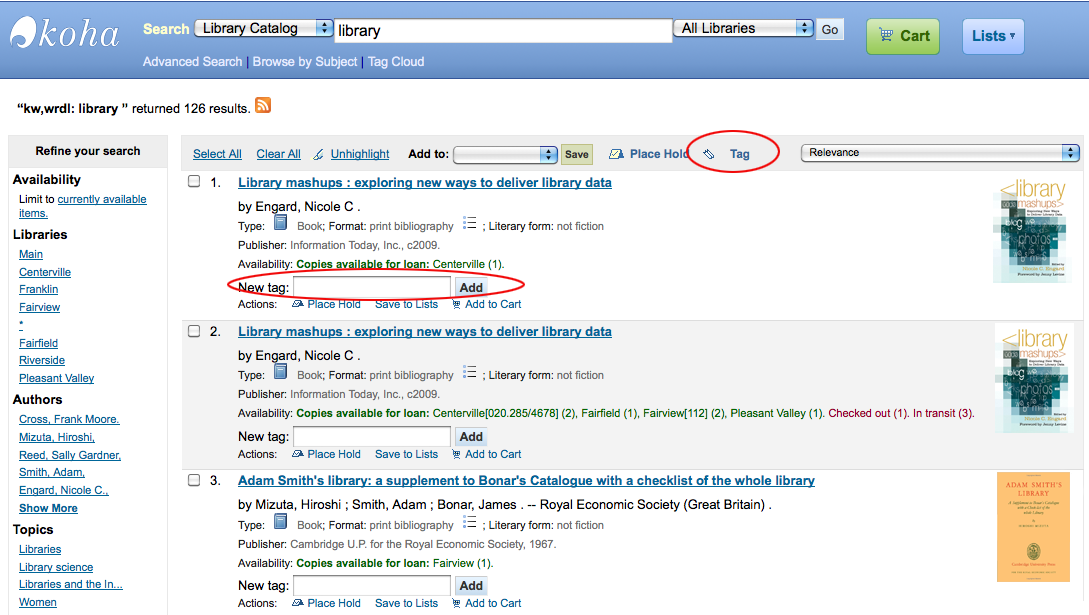
To add a tag to one item, type the tabs (separated by commas) in the ‘New tag’ box and click ‘Add’. You will be presented with a confirmation of your tags being added.
Tags Added on Results
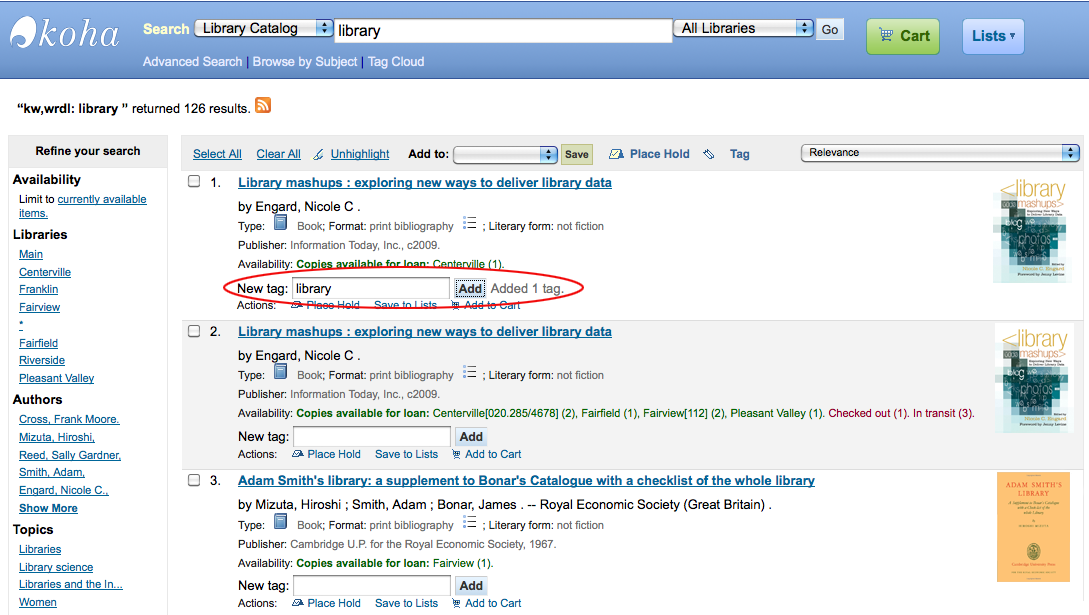
From the results you can also tag items in bulk by clicking the checkboxes on the left and then clicking the ‘Tag’ button at the top. After clicking the button it will change into an input box for you to add tags to all of the items you have selected.
Add Tags to Multiple Items
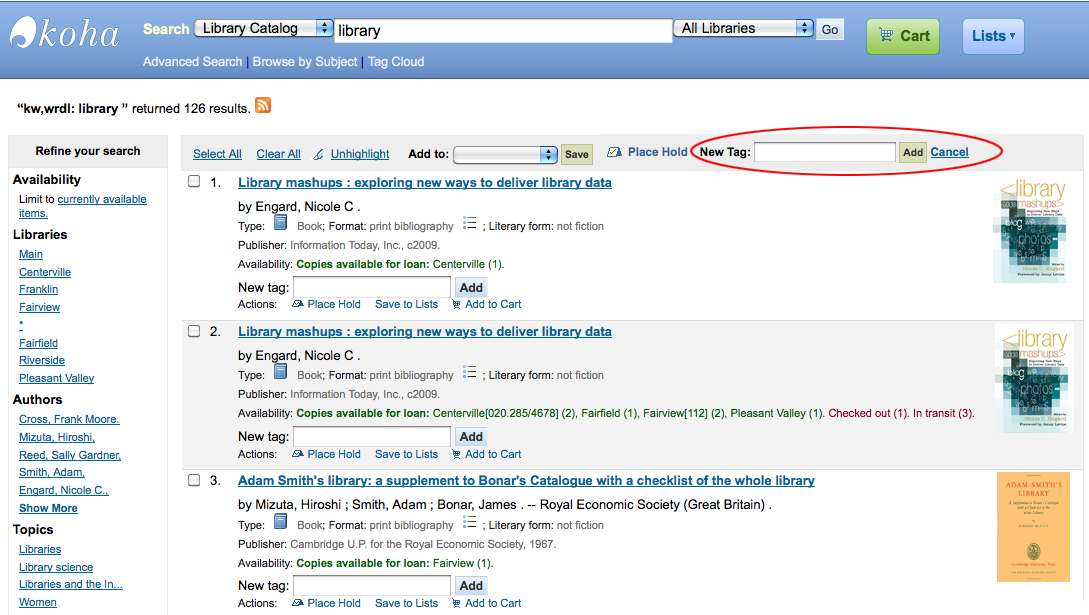
Comments
Patrons can leave comments in the OPAC if you have the reviewson preference set to allow this. Each bibliographic record has a comments tab below the bibliographic information.
Comments Tab
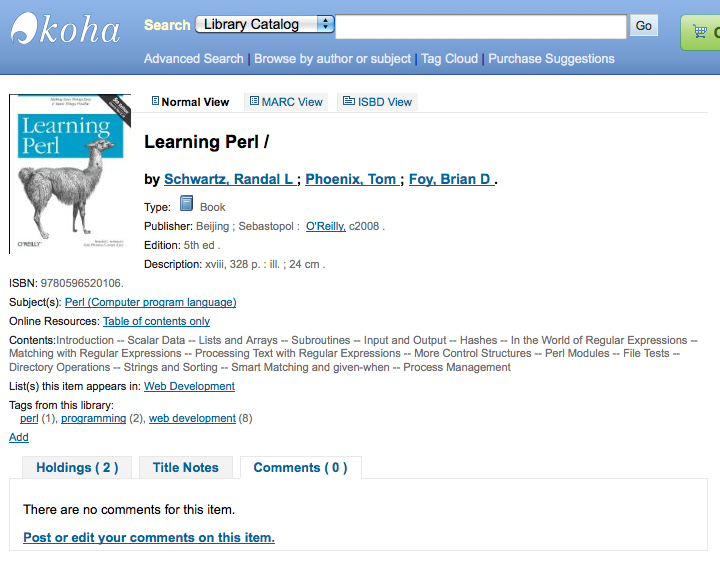
If the patron is logged in they will see a link to add a comment to the item. Clicking this link will open a pop up window with a box for their comments.
Add a Comment
Once the comment has been typed and the ‘Submit’ button clicked, the patron will see their comment as pending and other patrons will simply see that there are no comments on the item.
Pending Comment
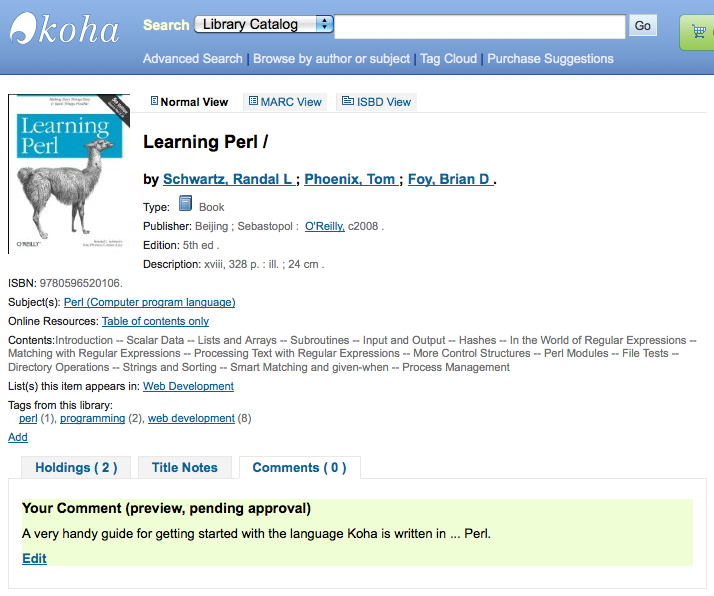
Once the comment is approved the patron will see the number of comments on the ‘Comments’ tab and the comment highlighted in yellow as their comment.
Your Comments
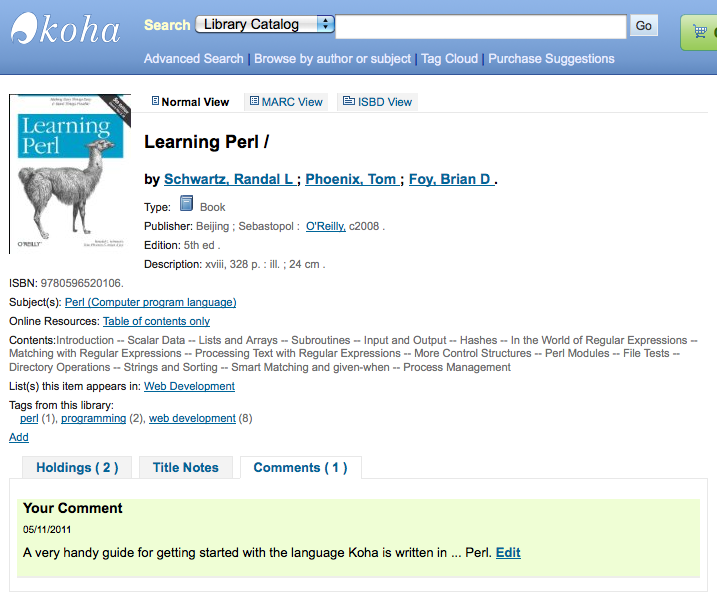
Other patrons will see the comment with the name of the patron who left the comment (unless you have set the ShowReviewer preference to not show patron names).
Comment by other patron
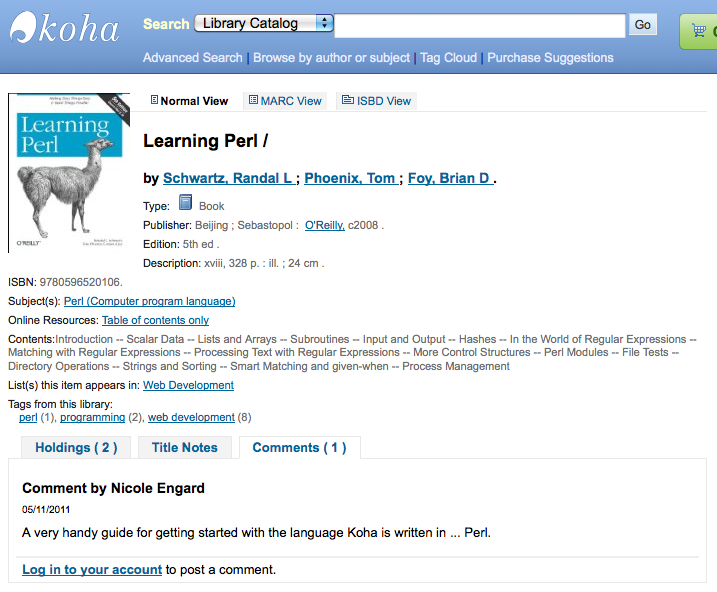
If you’d like to link to a page of recent comments added to your catalog you simply need to add a link to http://YOURCATALOG/cgi-bin/koha/opac-showreviews.pl to anywhere on your OPAC:
Recent Comments List
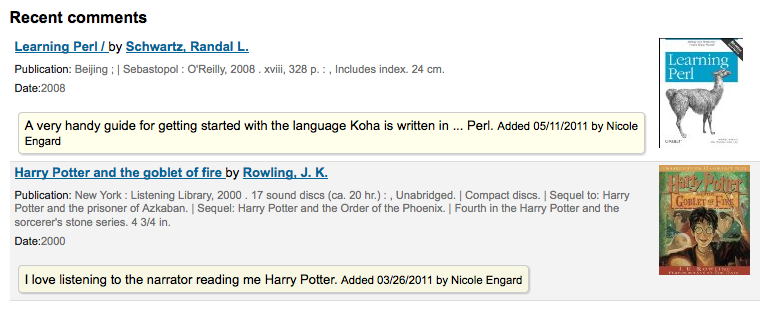
Zotero
Zotero is a Firefox add on that allows for the saving and generating of a bibliography. Learn more about and download Zotero at http://zotero.org.
When on the search results in the Koha OPAC, if you have Zotero installed, you will see a folder icon in the address bar to the right of the URL. Clicking that folder will open up a list of titles on the page for you to pick from to add to Zotero.
Zotero pop up
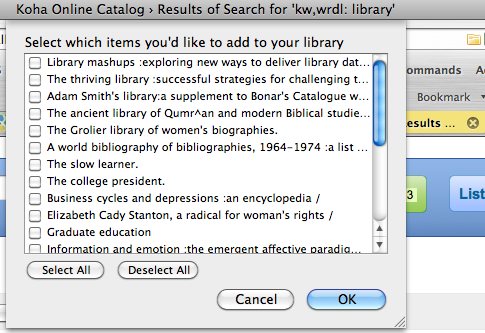
Select the titles you want to add to Zotero and then click the ‘OK’ button. This will add the title to Zotero. You can see the title by opening your Zotero library.
Title in the Zotero Library
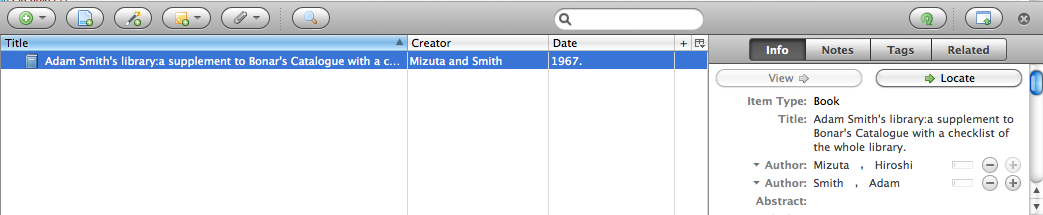
Custom RSS Feeds
Using misc/cronjobs/rss/rss.pl you can generate an RSS feed for any SQL query (for example a new acquisitions RSS feed). rss.pl is run on the command line to produce an RSS XML document.
The output should be placed in a directory accessible to the OPAC (or staff) web interface so that users can download the RSS feed.
An example of usage can be found at: misc/cronjobs/rss.pl lastAcquired.conf
Normally rss.pl should be run periodically (e.g., daily) to keep the feed up-to-date.
The configuration file (e.g., lastAcquired.conf) lists
- name of the template file to use
- path of output file
- SQL query
rss.pl runs the SQL query, then feeds the output of the query through the template to produce the output file.
Important
To use custom RSS feeds you need to turn on the cron job.
My Account
From the OPAC patrons can log in and access their account if you have set the opacuserlogin preference to ‘Allow’. Once logged in patrons are brought to their account summary. If you would like to get to your account in the OPAC, you can click on your name in the top right of any page in the OPAC.
My Summary
My Summary
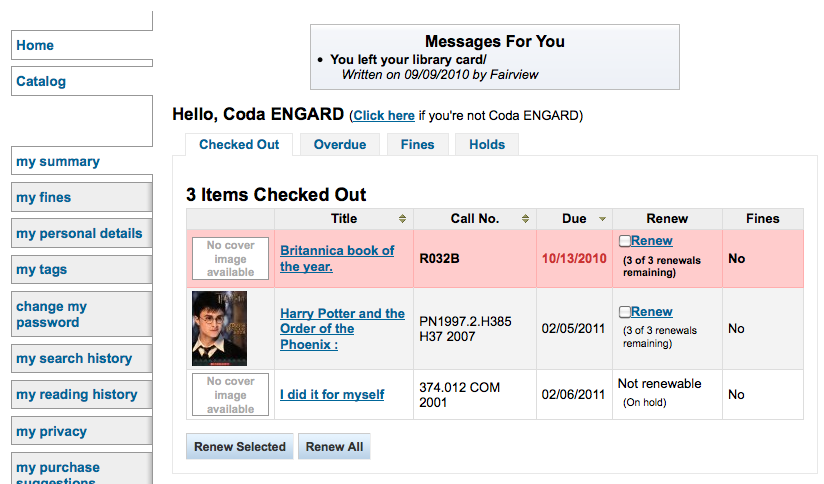
From the ‘my summary’ tab, patrons will see all of the items they have checked out with the overdue items highlighted in red. If you have OpacRenewalAllowed set to ‘Allow’ then your patrons will be able to renew their books right from the OPAC. If you have HTML entered in the OPACMySummaryHTML preference then you will see that to the right of the ‘Fines’ column.
Checked out tab with OPACMySummaryHTML set
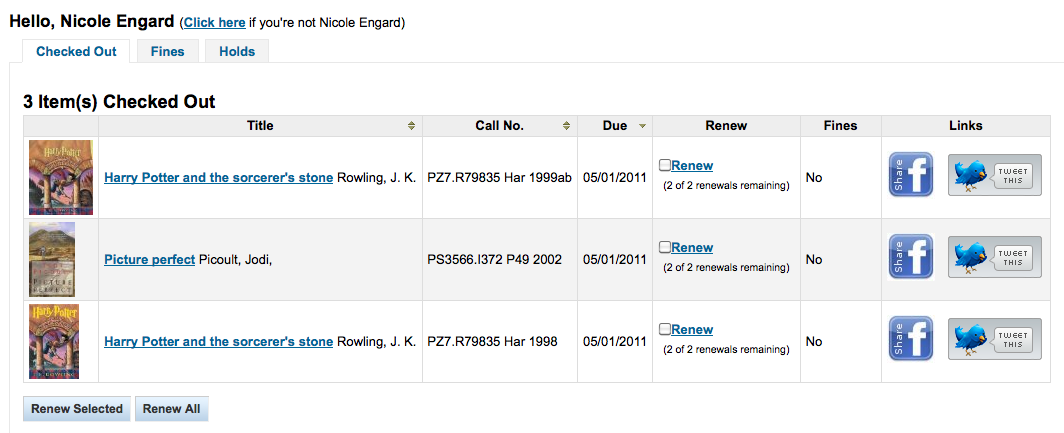
If your patrons would like to see the items barcodes on their list of checked out items you can set up a patron attribute with the value of SHOW_BCODE and authorized value of YES_NO.
Add SHOW_BCODE patron attribute
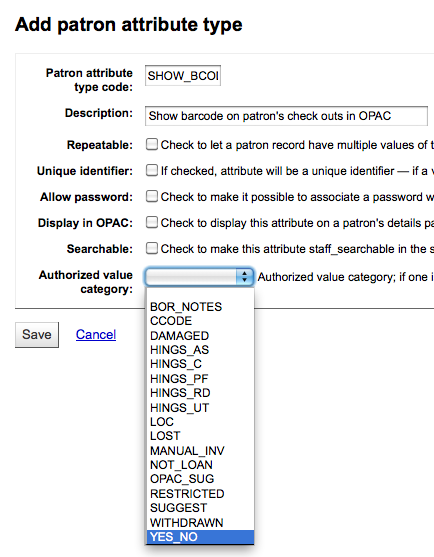
Then on the patron’s record set the value for SHOW_BCODE to yes.
Setting value for SHOW_BCODE on patron record
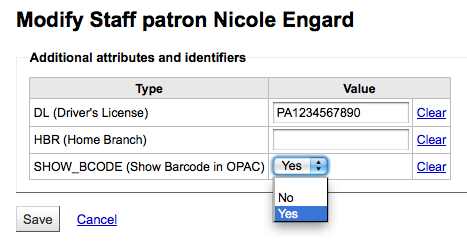
This will add a column to the check out summary in the OPAC that shows the patrons the barcodes of the items they have checked out.
Barcode number on checkout list in OPAC
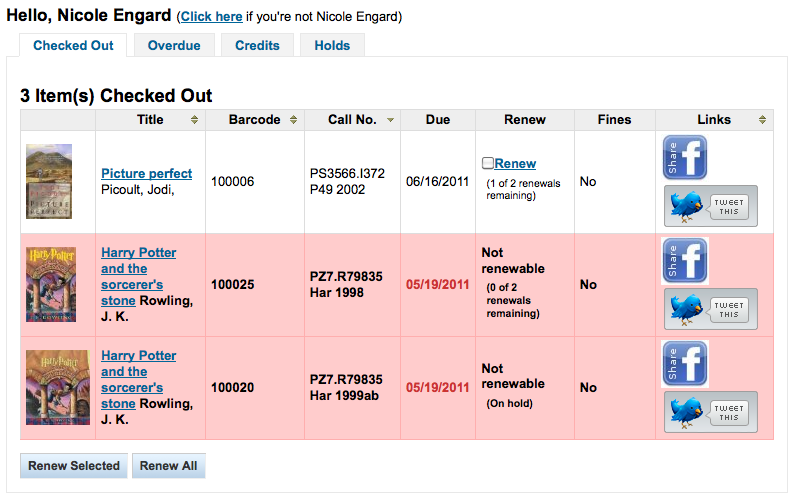
Clicking on the ‘Overdue’ tab will show only the items that are overdue.
Overdue Items
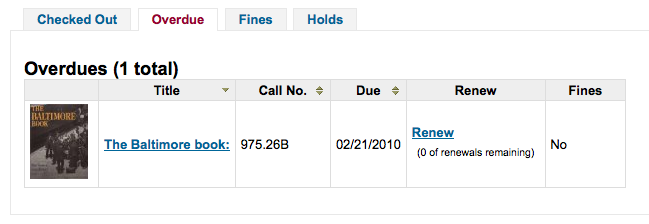
The ‘Fines’ tab will show just a total of what the patron owes. Clicking on the total will take them to the ‘my fines’ tab where they will see a complete breakdown of their fines and bills. If you don’t charge fines at your library you can turn the display of these tabs off by setting the OPACFinesTab preference to ‘Don’t Allow.’
Patron Fines
Finally, clicking on the ‘Holds’ tab will show the patron the status of all of the items they have on hold. Items that are ready for pickup will be highlighted in yellow.
Patron holds status
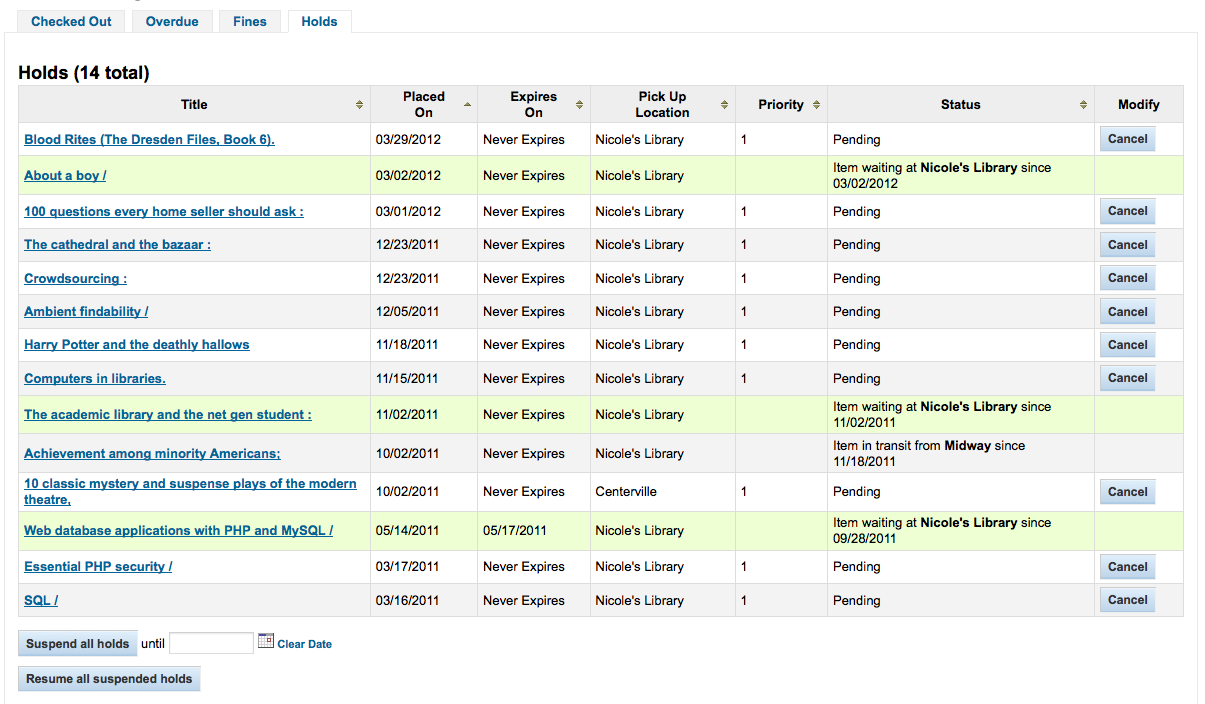
Patrons can cancel their own holds if they are not in transit or already waiting for them. They can also suspend all of their holds (depending on the value of your SuspendHoldsOpac system preference) indefinitely or until a specific date if they choose by filling in the suspend options at the bottom of the page.
Note
If you have your AutoResumeSuspendedHolds preference set to “Don’t allow” then you will not have the option to put an end date on the hold suspension
Patron Flags
If you have flagged your patron’s account they may see one of the following error messages at the top of their account.
Card marked as lost Library card lost .. image:: images/opac/nocard.png
Patron address in question Patron address in question .. image:: images/opac/noaddress.png - .. note:: this error message will not include a link to the
update form if you have OPACPatronDetails set to ‘Don’t allow’
Patron marked restricted Patron restricted .. image:: images/opac/debarred.png
My Fines
If your library charges fines the next tab on the left is ‘my fines.’ Opening this tab will show the patron an entire history of their accounting at the library.
Library Fines & Charges
My Details
If you have your OPACPatronDetails preference set to ‘Allow’, your patrons will see a form filled in with their contacting information by clicking on the ‘my personal details’ tab.
Patron’s personal details
Patrons can edit their details in this form and click ‘Submit Changes’ to have their edits sent to the library for review before their record is updated. The email with the changes is sent to the library administration email address and lines that the patron changed will start with the field name in all caps.
If the OPACPatronDetails preference is set to ‘Don’t allow’ then patrons will simply see their details in plain text.
Patron’s personal details with no edits
My Tags
If your library has TagsEnabled set to ‘Allowed’ then the next tab on the left will be ‘my tags.’ This tab will show patrons all of the tags in the system as a cloud and then all of the tags they have applied in a list format. From here patrons have the ability to remove tags that they have added if they want.
Patron’s tags
Change My Password
Next, if you have OpacPasswordChange set to ‘Allow’ the next tab will be ‘change my password,’ where patrons can change their password for logging into the OPAC. Patrons will be presented with a standard form asking them to enter their old password and then their new password twice.
Change my password
My Search History
If you have your EnableOpacSearchHistory preference set to ‘Allow’ then your patrons can access their search history via the ‘my search history’ tab.
my search history tab
The search history is a record of all searches run by the patron. Clicking on any of the search phrases will re-run the search for the patron. The search history can be deleted by the patron at any time by clicking the ‘Delete your search history’ link found at the top of this tab or by clicking the little red ‘x’ next to the ‘Search history’ link at the top right of the OPAC.
Search history link at the top right of the OPAC

My Reading History
Depending on your library’s setting for opacreadinghistory your patrons may see the ‘my reading history’ tab next. This will show the patron their entire reading history unless they have asked the library to not keep that information via the ‘my privacy’ tab which will appear if you have the OPACPrivacy preference set to ‘Allow.’
Patron reading history
My Privacy
The ‘my privacy’ tab will appear if you have both the opacreadinghistory and the OPACPrivacy preferences set to ‘Allow.’ This tab will allow the patrons to decide how the library keeps their circulation history data.
my privacy tab
The patron can choose from three options:
- Forever: keep my reading history without limit. This is the option for users who want to keep track of what they are reading.
- Default: keep my reading history according to local laws. This is the default option : the library will keep your reading history for the duration permitted by local laws.
- Never: Delete my reading history immediately. This will delete all record of the item that was checked-out upon check-in.
Depending on the patron’s suggestions the contents of the ‘my reading history‘ tab and the ‘Circulation History‘ tab in the staff client may change.
Regardless of the patron’s choice they can delete their reading history in bulk at any time by clicking the ‘Immediate deletion’ button.
Delete Circulation History

Clicking this button will not delete items that are currently checked out, but will clear the patron’s past reading history.
My Purchase Suggestions
If your library allows patrons to make purchase suggestions the next tab will show all suggestions that the patron made to the library and their statuses. To disable this tab and the suggestion functionality set the suggestion preference to ‘Don’t allow.’
Patron purchase suggestions
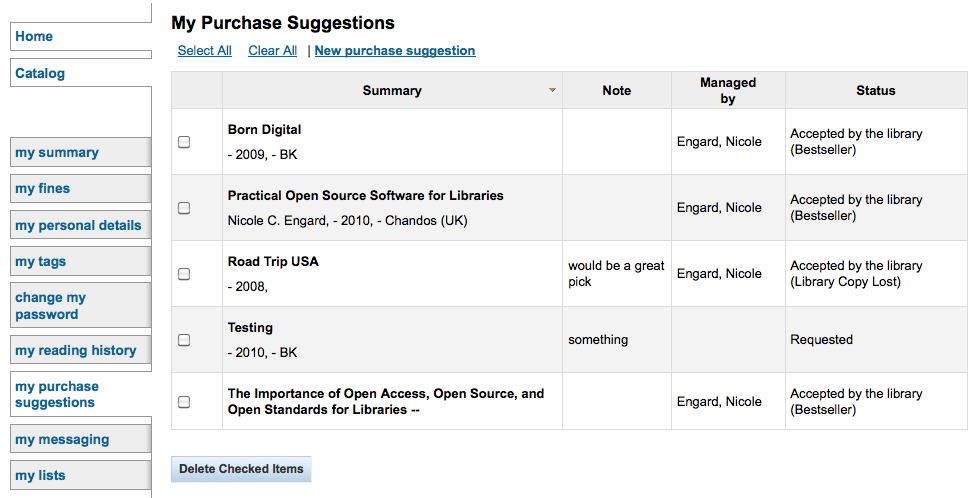
My Messaging
If your library has the EnhancedMessagingPreferences preference set to ‘Allow’ then your patrons will be able to choose which messages they receive from the library (with the exception of overdue notices which the library controls).
Patron messaging preferences
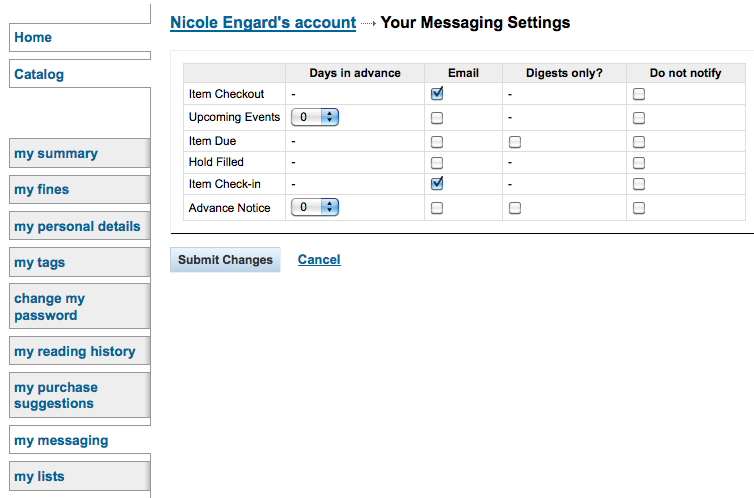
If you also allow SMS messages with the SMSSendDriver preference, you will see an additional column to receive these messages as SMS (or text messages) and a field for a cell (or SMS) number.
SMSSendDriver in the OPAC
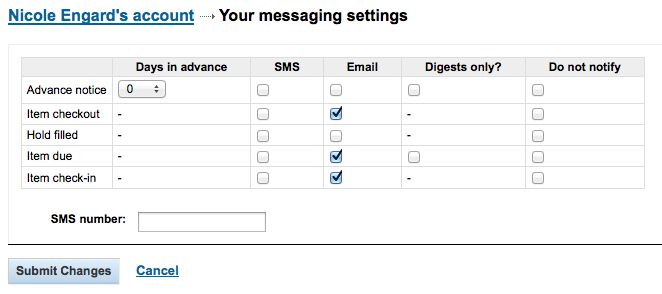
My Lists
Finally, if your library has the virtualshelves set to ‘Allow’ then the last tab will by ‘my lists.’ From here your patrons can review public lists and create or edit their own private lists.
Patron lists
Purchase Suggestions
If your library has the suggestion preference set to ‘Allow’ then patrons will have the option to make purchase suggestions in several areas in the OPAC.
There will be a link at the top of your OPAC under the search box.
Purchase Suggestions Link on Search Box

There will be a link when the patron finds nothing for their search.
Purchase Suggestion Link from Search Results

And there will be a link on the patron’s My Purchase Suggestions tab.
Purchase Suggestion from My Purchase Suggestions Tab

Clicking any one of these links will open the purchase suggestion form.
New Purchase Suggestion
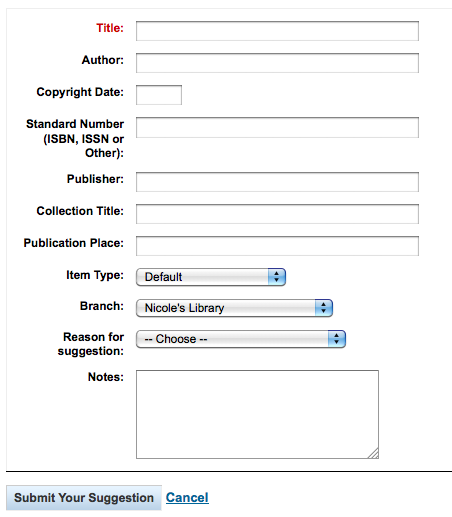
- From the form on the ‘Title’ is required by the library.
- If you would like the ‘Reason for suggestion’ menu shown in the screenshot above to appear on your suggestions list you need to add an authorized value category titled ‘OPAC_SUG’ and include reasons as values in that list.
- If you would like the patron to be able to choose which branch they are making a suggestion for you need to set the AllowPurchaseSuggestionBranchChoice preference to ‘Allow’
Once the form is submitted the data will be saved to the Acquisitions module for the librarians to manage.
Searching
Advanced Search Prefixes
The following prefixes can be added to search terms in the keyword search box to limit items returned
- ti: title search - ex. ti:hamlet
- su: subject search - ex. su:cooking
- pb: publisher search - ex. pb:penguin
- au: author search - ex. au:rowling
- su-geo: geographic subjects - ex. su-geo:wales and kw:description and kw:travel
- bc: barcode - ex. bc:502326000912
- lex: lexile - levels lex:510
Becky Bell
October 2008
Nicole C.
Engard
Fixed typos, changed content where necessary and added new screenshots.
Guide to Searching
This brief guide will explain a chart that shows a sample of how a MARC21 database can be configured, as well as a brief introductory searching guide. The indexing fields described in this document relate to the bibliographic data and does not address authority database indexing.
Indexing and Searching Description
Koha’s databases are indexed by the Zebra open-source software. The overview to the documentation describes Zebra as:
”...Zebra is a high-performance, general-purpose structured text indexing and retrieval engine. It reads records in a variety of input formats (eg. email, XML, MARC) and provides access to them through a powerful combination of Boolean search expressions and relevance-ranked free-text queries. Zebra supports large databases (tens of millions of records, tens of gigabytes of data). It allows safe, incremental database updates on live systems. Because Zebra supports the industry-standard information retrieval protocol, Z39.50, you can search Zebra databases using an enormous variety of programs and toolkits, both commercial and free, which understands this protocol...” Zebra - User’s Guide and Reference, p. 1, http://www.indexdata.dk/zebra/doc/zebra.pdf
This brief guide will explain a chart that shows a sample of how a MARC21 database can be configured, as well as a brief introductory searching guide. The indexing fields described in this document relate to the bibliographic data and does not address authority database indexing.
Note
The indexing described in this document is the set used by SouthEastern University. Your local indexing may vary.
Indexing Configuration
There are three configuration files that Koha uses while indexing.
The first configuration file (etc/zebradb/biblios/etc/bib1.att) contains the Z39.50 bib-1 attribute list, plus the Koha local use attributes for Biblio Indexes, Items Index, and Fixed Fields and other special indexes. The Z39.50 Bib-1 profile is made up of several different types of attributes: Use, Relation, Position, Structure, Truncation, and Completeness. The bib-1 ‘Use’ attribute is represented on the chart; the other attributes are used primarily when doing searches. While there are over 150+ use attributes that could be used to define your indexing set, it’s unlikely that you will choose to use them all. The attributes you elect to use are those that become the indexing rules for your database. The other five attribute sets define the various ways that a search can be further defined, and will not specifically be addressed in this document. For a complete list of the standard Bib-1 attributes, go to http://www.loc.gov/z3950/agency/defns/bib1.html.
The second file (etc/zebradb/marc_defs/[marc21|unimarc]/biblios/record.abs) contains the abstract syntax which maps the MARC21 tags to the set of Use Attributes you choose to use. The rules established in this file provides a passable Bath level 0 and 1 service, which includes author, title, subject, keyword and exact services such as standard identifiers (LCCN, ISBN, ISSN, etc.)
The third file (etc/zebradb/ccl.properties) is the Common Command Language (CCL) field mappings. This file combines the bib-1 attribute set file and the abstract file and adds the qualifiers, usually known as index names. The qualifiers, or indexes, for this database are: pn, cpn, cfn, ti, se, ut, nb, ns, sn, lcn, callnum, su, su-to, su-geo, su-ut, yr,pubdate, acqdate, ln, pl, ab, nt, rtype, mc-rtype, mus, au, su-na, kw, pb, ctype, and an.
The Koha Indexing Chart summarizes the contents of all three of these files in a more readable format. The first two columns labeled Z39.50 attribute and Z39.50 name matches the Z39.50 bib-1 attributes file. The third column labeled MARC tags indexed is where you find which MARC tags are mapped to an attribute. The fourth column labeled Qualifiers identifies the search abbreviations used in the internal CCL query. The following description provides a definition for the word ‘qualifiers’.
Qualifiers are used to direct the search to a particular searchable index, such as title (ti) and author indexes (au). The CCL standard itself doesn’t specify a particular set of qualifiers, but it does suggest a few shorthand notations. You can customize the CCL parser to support a particular set of qualifiers to reflect the current target profile. Traditionally, a qualifier would map to a particular use-attribute within the BIB-1attribute set. It is also possible to set other attributes, such as the structure attribute.
In the MARC tags indexed column, there are some conventions used that have specific meanings. They are:
- A three digit tag (100) means that all subfields in the tag can be used in a search query. So, if you enter a search for ‘Jackson’ as an author, you will retrieve records where Jackson could be the last name or the first name.
- A three digit tag that has a ‘$’ followed by a letter (600$a) means that a search query will only search the ‘a’ subfield.
- A three digit tag that is followed by a ‘:’ and a letter (240:w) means that a search query can be further qualified. The letter following the ‘:’ identifies how to conduct the search. The most common values you’ll see are ‘w’ (word), ‘p’ (phrase), ‘s’ (sort), and ‘n’ (numeric).
The contents of the MARC tags, subfields, and/or fixed field elements that are listed in this chart are all indexed. You’ll see that every attribute line is not mapped to a specific qualifier (index)-LC card number, line 9 is one example. However, every indexed word (a string of characters preceded and succeeded by a space) can be searched using a keyword (kw) search. So, although an LC card number specific index doesn’t exist, you can still search by the LCCN since tag 010 is assigned to the LC-card-number attribute. To verify this, enter 72180055 in the persistent search box. You should retrieve The gods themselves, by Isaac Asimov.
Examples of fixed field elements indexing can be seen on the chart between Attribute 8822 and Attribute 8703. These attributes are most commonly used for limiting. The fixed field attributes currently represent the BK codes. Other format codes, if needed, could be defined.
Basic Searching
The search box that library staff and library patrons will see most often is the persistent search box at the top of the page. Koha interprets the searches as keyword searches.
Koha search box

To start a search, you enter a word or multiple words in the search box. When a single word is entered, a keyword search is performed. You can check this out by typing one word into the form and note the number of results located. Then, repeat the search with a minor change. In front of the search word, type ‘kw=’ followed by the same search term. The results will be identical.
When you have more than one word in the search box, Koha will still do a keyword search, but a bit differently. Each word will be searched on its own, then the Boolean connector ‘and’ will narrow your search to those items with all words contained in matching records.
Suppose you want to find material about how libraries are using mashups. You’ll select the major words and enter them into the persistent search box.
Keyword Search

The response to this search is:
Results

The order of the words does not affect the retrieval results, so you could also enter the search as “mashups library”. The response to this search is results
Results

Too many words in the search box will find very few matches, as the following example illustrates:
No results found

Advanced Searching
When you can’t find the most appropriate material with a general search, you can move to the Advanced Search page by clicking on the Search option on the persistent toolbar.
Koha Menu

The Advanced Search page offers many ways to limit the results of your search. You can search using the Boolean operators AND, OR, and NOT; limit by item type; limit by year and language; limit by subtypes audience, content, format, or additional content types; by location and by availability.
The first limiting section on the Advanced Search page provides a quick and simple way to use the Boolean operators in your search. Note that this display depends on a system preference setting. This option can be found on the Administration > System Preferences > Searching page. The option called expandedSearchOption must be set to ‘show’ to see the following display.
Advanced Search Options
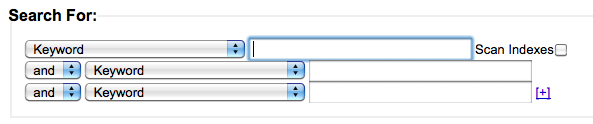
In this section you can choose among the many indexes by clicking on the arrow in the first box. The blank box that follows is where you enter your first search term or terms. On the second line, you can choose the Boolean operator you want to use in your search. The options are ‘and’, ‘or’, and ‘not’. Then, you would again choose the index to search, followed by the second term or terms. If you have more concepts you want to include in your search, you can click the [+] to add another line for your search.
A sample search is shown next, followed by its results:
Advanced Search
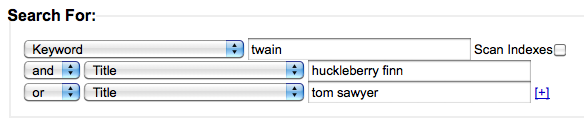
Results from Advanced Search

When you use the Boolean operators to broaden or narrow a search, remember the action of each operator. The ‘and’ operator narrows the results you’ll retrieve because the search will retrieve the records that include all your search terms. The ‘or’ operator expands the results because the search will look for occurrences of all of your search terms. The ‘not’ operator excludes records with the term that follows the operator.
Note: If you leave this expandedSearchOption set to ‘don’t show’, this is the display you will see:
Fewer Search Options
The Advanced Search page then shows the multiple kinds of limits that can be applied to your search results. Either check a box or select from the drop down menus to narrow your search. You will type the year, year range, or a ‘greater than (>)’ or ‘less than (<)’ year.
Other Advanced Search Options
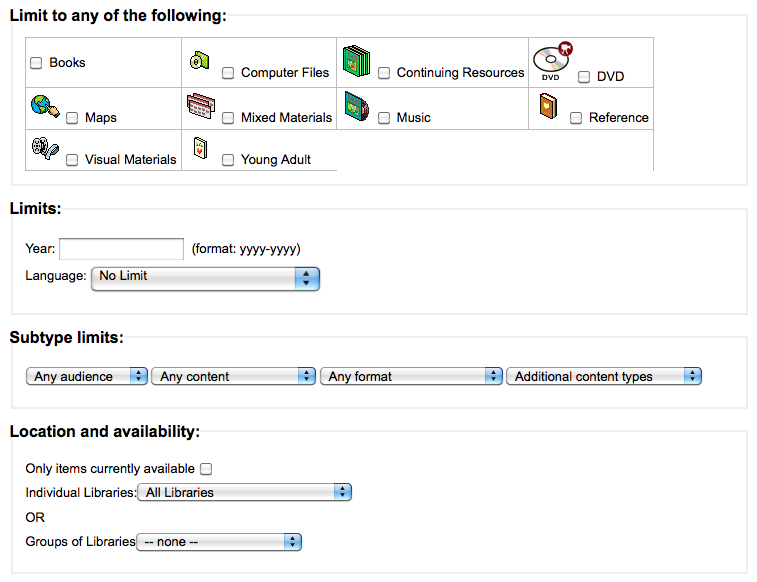
Finally, you can choose how the results will be sorted. The pre-defined sort options are in the final area of the Advanced Search screen.
Sort Results By
The default sort is by relevance, although you can choose to sort by author, by title, by call number, by dates, or by popularity. If you would prefer a different default sort, you can set defaultSortField to one of the other choices in Administration > System Preferences > Searching.
Common Command Language Searching
Koha uses the Common Command Language (CCL) (ISO 8777) as its internal search protocol. Searches initiated in the graphical interface use this protocol as well, although the searcher doesn’t know which indexes, operators and limiters are available and being used to conduct their search. The searcher can use the Advanced Search when more precise results set are desired and where the search indexes are somewhat known. However, some library users and many library staff prefer using a command based structure. This part of the document will present and explain the use of the Koha command based structure. The indexes, operators, and limiters used are identical to those used in the graphical interface.
Indexes
The CCL standard itself doesn’t specify a particular set of qualifiers (indexes), but it does suggest a few short-hand notations such as ‘ti’, ‘au’, and ‘su’. Koha has a default set of indexes; it’s possible to customize that set by adding needed indexes based on local requirements. A qualifier (index) maps to a particular use-attribute within the Z39.50 BIB-1 attribute set. The complete Z39.50 Bib-1 Attribute can be viewed at http://www.loc.gov/z3950/agency/defns/bib1.html.
The standard Koha set of indexes is a fairly common example of MARC21 indexing rules. The indexes that are defined in Koha are indexes typically used by other integrated library systems. The defined Z39.50 Bib-1 Attribute mapped to the indexes include:
Attributes
Bib-1 Attribute
Qualifier (index)
Personal-name
pn
Corporate-name
cpn
Conference-name
cfn
Title
ti
Title-series
se
Title-uniform
ut
ISBN
nb
ISSN
ns
Local number
sn
Local-classification
lcn and callnum
Subject
su, su-to, su-geo, su-ut
Pubdate
yr,pubdate
Date-of-Acquisition
acqdate
Language
ln
Place-of-publication
pl
Abstract
ab
Notes
nt
Record-type
rtype, mc-rtype, mus
Author
au, aut
Subject-person-name
su-na
Any (keyword)
kw
Publisher
pb
Content-type
ctype
Koha-Auth-Number
an
Author-personal-bibliography
aub
Author-in-order
auo
Refer to the Koha Indexing Chart for the MARC21 tags mapped to each Bib-1 Attribute and index combination.
Audience Examples
- aud:a Easy
- aud:cc Juvenile
- aud:d Young adult
- aud:e Adult
Contents Examples
- fic:1 Fiction
- fic:0 Non Fiction
- bio:b Biography
- mus:j Musical recording
- mus:I Non musical record
Search Syntax
In the persistent search box, single words generally retrieve large sets. To narrow a search, you can use multiple words. Koha automatically uses the ‘and’ Boolean operator to create a set of records matching your input. When you want to narrow the search to an author or a title or a subject or some other specific field or use a Boolean operator, there isn’t an obvious way to accomplish that specificity. The library user can, of course, go to the Advanced Search page; however, if you know how to construct a CCL search, you can achieve more specificity while using the persistent search box on any page.
There is a specific order to the CCL search syntax. Although it can be used for simple searches, it is an especially effective way to perform complex searches, as it affords you a great deal of control over your search results. To construct a CCL search, first enter a desired index code, then an equal sign, followed by your search word(s). Following are examples of simple CCL searches.
- ti=principles of accounting
- au=brown joseph
- su=poetry
- su-na=Shakespeare
- kw=marlin
You can refine your search by combining search terms with Boolean operators ‘and’, ‘or’, or ‘not’. Following are examples of searches using Boolean operators.
- ti=principles of accounting and au=brown joseph
- su=poetry not su-na=Shakespeare
- kw=communication and su=debate
You can also choose to search for things that start with a character or series of characters
- ti,first-in-subfield=C (will show you all titles that start with the letter ‘C’)
Other string location searches can be performed with the following keywords:
- rtrn : right truncation
- ltrn : left truncation
- lrtrn : left and right truncation
- st-date : type date
- st-numeric : type number (integer)
- ext : exact search on whole subfield (does not work with icu)
- phr : search on expression anywhere in the subfield
- startswithnt : subfield starts with
Using specific indexes and Boolean operators are not the only way a search can be refined. You can also refine your search as a phrase when looking for a title, author, or subject. The syntax for this search is index,phr=search words.
To illustrate the results of various search types, a search was done for the words ‘supreme court’. The results illustrate that the search index and the word order make a difference in search results. Only the results count and the search itself is in these examples. The search executed will always be between the single quotes.
Sample Search 1

Sample Search 2

Sample Search 3

Sample Search 4

Sample Search 5

Sample Search 6

Sample Search 7

Sample Search 8

Sample Search 9

You can also choose to use limiters in your search query. Some common limiters include dates, languages, record types, and item types. In the Advance Search, you can either click a box or key in data to limit your search. You can also apply the same limits with CCL by using the syntax in the following examples. In all
By Date: su=supreme court and yr,st-numeric=>2000
Sample Search 10

When you limit by date, you can use the ‘>’ (greater than), ‘<’ (less than), ‘=’ (equal), or ‘yyyy-yyyy’ (range) symbols.
By Item Type: su=nursing and itype:BK
Sample Search 11

Each library will have a different set of item types defined in their circulation configuration. When you set up item types, you define a code and a name for each one. The name will appear on the Advance Search page. The code you assigned is used as a CCL search limit, formatted as ‘itype:x’, where ‘x’ is the assigned code. The initial set of item types in Koha will usually be edited to reflect your collections, so your item type limiters may be different than the initial ones. The initial item type limiters follow.
- itype:BKS Books, Booklets, Workbooks
- itype:SR Audio Cassettes, CDs
- itype:IR Binders
- itype:CF CD-ROMs, DVD-ROMs, General Online Resources
- itype:VR DVDs, VHS
- itype:KT Kit
- itype:AR Models
- itype:SER Serials
By format: su=supreme court not l-format:sr
Sample Search 12

The format limiters are derived from a combination of LDR, 006 and 007 positions. The formats that are currently defined are the following.
- l-format:ta Regular print
- l-format:tb Large print
- l-format:fk Braille
- l-format:sd CD audio
- l-format:ss Cassette recording
- l-format:vf VHS tape
- l-format:vd DVD video
- l-format:co CD software
- l-format:cr Website
By content type: su=supreme court not ctype:l
Sample Search 13

The content types are taken from the 008 MARC tag, positions 24-27.
There are two other limiter types that are not described in this document. They are: Audience and Content. The only difference in the syntax of the CCL is the actual limiter. They are reproduced here just in case you would like to use these limiters.
Koha Search Indexes
By default, not all fields are indexed in the Zebra search engine, but many are. Below are the MARC21 fields that are indexed in Zebra.
Indexes
Field
Description
001
Control-number
005
Date/time-last-modified
007
Microform-generation:n:range(data,11,1), Material-type,ff7-00:w:range(data,0,1), ff7-01:w:range(data,1,1), ff7-02:w:range(data,2,1), ff7-01-02:w:range(data,0,2)
008
date-entered-on-file:n:range(data,0,5), date-entered-on-file:s:range(data,0,5), pubdate:w:range(data,7,4), pubdate:n:range(data,7,4), pubdate:y:range(data,7,4), pubdate:s:range(data,7,4), pl:w:range(data,15,3), ta:w:range(data,22,1), ff8-23:w:range(data,23,1), ff8-29:w:range(data,29,1), lf:w:range(data,33,1), bio:w:range(data,34,1), ln:n:range(data,35,3), ctype:w:range(data,24,4), Record-source:w:range(data,39,0)
010
LC-card-number, Identifier-standard
011
LC-card-number, Identifier-standard
015
BNB-card-number, BGF-number, Number-db, Number-natl-biblio, Identifier-standard
017
Number-legal-deposit, Identifier-standard
018
Identifier-standard
020$a
ISBN:w, Identifier-standard:w
020
Identifier-standard
022$a
ISSN:w, Identifier-standard:w
022
Identifier-standard
023
Identifier-standard
024$a
Identifier-other
024
Identifier-standard
025
Identifier-standard
027
Report-number, Identifier-standard
028
Number-music-publisher, Identifier-standard
030
CODEN, Identifier-standard
034
Map-scale
037
Identifier-standard, Stock-number
040
Code-institution, Record-source
041
ln
043
Code-geographic
050$b
LC-call-number:w, LC-call-number:p, LC-call-number:s
050
LC-call-number:w, LC-call-number:p, LC-call-number:s
052
Geographic-class
060
NLM-call-number
070
NAL-call-number
080
UDC-classification
082
Dewey-classification:w, Dewey-classification:s
086
Number-govt-pub
100$9
Cross-Reference:w, Koha-Auth-Number
100$a
Author,Author:p, Author:s, Editor, Author-personal-bibliography, Author-personal-bibliography:p, Author-personal-bibliography:s
100
Author, Author-title, Author-name-personal, Name, Name-and-title, Personal-name
110$9
Koha-Auth-Number
110
Author, Author-title, Author-name-corporate, Name, Name-and-title, Corporate-name
111$9
Koha-Auth-Number
111
Author, Author-title, Author-name-corporate, Name, Name-and-title, Conference-name
130$n
Thematic-number
130$r
Music-key
130$9
Koha-Auth-Number
130
Title, Title-uniform
210
Title, Title-abbreviated
211
Title, Title-abbreviated
212
Title, Title-other-variant
214
Title, Title-expanded
222
Title, Title-key
240$r
Music-key
240$n
Thematic-number
240
Title:w, Title:p, Title-uniform
243$n
Thematic-number
243$r
Music-key
243
Title:w, Title:p, Title-collective
245$a
Title-cover:w, Title-cover:p, Title-cover:s, Title:w, Title:p, Title:s
245$c
Author, Author-in-order:w, Author-in-order:p, Author-in-order:s
245$9
Cross-Reference:w, Koha-Auth-Number
245
Title:w, Title:p
246
Title, Title:p, Title-abbreviated, Title-expanded, Title-former
247
Title, Title:p, Title-former, Title-other-variant, Related-periodical
260$a
pl:w, pl:p
260$b
Publisher:w, Publisher:p
260$c
copydate, copydate:s
260
pl
300
Extent:w, Extent:p
400$a
Name-and-title
400$t
Author-title, Name-and-title, Title, Title-series
400$9
Koha-Auth-Number
400
Author, Author-name-personal, Name, Personal-name
410
Author, Corporate-name
410$a
Name-and-title
410$t
Author-title, Title, Title-series
410$9
Koha-Auth-Number
410
Author-name-corporate, Name
411
Author, Conference-name
411$a
Name-and-title
411$t
Author-title, Title-series
411
Author-name-corporate, Name
440$a
Title-series:w, Title-series:p
440$9
Koha-Auth-Number
440
Title-series:w, Title-series:p, Title, Title-series
490$a
Title-series:w, Title-series:p
490
Title, Title-series
490$9
Koha-Auth-Number
500
Note:w, Note:p
502
Material-type
505$r
Author
505$t
Title
505
Note:w, Note:p
510
Indexed-by
520
Abstract:w, Abstract:p
521$a
lex:n
526$c
arl, arl:n
526$d
arp, arp:n
590
Note:w, Note:p
600$a
Name-and-title, Name, Personal-name, Subject-name-personal, Subject
600$t
Name-and-title, Title, Subject
600$9
Koha-Auth-Number
600
Name, Personal-name, Subject-name-personal, Subject
610$a
Name-and-title
610$t
Name-and-title, Title
610$9
Koha-Auth-Number
610
Name, Subject, Corporate-name
611
Conference-name
611$a
Name-and-title
611$t
Name-and-title, Title
611$9
Koha-Auth-Number
611
Name, Subject
630$n
Thematic-number
630$r
Music-key
630$9
Koha-Auth-Number
630
Subject
650$9
Koha-Auth-Number
650
Subject, Subject:p
651$9
Koha-Auth-Number
651
Name-geographic, Subject,Subject:p
652$9
Koha-Auth-Number
653$9
Koha-Auth-Number
653
Subject, Subject:p
654$9
Koha-Auth-Number
654
Subject
655$9
Koha-Auth-Number
655
Subject
656$9
Koha-Auth-Number
656
Subject
657$9
Koha-Auth-Number
657
Subject
690$9
Koha-Auth-Number
690
Subject, Subject:p
700$9
Cross-Reference, Koha-Auth-Number
700$a
Author, Author:p
700$n
Thematic-number
700$r
Music-key
700$t
Author-title, Name-and-title, Title, Title-uniform
700
Author, Author-name-corporate, Author-name-personal, Name, Editor, Personal-name
710
Author, Corporate-name
710$t
Author-title, Name-and-title, Title, Title-uniform
710$a
Name-and-title
710$9
Koha-Auth-Number
710
Author, Name
711$a
Name-and-title
711$t
Author-title, Title, Title-uniform
711$9
Koha-Auth-Number
711
Author-name-corporate, Name, Conference-name
730$n
Thematic-number
730$r
Music-key
730$9
Koha-Auth-Number
730
Title, Title-uniform
740
Title, Title-other-variant
773$t
Host-item
780$t
Title
780
Title, Title-former, Related-periodical
785
Related-periodical
800$a
Name-and-title
800$t
Author-title, Name-and-title, Title, Title-series
800$9
Koha-Auth-Number
800
Author, Author-name-personal, Name, Personal-name
810$a
Name-and-title
810$t
Author-title, Name-and-title, Title, Title-series
810$9
Koha-Auth-Number
810
Author, Corporate-name, Author-name-corporate, Name
811$a
Name-and-title
811$9
Koha-Auth-Number
811$t
Author-title, Name-and-title, Title, Title-series
811
Author, Author-name-corporate, Name, Conference-name
830$9
Koha-Auth-Number
830
Title, Title-series
840
Title, Title-series
999$c
Local-Number:n, Local-Number:w, Local-Number:s
999$d
biblioitemnumber:n, biblioitemnumber:w, biblioitemnumber:s
942$0
totalissues:n, totalissues:s
942$2
cn-bib-source
942$6
cn-bib-sort:n, cn-bib-sort:s
942$c
itemtype:w
942$n
Suppress:w, Suppress:n
942$h
cn-class
942$i
cn-item
942$k
cn-prefix
942$m
cn-suffix
952$0
withdrawn:n, withdrawn:w
952$1
lost, lost:n
952$2
classification-source
952$3
materials-specified
952$4
damaged:n, damaged:w
952$5
restricted:n, restricted:w
952$6
cn-sort:n, cn-sort:s
952$7
notforloan:n, notforloan:w
952$8
ccode
952$9
itemnumber:n, itemnumber:s
952$a
homebranch
952$b
holdingbranch
952$c
location
952$d
Date-of-acquisition, Date-of-acquisition:d, Date-of-acquisition:s
952$e
acqsource
952$f
coded-location-qualifier
952$g
price
952$j
stack:n, stack:w
952$l
issues:n, issues:w, issues:s
952$m
renewals:n, renewals:w
952$n
reserves:n, reserves:w
952$o
Local-classification:w, Local-classification:p, Local-classification:s
952$p
barcode, barcode:n
952$q
onloan:n, onloan:w
952$r
datelastseen
952$s
datelastborrowed
952$t
copynumber
952$u
uri:u
952$v
replacementprice
952$w
replacementpricedate
952$y
itype:w
952$z
Note:w, Note:p
About Koha
The ‘About Koha’ area will give you important server information as well as general information about Koha.
- Get there: More > About Koha
Server Information
Under the ‘Server Information’ tab you will find information about the Koha version and the machine you have installed Koha on. This information is very important for debugging problems. When reporting issues to your support provider or to the various other support avenues (mailing lists, chat room, etc), it’s always good to give the information from this screen.
Server Information on Koha
Perl Modules
In order to take advantage of all of the functionalities of Koha, you will need to keep your Perl modules up to date. The ‘Perl Modules’ tab will show you all of the modules required by Koha, the version you have installed and whether you need to upgrade certain modules.
Perl Modules
Items listed in bold are required by Koha, items highlighed in red are missing completely and items highlighted in yellow simply need to be upgraded.
Implementation Checklist
The following guide will walk you through the areas of Koha you need to look at in order to prepare to start using the system.
Data Migration
Before you can start using Koha you’ll need to have some data. This can be done by entering it all by hand, but most people already have their data in electronic format of some sort and just need to reformat it a bit for importing into Koha.
Create a list of libraries and enter their info and codes into Libraries & Groups
Define your list of Item Types
Define you patron categories and enter the categories and their codes into Patron Categories
Enter any additional patron information fields you use in your library in the Patron Attributes - Requires that you first set the ExtendedPatronAttributes
system preference if you have custom fields
Define all of your Authorized Values - Collection codes - :ref:`Shelving
locations <shelvelocvals>`
- Item statuses (lost, not for loan, use restrictions)
- Plus any others that are needed in your library
Optionally define City/Postal Code combos and Road Types for patron entry
Map your bibliographic data from your legacy system to Koha fields and migrate (remembering to use the collection, shelving, item type and library codes you entered in the above setting areas)
Map your patron data from your legacy system to the Koha fields and migrate (remembering to use the patron and library codes you defined above)
Test your migrated data to be sure that everything is as you expect it to be, some things to test include: - Check some of your titles with diacritics and make sure
that they migrated properly.
- Check titles in a series and make sure that series information migrated properly.
- Make sure that your patrons have their contact information in the right fields.
- If your serials data was migrated search for these records in the catalog and confirm that they look right.
- If your serials data was migrated search for these records in the serials module and confirm that they look right.
- Check marc records to verify a variety of items are cataloged correctly
- Check cataloging process to see if all necessary fields are available
- If fines are migrated, check to see that they are applied correctly
- If holds are migrated, check to see they are accurate in catalog and patron record
Admin Configuration
Most of these preferences won’t need to be changed to use your Koha system, but there are a few that you might want to customize.
If your library uses CAS Authentication, you’ll want to set the various CAS system preferences
Administration System Preferences - KohaAdminEmailAddress :
This is the email address that will be used by the system in ‘from’ lines and to send errors to if there is no email set for the branch
- noItemTypeImages : Decide if you want to show item type icons in the staff client and opac
- delimiter : This value will be put in between fields when exporting data from Koha
- virtualshelves : Decide if you want the staff and/or patrons to use lists in Koha
- insecure : If your system is behind a local firewall, you can set it to no require log in for the staff client
- AutoLocation : Require staff to log in to the staff client from a specific IP range
- IndependantBranches : Prevent librarians from editing content that belongs to other branches
Go through the Log System Preferences and decide which actions you want to keep track of in the logs
Localization Configuration
Koha is used worldwide and so you need to make sure you set your localization preferences so that options throughout Koha appear properly for your location/language.
Localization/Internationalization System Preferences - dateformat : Decide how
dates are displayed throughout Koha
opaclanguagesdisplay : Decide if patrons can choose what language the OPAC appears in - opaclanguages :
Decide which languages the patrons can choose from
language : Decide which languages appear in the staff client
CalendarFirstDayOfWeek : Define your first day of the week
Circulation Configuration
Before you start circulating your collection you’ll need to set up your rules and preferences for circulation.
Define you Circulation/Fine rules
Enter the days your library is closed for fines and due date calculations
Circulation System Preferences - CircControl : Define
whether circ rules are based on item’s location, patron’s location or transaction location
useDaysMode : Define how due dates are calculated
finesCalendar : Define how fines are calculated (for every late date or only for days the library is open)
SpecifyDueDate : Decide if staff are allowed to override due dates on checkout
AutomaticItemReturn : Decide if items are sent back to the owning branch when checked in
todaysIssuesDefaultSortOrder : Decide how items checked out today display on the patron record
previousIssuesDefaultSortOrder : Decide how items checked out prior to today display on the patron record
noissuescharge : Define the maximum amount a patron can owe before checkouts are blocked
ReturnBeforeExpiry : Decide if patrons need to return items before their accounts expire
AllowOnShelfHolds : Decide if patrons can place holds on items that are marked as being available - AllowHoldPolicyOverride
: Decide if you want the staff to be able to override the setting for the above at checkout
AllowHoldsOnDamagedItems : Decide if patrons can place holds on items that are marked as damaged - AllowHoldPolicyOverride
: Decide if you want the staff to be able to override the setting for the above at checkout
maxreserves : Decide how many items a patron can have on hold at once - AllowHoldPolicyOverride
: Decide if you want the staff to be able to override the setting for the above at checkout
maxoutstanding : Define the maximum amount a patron can owe before holds are blocked - AllowHoldPolicyOverride
: Decide if you want the staff to be able to override the setting for the above at checkout
ReservesMaxPickUpDelay : Define the number of days before a hold expires
WebBasedSelfCheck : Decide if you want to use the built in web-based self-checkout system - AutoSelfCheckAllowed :
Decide if the self-checkout system requires login
- ShowPatronImageInWebBasedSelfCheck : Decide if you want patron images to show on the self checkout screen
AllowNotForLoanOverride : Decide if you want the staff to be able to checkout items marked as ‘not for loan’
AllowRenewalLimitOverride : Decide if you want staff to override the limit put on renewals
AllowFineOverride : Decide if you want staff to be able to override fine limits
RenewalPeriodBase : Decide what date renewals are based on
finesMode : Switch to ‘Calculate and Charge’ before go live if you charge fines
OverdueNoticeBcc : If you want to receive a copy of every overdue notice sent out, enter your email address here
emailLibrarianWhenHoldIsPlaced : Decide if you want an email every time a hold is placed
ReservesControlBranch : Decide which branch’s hold rules are considered first
soundon : Decide if you want to have sounds on for circulation actions
FilterBeforeOverdueReport : If you have a large amount of overdues, you might want to turn this preference on so as to allow you to filter before results appear
DisplayClearScreenButton : If you have a lot of staff members sharing one circ computer you might want to enable this so that staff can clear the screen in between checkouts to protect patron’s privacy
CircAutoPrintQuickSlip : Decide how you want Koha to react if you scan in a blank barcode on the checkout screen
SuspendHoldsIntranet and/or SuspendHoldsOpac : Decide if you want patrons and/or staff to be able to suspend holds - AutoResumeSuspendedHolds
: If you allow holds to be suspended decide if you want them to automatically resume on the date entered by the staff and/or patron
Customize your Notices & Slips
Define your Overdue Notice Triggers
Set up your cron jobs - Populate :ref:`your holds
queue <buildholdscron>` (every 1-4 hours)
Decide when holds expire (daily)
Calculate fines due (daily) - Fines on hourly loans will calculate when you check
the items in
Mark long overdue items as lost (daily)
Decide when the system sends out messages (1-4 hours)
Decide when the system queues overdue notices (daily)
Set up hold notices that didn’t send for printing (daily after overdues and message queue)
Decide when the system queues the advanced notice of items due (daily)
Find holds that need to be resumed and remove suspension (daily)
Patron Configuration
You have already imported patron data from your old system, but there are plenty of options available to you regarding patrons and their accounts.
Enter your staff members as patrons - Define :ref:`staff members
access permissions <patronpermissions>`
Patron System Preferences - AddPatronLists :
Decide how patron categories appear when creating a new patron
- autoMemberNum : Decide if the patrons barcodes are auto-generated or if you enter them yourself
- MaxFine : Determine the maximum amount that people can owe in fines
- NotifyBorrowerDeparture : Decide when to warn staff that the patron account is about to expire
- intranetreadinghistory : Decide if the staff can see the patron’s reading/checkout history
- BorrowerMandatoryField : List fields that you want to appear as mandatory on the patron add/edit form
- BorrowersTitles : Add or change the titles for your patrons
- borrowerRelationship : Add or change borrower relationships (child to adult and professional to organization)
- AutoEmailPrimaryAddress : Determine if the patrons get an email confirming the creation of their account
- EnhancedMessagingPreferences : Decide if patrons can choose from a series of notices (other than overdues)
- patronimages : Decide if you want to save patron images in your system
- ExtendedPatronAttributes : Decide if you want to enable custom patron fields
- minPasswordLength : Enter the minimum number of characters you want passwords to have
- BorrowerUnwantedField : Decide what fields your library doesn’t need to see on the patron entry form
Cataloging Configuration
Before you start cataloging in Koha you’ll want to set up your preferences and other rules.
Define your cataloging templates aka MARC Bibliographic Frameworks - Run the :ref:`MARC
Bibliographic Framework Test <marcbibframeworkstest>` to be sure your changes are valid
Define any authorized values you might want to use in cataloging
Set up custom classification sources (if you use something other than the defaults)
Set up MARC matching rules for importing records from mrc files or z39.50
Set up Koha to Keyword mapping for deciding how to display marc fields to the screen (still in beta - only one field)
Set up the z39.50 targets you want to search for cataloging (and acquisitions)
Cataloging System Preferences - URLLinkText : Enter
text to display when 856 fields do not have pre-defined labels
- hide_marc : If you are unfamiliar with MARC you can have the MARC fields number hidden
- LabelMARCView : Choose how you want duplicate fields to appear on the editor
- DefaultClassificationSource : Choose which classification source is the default in your library
- advancedMARCeditor : Decide if you need labels to appear on your MARC editor
- marcflavour : Choose your MARC format
- itemcallnumber : Enter which field and subfields to look into for the call number
- MARCOrgCode : Enter your MARC Organizational Code (not the same as your OCLC number)
- autoBarcode : Decide if Koha generates item barcodes for you
- OpacSuppression : Decide if you want to hide items marked as suppressed from the OPAC search results
Set up your cron jobs - Decide when the system :ref:`checks
URLs in catalog records <checkurlcron>` to see if they are still valid
Authorities Configuration
Koha has the ability to keep track of your authority records and how they’re linked to your bibliographic records. Before using authorities you should configure several preferences.
Set Authority Frameworks aka templates
Authority System Preferences - BiblioAddsAuthorities :
Decide if Koha creates authorities when cataloging
- dontmerge : Decide if updates to authorities trigger updates to the bibliographic records that link to them
- AutoCreateAuthorities : Decide when authorities are created
- LinkerModule : Decide which match the authority linker should use
- LinkerOptions : Decide if you want authority linking to be broader or more specific
- CatalogModuleRelink : Decide if you want to enable authority linking while cataloging
Set up your cron jobs - Choose when the system looks for authorities updates to
Searching Configuration
There are several system preferences related to searching, it is not always recommended to make too many changes to these preferences since they are set to get you the most relevant results. If you would like to change the default way that Koha handles searching, view the Searching system preferences tab.
Set up your cron jobs - Decide how often your :ref:`system rebuilds the search
index <rebuildsearchcron>` (4-10 min)
Searching System Preferences - AdvancedSearchTypes :
Decide which authorized value fields you want patrons and staff to be able to limit their advanced searches by
UseAuthoritiesForTracings : Decide how you want Koha to handle subject searches in the OPAC - TraceCompleteSubfields
: Decide how you want Koha to handle subject searches in the OPAC
- TraceSubjectSubdivisions : Decide how you want Koha to handle subject searches in the OPAC
displayFacetCount : Decide whether to show facet counts on search results
OPAC Configuration
There are a lot of ways you can customize your OPAC in Koha.
Decide how you want your OPAC to look & what content you want on the main page
Create a library branded stylesheet using CSS - .. important:: Do not edit the default CSS files, instead create a new
one, that way the system can always fall back on the original CSS.
Create a custom XSLT stylesheet to change the way search results and bib records appear in the OPAC
OPAC System preferences - opacuserlogin :
Decide if you want to allow patrons to login to the OPAC to access customized functionality (searching will be allowed without logging in) - RequestOnOpac :
Decide if patrons can place holds via the OPAC
- OPACItemHolds : Decide if patrons can place holds on specific items (instead of just the next available item)
- OpacPasswordChange : Decide if patrons can change their password (don’t allow this if you’re using LDAP)
- OpacRenewalAllowed : Decide if patrons can renew their checked out items via the OPAC
- opacreadinghistory : Decide if patrons can view their reading/checkout history via the OPAC
- reviewson : Decide if you want to allow patrons to comment on bib records via the OPAC
- OpacStarRatings : Decide if patrons can leave star ratings
- virtualshelves : Decide if you want patrons to be able to create Lists
- OpacAllowPublicListCreation : If patrons can create lists then decide if they are allowed to create public lists
- suggestion : Decide if you want patrons to be able to submit purchase suggestions
- OPACViewOthersSuggestions : Decide if you want patrons to be able to see purchase suggestions made by other patrons
opacbookbag : Decide if patrons can save items into their cart
AnonSuggestions : Decide if you want non logged in users to be able to make purchase suggestions
OPACXSLTResultsDisplay : Decide if you want to use the XSLT stylesheets on the OPAC search results
OPACXSLTDetailsDisplay : Decide if you want to use the XSLT stylesheets on the bib records in the OPAC
LibraryName : Enter your library name for display in the <title> tag and on the top of the OPAC
opacsmallimage : Choose a logo to replace the Koha logo
opaccredits : Enter HTML to appear at the bottom of every page in the OPAC
OpacMainUserBlock : Enter HTML that will appear in the center of the main OPAC page
OpacNav : Enter HTML that will appear to the left on the main OPAC page
OpacNavBottom : Enter HTML that will appear below OpacNav
OpacNavRight : Enter HTML that will appear below the login box on the right
opacheader : Enter the HTML that will appear above the search box on the OPAC
OPACNoResultsFound : Enter the HTML that will appear when no results are found
OPACResultsSidebar : Enter the HTML that will appear below the facets on your search results
OPACMySummaryHTML : Enter the HTML that will appear in the far right of the circulation summary in the OPAC
Customize your stylesheets: - OPACUserCSS : Enter
any additional fields you want to define styles for
- opaclayoutstylesheet : Point to a CSS file on your Koha server
- opacstylesheet : If you have a custom CSS enter the link to that file
- opaccolorstylesheet : Point to a CSS file on your Koha server
OpacHighlightedWords : Decide if you want search terms to be highlighted on the search results
hidelostitems : Decide if you want to show patrons items you have marked as lost
BiblioDefaultView : Decide what view is the default for bib records on the OPAC
OPACShelfBrowser : Decide if you want to enable the shelf browse functionality
OPACURLOpenInNewWindow : Decide if URLs clicked in the OPAC are opened in a new window
SearchMyLibraryFirst : If you have a multi-branch system decide if you want patrons to search their library first
OpacAuthorities : Decide if you want patrons to be able to search your authority file
OpacBrowser : Decide if you want patrons to browse your authority file
OPACSearchForTitleIn : Choose which libraries you want patrons to be able to re-run their search in
OpacAddMastheadLibraryPulldown : If you’re a multi-branch system you can add a pull down to the search bar for patrons to search which library to search
EnableOpacSearchHistory : Decide if you want the system to keep a search history
Set up your cron jobs - If you have the OpacBrowser preference set decide
- If you have custom RSS feeds, decide when you want the feed to be populated
Editable OPAC Regions
Using the OPAC system preferences you can customize various regions, the following graphics will define what preferences update each regions.
OPAC Editable Regions
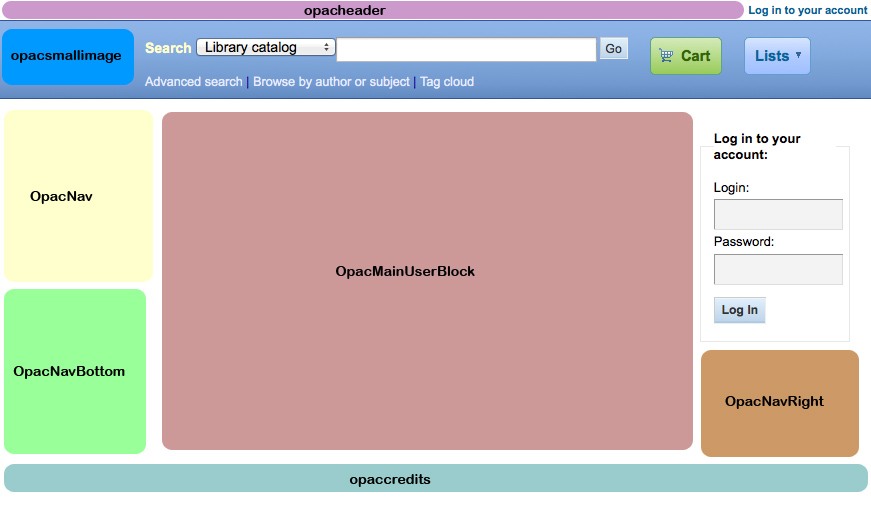
An example of a way to customize the page is included as well:
Customized Koha OPAC
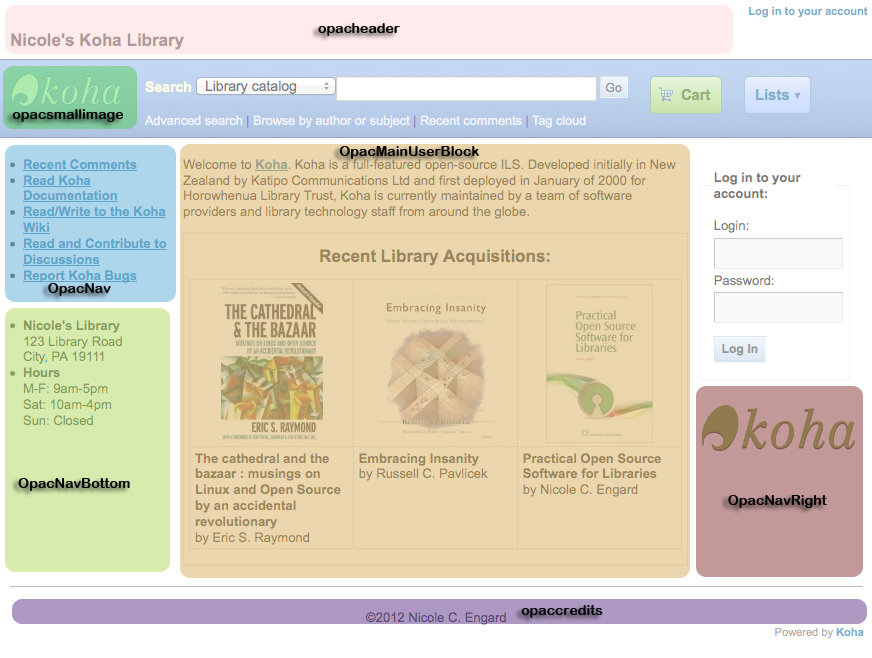
Enhanced Content Configuration
Koha allows you to pull in content from outside sources to enhance your bib records. All of this content can be toggled on and off using the enhanced content system preferences.
FRBR/Editions - If you would like to have your OPAC and/or staff client
show an ‘Editions’ tab on the bib record, you want to enable one or the other FRBR preferences and then either one or both of the ISBN services (XISBN and ThingISBN).
Amazon : This service is free and just requires that you visit http://aws.amazon.com to sign up - Using the Amazon preferences you can choose to show
different types of content from Amazon. Before choosing which types of content you would like to display you will need to enable Amazon content for the staff client and/or the OPAC.
Babelthèque - This is a pay service. Contact Babelthèque to learn how to
enable this content in the OPAC.
Baker and Taylor - This is a pay service from Baker & Taylor. Contact
Baker & Taylor for the information to enter into these preferences.
Google - This service is free and does not require registration,
simply enable GoogleJackets and you’re set to go.
LibraryThing - With the exception of ThingISBN, you will need to contact
LibraryThing for the information to enter into these preferences
- Enabling ThingISBN will help to populate the editions tab on the bib record display if you have enabled FRBR.
Novelist - This is a pay service from Ebsco. Contact Ebsco for the
information to enter into these preferences
OCLC - XISBN is used to populate the editions tab on the bib
record display if you have enabled FRBR. This service is free for up to 999 queries a day.
Syndetics - This is a pay service from Syndetics to add content for
your bib records. Contact Syndetics for the information to enter into these preferences.
Tagging - Choose whether or not you want to allow patrons to add
tags to records in Koha.
Acquisitions Configuration
When using acquisitions in Koha you first need to define some defaults.
Set up your funds & budgets
Choose your default currency and enter others if you order from multiple countries
Enter in your vendor information
Create an Framework with the code ACQ (if you’re going to enter item records at the time of ordering or receiving)
Acquisitions System preferences - AcqCreateItem :
Decide if an item record is created during acquisition
- CurrencyFormat : Decide how you want monetary amounts to display
- gist : Enter your sales tax (if you are billed for tax)
- OrderPdfFormat : Decide what format you want your print orders to use
Serials Configuration
When you use serials there are a few options you can set before hand.
Serials System Preferences - RenewSerialAddsSuggestion
: Decide if you want renewing serials to add a suggestion for easy purchasing
- RoutingSerials : Decide if you want to route serials around your library
- RoutingListAddReserves : Decide if holds are placed on serials when there is a routing list in place
Cataloging System Preferences - StaffSerialIssueDisplayCount
: Decide how many of the most recent issues to display in the staff client
- OPACSerialIssueDisplayCount : Decide how many of the most recent issues to display in the OPAC
- SubscriptionHistory : Decide how you want the subscription information to display in the OPAC
Planning for Go-Live
Once you have all of your settings ready, you need to prepare for making your system live:
- Decide if you need training by an outside service or if your staff can do the training themselves.
- Make sure that there is time for your staff to play with your test system and get comfortable with it
- If this is a migration, work with your previous company to extract data right before you go live
- Come up with URLs for your new Koha OPAC & Staff Client
- Make sure that if you’re hosting your own system you have a backup plan
SOPAC2 Installation
Jean-André Santoni
August 2009
Nicole C.
Engard
Translation
SOPAC2 Introduction
Note
The following documentation was translated using Google Translate from French to English and may have some language errors.
Introduction
This is an installation guide and the connector SOPAC2 Koha. It has been tested on Debian Lenny and Ubuntu Jaunty, with 6.12 and Koha Drupal 3.0.x It does not cover the installation of Koha and Drupal, but SOPAC, its dependencies and the connector.
Installation of Locum and Insurge
Locum and Insurge are the two libraries used primarily by SOPAC. They serve as a layer of abstraction to the data. Insurge manages the social aspect (tags, reviews, ratings), while Locum manages the connection to the ILS via the connector. Both libraries use a different database from that of Drupal.
Dependencies
There are no packages for Debian MDB2 yet, you can install it via pear:
# apt-get install php-pear # pear install MDB2 # pear install MDB2#mysql
Download
Download the Locum and Insurge libraries from SVN:
# cd /usr/local/lib # svn co http://dobby.darienlibrary.org/svn/locum/trunk/ locum # svn co http://dobby.darienlibrary.org/svn/insurge/trunk/ insurge
Creation of the Database
$ mysql -u root mysql> create database scas; mysql> grant all privileges on scas.* to scas_user@'localhost‘ identified by ‘scas_pass’; mysql> flush privileges; mysql> exit
Sync DSN
This file will provide the connection information to a DB libraries:
# nano /usr/local/etc/locum_insurge_dsn.php
It should contain:
<?php $dsn = ‘mysql://scas_user:scas_pass@localhost/scas’;
Installation of Insurge
If you customize the name of the database, consider editing the sql file:
# nano /usr/local/lib/insurge/sql/scas_insurge.sql
Import Insurge:
$ mysql -u root -p < /usr/local/lib/insurge/sql/scas_insurge.sql
Configure Insurge:
# nano /usr/local/lib/insurge/config/insurge.ini
The variables in insurge.ini are empty. The default values are too long and cause MySQL errors.
Here is a sample of insurge.ini
; This is the Locum configuration file ; General configuration options for your installation of Insurge. [insurge_config] dsn_file = “/usr/local/etc/locum_insurge_dsn.php” ; This is where you configure your repository membership information. ; ; parent_server is the server name of the repository parent server you have been ; told to use. ; group_id = The group ID you have been given by your repository admin. ; These configuration points are OPTIONAL and are only necessary if you are ; participating in a repository relationship. [repository_info] parent_server = “” group_id = “” group_key = “”
Installation of Locum
The same procedure applies to Locum
# nano /usr/local/lib/locum/sql/scas_locum.sql # mysql < /usr/local/lib/locum/sql/scas_locum.sql # nano /usr/local/lib/locum/sql/locum_init.sql # mysql < /usr/local/lib/locum/sql/locum_init.sql # nano /usr/local/lib/locum/config/locum.ini # mkdir /usr/local/var # mkdir /usr/local/var/log
Configure the DSN:
[locum_config] dsn_file = “/usr/local/etc/locum_insurge_dsn.php”
And the coordinates of your Koha installation:
[ils_config] ils = “koha”; ils_version = “30x” ils_server = “localhost” ils_harvest_port = “80”
The rest depends on your configuration of Koha.
Installation of Koha Connector
Enter the connector Koha from SVN:
# cd /usr/local/lib/locum/connectors/ # svn co http://dobby.darienlibrary.org/svn/connectors/koha/ locum_koha_30x
Harvest Records
Now that the connector is in place, we will be able to launch harvest.php, a tool that will reap Locum DB Koha and fill the locum.
Start by configuring harvest.php:
# nano /usr/local/lib/locum/tools/harvest.php
Here are the variables you must change:
$first_record = 1; $last_record = 30;
These are the minimum and maximum biblionumbers from your Koha install.
Then start the harvest:
# chmod +x /usr/local/lib/locum/tools/harvest.php $ /usr/local/lib/locum/tools/harvest.php
Installation of Sphinx
Sphinx is the indexer for the database used by Locum and Insurge.
Dependencies
There is no Debian package for Sphinx so you’ll have to compile the source directly:
# apt-get install g++ make libmysql++-dev
Download and Compile
$ wget http://sphinxsearch.com/downloads/sphinx-0.9.8.tar.gz $ tar zxvf sphinx-0.9.8.tar.gz $ cd sphinx-0.9.8 $ ./configure –prefix=/usr/local/sphinx $ make # make install # mkdir /usr/local/sphinx # mkdir /usr/local/sphinx/lib # cp api/sphinxapi.php /usr/local/sphinx/lib/ $ rm -R sphinx-0.9.8*
Creation of User and Group
Creating a Sphinx user and change the owner:
# adduser sphinx # addgroup sphinx # usermod -G sphinx sphinx # mkdir /usr/local/sphinx/var/run # chown -R sphinx.sphinx /usr/local/sphinx/var
The demon Sphinx
Download:
# cd /etc/init.d # wget http://www.thesocialopac.net/sites/thesocialopac.net/files/sphinx # chmod +x /etc/init.d/sphinx
Add Sphinx in the service at boot:
# update-rc.d sphinx defaults
Configuration
Copy the configuration file supplied with the source of Sphinx before the change:
# cp /usr/local/lib/locum/sphinx/sphinx.conf /usr/local/sphinx/etc/ # sed ‘s/locum_db_user/scas_user/g’ /usr/local/sphinx/etc/sphinx.conf > tmpfile; mv tmpfile /usr/local/sphinx/etc/sphinx.conf # sed ‘s/locum_db_pass/scas_pass/g’ /usr/local/sphinx/etc/sphinx.conf > tmpfile; mv tmpfile /usr/local/sphinx/etc/sphinx.conf
And if you personalize the name of the BDD:
# sed ‘s/scas/Ma_BDD/g’ /usr/local/sphinx/etc/sphinx.conf > tmpfile; mv tmpfile /usr/local/sphinx/etc/sphinx.conf
Indexing documents
Indexing is necessary if you want to use the search features of SOPAC.
You must first complete the Insurge table index
# chmod +x /usr/local/lib/insurge/tools/update-index.php $ /usr/local/lib/insurge/tools/update-index.php
Then start indexing Sphinx
$ /usr/local/sphinx/bin/indexer –all
Finally, we must start the demon:
# /etc/init.d/sphinx start
When the demon is already en route, you can update the index with:
$ /usr/local/sphinx/bin/indexer –all –rotate
Installation of SOPAC2
Now to the SOPAC software itself:
Download
Download from SVN:
$ cd /chemin/vers/drupal/sites/all/ $ mkdir modules $ cd modules/ $ svn co http://dobby.darienlibrary.org/svn/sopac/trunk/ sopac
Installation
Going in the administration of Drupal to activate the module. Enable also the dependencies:
- Profile
- PHP Filter
- Path
The Drupal menu should now list these entries.
Configuration
Then go into the settings of SOPAC.
- Configure the paths to the Locum and Insurge libraries
- Choose a URL prefix SOPAC, in my “catalog”. Create a node with content like:
<?php print sopac_search_form(‘both’); print theme(‘pages_catalog’);
- Check the Input Format “PHP Code”
- Check Move to front page
- In URL path settings, set the SOPAC URL prefix you have chosen.
Go to the root of Drupal, a search form will appear.
Thinking to empty the cache of Drupal when something does not work.
Drupal offers a few blocks, not configured by default. Must specify on which page they should appear.
Cron Jobs
Cron Jobs
The locations below assume a dev install which puts the crons in misc/, if you have a standard install you may want to look in bin/ for these files if you cannot find them in misc/
Search
Rebuild Index
Script path: misc/migration_tools/rebuild_zebra.pl
Does: Updates Zebra indexes with recently changed data.
Required by: Zebra
Frequency suggestion: every x minutes, (between 5-15 minutes) depending on performance needs
Circulation
Holds Queue
Script path: misc/cronjobs/holds/build_holds_queue.pl
Does: Updates holds queue report
Required by: Holds Queue Report
Frequency suggestion: every 1-4 hours
Description:
- A script that should be run periodically if your library system allows borrowers to place on-shelf holds. This script decides which library should be responsible for fulfilling a given hold request. It’s behavior is controlled by the system preferences StaticHoldsQueueWeight and RandomizeHoldsQueueWeight. If you do not want all of your libraries to participate in the on-shelf holds fulfillment process, you should list the the libraries that *do* participate in the process here by inputting all the participating library’s branchcodes, separated by commas ( e.g. “MPL,CPL,SPL,BML” etc. ). By default, the holds queue will be generated such that the system will first attempt to hold fulfillment using items already at the pickup library if possible. If there are no items available at the pickup library to fill a hold, build_holds_queue.pl will then use the list of libraries defined in StaticHoldsQueueWeight. If RandomizeHoldsQueueWeight is disabled ( which it is by default ), the script will assign fulfillment requests in the order the branches are placed in the StaticHoldsQueueWeight system preference. For example, if your system has three libraries, of varying sizes ( small, medium and large ) and you want the burden of holds fulfillment to be on larger libraries before smaller libraries, you would want StaticHoldsQueueWeight to look something like “LRG,MED,SML”. If you want the burden of holds fulfillment to be spread out equally throughout your library system, simply enable RandomizeHoldsQueueWeight. When this system preference is enabled, the order in which libraries will be requested to fulfill an on-shelf hold will be randomized each time the list is regenerated. Leaving StaticHoldsQueueWeight empty is contraindicated at this time. Doing so will cause the build_holds_queue script to ignore RandomizeHoldsQueueWeight, causing the script to request hold fulfillment not randomly, but by alphabetical order.
Perl Documentation
GetBibsWithPendingHoldRequests
my $biblionumber_aref = GetBibsWithPendingHoldRequests();
Return an arrayref of the biblionumbers of all bibs that have one or more unfilled hold requests.
GetPendingHoldRequestsForBib
my $requests = GetPendingHoldRequestsForBib($biblionumber);
Returns an arrayref of hashrefs to pending, unfilled hold requests on
the bib identified by $biblionumber. The following keys are present in each hashref:
- biblionumber
- borrowernumber
- itemnumber
- priority
- branchcode
- reservedate
- reservenotes
- borrowerbranch
The arrayref is sorted in order of increasing priority.
GetItemsAvailableToFillHoldRequestsForBib
my $available_items =
GetItemsAvailableToFillHoldRequestsForBib($biblionumber);
Returns an arrayref of items available to fill hold requests for the bib identified by $biblionumber. An item is available to fill a hold
request if and only if:
- it is not on loan
- it is not withdrawn
- it is not marked notforloan
- it is not currently in transit
- it is not lost
- it is not sitting on the hold shelf
MapItemsToHoldRequests
MapItemsToHoldRequests($hold_requests, $available_items);
CreatePickListFromItemMap
AddToHoldTargetMap
_get_branches_to_pull_from
Query system preferences to get ordered list of branches to use to fill hold requests.
Expired Holds
Script path: misc/cronjobs/holds/cancel_expired_holds.pl
Does: By default, this cron job will only automatically cancel holds where the user has set an expiration date. If the library is using the ExpireReservesMaxPickUpDelay and ExpireReservesMaxPickUpDelayCharge preferences then this script will also cancel holds that have been sitting on the hold shelf for too long and will (if the library does) charge the patron for not picking up the hold.
Frequency suggestion: daily
Unsuspend Holds
Script path: misc/cronjobs/holds/auto_unsuspend_holds.pl
Does: This script checks to find holds that should no longer be suspended and removes the suspension if the AutoResumeSuspendedHolds preference is set to ‘allow’. This puts the patron back in to the queue where they were when the hold was suspended.
Frequency suggestion: daily
Fines
Script path: misc/cronjobs/fines.pl
Required by: finesMode system preference
Frequency suggestion: nightly
Long Overdues
Script path: misc/cronjobs/longoverdue.pl
Does: allows one to specify delays for changing items to different lost statuses, and optionally charge for them using the replacement price listed on the item record.
Frequency suggestion: nightly
Perl Documentation
NAME
longoverdue.pl cron script to set lost statuses on overdue materials. Execute without options for help.
Track total checkouts
Script path: misc/cronjobs/update_totalissues.pl
Does: updates the biblioitems.totalissues field in the database with the latest tally of checkouts.
Frequency suggestion: nightly
Notices
Message Queue
Script path: misc/cronjobs/process_message_queue.pl
Does: processes the message queue to send emails and SMS messages to users. sends outgoing emails to patrons.
Frequency suggestion: 1-4 hours
Advanced Notice
Script path: misc/cronjobs/advance_notices.pl
Does: prepares “pre-due” notices and “item due” notices for patrons who request them prepares notices for patrons for items just due or coming due soon. requires EnhancedMessagingPreferences to be on
Frequency suggestion: nightly
Note
This script does not actually send the notices. It queues them in the message queue for later
Perl Documentation
NAME
advance_notices.pl - cron script to put item due reminders into message queue
SYNOPSIS
./advance_notices.pl -c
or, in crontab: 0 1 * * * advance_notices.pl -c
DESCRIPTION
This script prepares pre-due and item due reminders to be sent to patrons. It queues them in the message queue, which is processed by the process_message_queue.pl cronjob. The type and timing of the messages can be configured by the patrons in their “My Alerts” tab in the OPAC.
METHODS
parse_letter
Overdue Notice
Script path: misc/cronjobs/overdue_notices.pl
Does: prepares messages to alert patrons of overdue messages (both via email and print)
Frequency suggestion: nightly
Note
This script does not actually send the notices. It queues them in the message queue for later or generates the HTML for later printing
Perl Documentation
NAME
overdue_notices.pl - prepare messages to be sent to patrons for overdue items
SYNOPSIS
overdue_notices.pl [ -n ] [ -library <branchcode> ] [ -library <branchcode>...] [ -max <number of days> ] [ -csv [ <filename> ] ] [-itemscontent <field list> ]
Options:
-help brief help message
-man full documentation
-n No email will be sent
-max <days> maximum days overdue to deal with
-library <branchname> only deal with overdues from this library (repeatable : several libraries can be given)
-csv <filename> populate CSV file
-html <filename> Output html to file
-itemscontent <list of fields> item information in templates
-borcat <categorycode> category code that must be included
-borcatout <categorycode> category code that must be excluded
OPTIONS
-help Print a brief help message and exits.
-man Prints the manual page and exits.
-v Verbose. Without this flag set, only fatal errors are reported.
-n Do not send any email. Overdue notices that would have been sent to the patrons or to the admin are printed to standard out. CSV data (if the -csv flag is set) is written to standard out or to any csv filename given.
-max Items older than max days are assumed to be handled somewhere else, probably the longoverdues.pl script. They are therefore ignored by this program. No notices are sent for them, and they are not added to any CSV files. Defaults to 90 to match longoverdues.pl.
-library
select overdues for one specific library. Use the value in the branches.branchcode table. This option can be repeated in order to select overdues for a group of libraries.
-csv Produces CSV data. if -n (no mail) flag is set, then this CSV data is sent to standard out or to a filename if provided. Otherwise, only overdues that could not be emailed are sent in CSV format to the admin.
-itemscontent
comma separated list of fields that get substituted into templates in places of the <<items.content>> placeholder. This defaults to issuedate,title,barcode,author
Other possible values come from fields in the biblios, items, and issues tables.
-borcat Repetable field, that permit to select only few of patrons categories.
-borcatout
Repetable field, permis to exclude some patrons categories.
-t | –triggered
This option causes a notice to be generated if and only if an item is overdue by the number of days defined in a notice trigger.
By default, a notice is sent each time the script runs, which is suitable for less frequent run cron script, but requires syncing notice triggers with the cron schedule to ensure proper behavior. Add the –triggered option for daily cron, at the risk of no notice being generated if the cron fails to run on time.
-list-all
Default items.content lists only those items that fall in the range of the currently processing notice. Choose list-all to include all overdue items in the list (limited by -max setting).
DESCRIPTION
This script is designed to alert patrons and administrators of overdue items.
Configuration
This script pays attention to the overdue notice configuration performed in the “Overdue notice/status triggers” section of the “Tools” area of the staff interface to Koha. There, you can choose which letter templates are sent out after a configurable number of days to patrons of each library. More information about the use of this section of Koha is available in the Koha manual.
The templates used to craft the emails are defined in the “Tools: Notices” section of the staff interface to Koha.
Outgoing emails
Typically, messages are prepared for each patron with overdue items. Messages for whom there is no email address on file are collected and sent as attachments in a single email to each library administrator, or if that is not set, then to the email address in the “KohaAdminEmailAddress” system preference.
These emails are staged in the outgoing message queue, as are messages produced by other features of Koha. This message queue must be processed regularly by the misc/cronjobs/process_message_queue.pl program.
In the event that the “-n” flag is passed to this program, no emails are sent. Instead, messages are sent on standard output from this program. They may be redirected to a file if desired.
Templates
Templates can contain variables enclosed in double angle brackets like <<this>>. Those variables will be replaced with values specific to the overdue items or relevant patron. Available variables are:
<<bib>>
the name of the library
<<items.content>>
one line for each item, each line containing a tab separated list of title, author, barcode, issuedate
<<borrowers.*>>
any field from the borrowers table
<<branches.*>>
any field from the branches table
CSV output
The “-csv” command line option lets you specify a file to which overdues data should be output in CSV format.
With the “-n” flag set, data about all overdues is written to the file. Without that flag, only information about overdues that were unable to be sent directly to the patrons will be written. In other words, this CSV file replaces the data that is typically sent to the administrator email address.
USAGE EXAMPLES
“overdue_notices.pl” - In this most basic usage, with no command line arguments, all libraries are processed individually, and notices are prepared for all patrons with overdue items for whom we have email addresses. Messages for those patrons for whom we have no email address are sent in a single attachment to the library administrator’s email address, or to the address in the KohaAdminEmailAddress system preference.
“overdue_notices.pl -n -csv /tmp/overdues.csv” - sends no email and populates /tmp/overdues.csv with information about all overdue items.
“overdue_notices.pl -library MAIN max 14” - prepare notices of overdues in the last 2 weeks for the MAIN library.
SEE ALSO
The misc/cronjobs/advance_notices.pl program allows you to send messages to patrons in advance of their items becoming due, or to alert them of items that have just become due.
INTERNAL METHODS
These methods are internal to the operation of overdue_notices.pl.
parse_letter
parses the letter template, replacing the placeholders with data specific to this patron, biblio, or item
named parameters:
letter - required hashref
borrowernumber - required integer
substitute - optional hashref of other key/value pairs that should be substituted in the letter content
returns the “letter” hashref, with the content updated to reflect the substituted keys and values.
prepare_letter_for_printing
returns a string of text appropriate for printing in the event that an overdue notice will not be sent to the patron’s email address. Depending on the desired output format, this may be a CSV string, or a human-readable representation of the notice.
required parameters:
letter
borrowernumber
optional parameters:
outputformat
Print Hold Notices
Script path: misc/cronjobs/gather_print_notices.pl
Does: looks through the message queue for hold notices that didn’t go through because the patron didn’t have an email address and generates a print notice
Frequency suggestion: nightly
Talking Tech
To learn more about setting up this third party product view the Talking Tech Appendix.
Sending Notices File
Script path: misc/cronjobs/thirdparty/TalkingTech_itiva_outbound.pl
Does: Script to generate Spec C outbound notifications file for Talking Tech i-tiva phone notification system.
Required by: TalkingTechItivaPhoneNotification
Frequency suggestion: nightly
Perl Documentation
USAGE
TalkingTech_itiva_outbound.pl
TalkingTech_itiva_outbound.pl –type=OVERDUE -w 0 -w 2 -w 6 –output=/tmp/talkingtech/outbound.csv
TalkingTech_itiva_outbound.pl –type=RESERVE –type=PREOVERDUE –lang=FR
Script to generate Spec C outbound notifications file for Talking Tech i-tiva phone notification system.
–help -h
Prints this help
-v Provide verbose log information.
–output -o
Destination for outbound notifications file (CSV format). If no value is specified, output is dumped to screen.
–lang
Sets the language for all outbound messages. Currently supported values are EN, FR and ES. If no value is specified, EN will be used by default.
–type
REQUIRED. Sets which messaging types are to be used. Can be given multiple times, to specify multiple types in a single output file. Currently supported values are RESERVE, PREOVERDUE and OVERDUE. If no value is given, this script will not produce any outbound notifications.
–waiting-hold-day -w
OPTIONAL for –type=RESERVE. Sets the days after a hold has been set to waiting on which to call. Use switch as many times as desired. For example, passing “-w 0 -w 2 -w 6” will cause calls to be placed on the day the hold was set to waiting, 2 days after the waiting date, and 6 days after. See example above. If this switch is not used with –type=RESERVE, calls will be placed every day until the waiting reserve is picked up or canceled.
–library-code –code -c
OPTIONAL The code of the source library of the message. The library code is used to group notices together for consortium purposes and apply library specific settings, such as prompts, to those notices. This field can be blank if all messages are from a single library.
Receiving Notices File
Script path: misc/cronjobs/thirdparty/TalkingTech_itiva_inbound.pl
Does: Script to process received Results files for Talking Tech i-tiva phone notification system.
Required by: TalkingTechItivaPhoneNotification
Frequency suggestion: nightly
Perl Documentation
USAGE
TalkingTech_itiva_inbound.pl
TalkingTech_itiva_inbound.pl -v –input=/tmp/talkingtech/results.csv
Script to process received Results files for Talking Tech i-tiva phone notification system.
–help -h
Prints this help
-v Provide verbose log information.
–input -i
REQUIRED. Path to incoming results file.
In Processing/Book Cart
Script path: misc/cronjobs/cart_to_shelf.pl
Does: Updates all items with a location of CART to the item’s permanent location.
Required by: NewItemsDefaultLocation, InProcessingToShelvingCart, & ReturnToShelvingCart system preferences
Frequency suggestion: hourly
Perl Documentation
NAME
cart_to_shelf.pl cron script to set items with location of CART to original shelving location after X hours. Execute without options for help.
Catalog
Check URLs
Script path: misc/cronjobs/check-url.pl
Does: checks URLs in 856$u field. Script output can now be formatted in CSV or HTML. The HTML version links directly to MARC biblio record editor.
Frequency suggestion: monthly
Learn more: http://wiki.koha-community.org/wiki/Check-url_enhancements
Perl Documentation
NAME
C4::URL::Checker - base object for checking URL stored in Koha DB
SYNOPSIS
use C4::URL::Checker;
my $checker = C4::URL::Checker->new( ); $checker->{ host_default } = ‘http://mylib.kohalibrary.com’; my $checked_urls = $checker->check_biblio( 123 ); foreach my $url ( @$checked_urls ) { print “url: ”, $url->{ url A }, “\n”, “is_success: ”, $url->{ is_success }, “\n”, “status: ”, $url->{ status }, “\n”; }
FUNCTIONS
new
Create a URL Checker. The returned object can be used to set default host variable :
my $checker = C4::URL::Checker->new( ); $checker->{ host_default } = ‘http://mylib.kohalibrary.com’;
check_biblio
Check all URL from a biblio record. Returns a pointer to an array containing all URLs with checking for each of them.
my $checked_urls = $checker->check_biblio( 123 );
With 2 URLs, the returned array will look like that:
‘url’ => ‘http://mylib.tamil.fr/img/62265_0055B.JPG‘, ‘is_success’ => 1, ‘status’ => ‘ok’ }, { ‘url’ => ‘http://mylib.tamil.fr//img/62265_0055C.JPG‘, ‘is_success’ => 0, ‘status’ => ‘404 - Page not found’ } ],


NAME
check-url.pl - Check URLs from 856$u field.
USAGE
check-url.pl [–verbose|–help] [–host=http://default.tld]
Scan all URLs found in 856$u of bib records and display if resources are available or not.
PARAMETERS
–host=http://default.tld
Server host used when URL doesn’t have one, ie doesn’t begin with ‘http:’. For example, if –host=http://www.mylib.com, then when 856$u contains ‘img/image.jpg’, the url checked is: http://www.mylib.com/image.jpg‘.

–verbose|-v
Outputs both successful and failed URLs.
–html
Formats output in HTML. The result can be redirected to a file accessible by http. This way, it’s possible to link directly to biblio record in edit mode. With this parameter –host-pro is required.
–host-pro=http://koha-pro.tld
Server host used to link to biblio record editing page.
–help|-h
Print this help page.
Merge Authorities
Script path: misc/migration_tools/merge_authorities.pl
Does: Updates biblio data with changes to authorities records
Required by: dontmerge system preference
Frequency suggestion: nightly
Serials Update
Script path: misc/cronjobs/serialsUpdate.pl
Does: checks if there is a “late” issue on active subscriptions, and if there is, the script will set it as late, and add the next one as expected.
Frequency suggestion: nightly
OPAC
RSS Feeds
Script path: misc/cronjobs/rss/rss.pl
Does: Produces an RSS XML document for any SQL query (not used for search results RSS feed). Learn more.
Frequency suggestion: hourly
Authorities Browser
Script path: misc/cronjobs/build_browser_and_cloud.pl
Does: Generate content for authorities browse in OPAC
Required by: OpacBrowser system preference
Subject/Author Clouds
Script path: misc/cronjobs/cloud-kw.pl
Does: Generates HTML keywords clouds from Koha Zebra indexes. misc/cronjobs/cloud-sample.conf has a sample of how this script operates.
Frequency: This is the type of script you can run once a month or so, the content generated isn’t going to change very much over time.
Perl Documentation
NAME
cloud-kw.pl - Creates HTML keywords clouds from Koha Zebra Indexes
USAGE
cloud-kw.pl [–verbose|–help] –conf=cloud.conf
Creates multiple HTML files containing keywords cloud with top terms sorted by their logarithmic weight. cloud.conf is a YAML configuration file driving cloud generation process.
PARAMETERS
–conf=configuration file
Specify configuration file name
–verbose|-v
Enable script verbose mode.
–help|-h
Print this help page.
CONFIGURATION
Configuration file looks like that:
— # Koha configuration file for a specific installation # If not present, defaults to KOHA_CONF KohaConf: /home/koha/mylibray/etc/koha-conf.xml # Zebra index to scan ZebraIndex: Author # Koha index used to link found kewords with an opac search URL KohaIndex: au # Number of top keyword to use for the cloud Count: 50 # Include CSS style directives with the cloud # This could be used as a model and then CSS directives are # put in the appropriate CSS file directly. Withcss: Yes # HTML file where to output the cloud Output: /home/koha/mylibrary/koharoot/koha-tmpl/cloud-author.html — KohaConf: /home/koha/yourlibray/etc/koha-conf.xml ZebraIndex: Subject KohaIndex: su Count: 200 Withcss: no Output: /home/koha/yourlibrary/koharoot/koha-tmpl/cloud-subject.html*IMPROVEMENTS*
Generated top terms have more informations than those outputted from the time being. Some parameters could be easily added to improve this script:
WithCount
In order to output terms with the number of occurrences they have been found in Koha Catalogue by Zebra.
CloudLevels
Number of levels in the cloud. Now 24 levels are hardcoded.
Weighting
Weighting method used to distribute terms in the cloud. We could have two values: Logarithmic and Linear. Now it’s Logarithmic by default.
Order
Now terms are outputted in the lexical order. They could be sorted by their weight.
System Administration
Clean up Database
Script path: misc/cronjobs/cleanup_database.pl
Does: Truncates the sessions table and cleans out old zebraqueue entries.
Acquisitions
Clean up old suggestions
Script path: misc/cronjobs/purge_suggestions.pl
Does: Removes old (defined by you) suggestions from the suggestion management area.
Deprecated scripts
These should not be run without modification:
Script path: misc/cronjobs/update_items.pl
Script path:misc/cronjobs/smsoverdues.pl
Script path:misc/cronjobs/notifyMailsOp.pl
Script path:misc/cronjobs/reservefix.pl
Script path:misc/cronjobs/zebraqueue_start.pl
Script path:misc/cronjobs/j2a.pl
Web Services
OAI-PMH
Sample OAI Conf File
format: vs: metadataPrefix: vs metadataNamespace: http://veryspecial.tamil.fr/vs/format-pivot/1.1/vs schema: http://veryspecial.tamil.fr/vs/format-pivot/1.1/vs.xsd xsl_file: /usr/local/koha/xslt/vs.xsl marcxml: metadataPrefix: marxml metadataNamespace: http://www.loc.gov/MARC21/slim http://www.loc.gov/standards/marcxml/schema/MARC21slim schema: http://www.loc.gov/MARC21/slim http://www.loc.gov/standards/marcxml/schema/MARC21slim.xsd oai_dc: metadataPrefix: oai_dc metadataNamespace: http://www.openarchives.org/OAI/2.0/oai_dc/ schema: http://www.openarchives.org/OAI/2.0/oai_dc.xsd xsl_file: /usr/local/koha/koha-tmpl/intranet-tmpl/xslt/UNIMARCslim2OAIDC.xsl
Using the SRU server
Nicolas Morin
December 2009
Using the SRU server
Koha implements the Search/Retrieve via URL (SRU) protocol. More information about the protocol itself can be found at http://www.loc.gov/standards/sru/. The version implemented is version 1.1.
Explain
If you want to have information about the implementation of SRU on a given server, you should have access to the Explain file using a request to the server without any parameter. Like <http://myserver.com:9999/biblios/>. The response from the server is an XML file that should look like the following and will give you information about the default settings of the SRU server.
<zs:explainResponse> <zs:version>1.1</zs:version> <zs:record> <zs:recordSchema>http://explain.z3950.org/dtd/2.0/</zs:recordSchema> <zs:recordPacking>xml</zs:recordPacking> <zs:recordData> <explain xml:base=”zebradb/explain-biblios.xml”> <!– try stylesheet url: http://./?stylesheet=docpath/sru2.xsl –> <serverInfo protocol=”SRW/SRU/Z39.50”> <host>biblibre</host> <port>9999</port> <database>biblios</database> </serverInfo> <databaseInfo> <title lang=”en” primary=”true”>Koha 3 Bibliographic SRU/SRW/Z39.50 server</title> <description lang=”en” primary=”true”>Koha 3 Bibliographic Server</description> <links> <sru>http://biblibre:9999</sru> </links> </databaseInfo> <indexInfo> <set name=”cql” identifier=”info:srw/cql-context-set/1/cql-v1.1”> <title>CQL Standard Set</title> </set> <index search=”true” scan=”true” sort=”false”> <title lang=”en”>CQL Server Choice</title> <map> <name set=”cql”>serverChoice</name> </map> <map> <attr type=”1” set=”bib1”>text</attr> </map> </index> <index search=”true” scan=”true” sort=”false”> <title lang=”en”>CQL All</title> <map> <name set=”cql”>all</name> </map> <map> <attr type=”1” set=”bib1”>text</attr> </map> </index> <!– Record ID index –> <index search=”true” scan=”true” sort=”false”> <title lang=”en”>Record ID</title> <map> <name set=”rec”>id</name> </map> <map> <attr type=”1” set=”bib1”>rec:id</attr> <attr type=”4” set=”bib1”>3</attr> </map> </index>
Search
This url : http://myserver.com:9999/biblios?version=1.1&operation=searchRetrieve&query=reefs is composed of the following elements:
- base url of the SRU server : http://myserver.com:9999/biblios?
- search part with the 3 required parameters : version, operation and query. The parameters within the search part should be of the key=value form, and can be combined with the & character.
One can add optional parameters to the query, for instance maximumRecords indicating the maximum number of records to be returned by the server. So http://myserver.com:9999/biblios?version=1.1&operation=searchRetrieve&query=reefs&maximumRecords=5 will only get the first 5 results results from the server.
http://www.loc.gov/standards/sru/sru1-1archive/search-retrieve-operation.html gives more details about the search operations and in particular the list of optional parameters for searching.
More details about Search
The “operation” key can take two values: scan or searchRetrieve.
If operation=searchRetrieve, then the search key should be query. As in : operation=searchRetrieve&query=reefs
If operation=scan, then the search key should be scanClause. As in : operation=scan&scanClause=reefs
etc/zebradb/biblios/etc/bib1.att defines Zebra/3950 indexes that exist on your system. For instance you’ll see that we have indexes for Subject and for Title: att 21 Subject and att 4 Title respectively.
In the pqf.properties file located under etc/zebradb/pqf.properties I see that an access point already uses my Subject index (index.dc.subject = 1=21) while another uses my Title index (index.dc.title = 1=4) I know this is my Subject index because as I’ve seen just before in my bib1.att file, it’s called with =1=21 in Z3950: so index.dc.subject = 1=21 correctly points to my Subject index. And Title was called with 1=4 so index.dc.title = 1=4 correctly points to my Title index. I can now construct my query just like I would in a search box, just preceding it with the “query” key: query=Subject=reefs and Title=coral searches “reefs” in the subject and “coral” in the title. The full url would be http://myserver.com:9999/biblios?version=1.1&operation=searchRetrieve&query=Subject=reefs and Title=coral If I want to limit the result set to just 5 records, I can do http://myserver.com:9999/biblios?version=1.1&operation=searchRetrieve&query=Subject=reefs and Title=coral&maximumRecords=5
I can also play with truncate, relations, etc. Those are also defined in my pqf.properties file. I can see for instance the position properties defined as:
position.first = 3=1 6=1 # “first in field” position.any = 3=3 6=1 # “any position in field”
So as an example if I want “coral” to be at the beginning of the title, I can do this query : http://myserver.com:9999/biblios?version=1.1&operation=searchRetrieve&query=Title=coral first
Retrieve
My search for http://univ_lyon3.biblibre.com:9999/biblios?version=1.1&operation=searchRetrieve&query=coral reefs&maximumRecords=1 retrieves just on record. The response looks like this:
<zs:searchRetrieveResponse> <zs:version>1.1</zs:version> <zs:numberOfRecords>1</zs:numberOfRecords> <zs:records> <zs:record> <zs:recordPacking>xml</zs:recordPacking> <zs:recordData> <record xsi:schemaLocation=”http://www.loc.gov/MARC21/slim http://www.loc.gov/ standards/marcxml/schema/MARC21slim.xsd”> <leader> cam a22 4500</leader> <datafield tag=”010” ind1=” ” ind2=” “> <subfield code=”a”>2-603-01193-6</subfield> <subfield code=”b”>rel.</subfield> <subfield code=”d”>159 F</subfield> </datafield> <datafield tag=”020” ind1=” ” ind2=” “> <subfield code=”a”>FR</subfield> <subfield code=”b”>00065351</subfield> </datafield> <datafield tag=”101” ind1=”1” ind2=” “> <subfield code=”c”>ita</subfield> </datafield> <datafield tag=”105” ind1=” ” ind2=” “> <subfield code=”a”>a z 00|y|</subfield> </datafield> <datafield tag=”106” ind1=” ” ind2=” “> <subfield code=”a”>r</subfield> </datafield> <datafield tag=”100” ind1=” ” ind2=” “> <subfield code=”a”>20091130 frey50 </subfield> </datafield> <datafield tag=”200” ind1=”1” ind2=” “> <subfield code=”a”>Guide des récifs coralliens / A Guide to Coral Reefs</subfield> <subfield code=”b”>Texte imprimé</subfield> <subfield code=”e”>la faune sous-marine des coraux</subfield> <subfield code=”f”>A. et A. Ferrari</subfield> </datafield> <datafield tag=”210” ind1=” ” ind2=” “> <subfield code=”a”>Lausanne</subfield> <subfield code=”a”>Paris</subfield> <subfield code=”c”>Delachaux et Niestlé</subfield> <subfield code=”d”>cop. 2000</subfield> <subfield code=”e”>impr. en Espagne</subfield> </datafield> <datafield tag=”215” ind1=” ” ind2=” “> <subfield code=”a”>287 p.</subfield> <subfield code=”c”>ill. en coul., couv. ill. en coul.</subfield> <subfield code=”d”>20 cm</subfield> </datafield> ...... <idzebra> <size>4725</size> <localnumber>2</localnumber> <filename>/tmp/nw10BJv9Pk/upd_biblio/exported_records</filename> </idzebra> </record> </zs:recordData> <zs:recordPosition>1</zs:recordPosition> </zs:record> </zs:records> </zs:searchRetrieveResponse>
System Preference Defaults
ISBD Defaults
MARC Default
#100||{ 100a }{ 100b }{ 100c }{ 100d }{ 110a }{ 110b }{ 110c }{ 110d }{ 110e }{ 110f }{ 110g }{ 130a }{ 130d }{ 130f }{ 130g }{ 130h }{ 130k }{ 130l }{ 130m }{ 130n }{ 130o }{ 130p }{ 130r }{ 130s }{ 130t }|<br/><br/>
#245||{ 245a }{ 245b }{245f }{ 245g }{ 245k }{ 245n }{ 245p }{ 245s }{ 245h }|
#246||{ : 246i }{ 246a }{ 246b }{ 246f }{ 246g }{ 246n }{ 246p }{ 246h }|
#242||{ = 242a }{ 242b }{ 242n }{ 242p }{ 242h }|
#245||{ 245c }|
#242||{ = 242c }|
#250| - |{ 250a }{ 250b }|
#254|, |{ 254a }|
#255|, |{ 255a }{ 255b }{ 255c }{ 255d }{ 255e }{ 255f }{ 255g }|
#256|, |{ 256a }|
#257|, |{ 257a }|
#258|, |{ 258a }{ 258b }|
#260| - |{ 260a }{ 260b }{ 260c }|
#300| - |{ 300a }{ 300b }{ 300c }{ 300d }{ 300e }{ 300f }{ 300g }|
#306| - |{ 306a }|
#307| - |{ 307a }{ 307b }|
#310| - |{ 310a }{ 310b }|
#321| - |{ 321a }{ 321b }|
#340| - |{ 3403 }{ 340a }{ 340b }{ 340c }{ 340d }{ 340e }{ 340f }{ 340h }{ 340i }|
#342| - |{ 342a }{ 342b }{ 342c }{ 342d }{ 342e }{ 342f }{ 342g }{ 342h }{ 342i }{ 342j }{ 342k }{ 342l }{ 342m }{ 342n }{ 342o }{ 342p }{ 342q }{ 342r }{ 342s }{ 342t }{ 342u }{ 342v }{ 342w }|
#343| - |{ 343a }{ 343b }{ 343c }{ 343d }{ 343e }{ 343f }{ 343g }{ 343h }{ 343i }|
#351| - |{ 3513 }{ 351a }{ 351b }{ 351c }|
#352| - |{ 352a }{ 352b }{ 352c }{ 352d }{ 352e }{ 352f }{ 352g }{ 352i }{ 352q }|
#362| - |{ 362a }{ 351z }|
#440| - |{ 440a }{ 440n }{ 440p }{ 440v }{ 440x }|.
#490| - |{ 490a }{ 490v }{ 490x }|.
#800| - |{ 800a }{ 800b }{ 800c }{ 800d }{ 800e }{ 800f }{ 800g }{ 800h }{ 800j }{ 800k }{ 800l }{ 800m }{ 800n }{ 800o }{ 800p }{ 800q }{ 800r }{ 800s }{ 800t }{ 800u }{ 800v }|.
#810| - |{ 810a }{ 810b }{ 810c }{ 810d }{ 810e }{ 810f }{ 810g }{ 810h }{ 810k }{ 810l }{ 810m }{ 810n }{ 810o }{ 810p }{ 810r }{ 810s }{ 810t }{ 810u }{ 810v }|.
#811| - |{ 811a }{ 811c }{ 811d }{ 811e }{ 811f }{ 811g }{ 811h }{ 811k }{ 811l }{ 811n }{ 811p }{ 811q }{ 811s }{ 811t }{ 811u }{ 811v }|.
#830| - |{ 830a }{ 830d }{ 830f }{ 830g }{ 830h }{ 830k }{ 830l }{ 830m }{ 830n }{ 830o }{ 830p }{ 830r }{ 830s }{ 830t }{ 830v }|.
#500|<br/><br/>|{ 5003 }{ 500a }|
#501|<br/><br/>|{ 501a }|
#502|<br/><br/>|{ 502a }|
#504|<br/><br/>|{ 504a }|
#505|<br/><br/>|{ 505a }{ 505t }{ 505r }{ 505g }{ 505u }|
#506|<br/><br/>|{ 5063 }{ 506a }{ 506b }{ 506c }{ 506d }{ 506u }|
#507|<br/><br/>|{ 507a }{ 507b }|
#508|<br/><br/>|{ 508a }{ 508a }|
#510|<br/><br/>|{ 5103 }{ 510a }{ 510x }{ 510c }{ 510b }|
#511|<br/><br/>|{ 511a }|
#513|<br/><br/>|{ 513a }{513b }|
#514|<br/><br/>|{ 514z }{ 514a }{ 514b }{ 514c }{ 514d }{ 514e }{ 514f }{ 514g }{ 514h }{ 514i }{ 514j }{ 514k }{ 514m }{ 514u }|
#515|<br/><br/>|{ 515a }|
#516|<br/><br/>|{ 516a }|
#518|<br/><br/>|{ 5183 }{ 518a }|
#520|<br/><br/>|{ 5203 }{ 520a }{ 520b }{ 520u }|
#521|<br/><br/>|{ 5213 }{ 521a }{ 521b }|
#522|<br/><br/>|{ 522a }|
#524|<br/><br/>|{ 524a }|
#525|<br/><br/>|{ 525a }|
#526|<br/><br/>|{\n510i }{\n510a }{ 510b }{ 510c }{ 510d }{\n510x }|
#530|<br/><br/>|{\n5063 }{\n506a }{ 506b }{ 506c }{ 506d }{\n506u }|
#533|<br/><br/>|{\n5333 }{\n533a }{\n533b }{\n533c }{\n533d }{\n533e }{\n533f }{\n533m }{\n533n }|
#534|<br/><br/>|{\n533p }{\n533a }{\n533b }{\n533c }{\n533d }{\n533e }{\n533f }{\n533m }{\n533n }{\n533t }{\n533x }{\n533z }|
#535|<br/><br/>|{\n5353 }{\n535a }{\n535b }{\n535c }{\n535d }|
#538|<br/><br/>|{\n5383 }{\n538a }{\n538i }{\n538u }|
#540|<br/><br/>|{\n5403 }{\n540a }{ 540b }{ 540c }{ 540d }{\n520u }|
#544|<br/><br/>|{\n5443 }{\n544a }{\n544b }{\n544c }{\n544d }{\n544e }{\n544n }|
#545|<br/><br/>|{\n545a }{ 545b }{\n545u }|
#546|<br/><br/>|{\n5463 }{\n546a }{ 546b }|
#547|<br/><br/>|{\n547a }|
#550|<br/><br/>|{ 550a }|
#552|<br/><br/>|{ 552z }{ 552a }{ 552b }{ 552c }{ 552d }{ 552e }{ 552f }{ 552g }{ 552h }{ 552i }{ 552j }{ 552k }{ 552l }{ 552m }{ 552n }{ 562o }{ 552p }{ 552u }|
#555|<br/><br/>|{ 5553 }{ 555a }{ 555b }{ 555c }{ 555d }{ 555u }|
#556|<br/><br/>|{ 556a }{ 506z }|
#563|<br/><br/>|{ 5633 }{ 563a }{ 563u }|
#565|<br/><br/>|{ 5653 }{ 565a }{ 565b }{ 565c }{ 565d }{ 565e }|
#567|<br/><br/>|{ 567a }|
#580|<br/><br/>|{ 580a }|
#581|<br/><br/>|{ 5633 }{ 581a }{ 581z }|
#584|<br/><br/>|{ 5843 }{ 584a }{ 584b }|
#585|<br/><br/>|{ 5853 }{ 585a }|
#586|<br/><br/>|{ 5863 }{ 586a }|
#020|<br/><br/><label>ISBN: </label>|{ 020a }{ 020c }|
#022|<br/><br/><label>ISSN: </label>|{ 022a }|
#222| = |{ 222a }{ 222b }|
#210| = |{ 210a }{ 210b }|
#024|<br/><br/><label>Standard No.: </label>|{ 024a }{ 024c }{ 024d }{ 0242 }|
#027|<br/><br/><label>Standard Tech. Report. No.: </label>|{ 027a }|
#028|<br/><br/><label>Publisher. No.: </label>|{ 028a }{ 028b }|
#013|<br/><br/><label>Patent No.: </label>|{ 013a }{ 013b }{ 013c }{ 013d }{ 013e }{ 013f }|
#030|<br/><br/><label>CODEN: </label>|{ 030a }|
#037|<br/><br/><label>Source: </label>|{ 037a }{ 037b }{ 037c }{ 037f }{ 037g }{ 037n }|
#010|<br/><br/><label>LCCN: </label>|{ 010a }|
#015|<br/><br/><label>Nat. Bib. No.: </label>|{ 015a }{ 0152 }|
#016|<br/><br/><label>Nat. Bib. Agency Control No.: </label>|{ 016a }{ 0162 }|
#600|<br/><br/><label>Subjects–Personal Names: </label>|{\n6003 }{\n600a}{ 600b }{ 600c }{ 600d }{ 600e }{ 600f }{ 600g }{ 600h }{–600k}{ 600l }{ 600m }{ 600n }{ 600o }{–600p}{ 600r }{ 600s }{ 600t }{ 600u }{–600x}{–600z}{–600y}{–600v}|
#610|<br/><br/><label>Subjects–Corporate Names: </label>|{\n6103 }{\n610a}{ 610b }{ 610c }{ 610d }{ 610e }{ 610f }{ 610g }{ 610h }{–610k}{ 610l }{ 610m }{ 610n }{ 610o }{–610p}{ 610r }{ 610s }{ 610t }{ 610u }{–610x}{–610z}{–610y}{–610v}|
#611|<br/><br/><label>Subjects–Meeting Names: </label>|{\n6113 }{\n611a}{ 611b }{ 611c }{ 611d }{ 611e }{ 611f }{ 611g }{ 611h }{–611k}{ 611l }{ 611m }{ 611n }{ 611o }{–611p}{ 611r }{ 611s }{ 611t }{ 611u }{–611x}{–611z}{–611y}{–611v}|
#630|<br/><br/><label>Subjects–Uniform Titles: </label>|{\n630a}{ 630b }{ 630c }{ 630d }{ 630e }{ 630f }{ 630g }{ 630h }{–630k }{ 630l }{ 630m }{ 630n }{ 630o }{–630p}{ 630r }{ 630s }{ 630t }{–630x}{–630z}{–630y}{–630v}|
#648|<br/><br/><label>Subjects–Chronological Terms: </label>|{\n6483 }{\n648a }{–648x}{–648z}{–648y}{–648v}|
#650|<br/><br/><label>Subjects–Topical Terms: </label>|{\n6503 }{\n650a}{ 650b }{ 650c }{ 650d }{ 650e }{–650x}{–650z}{–650y}{–650v}|
#651|<br/><br/><label>Subjects–Geographic Terms: </label>|{\n6513 }{\n651a}{ 651b }{ 651c }{ 651d }{ 651e }{–651x}{–651z}{–651y}{–651v}|
#653|<br/><br/><label>Subjects–Index Terms: </label>|{ 653a }|
#654|<br/><br/><label>Subjects–Facted Index Terms: </label>|{\n6543 }{\n654a}{–654b}{–654x}{–654z}{–654y}{–654v}|
#655|<br/><br/><label>Index Terms–Genre/Form: </label>|{\n6553 }{\n655a}{–655b}{–655x }{–655z}{–655y}{–655v}|
#656|<br/><br/><label>Index Terms–Occupation: </label>|{\n6563 }{\n656a}{–656k}{–656x}{–656z}{–656y}{–656v}|
#657|<br/><br/><label>Index Terms–Function: </label>|{\n6573 }{\n657a}{–657x}{–657z}{–657y}{–657v}|
#658|<br/><br/><label>Index Terms–Curriculum Objective: </label>|{\n658a}{–658b}{–658c}{–658d}{–658v}|
#050|<br/><br/><label>LC Class. No.: </label>|{ 050a }{ / 050b }|
#082|<br/><br/><label>Dewey Class. No.: </label>|{ 082a }{ / 082b }|
#080|<br/><br/><label>Universal Decimal Class. No.: </label>|{ 080a }{ 080x }{ / 080b }|
#070|<br/><br/><label>National Agricultural Library Call No.: </label>|{ 070a }{ / 070b }|
#060|<br/><br/><label>National Library of Medicine Call No.: </label>|{ 060a }{ / 060b }|
#074|<br/><br/><label>GPO Item No.: </label>|{ 074a }|
#086|<br/><br/><label>Gov. Doc. Class. No.: </label>|{ 086a }|
#088|<br/><br/><label>Report. No.: </label>|{ 088a }|
UNIMARC Default
#200|<h2>Title : |{200a}{. 200c}{ : 200e}{200d}{. 200h}{. 200i}|</h2>
#461|<label class=”ipt”>A part of : </label>|<a href=”/cgi-bin/koha/catalogue/search.pl?op=do_search{&q=461t&idx=ti}”>{461t}</a>{N∞ 461h} {v. 461v}{(461d)}<br/>|
#200b|<label class=”ipt”>Material Designation : </label>| {200b }|<br/>
#101a|<label class=”ipt”>Language(s): </label>|<a href=”/cgi-bin/koha/catalogue/search.pl?op=do_search{&q=101a&idx=ln}”>{101a}</a>|<br/>
#200f|<label class=”ipt”>Authors : </label>|<a href=”/cgi-bin/koha/catalogue/search.pl?op=do_search{&q=200f&idx=au}”>{200f ; }</a>|<br/>
#200g|<label class=”ipt”>Co-authors : </label>|<a href=”/cgi-bin/koha/catalogue/search.pl?op=do_search{&q=200g&idx=au}”>{200g ; }</a>|<br/>
#210a|<br/><label class=”ipt”>Place of pubblication : </label>|<a href=”/cgi-bin/koha/catalogue/search.pl?op=do_search&idx=pl&q={210a}”>{210a}</a>|<br/>
#210c|<label class=”ipt”>Publisher : </label>|<a href=”/cgi-bin/koha/catalogue/search.pl?op=do_search&idx=pb&q={210c}”>{210c ; }</a>|<br/>
#210d|<label class=”ipt”>Date of pubblication : </label>|{ 210d}|<br/>
#215|<label class=”ipt”>Description : </label>|{215a}{ : 215c}{ ; 215d}{ + 215e}|<br/>
#225a|<label class=”ipt”>Series :</label>|<a href=”/cgi-bin/koha/catalogue/search.pl?op=do_search{&q=225a&idx=se}”>{225a ;}</a> |
#225||{ = 225d}{ : 225e}{. 225h}{. 225i}{ / 225f}{, 225x}{ ; 225v}|<br/>
#686|<label>Classification : </label>|{ 686a }|<br/>
#608|<label>Form, Genre : </label>|<a href=”/cgi-bin/koha/catalogue/search.pl?op=do_search&idx=su&q={608a}”><img border=”0” src=”/opac-tmpl/css/en/images/filefind.png” height=”15” title=”Search on {608a}”>{ 608a}</a>|<br/><br/>
#200||<label class=”ipt”>Subjects : </label><br/>|<ul>
#600|<label class=”ipt”>Person(s) </label><br/> |<li><a href=”/cgi-bin/koha/catalogue/search.pl?op=do_search&idx=su&q={600a}”><img border=”0” src=”/opac-tmpl/css/en/images/filefind.png” height=”15” title=”Search on {600a}”>{ 600a}</a></li>|<br/>
#601|<label class=”ipt”>Organisation(s) </label><br/>|<li><a href=”/cgi-bin/koha/catalogue/search.pl?op=do_search&idx=su&q={601a}”><img border=”0” src=”/opac-tmpl/css/en/images/filefind.png” height=”15” title=”Search on {601a}”>{ 601a}</a></li>|<br/>
#606|<label class=”ipt”>Term(s) </label><br/>|<li><a href=”/cgi-bin/koha/catalogue/search.pl?op=do_search&idx=su&q={606a}”><img border=”0” src=”/opac-tmpl/css/en/images/filefind.png” height=”15” title=”Search on {606a}”>{ 606a}</a></li>|<br/>
#607|<label class=”ipt”>Place(s) </label><br/>|<li><a href=”/cgi-bin/koha/catalogue/search.pl?op=do_search&idx=su&q={607a}”><img border=”0” src=”/opac-tmpl/css/en/images/filefind.png” height=”15” title=”Search on {607a}”>{ 607a}</a></li>|<br/>
#610|<label>Keywords</label><br/>|<li><a href=”/cgi-bin/koha/catalogue/search.pl?op=do_search&idx=su&q={610a}”><img border=”0” src=”/opac-tmpl/css/en/images/filefind.png” height=”15” title=”Search on {610a}”>{ 610a}</a></li>|
#200||</ul>|
#856|<label class=”ipt”>Electronic resource : </label>|<a href=”{856u}”>click here</a> to go to the external resource<br/>
#010|<label class=”ipt”>ISBN : </label>|{010a ;}|<br/>
#011|<label class=”ipt”>ISSN : </label>|{011a ;}|<br/>
#200||<label class=”ipt”>Notes : </label>|<br/><ul>
#300||<li>{300a}</li>|
#307||<li>{307a}</li>|
#310||<li>{310a}</li>|
#326||<li>{326a}</li>|
#327||<li>{327a}</li>|
#333|<li>Public : |{333a}</li>|
#200||</ul>|
#330||<label class=”ipt”>Abstract : </label>|<br/>
#330||{330a}|<br/>
#200||<br/><h2>Items</h2>|
#200|<table>|<th>Call number</th><th>Copy note</th><th>Fonds</th><th>Genre detail</th><th>Circulation type</th><th>Barcode</th>|
#995||<tr><td> {995k}</td><td> {995u}</td><td> {995y}</td><td>{995e} </td><td> {995o}</td><td>{995f}</td></tr>|</table>
NoZebraIndexes Default
‘title’ => ‘130a,210a,222a,240a,243a,245a,245b,246a,246b,247a,247b,250a,250b,440a,830a’,
‘author’ => ‘100a,100b,100c,100d,110a,111a,111b,111c,111d,245c,700a,710a,711a,800a,810a,811a’,
‘isbn’ => ‘020a’,
‘issn’ => ‘022a’,
‘lccn’ => ‘010a’,
‘biblionumber’ => ‘999c’,
‘itemtype’ => ‘942c’,
‘publisher’ => ‘260b’,
‘date’ => ‘260c’,
‘note’ => ‘500a, 501a,504a,505a,508a,511a,518a,520a,521a,522a,524a,526a,530a,533a,538a,541a,546a,555a,556a,562a,563a,583a,585a,582a’,
‘subject’ => ‘600*,610*,611*,630*,650*,651*,653*,654*,655*,662*,690*’,
‘dewey’ => ‘082’,
‘bc’ => ‘952p’,
‘callnum’ => ‘952o’,
‘an’ => ‘6009,6109,6119’,
‘homebranch’ => ‘952a,952c’
Configuring Receipt Printers
The following instructions are for specific receipt printers, but can probably be used to help with setup of other brands as well.
NEKLS
2008
http://www.nexpresslibrary.org/go-live/configure-your-receipt-printers/
For Epson TM-T88III (3) & TM-T88IV (4) Printers
In the Print Driver
For these instructions, we are using version 5,0,3,0 of the Epson TM-T88III print driver; the EPSON TM-T88IV version is ReceiptE4. Register at the EpsonExpert Technical Resource Center website to gain access to the drivers; go to Technical Resources, then choose the printer model from the Printers drop-down list.
Click Start > Printers and Faxes > Right click the receipt printer > Properties:
- Advanced Tab, click Printing Defaults button
- Layout Tab: Paper size: Roll Paper 80 x 297mm
- TM-T88III: Layout Tab: Check Reduce Printing and Fit to Printable Width
- TM-T88IV: Check Reduced Size Print; Click OK on the popup window that appears. Fit to Printable Width should be automatically selected.
- OK your way out of there.
In Firefox
Under File > Page Setup:
- Shrink to fit page on Format & Options tab
- 0,0,0,0 for Margins on Margins & Header/Footer Tab. This makes the receipts use all available space on the paper roll.
- Set all Headers/Footers to -blank-. This removes all of the gunk you might normally find on a print from Firefox, such as the URL, number of pages, etc.
- Click OK
Set the default printer settings in Firefox so you don’t see a “Print” dialog:
Go to File > Print
Set the Printer to the receipt printer.
Click the Advanced (or Properties) button
Layout Tab: Paper size: Roll Paper 80 x 297mm
TM-T88III: Layout Tab: Check Reduce Printing and Fit to Printable Width
TM-T88IV: Check Reduced Size Print; click OK on the popup window that appears. Fit to Printable Width should be automatically selected.
OK your way out, go ahead and print whatever page you are on.
Type about:config, in the address bar. Click “I’ll be careful, I promise!” on the warning message.
Type, print.always in Filter.
Look for print.always_print_silent. - If the preference is there then set the value to
true.
If the preference is not there (and it shouldn’t be in most browsers) you have to add the preference. - Right click the preference area and select New >
Boolean
- Type print.always_print_silent in the dialog box and set the value to True. This sets the print settings in Firefox to always use the same settings and print without showing a dialog box.
Warning
Setting the print.always_print_silent setting in about:config DISABLES the ability to choose a printer in Firefox.
NEKLS
2008
http://www.nexpresslibrary.org/go-live/configure-your-receipt-printers/
For Epson TM-T88II (2) Printers
Register at the EpsonExpert Technical Resource Center website to gain access to the drivers; go to Technical Resources, then choose the printer model from the Printers drop-down list.
In Firefox
Under File > Page Setup:
- Shrink to fit page on Format & Options tab
- 0,0,0,0 for Margins on Margins & Header/Footer Tab. This makes the receipts use all available space on the paper roll.
- Set all Headers/Footers to -blank-. This removes all of the gunk you might normally find on a print from Firefox, such as the URL, number of pages, etc.
- Click OK
Set the default printer settings in Firefox so you don’t see a “Print” dialog:
Go to File > Print
Set the Printer to the receipt printer.
Print whatever page you are on.
Type about:config, in the address bar. Click “I’ll be careful, I promise!” on the warning message.
Type, print.always in Filter.
Look for, print.always_print_silent. - If the preference is there then set the value to
true.
If the preference is not there (and it shouldn’t be in most browsers) you have to add the preference. - Right click the preference area and select New >
Boolean
- Type, print.always_print_silent in the dialog box and set the value to True. This sets the print settings in Firefox to always use the same settings and print without showing a dialog box.
Warning
Setting the print.always_print_silent setting in about:config DISABLES the ability to choose a printer in Firefox.
RHCL
Nicole C. Engard
2010
For Star SP542 Printers
Installing the Printer
While the following comments are based on the Star SP542 receipt printer, they probably apply to all printers in the SP5xx series.
The Star SP542 receipt printer works well with Koha and Firefox on Windows XP SP3. This printer, with either the parallel or USB interface, is fairly easy to install and configure. You will need the following executable file which is available from numerous places on the Internet:
linemode_2k-xp_20030205.exe
This executable actually does all of the installation; you will not need to use the Microsoft Windows “Add Printer” program. We recommend that when installing, the option for the software monitor not be selected; we have experienced significant pauses and delays in printing with it. Instead, simply choose to install the receipt printer without the monitor.
Additionally, the install program may not put the printer on the correct port, especially if using the USB interface. This is easily corrected by going to “Start -> Printers and Faxes -> Properties for the SP542 printer -> Ports”, then check the appropriate port.
A reboot may be required, even if not indicated by the installation software or the operating system.
VOKAL
Nicole C. Engard
2010
https://docs.google.com/View?id=dcccx9zm_3htvhwzgc#Setting_up_your_SLIP_printer_1_18087191815760117
Configuring Firefox to Print to Receipt Printer
Open File > Page Setup
Make all the headers and footers blank
Set the margins to 0 (zero)
In the address bar of Firefox, type about:config
Search for print.always_print_silent and double click it
Change it from false to true - This lets you skip the Print pop up box that comes up, as
well as skipping the step where you have to click OK, automatically printing the right sized slip.
If print.always_print_silent does not come up - Right click on a blank area of the preference
window
- Select new > Boolean
- Enter “print.always_print_silent” as the name (without quotes)
- Click OK
- Select true for the value
You may also want to check what is listed for print.print_printer - You may have to choose Generic/Text Only (or whatever your
receipt printer might be named)
Example Notice
Nicole Engard
410 Library Rd.
Philadelphia, PA 19107
Dear Nicole Engard (23529000035726),
According to our records, at the time of this notice, you have items that are overdue. Please return or renew them as soon as possible to avoid increasing late fines.
If you have registered a password with the library, you may use it with your library card number to renew online.
If you believe you have returned the items below please call at and library staff will be happy to help resolve the issue.
The following item(s) are currently overdue:
07/08/2008 Creating drug-free schools and communities : 502326000054 Fox, C. Lynn.
06/27/2008 Eating fractions / 502326000022 McMillan, Bruce.
Sincerely, Library Staff
Sample Serials
Reader’s Digest (0034-0375)
- Published 12 times a year (monthly)
- The Volume number changes every 6 months and the numbers continues on (requires an advanced pattern). Sample Reader’s Digest Subscription .. image:: images/serialssamples/readersserial.png
People Weekly (1076-0091)
Published weekly - The website says “on Saturday except the first week of
August, Thanksgiving week, the first and last weeks of the year” but this does not match the pattern for 2007 or 2008
In the Jul-Dec there are 26 issues
In the Jan-Jun there are 25 issues (no issue for the first week of January)
Since the irregularity on the first # 26 does not skip a week, this would be set up as to roll over on issue 25. The 26th issue in the second half of the year would have to be received as a supplemental.
The irregularity check will complain that 52 issues were expected, but 25 entered. The current irregularity check can only check that the first position of the numbering pattern matches the expected issue count of the periodicity. But we do need to trigger the rollover on the volume, so we need to define the last two weeks of the year as irregularities. So we receive 50 issues the first 50 weeks, then one supplemental issue in week 51, which we have to define the enumeration for, then the next predicted issue will be the following year’s first week.
עת-מול עיתון לתולדות ארץ ישראל ועם ישראל
This journal is published with the following rules:
- 6 issues a year (every 2 months)
- year changes every 6 issues
- we start in 2011
- the issue number goes up indefinitely
- starting from issue 215
The planning would look like this:
Sample for this Hebrew Journal
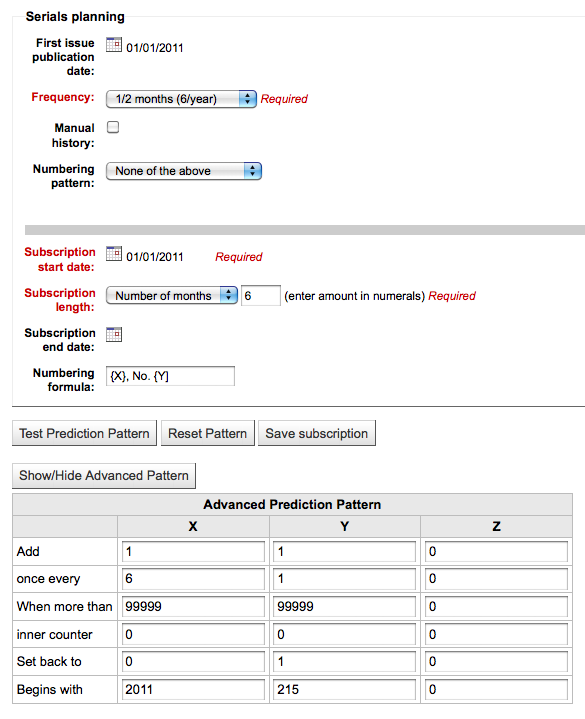
Using Koha as a Content Management System (CMS)
Setup
These are instructions for taking a default install of Koha 3.0 and allowing it to function as a little content management system. This will allow a library to publish an arbitrary number of pages based on a template. This example uses the template for the main opac page, but you could just as well use any template you wish with a bit more editing. This may be appropriate if you have a small library, want to allow librarians to easily add pages, and do not want to support a complete CMS.
Copy /usr/share/koha/opac/cgi-bin/opac/opac-main.pl to /usr/share/koha/opac/cgi-bin/opac/pages.pl (in the same directory)
Edit pages.pl in an editor
At approximately line 32 add: my $cgi = new CGI;
At approximately line 36 change this code: template_name => “opac-main.tmpl”, To this code: template_name => “pages.tmpl”,
At approximately line 54 change this code: $template->param( koha_news => $all_koha_news, koha_news_count => $koha_news_count ); To this: my $page = “page_” . $cgi->param(“p”); $template->param( koha_news => $all_koha_news, koha_news_count => $koha_news_count, local_page => “” . C4::Context->preference($page) );
Copy /usr/share/koha/opac/htdocs/opac-tmpl/prog/en/modules/opac-main.tmpl to /usr/share/koha/opac/htdocs/opac-tmpl/prog/en/modules/pages.tmpl
At approximately line 38, change this: <!– TMPL_IF NAME=”OpacMainUserBlock” –><div id=”opacmainuserblock” class=”container”><!– TMPL_VAR NAME=”OpacMainUserBlock” –></div><!– /TMPL_IF –> To this: <!– TMPL_IF NAME=”local_page” –><div id=”opacmainuserblock” class=”container”><!– TMPL_VAR NAME=”local_page” –></div><!– /TMPL_IF –>
In system preferences in the staff client, click the button for “New Preference” under “Local Use”
Fill it out as so - Explanation: test page for pages tiny cms - Variable: page_test - Value: Lorem ipsum - Click the TextArea link (or enter “TextArea” into the
input field below it)
- variable options (last field): 80|50
In a browser go to http://youraddress/cgi-bin/koha/pages.pl?p=test The page should come up with the words “Lorem ipsum” in the main content area of the page. (replace “youraddress” with localhost, 127.0.0.1, or your domain name depending on how you have Apache set up.)
To add more pages simply create a system preference where the title begins with “page_” followed by any arbitrary letters. You can add any markup you want as the value of the field. Reference the new page by changing the value of the “p” parameter in the URL.
Troubleshooting
If you have problems check file permissions on pages.pl and pages.tmpl. They should have the same user and group as other Koha files like opac-main.pl.
Bonus Points
Instead of using the address http://youraddress/cgi-bin/koha/pages.pl?p=test you can shorten it to http://youraddress/pages.pl?p=test Just open up /etc/koha/koha-httpd.conf and add the follow at about line 13:ScriptAlias /pages.pl “/usr/share/koha/opac/cgi-bin/opac/pages.pl”
Then restart Apache.
Usage
After setting up Koha as a CMS you can create new pages following these instructions:
Adding Pages
To add a new page you need to add a system preference under Local Use.
- Get there: More > Administration > Global System Preferences > Local Use
- Click ‘New Preference’
- Enter in a description in the Explanation field
- Enter a value that starts with ‘page_‘ in the Variable field
- Enter starting HTML in the Value field Add a new preference .. image:: images/appendix-cms/newpreference.png
- Set the Variable Type to Textarea
- Set the Variable options to something like 20|20 for 20 rows and 20 columns Settings for the new preference .. image:: images/appendix-cms/newpref-settings.png
Viewing your page
You can view your new page at http://YOUR-OPAC/cgi-bin/koha/pages.pl?p=PAGENAME where PAGENAME is the part you entered after ‘page_‘ in the Variable field.
Example
This process can be used to create recommended reading lists within Koha. So once the code changes have been made per the instructions on ‘Koha as a CMS’ you go through the ‘Adding a New Page’ instructions above to great a page for ‘Recommended Reading Lists’
Create page by modifying a system preference
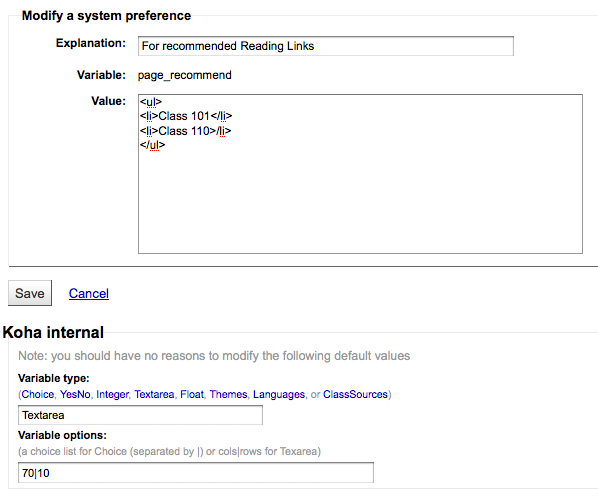
Next we need to create pages for our various classes (or categories). To do this, return to the ‘Adding a New Page’ section and create a preference for the first class.
Add a new sys pref for another page
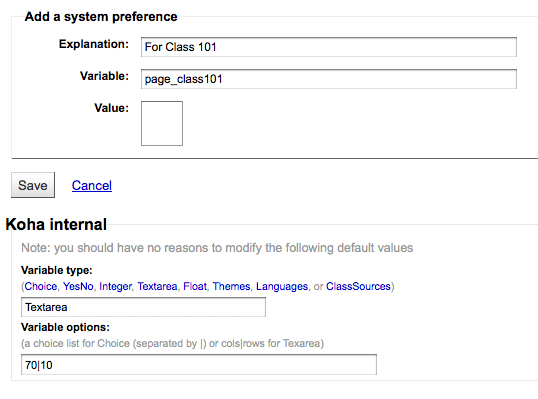
Next you’ll want to link your first page to your new second page, go to the page_recommend preference and click ‘Edit.’ Now you want to edit the HTML to include a link to your newest page:
Edit original preference to add new page
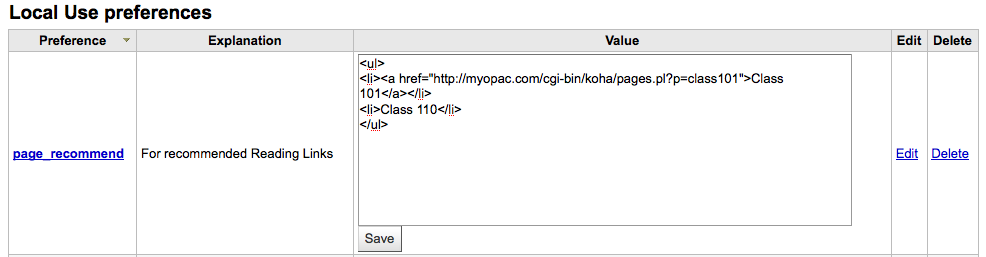
Live Examples
- The Crawford Library at Dallas Christian College is using this method for their recommended reading lists: http://opac.dallas.edu/
Resetting the Koha Database
These notes on how to reset the database for Koha 3 were derived from the following email thread: http://lists.koha-community.org/pipermail/koha-devel/2009-January/008939.html
Resetting the database may be useful if you install Koha with the sample data, and then wish to use real data without reinstalling the software.
Truncate Tables
Use your preferred MySQL client to truncate the following tables:
- bibio
- biblioitems
- items
- auth_header
- sessions
- zebraqueue
Reset the Zebra Index
Run the following commands to reset the authorities and biblios Zebra indices. $ zebraidx -c /etc/koha/zebradb/zebra-authorities-dom.cfg -g iso2709 -d authorities init $ zebraidx -c /etc/koha/zebradb/zebra-biblios.cfg -g iso2709 -d biblios init
Important Links
Installation Guides
- Installing Koha 3 on Ubuntu - http://www.blazingmoon.org/guides/k3-on-u810-1.html
- Koha on Debian installation documentation - http://openlib.org/home/krichel/courses/lis508/doc/koha_installation_overview.html
- Koha 3.2 on Debian Squeeze - http://wiki.koha-community.org/wiki/Koha_3.2_on_Debian_Squeeze
Misc
- Zotero - http://zotero.org
- SOPAC - http://thesocialopac.net
Koha XSLT Item Types
When you have any of the XSLT system preferences (OPACXSLTDetailsDisplay, OPACXSLTResultsDisplay, XSLTDetailsDisplay, and/or XSLTResultsDisplay) along with the DisplayOPACiconsXSLT preference turned on you will see item type icons on the related screen.
Important
These images are coming from values found in your leader, if your leader is not cataloged properly it might be best to turn off the DisplayOPACiconsXSLT preference (which can be done while leaving the other XSLT preferences turned on).
Book image

Book [BK] - leader6 = a (and one of the leader7 values below)
- leader7 = a
- leader7 = c
- leader7 = d
- leader7 = m
- leader6 = t
Computer Image
- Computer File [CF] - leader6 = m
Continuing Resource Image

- Continuing Resource [CR] - leader7 = b - leader7 = i - leader7 = s
Map Image

- Map [MP] - leader6 = e - leader6 = f
Mixed Materials Image

- Mixed [MX] - leader6 = p
Sound Image
- Sound [MU] - leader6 = c - leader6 = d - leader6 = i - leader6 = j
Visual Material Image
- Visual Material [VM] - leader6 = g - leader6 = k - leader6 = r
Kit Image

- Kit - leader6 = o
MarcEdit
Adding a prefix to call numbers
When bringing data into Koha, you may want to first clean it up. One common action among Koha users is to add a prefix to the call number.
Open MarcEdit MarcEdit .. image:: images/appendix-marcedit/marcedit.png
Click ‘MarcEditor’
Go to Tools > Edit Subfield Data Edit subfield data .. image:: images/appendix-marcedit/marcedit-editsubfield.png
To prepend data the special character is: ^b To simply prepend data to the beginning of a subfield, add ^b to the Field Data: textbox and the data to be appended in the Replace Prepend data to a field .. image:: images/appendix-marcedit/editsubfield.png - To prepend data to the beginning of the subfield while
replacing a text string, add ^b[string to replace] to the Field Data textbox and the data to be appended in the Replace With textbox.
Kanika Goyal
Nicole C. Engard
2010
Importing Excel data into Koha
Suppose you have records of your library in excel data sheet format and want them to import into Koha. But how will you do this? Koha will not let you import excel records directly. Well here is a very simple solution for you which will let you import your excel records in Koha easily. First, we will convert excel file into Marc file and then will import it into Koha.
Follow the given steps to import your excel records into Koha
Converting from Excel format into .mrk format
First, we will convert excel format into .mrk format. For this we will use MarcEdit. You can download it from http://people.oregonstate.edu/~reeset/marcedit/html/downloads.html.
Now open it and select Add-ins–>Delimited Text Translator.
Delimited Text Translator
Click Next when the following window appears.
Delimited Text Translator
Browse for your excel file.
Delimited Text Translator
Locate your excel file by choosing the format Excel File(*.xls).
Delimited Text Translator
Similarly, fill all the other entries such as Output File, Excel Sheet Name and check UTF-8 Encoded (if required) and Click Next.
Delimited Text Translator
Now you will be prompted for mapping the fields to recognise the fields by standard marc format.
Suppose for Field 0 that is first column I entered Map to: 022$a( Valid ISSN for the continuing resource) and then click on Apply.
Delimited Text Translator
Note
You can customize Indicators and all other things, for more information on marc21 format visit the official library of congress site.
Similarly map all other fields and then Click on Finish.
Delimited Text Translator
And then a window will appear indicating that your Marc Text File(*.mrk) has been created.
Delimited Text Translator
Click Close and we have created a .mrk file from .xls file in this step. You can view the file by double clicking on it.
Convert .mrk file to .mrc
We will convert .mrk file that we have created in the above step into raw Marc format that can be directly imported into Koha.
For this again open MarcEdit and Select MARC Tools.
MARC Tools
Next Select MarcMaker to convert .mrk file into .mrc format.
MarcMaker
Locate your input file and name your output file. Then Click Execute.
MarcMaker
And it will show you the Result.
MarcMaker
Click Close and now we have raw Marc records with us (.mrc file).
Import .mrc into Koha
More information on importing records into Koha can be found in the ‘Stage MARC Records for Import‘ section of this manual.
Finally we will import above created .mrc file into Koha.
Click on Tools in your Koha staff client.
Koha Staff Client
Next Click on Stage MARC Records for Import.
Stage MARC Records for Import
After this, choose your previously created .mrc file and click on Upload.
Stage File
You can also add comment about file and finally click on Stage For Import.
Stage for Import
When the import is done, you will get a result something like this
Staged Records Summary
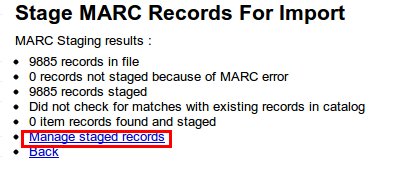
Next, click on Manage staged records.
Here you can even change matching rules.
Manage Staged Records
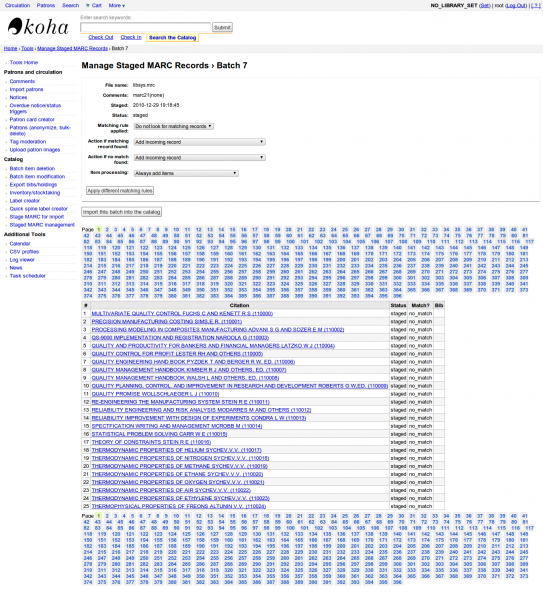
Click on Import this batch into catalog when you are done.
Thats it. After all the records get imported, check Status and it should read “imported”
Finalize Import
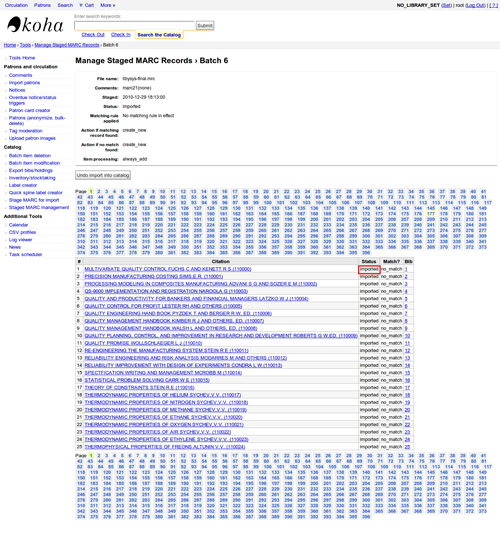
You can even undo the Import operation.
And within few minutes, we have imported around 10,000 records in Koha
Talking Tech
Talking Tech I-tiva is a third party, proprietary, product that libraries can subscribe to. Learn more here: http://www.talkingtech.com/solutions/library.
Installation and Setup Instructions
Be sure you’ve run installer/data/mysql/atomicupdate/Bug-4246-Talking-Tech-itiva-phone-notifications.pl to install the required data pack (new syspref, notice placeholders and messaging transport preferences)
To use, TalkingTechItivaPhoneNotification syspref must be turned on.
If you wish to process PREOVERDUE or RESERVES messages, you’ll need the EnhancedMessagingPreferences system preference turned on, and patrons to have filled in a preference for receiving these notices by phone.
For OVERDUE messages, overdue notice triggers must be configured under Koha -> Tools -> Overdue Notice Triggers. Either branch-specific triggers or the default level triggers may be used (script will select whichever is appropriate).
Sending Notices File
- # Add the TalkingTech_itiva_outbound.pl
- script to your crontab
- # Add an FTP/SFTP or other transport method to send the output
- file to the I-tiva server
- # If you wish, archive the sent notices file in another
- directory after sending
Run TalkingTech_itiva_outbound.pl –help for more information
Receiving Results File
- # Add an FTP/SFTP or other transport method to send the Results
- file to a known directory on your Koha server
- # Add the TalkingTech_itiva_inbound.pl
- script to your crontab, aimed at that directory
- # If you wish, archive the results file in another directory
- after processing
Run TalkingTech_itiva_inbound.pl –help for more information
FAQs
Display
Custom Item Type/Authorized Value Icons
Question: Can I have my own set of item type images (or authorized value icons)?
*Answer:*Absolutely. To add additional icons to your system you simply add a new directory to koha-tmpl/intranet-tmpl/prog/img/itemtypeimg/ and to koha-tmpl/opac-tmpl/prog/itemtypeimg and put your icons in the new directory. Your icons will show up in a new tab as soon as they are in the folders.
Tip
Remember to put the icons in both places (on the OPAC and the intranet).
Customizing Koha Images
Question: Can I customize the images in the OPAC?
Answer: Absolutely. Koha comes with a series of original images that you can alter to meet your needs. The originals can be found in the misc/interface_customization/ directory.
OPAC Display Fields
Question: What MARC fields print to the different OPAC screens in Koha?
Answer: The XSLT preference must be set as follows for the following fields to show
- OPACXSLTResultsDisplay = using XSLT stylesheets
- OPACXSLTDetailsDisplay = using XSLT stylesheets
- DisplayOPACiconsXSLT = show
The OPAC Results page shows:
- 245
- 100, 110, 111
- 700, 710, 711
- 250
- 260
- 246
- 856
The OPAC Details page shows:
- 245
- 100, 110, 111
- 700, 710, 711
- 440, 490
- 260
- 250
- 300
- 020
- 022
- 246
- 130, 240
- 6xx
- 856
- 505
- 773
- 520
- 866
- 775
- 780
- 785
- plus all of the 5xx fields in the Notes tab at the bottom
Subtitle Display on Bib Records
Question: How do I get the subtitle to display on the detail pages for my bib records?
Answer: Subtitle display now depends on there being a keyword mapping for the MARC field in question. Adding a mapping for “subtitle” -> “245b” for an item’s framework results in display of the subtitle in OPAC and staff client search and detail pages (although not in all instances where subtitles might be displayed, e.g. the Cart).
Owen Leonard
July 2010
Customize Logo on Staff Client
Question: How do I change the Koha logo on the Staff Client login page?
Answer: Opacsmallimage controls the display of the Koha logo in the OPAC, but there is no system preference controlling the logo on the staff client login page. Luckily the logo is displayed via CSS so it can be easily customized through some custom CSS.
These are the relevant parts of the staff client default CSS: #login h1 { background:url(”../../img/koha-logo.gif”) no-repeat scroll center top transparent; margin-bottom:0.5em; margin-top:0; }
#login h1 a { border-bottom:medium none; display:block; height:74px; text-indent:-1000px; }
If you have access to the file system on your Koha server you can add a custom CSS file and specify that file using the intranetcolorstylesheet system preference.
There is no analogue to the OPACUserCSS preference in the staff client, but you can get around this by putting this in the intranetuserjs preference: //]]> </script> <style type=”text/css”> /* inline styles */ </style> <script type=”text/javascript”> //<![CDATA[
In the above snippet where it says /* inline styles */ we’ll redeclare the relevant properties from the styles of the login image://]]> </script> <style type=”text/css”> /* inline styles */
#login h1 { background:url(”../../img/koha-logo.gif”) no-repeat scroll center top transparent; }
#login h1 a { height:74px; } </style> <script type=”text/javascript”> //<![CDATA[
I’ve only reproduced the properties necessary to make the change we want. You can see that the “background:” property sets the path to the default logo. You can change this to point to any image you want, on the Koha server or anywhere else. Then you just need to change the #login h1 a’s “height” property to match the height of the image you choose.
For example:
//]]> </script> <style type=”text/css”> /* inline styles */
#login h1 { background:url(“http://www.myacpl.org/sites/all/themes/npl/logo.png”) no-repeat scroll center top transparent; }

#login h1 a { height:71px; } </style> <script type=”text/javascript”> //<
Koha to MARC Mapping
Question: What’s the relationship between ‘Koha to MARC Mapping’ and ‘MARC Bibliographic Frameworks’?
Answer: Mapping can be defined through ‘MARC Bibliographic Frameworks’ OR ‘Koha to MARC Mapping’. ‘Koha to MARC Mapping’ is just a shortcut to speed up linkage. If you change a mapping in one of these modules, the mapping will change in the other as well. (In other words, the two modules ‘overwrite’ each other in order to prevent conflicts from existing in Koha).
Number of Items Per Bib Record
Question: Is there a limit on the number of items I can attach to a bib record?
Answer: There is no explicit limit to the number of items you can attach to a bibliographic record, but if you attach enough of them, your MARC record will exceed the maximum file size limit for the ISO-2709 standard, which breaks indexing for that record. I’ve found this occurs somewhere between 600 and 1000 items on a ‘normal’ bibliographic record.
Analytics
Question: I am using the EasyAnalyticalRecords feature, but my links in the OPAC and Staff Client to ‘Show Analytics’ are not working.
Answer: If you plan on using EasyAnalyticalRecords you will want to make sure to set your UseControlNumber preference to “Don’t use,” this will prevent broken links.
Acquisitions
Planning Categories
Question: What is a planning category?
Answer: When you plan in advance for the way your budget is going to be spent, you initially plan for how it’s going to be spent over time, that’s the most natural thing to do.
So you plan for $1000 in Jan. $1000 in Feb., $3000 in March, etc. You can basically do the same thing with a list of values in lieu of the months.
Say you have a list like this one:
- < 1 month
- < 6 months
- < 1 year
- < 3 years
- < 10 years
- > 10 years
The list is meant to represent when the books acquired where published. Then you plan for it, saying: we went to spend at list 40% of our budgets on books published less than a year ago, 10% on books more than 10 years old, etc.
Upon acquiring new material, you’ll be able to select, for a given item, a value from this list in a drop down. Then, after the material has been acquired, at the end of the year, you’ll be able to compare the goals set, with what’s been achieved.
Serials
Advanced Patterns
Question: What is the ‘inner counter’ on the advanced serials pattern interface?
Answer: I think it is better to give an example to understand this :
Example for a monthly subscription :
- First issue publication date : April 2010
- Numbering : No {X}, year {Y}
- First issue : No 4, year 2010
For the year Y : you will want the year change on January 2011
So, the advanced pattern for Y will be :
- Add : 1
- once every : 12
- When more than 9999999
- inner counter : 3
- Set back to 0
- Begins with 2010
Year is going to change after 12 received issues from April 2010, that is in April 2011 if you don’t set inner counter. Set inner counter to 3 will say to Koha : change year after 12-3 = 9 received issues.
Inner counter says to Koha to take into account the first issues of the year, even if they are not received with Koha. If you begin with first issue of the year write nothing or 0.
Reports
Define Codes Stored in DB
Fines Table
Question: What do the codes in the accounttype field in the accountlines table stand for?
Answer:
- A = acc’t management fee
- C = credit
- F = overdue fine
- FOR =forgiven
- FU = overdue, still acccruing
- L = Lost Item
- M = Sundry
- N = New Card
- PAY = payment
- W = writeoff
Statistics Table
*Question:*What are the possible codes for the type field in the statistics table?
Answer:
localuse - Registers if an item that had been checked out to a
statistics patron (category type = ‘X’) is returned
issue
return
renew
writeoff
payment
CreditXXX - stores different types of fee credits, so a query to
catch them all would include a clause like “type LIKE ‘Credit%’”
Reserves Table
Question: What are the possible codes for the found field in the reserves and old_reserves tables?
Answer:
- NULL: means the patron requested the 1st available, and we haven’t chosen the item
- T = Transit: the reserve is linked to an item but is in transit to the pickup branch
- W =Waiting: the reserve is linked to an item, is at the pickup branch, and is waiting on the hold shelf
- F = Finished: the reserve has been completed, and is done
Reports Dictionary Table
Question: What are the possible codes for the area field in the reports_dictionary table?
Answer:
- 1 = Circulation
- 2 = Catalog
- 3 = Patrons
- 4 = Acquistions
- 5 = Accounts
Messages Table
Question: What are the possible codes for the message_type field in the messages table?
Answer:
- L = For Librarians
- B = For Patrons/Borrowers
Serial Table
Question: What are the possible codes for the status field in the serial table”?
Answer:
- 1 = Expected
- 2 = Arrived
- 3 = Late
- 4 = Missing
- 5 = Not Available
- 6 = Delete
Runtime Parameters
Question: Is there a way to filter my custom SQL reports before they run?
Answer: If you feel that your report might be too resource intensive you might want to consider using runtime parameters to your query. Runtime parameters basically make a filter appear before the report is run to save your system resources.
There is a specific syntax that Koha will understand as ‘ask for values when running the report’. The syntax is <<Question to ask|authorized_value>>.
- The << and >> are just delimiters. You must put << at the beginning and >> at the end of your parameter
- The ‘Question to ask’ will be displayed on the left of the string to enter.
- The authorized_value can be omitted if not applicable. If it contains an authorized value category, or branches or itemtype or categorycode, a list with the Koha authorized values will be displayed instead of a free field Note that you can have more than one parameter in a given SQL Note that entering nothing at run time won’t probably work as you expect. It will be considered as “value empty” not as “ignore this parameter”. For example entering nothing for : “title=<<Enter title>>” will display results with title=’’ (no title). If you want to have to have something not mandatory, use “title like <<Enter title>>” and enter a % at run time instead of nothing
Examples:
- SELECT surname,firstname FROM borrowers WHERE branchcode=<<Enter patrons library|branches>> AND surname like <<Enter filter for patron surname (% if none)>>
- SELECT * FROM items WHERE homebranch = <<Pick your branch|branches>> and barcode like <<Partial barcode value here>>
Tip
To generate a date picker calendar to the right of the field when running a report you can use the ‘date’ keyword like this: <<Enter Date|date>> Date Picker .. image:: images/reports/datepicker.png
Tip
You have to put “%” in a text box to ‘leave it blank’. Otherwise, it literally looks for “” (empty string) as the value for the field.
Important
In addition to using any authorized value code to generate a dropdown, you can use the following values as well: Branches (branches), Item Types (itemtypes) and Patron Categories (categorycode). For example a branch pull down would be generated like this <<Branch|branches>> Branch pull down .. image:: images/reports/branchpulldown.png
Results Limited
Question: When I download my report it’s limited to 10,000 results, how do I get all of the results to download?
Answer: There is a limit of 10,000 records put on SQL statements entered in Koha. To get around this you want to add ‘LIMIT 100000’ to the end of your SQL statement (or any other number above 10,000.
Searching
Advanced Search
Scan Indexes
Question: What does ‘scan indexes’ on the advanced search page mean?
Answer: When you choose an index, enter a term, click ‘scan indexes’ and do the search, Koha displays the searched term and the following terms found in this index with the number of corresponding records That is search is not made directly in the catalog, but first in the indexes It works only for one index at once, and only with no limit in Location (All libraries needed)
Searching for Terms that Start With a Character
Question: How do I search for all titles that start with the letter ‘C’?
Answer: You can choose to search for things that start with a character or series of characters by using the CCL ‘first-in-subfield’
- example: ti,first-in-subfield=C
Wildcard Searching
Question:What is the difference between a keyword search using the ‘*’ (asterisk) versus a keyword search using the ‘%’ (percent)? Both work in the catalog, but return different sets. Why?
Answer: A wildcard is a character (*,?,%,.) that can be used to represent one or more characters in a word. Two of the wildcard characters that can be used in Koha searches are the asterisk (‘*’) and the percent sign (‘%’). However, these two characters act differently when used in searching.
The ‘*’ is going to force a more exact search of the first few characters you enter prior to the ‘*’. The asterisk will allow for an infinite number of characters in the search as long as the first few characters designated by your search remain the same. For example, searching for authors using the term, Smi*, will return a list that may include Smith, Smithers, Smithfield, Smiley, etc depending on the authors in your database.
The ‘%’ will treat the words you enter in the terms of “is like”. So a search of Smi% will search for words like Smi. This results in a much more varied results list. For example, a search on Smi% will return a list containing Smothers, Smith, Smelley, Smithfield and many others depending on what is your database.
The bottom line in searching with wildcards: ‘*’ is more exact while ‘%’ searches for like terms.
Enhanced Content
FRBRizing Content
*Question:*At our public library we are running a Koha installation and we’ve tried to turn on all the nice functionalities in Koha such as the frbrising tool, but do not get the same result as Nelsonville public library.
*Answer:*In fact, this feature is quite tricky to make that right. First it looks at XISBN service. And then search in your database for that ISBN. So both XISBN and your internal ISBN (in biblio table) have to be normalized. You could therefore use the script misc/batchupdateISBNs.pl (it removes all the - in your local ISBNs)
Amazon
Amazon Private Key
Question: Why do I need the AWSPrivateKey as well as the AWSAccessKeyID to use Amazon Content?
Answer: After 2009-08-15, Amazon Web Services will expect that all requests to the Product Advertising API, which is what Koha uses for retrieving reviews and other enhanced content from Amazon, include signatures. This patch and subsequent patches implement this functionality.
What this means in practice (assuming the user has elected to use any enhanced content from Amazon) is that
- # The user must get a Amazon Secret Access Key. This can be
- done by logging in to the user’s AWS account at (e.g.) http://aws.amazon.com/, going to the ‘Access Identifiers’ page, and from there retrieving and/or creating a new Secret Access Key.
- # The contents of the Secret Access Key should then be
- entered into the new AWSPrivateKey system preference.
Once that is done, grabbing reviews and table of contents from Amazon should work as normal. If the user doesn’t do this before 2009-08-15, reviews and TOCs will no longer be supplied from Amazon, although there should be no crashes - the content will simply not show up.
Note that the requirement to sign requests does *NOT* appear to apply to simply displaying book covers from Amazon.
All Amazon Content
Question: I have all of the Amazon preferences turned on and have entered both of my keys, but none of the content appears in my system, why is that?
Answer: Amazon’s API checks your server time on all requests and if your server time is not set properly requests will be denied. To resolve this issue be sure to set your system time appropriately. Once that change in made Amazon content should appear immediately.
On Debian the the command is date -s “2010-06-30 17:21” (with the proper date and time for your timezone).
System Administration
Errors in Zebra Cron
Question: I am noticing some errors in the koha-zebradaemon-output.log file. When new records are added it takes a bit longer to index than we think they should. Running rebuild zebra is often faster. Zebra ends up indexing and search works, but I am concerned about the errors. Any ideas?
Answer: Rebuild_zebra.pl -r deletes all of the files in the Zebra db directories (such as reci-0.mf) and then recreates them. Thus, permissions will be lost, and the files will be owned by the user who ran rebuild_zebra.pl. If one rebuilds the zebra indexes as root, the daemons, which typically run under the user Koha, will not be able to update the indexes. Thus, it’s important then that the zebra rebuilds are put in the cronjob file of the user Koha, and not root. Also important is that other users, such as root, don’t manually execute rebuilds.
If one desires that another user be able to execute rebuild_zebra.pl, he should be given the permission to execute ‘sudo -u Koha .../rebuild_zebra.pl,’ (if you want to do this, you also have to edit the sudoers file to pass the PERL5LIB variable with the env_keep option as by default sudo strips away almost all environment variables). Or, as root user, one can use a simple ‘su koha’ and then the rebuild_zebra.pl command.
I’ve also tried to set the sticky bit on rebuild_zebra.pl, but for whatever reason it didn’t seem to work due to some problem with the PERL5LIB variable that I wasn’t able to figure. That seems to me the easiest thing to do, if anybody has any idea how to make it work. If it worked and were the default, I think it would help folks to avoid a great deal of the problems that come up with zebra.
Making Z39.50 Target Public
Question: Could someone tell me the exact steps I need to take to configure Zebra to expose my Koha 3 db as a public Z39.50 service?
Answer: Edit the KOHA_CONF file that your Koha is using. Uncomment the publicserver line like:
<!– <listen id=”publicserver” >tcp:@:9999</listen> –>
to be:
<listen id=”publicserver” >tcp:@:9999</listen>
Then restart zebasrv and connect on the port specified (9999).
Shelving Location Authorized Values
Question: When editing an item, the new shelving location I created is not showing up by default in the items where I assigned it to.
Answer: This is because you created the new shelving location with a code value of 0 (zero) Just FYI the system interprets authorized values of 0 as equaling a null so when you edit a record in cataloging where the authorized value in a field was assigned where the code was 0, the value displays as null in the item editor (or MARC editor) instead of the value the library meant it to be.
Why do I need Authorized Values?
Question: Why would I want to define authorized values for MARC tags?
Answer: Authorized Values create a ‘controlled vocabulary’ for your staff. As an example, let us assume that your Koha installation is used by several libraries, and you use MARC 21. You might want to restrict the 850a MARC subfield to the institution codes for just those libraries. In that case, you could define an authorized values category (perhaps called “INST”) and enter the institution codes as the authorized values for that category.
Tip
Koha automatically sets up authorized value categories for your item types and branch codes, and you can link these authorized values to MARC subfields when you set up your MARC tag structure.
How do I clean up the sessions table?
Question: Is there a periodic job that can be run to cull old sessions from the table? We don’t want to backup all the useless session data every night.
Answer: You can run cleanup database cron job.
Or just before doing a backup command (mysqldump), you can truncate session table:
mysql -u<kohauser -p<password <koha-db-name -e ‘TRUNCATE TABLE sessions’
Hardware
Barcode Scanners
Question: What barcode scanners have been known to work with Koha?
Answer: The simple rule of thumb is, does it act like a keyboard device?, if so, it will work. (i.e. can you take the scanner, scan a barcode and have it show up in a text editor, if so, it will work.)
The main points to check are that it connects to your PC conveniently (can be USB or “keyboard wedge” which means it connects in line with the keyboard, which is useful with older computers), and that it scans the barcode type that you are using.
It is a good idea to test some ‘used’ barcodes if you have any, to see whether the scanner can read scuffed or slightly wrinkled ones successfully. Most scanners are capable of reading several barcode types - there are many, and the specification should list the ones it can read. You may need to adjust settings slightly, such as prefix and suffix characters, or whether you want to send an ‘enter’ character or not.
One more tip - some can be set ‘always on’ and may come with a stand, some have triggers under the handle, some have buttons on top, some are held like a pen. Think about the staff working with the hardware before choosing, as a button in the wrong place can be very awkward to use.
Printers
Printers used by Koha libraries
POS-X receipt printer
Star Micronics printer (exact model unknown) with a generic/plain text driver.
Star SP2000 (Nelsonville)
Star TSP-100 futurePRINT (Geauga) - “I know there have been a lot of questions on receipt
printers so I thought I’d pass on my findings. We have been testing the Star TSP-100 futurePRINT. I found this print to be VERY easy to configure for Koha. I was even able to customize the print job by adding our system logo (a .gif) to the top of every receipt. Also with a bitmap created in Paint was able to add a message at the bottom of each receipt with the contact information, hours and website for the library that the materials were checked out at.”
Epson TM 88 IIIP thermal receipt printers
Epson TM-T88IV
1x1 labels using a Dymolabelwriter printer
Braille Support
Question: Are there any braille embosser or printer which has inbuilt braille converter and it is accessible with UNIX environment?
Answer: You may want to look into BRLTTY (http://www.emptech.info/product_details.php?ID=1232).
Additional Support
Extending Koha
Cab Vinton
September 2009
http://lists.katipo.co.nz/pipermail/koha/2009-September/020003.html
Amazon lookup script for Koha libraries
We order most of our materials from Amazon, so I’ve been looking for a convenient way to tell if a book under consideration is in our catalog already.
Greasemonkey & a custom user script fit the bill nicely:
A few caveats:
- Like most scripts, this one was designed to work with Firefox; I haven’t explored getting it to work with other browsers.
- I’m not a JavaScript programmer – this was adapted from others’ work. Just a few lines would have to be changed to get the script to work with your catalog.
- It depends on the existence of ISBN for the item in question, so movies, older books, etc. would not work.
Others have added all sorts of bells & whistles: XISBN lookups to search for related titles, custom messages based on the status of items (on order, on hold, etc.), ... just search the UserScripts site for Amazon + library. For a later date!
Keyword Clouds
In addition to the traditional tag cloud available in Koha, there is a way to generate clouds for popular subjects within Koha.
The Author/Subject Cloud cron job is used to help with this process. This cron job sends its output to files.
- /home/koha/mylibrary/koharoot/koha-tmpl/cloud-author.html
- /home/koha/yourlibrary/koharoot/koha-tmpl/cloud-subject.html
This means that you can produce clouds for authors, collective author, all kind of subjects, classifications, etc. And since it works on zebra indexes, it is quick, even on large DBs. Tags clouds are sent to files. It’s up to library webmaster to deal with those files in order to include them in OPACMainUserBlock, or include them into their library CMS.
Some libraries even send the file into a Samba shared folder where webmaster take them, eventually clean them a little bit before integrating them into navigation widgets or pages.
Newest Titles Pulldown
Often we want to add a way for our patrons to do searches for the newest items. In this example I’ll show you how to create a pull down menu of the newest items by item type. These tips will work (with a couple changes) for collection codes or shelving locations as well.
First, it’s important to note that every link in Koha is a permanent link. This means if I do a search for everything of a specific item type sorted by the acquisitions date and bookmark that URL, whenever I click it I’ll see the newest items of that type on the first few pages of the results.
I took this knowledge and wrote a form takes this functionality in to consideration. It basically just does a search of your Koha catalog for a specific item type and sorts the results by acquisitions date.
The first thing I did was write a MySQL statement to generate a list of item types for me - why copy and paste when you can use the power of MySQL?
select concat(‘<option value=\”mc-itype:’, itemtype, ‘\”>’,description,’</option>’) from itemtypes
The above looks at the itemtypes table and slaps the necessary HTML around each item type for me. I then exported that to CSV and opened it in my text editor and added the other parts of the form.
<p><strong>New Items</strong></p> <p><form name=”searchform” method=”get” action=”/cgi-bin/koha/opac-search.pl”> <input name=”idx” value=”kw” type=”hidden”> <input name=”sort_by” value=”acqdate_dsc” type=”hidden”> <input name=”do” value=”OK” type=”hidden”> <select name=”limit” onchange=”this.form.submit()”> <option>– Please choose –</option> <option value=”mc-itype:BOOK”>Book</option> <option value=”mc-itype:BOOKCD”>Book on CD</option> <option value=”mc-itype:DVD”>DVD</option> <option value=”mc-itype:LRG_PRINT”>Large print book</option> <option value=”mc-itype:MAGAZINE”>Magazine</option> <option value=”mc-itype:NEWSPAPER”>Newspaper</option> <option value=”mc-itype:VIDEO”>Videocassette</option> </select> </form> </p>
Now, what does all of that mean? The important bits are these:
First the starting of the form.
<p><form name=”searchform” method=”get” action=”/cgi-bin/koha/opac-search.pl”>
This tells the browser to take any value selected and put it at the end of this http://YOURSITE/cgi-bin/koha/opac-search.pl. If you want to embed this form on your library website (and not on your OPAC) you can put the full OPAC URL in there.
Next, there is a hidden value that is telling the search to sort by acquisitions date descending (newest items at the top):
<input name=”sort_by” value=”acqdate_dsc” type=”hidden”>
And finally you have an option for each item type you want people to search.<option value=”mc-itype:BOOK”>Book</option>
These options each include the string “mc-itype:” which tells Koha to do an item type search.
Once you have all of that in place you can copy and paste the form to somewhere on your OPAC. The Farmington Public Libraries OPAC has a few examples of this on the left.
Koha and Your Website
This appendix will include tips for integrating Koha in to your library website.
Koha search on your site
Often you’ll want to add a Koha search box to your library website. To do so, just copy and paste the following code in to your library website and update the YOURCATALOG bit with your catalog’s URL and you’re set to go.
<form name=”searchform” method=”get” action=”http://YOURCATLOG/cgi-bin/koha/opac-search.pl” id=”searchform”> <input id=”transl1” name=”q” type=”text”><p> <select name=”idx” id=”masthead_search”> <option value=”kw”>Keyword</option> <option value=”ti”>Title</option> <option value=”au”>Author</option> <option value=”su”>Subject</option> <option value=”nb”>ISBN</option> <option value=”se”>Series</option> <option value=”callnum”>Call Number</option> </select> <input value=”Search” id=”searchsubmit” type=”submit”> </p></form>
GNU General Public License version 3
Version 3, 29 June 2007
Copyright © 2007 Free Software Foundation, Inc. http://fsf.org/
Everyone is permitted to copy and distribute verbatim copies of this license document, but changing it is not allowed.
Preamble
The GNU General Public License is a free, copyleft license for software and other kinds of works.
The licenses for most software and other practical works are designed to take away your freedom to share and change the works. By contrast, the GNU General Public License is intended to guarantee your freedom to share and change all versions of a program—to make sure it remains free software for all its users. We, the Free Software Foundation, use the GNU General Public License for most of our software; it applies also to any other work released this way by its authors. You can apply it to your programs, too.
When we speak of free software, we are referring to freedom, not price. Our General Public Licenses are designed to make sure that you have the freedom to distribute copies of free software (and charge for them if you wish), that you receive source code or can get it if you want it, that you can change the software or use pieces of it in new free programs, and that you know you can do these things.
To protect your rights, we need to prevent others from denying you these rights or asking you to surrender the rights. Therefore, you have certain responsibilities if you distribute copies of the software, or if you modify it: responsibilities to respect the freedom of others.
For example, if you distribute copies of such a program, whether gratis or for a fee, you must pass on to the recipients the same freedoms that you received. You must make sure that they, too, receive or can get the source code. And you must show them these terms so they know their rights.
Developers that use the GNU GPL protect your rights with two steps: (1) assert copyright on the software, and (2) offer you this License giving you legal permission to copy, distribute and/or modify it.
For the developers’ and authors’ protection, the GPL clearly explains that there is no warranty for this free software. For both users’ and authors’ sake, the GPL requires that modified versions be marked as changed, so that their problems will not be attributed erroneously to authors of previous versions.
Some devices are designed to deny users access to install or run modified versions of the software inside them, although the manufacturer can do so. This is fundamentally incompatible with the aim of protecting users’ freedom to change the software. The systematic pattern of such abuse occurs in the area of products for individuals to use, which is precisely where it is most unacceptable. Therefore, we have designed this version of the GPL to prohibit the practice for those products. If such problems arise substantially in other domains, we stand ready to extend this provision to those domains in future versions of the GPL, as needed to protect the freedom of users.
Finally, every program is threatened constantly by software patents. States should not allow patents to restrict development and use of software on general-purpose computers, but in those that do, we wish to avoid the special danger that patents applied to a free program could make it effectively proprietary. To prevent this, the GPL assures that patents cannot be used to render the program non-free.
The precise terms and conditions for copying, distribution and modification follow.
TERMS AND CONDITIONS
- Definitions.
“This License” refers to version 3 of the GNU General Public License.
“Copyright” also means copyright-like laws that apply to other kinds of works, such as semiconductor masks.
“The Program” refers to any copyrightable work licensed under this License. Each licensee is addressed as “you”. “Licensees” and “recipients” may be individuals or organizations.
To “modify” a work means to copy from or adapt all or part of the work in a fashion requiring copyright permission, other than the making of an exact copy. The resulting work is called a “modified version” of the earlier work or a work “based on” the earlier work.
A “covered work” means either the unmodified Program or a work based on the Program.
To “propagate” a work means to do anything with it that, without permission, would make you directly or secondarily liable for infringement under applicable copyright law, except executing it on a computer or modifying a private copy. Propagation includes copying, distribution (with or without modification), making available to the public, and in some countries other activities as well.
To “convey” a work means any kind of propagation that enables other parties to make or receive copies. Mere interaction with a user through a computer network, with no transfer of a copy, is not conveying.
An interactive user interface displays “Appropriate Legal Notices” to the extent that it includes a convenient and prominently visible feature that (1) displays an appropriate copyright notice, and (2) tells the user that there is no warranty for the work (except to the extent that warranties are provided), that licensees may convey the work under this License, and how to view a copy of this License. If the interface presents a list of user commands or options, such as a menu, a prominent item in the list meets this criterion.
- Source Code.
The “source code” for a work means the preferred form of the work for making modifications to it. “Object code” means any non-source form of a work.
A “Standard Interface” means an interface that either is an official standard defined by a recognized standards body, or, in the case of interfaces specified for a particular programming language, one that is widely used among developers working in that language.
The “System Libraries” of an executable work include anything, other than the work as a whole, that (a) is included in the normal form of packaging a Major Component, but which is not part of that Major Component, and (b) serves only to enable use of the work with that Major Component, or to implement a Standard Interface for which an implementation is available to the public in source code form. A “Major Component”, in this context, means a major essential component (kernel, window system, and so on) of the specific operating system (if any) on which the executable work runs, or a compiler used to produce the work, or an object code interpreter used to run it.
The “Corresponding Source” for a work in object code form means all the source code needed to generate, install, and (for an executable work) run the object code and to modify the work, including scripts to control those activities. However, it does not include the work’s System Libraries, or general-purpose tools or generally available free programs which are used unmodified in performing those activities but which are not part of the work. For example, Corresponding Source includes interface definition files associated with source files for the work, and the source code for shared libraries and dynamically linked subprograms that the work is specifically designed to require, such as by intimate data communication or control flow between those subprograms and other parts of the work.
The Corresponding Source need not include anything that users can regenerate automatically from other parts of the Corresponding Source.
The Corresponding Source for a work in source code form is that same work.
2. Basic Permissions.
All rights granted under this License are granted for the term of copyright on the Program, and are irrevocable provided the stated conditions are met. This License explicitly affirms your unlimited permission to run the unmodified Program. The output from running a covered work is covered by this License only if the output, given its content, constitutes a covered work. This License acknowledges your rights of fair use or other equivalent, as provided by copyright law.
You may make, run and propagate covered works that you do not convey, without conditions so long as your license otherwise remains in force. You may convey covered works to others for the sole purpose of having them make modifications exclusively for you, or provide you with facilities for running those works, provided that you comply with the terms of this License in conveying all material for which you do not control copyright. Those thus making or running the covered works for you must do so exclusively on your behalf, under your direction and control, on terms that prohibit them from making any copies of your copyrighted material outside their relationship with you.
Conveying under any other circumstances is permitted solely under the conditions stated below. Sublicensing is not allowed; section 10 makes it unnecessary.
3. Protecting Users’ Legal Rights From Anti-Circumvention Law.
No covered work shall be deemed part of an effective technological measure under any applicable law fulfilling obligations under article 11 of the WIPO copyright treaty adopted on 20 December 1996, or similar laws prohibiting or restricting circumvention of such measures.
When you convey a covered work, you waive any legal power to forbid circumvention of technological measures to the extent such circumvention is effected by exercising rights under this License with respect to the covered work, and you disclaim any intention to limit operation or modification of the work as a means of enforcing, against the work’s users, your or third parties’ legal rights to forbid circumvention of technological measures.
4. Conveying Verbatim Copies.
You may convey verbatim copies of the Program’s source code as you receive it, in any medium, provided that you conspicuously and appropriately publish on each copy an appropriate copyright notice; keep intact all notices stating that this License and any non-permissive terms added in accord with section 7 apply to the code; keep intact all notices of the absence of any warranty; and give all recipients a copy of this License along with the Program.
You may charge any price or no price for each copy that you convey, and you may offer support or warranty protection for a fee.
5. Conveying Modified Source Versions.
You may convey a work based on the Program, or the modifications to produce it from the Program, in the form of source code under the terms of section 4, provided that you also meet all of these conditions:
- # The work must carry prominent notices stating that you modified
- it, and giving a relevant date.
- # The work must carry prominent notices stating that it is
- released under this License and any conditions added under section 7. This requirement modifies the requirement in section 4 to “keep intact all notices”.
- # You must license the entire work, as a whole, under this License
- to anyone who comes into possession of a copy. This License will therefore apply, along with any applicable section 7 additional terms, to the whole of the work, and all its parts, regardless of how they are packaged. This License gives no permission to license the work in any other way, but it does not invalidate such permission if you have separately received it.
- # If the work has interactive user interfaces, each must display
- Appropriate Legal Notices; however, if the Program has interactive interfaces that do not display Appropriate Legal Notices, your work need not make them do so.
A compilation of a covered work with other separate and independent works, which are not by their nature extensions of the covered work, and which are not combined with it such as to form a larger program, in or on a volume of a storage or distribution medium, is called an “aggregate” if the compilation and its resulting copyright are not used to limit the access or legal rights of the compilation’s users beyond what the individual works permit. Inclusion of a covered work in an aggregate does not cause this License to apply to the other parts of the aggregate.
6. Conveying Non-Source Forms.
You may convey a covered work in object code form under the terms of sections 4 and 5, provided that you also convey the machine-readable Corresponding Source under the terms of this License, in one of these ways:
- # Convey the object code in, or embodied in, a physical product
- (including a physical distribution medium), accompanied by the Corresponding Source fixed on a durable physical medium customarily used for software interchange.
- # Convey the object code in, or embodied in, a physical product
- (including a physical distribution medium), accompanied by a written offer, valid for at least three years and valid for as long as you offer spare parts or customer support for that product model, to give anyone who possesses the object code either (1) a copy of the Corresponding Source for all the software in the product that is covered by this License, on a durable physical medium customarily used for software interchange, for a price no more than your reasonable cost of physically performing this conveying of source, or (2) access to copy the Corresponding Source from a network server at no charge.
- # Convey individual copies of the object code with a copy of the
- written offer to provide the Corresponding Source. This alternative is allowed only occasionally and noncommercially, and only if you received the object code with such an offer, in accord with subsection 6b.
- # Convey the object code by offering access from a designated
- place (gratis or for a charge), and offer equivalent access to the Corresponding Source in the same way through the same place at no further charge. You need not require recipients to copy the Corresponding Source along with the object code. If the place to copy the object code is a network server, the Corresponding Source may be on a different server (operated by you or a third party) that supports equivalent copying facilities, provided you maintain clear directions next to the object code saying where to find the Corresponding Source. Regardless of what server hosts the Corresponding Source, you remain obligated to ensure that it is available for as long as needed to satisfy these requirements.
- # Convey the object code using peer-to-peer transmission, provided
- you inform other peers where the object code and Corresponding Source of the work are being offered to the general public at no charge under subsection 6d.
A separable portion of the object code, whose source code is excluded from the Corresponding Source as a System Library, need not be included in conveying the object code work.
A “User Product” is either (1) a “consumer product”, which means any tangible personal property which is normally used for personal, family, or household purposes, or (2) anything designed or sold for incorporation into a dwelling. In determining whether a product is a consumer product, doubtful cases shall be resolved in favor of coverage. For a particular product received by a particular user, “normally used” refers to a typical or common use of that class of product, regardless of the status of the particular user or of the way in which the particular user actually uses, or expects or is expected to use, the product. A product is a consumer product regardless of whether the product has substantial commercial, industrial or non-consumer uses, unless such uses represent the only significant mode of use of the product.
“Installation Information” for a User Product means any methods, procedures, authorization keys, or other information required to install and execute modified versions of a covered work in that User Product from a modified version of its Corresponding Source. The information must suffice to ensure that the continued functioning of the modified object code is in no case prevented or interfered with solely because modification has been made.
If you convey an object code work under this section in, or with, or specifically for use in, a User Product, and the conveying occurs as part of a transaction in which the right of possession and use of the User Product is transferred to the recipient in perpetuity or for a fixed term (regardless of how the transaction is characterized), the Corresponding Source conveyed under this section must be accompanied by the Installation Information. But this requirement does not apply if neither you nor any third party retains the ability to install modified object code on the User Product (for example, the work has been installed in ROM).
The requirement to provide Installation Information does not include a requirement to continue to provide support service, warranty, or updates for a work that has been modified or installed by the recipient, or for the User Product in which it has been modified or installed. Access to a network may be denied when the modification itself materially and adversely affects the operation of the network or violates the rules and protocols for communication across the network.
Corresponding Source conveyed, and Installation Information provided, in accord with this section must be in a format that is publicly documented (and with an implementation available to the public in source code form), and must require no special password or key for unpacking, reading or copying.
7. Additional Terms.
“Additional permissions” are terms that supplement the terms of this License by making exceptions from one or more of its conditions. Additional permissions that are applicable to the entire Program shall be treated as though they were included in this License, to the extent that they are valid under applicable law. If additional permissions apply only to part of the Program, that part may be used separately under those permissions, but the entire Program remains governed by this License without regard to the additional permissions.
When you convey a copy of a covered work, you may at your option remove any additional permissions from that copy, or from any part of it. (Additional permissions may be written to require their own removal in certain cases when you modify the work.) You may place additional permissions on material, added by you to a covered work, for which you have or can give appropriate copyright permission.
Notwithstanding any other provision of this License, for material you add to a covered work, you may (if authorized by the copyright holders of that material) supplement the terms of this License with terms:
- # Disclaiming warranty or limiting liability differently from the
- terms of sections 15 and 16 of this License; or
- # Requiring preservation of specified reasonable legal notices or
- author attributions in that material or in the Appropriate Legal Notices displayed by works containing it; or
- # Prohibiting misrepresentation of the origin of that material, or
- requiring that modified versions of such material be marked in reasonable ways as different from the original version; or
- # Limiting the use for publicity purposes of names of licensors or
- authors of the material; or
- # Declining to grant rights under trademark law for use of some
- trade names, trademarks, or service marks; or
- # Requiring indemnification of licensors and authors of that
- material by anyone who conveys the material (or modified versions of it) with contractual assumptions of liability to the recipient, for any liability that these contractual assumptions directly impose on those licensors and authors.
All other non-permissive additional terms are considered “further restrictions” within the meaning of section 10. If the Program as you received it, or any part of it, contains a notice stating that it is governed by this License along with a term that is a further restriction, you may remove that term. If a license document contains a further restriction but permits relicensing or conveying under this License, you may add to a covered work material governed by the terms of that license document, provided that the further restriction does not survive such relicensing or conveying.
If you add terms to a covered work in accord with this section, you must place, in the relevant source files, a statement of the additional terms that apply to those files, or a notice indicating where to find the applicable terms.
Additional terms, permissive or non-permissive, may be stated in the form of a separately written license, or stated as exceptions; the above requirements apply either way.
- Termination.
You may not propagate or modify a covered work except as expressly provided under this License. Any attempt otherwise to propagate or modify it is void, and will automatically terminate your rights under this License (including any patent licenses granted under the third paragraph of section 11).
However, if you cease all violation of this License, then your license from a particular copyright holder is reinstated (a) provisionally, unless and until the copyright holder explicitly and finally terminates your license, and (b) permanently, if the copyright holder fails to notify you of the violation by some reasonable means prior to 60 days after the cessation.
Moreover, your license from a particular copyright holder is reinstated permanently if the copyright holder notifies you of the violation by some reasonable means, this is the first time you have received notice of violation of this License (for any work) from that copyright holder, and you cure the violation prior to 30 days after your receipt of the notice.
Termination of your rights under this section does not terminate the licenses of parties who have received copies or rights from you under this License. If your rights have been terminated and not permanently reinstated, you do not qualify to receive new licenses for the same material under section 10.
9. Acceptance Not Required for Having Copies.
You are not required to accept this License in order to receive or run a copy of the Program. Ancillary propagation of a covered work occurring solely as a consequence of using peer-to-peer transmission to receive a copy likewise does not require acceptance. However, nothing other than this License grants you permission to propagate or modify any covered work. These actions infringe copyright if you do not accept this License. Therefore, by modifying or propagating a covered work, you indicate your acceptance of this License to do so.
10. Automatic Licensing of Downstream Recipients.
Each time you convey a covered work, the recipient automatically receives a license from the original licensors, to run, modify and propagate that work, subject to this License. You are not responsible for enforcing compliance by third parties with this License.
An “entity transaction” is a transaction transferring control of an organization, or substantially all assets of one, or subdividing an organization, or merging organizations. If propagation of a covered work results from an entity transaction, each party to that transaction who receives a copy of the work also receives whatever licenses to the work the party’s predecessor in interest had or could give under the previous paragraph, plus a right to possession of the Corresponding Source of the work from the predecessor in interest, if the predecessor has it or can get it with reasonable efforts.
You may not impose any further restrictions on the exercise of the rights granted or affirmed under this License. For example, you may not impose a license fee, royalty, or other charge for exercise of rights granted under this License, and you may not initiate litigation (including a cross-claim or counterclaim in a lawsuit) alleging that any patent claim is infringed by making, using, selling, offering for sale, or importing the Program or any portion of it.
- Patents.
A “contributor” is a copyright holder who authorizes use under this License of the Program or a work on which the Program is based. The work thus licensed is called the contributor’s “contributor version”.
A contributor’s “essential patent claims” are all patent claims owned or controlled by the contributor, whether already acquired or hereafter acquired, that would be infringed by some manner, permitted by this License, of making, using, or selling its contributor version, but do not include claims that would be infringed only as a consequence of further modification of the contributor version. For purposes of this definition, “control” includes the right to grant patent sublicenses in a manner consistent with the requirements of this License.
Each contributor grants you a non-exclusive, worldwide, royalty-free patent license under the contributor’s essential patent claims, to make, use, sell, offer for sale, import and otherwise run, modify and propagate the contents of its contributor version.
In the following three paragraphs, a “patent license” is any express agreement or commitment, however denominated, not to enforce a patent (such as an express permission to practice a patent or covenant not to sue for patent infringement). To “grant” such a patent license to a party means to make such an agreement or commitment not to enforce a patent against the party.
If you convey a covered work, knowingly relying on a patent license, and the Corresponding Source of the work is not available for anyone to copy, free of charge and under the terms of this License, through a publicly available network server or other readily accessible means, then you must either (1) cause the Corresponding Source to be so available, or (2) arrange to deprive yourself of the benefit of the patent license for this particular work, or (3) arrange, in a manner consistent with the requirements of this License, to extend the patent license to downstream recipients. “Knowingly relying” means you have actual knowledge that, but for the patent license, your conveying the covered work in a country, or your recipient’s use of the covered work in a country, would infringe one or more identifiable patents in that country that you have reason to believe are valid.
If, pursuant to or in connection with a single transaction or arrangement, you convey, or propagate by procuring conveyance of, a covered work, and grant a patent license to some of the parties receiving the covered work authorizing them to use, propagate, modify or convey a specific copy of the covered work, then the patent license you grant is automatically extended to all recipients of the covered work and works based on it.
A patent license is “discriminatory” if it does not include within the scope of its coverage, prohibits the exercise of, or is conditioned on the non-exercise of one or more of the rights that are specifically granted under this License. You may not convey a covered work if you are a party to an arrangement with a third party that is in the business of distributing software, under which you make payment to the third party based on the extent of your activity of conveying the work, and under which the third party grants, to any of the parties who would receive the covered work from you, a discriminatory patent license (a) in connection with copies of the covered work conveyed by you (or copies made from those copies), or (b) primarily for and in connection with specific products or compilations that contain the covered work, unless you entered into that arrangement, or that patent license was granted, prior to 28 March 2007.
Nothing in this License shall be construed as excluding or limiting any implied license or other defenses to infringement that may otherwise be available to you under applicable patent law.
12. No Surrender of Others’ Freedom.
If conditions are imposed on you (whether by court order, agreement or otherwise) that contradict the conditions of this License, they do not excuse you from the conditions of this License. If you cannot convey a covered work so as to satisfy simultaneously your obligations under this License and any other pertinent obligations, then as a consequence you may not convey it at all. For example, if you agree to terms that obligate you to collect a royalty for further conveying from those to whom you convey the Program, the only way you could satisfy both those terms and this License would be to refrain entirely from conveying the Program.
13. Use with the GNU Affero General Public License.
Notwithstanding any other provision of this License, you have permission to link or combine any covered work with a work licensed under version 3 of the GNU Affero General Public License into a single combined work, and to convey the resulting work. The terms of this License will continue to apply to the part which is the covered work, but the special requirements of the GNU Affero General Public License, section 13, concerning interaction through a network will apply to the combination as such.
14. Revised Versions of this License.
The Free Software Foundation may publish revised and/or new versions of the GNU General Public License from time to time. Such new versions will be similar in spirit to the present version, but may differ in detail to address new problems or concerns.
Each version is given a distinguishing version number. If the Program specifies that a certain numbered version of the GNU General Public License “or any later version” applies to it, you have the option of following the terms and conditions either of that numbered version or of any later version published by the Free Software Foundation. If the Program does not specify a version number of the GNU General Public License, you may choose any version ever published by the Free Software Foundation.
If the Program specifies that a proxy can decide which future versions of the GNU General Public License can be used, that proxy’s public statement of acceptance of a version permanently authorizes you to choose that version for the Program.
Later license versions may give you additional or different permissions. However, no additional obligations are imposed on any author or copyright holder as a result of your choosing to follow a later version.
15. Disclaimer of Warranty.
THERE IS NO WARRANTY FOR THE PROGRAM, TO THE EXTENT PERMITTED BY APPLICABLE LAW. EXCEPT WHEN OTHERWISE STATED IN WRITING THE COPYRIGHT HOLDERS AND/OR OTHER PARTIES PROVIDE THE PROGRAM “AS IS” WITHOUT WARRANTY OF ANY KIND, EITHER EXPRESSED OR IMPLIED, INCLUDING, BUT NOT LIMITED TO, THE IMPLIED WARRANTIES OF MERCHANTABILITY AND FITNESS FOR A PARTICULAR PURPOSE. THE ENTIRE RISK AS TO THE QUALITY AND PERFORMANCE OF THE PROGRAM IS WITH YOU. SHOULD THE PROGRAM PROVE DEFECTIVE, YOU ASSUME THE COST OF ALL NECESSARY SERVICING, REPAIR OR CORRECTION.
16. Limitation of Liability.
IN NO EVENT UNLESS REQUIRED BY APPLICABLE LAW OR AGREED TO IN WRITING WILL ANY COPYRIGHT HOLDER, OR ANY OTHER PARTY WHO MODIFIES AND/OR CONVEYS THE PROGRAM AS PERMITTED ABOVE, BE LIABLE TO YOU FOR DAMAGES, INCLUDING ANY GENERAL, SPECIAL, INCIDENTAL OR CONSEQUENTIAL DAMAGES ARISING OUT OF THE USE OR INABILITY TO USE THE PROGRAM (INCLUDING BUT NOT LIMITED TO LOSS OF DATA OR DATA BEING RENDERED INACCURATE OR LOSSES SUSTAINED BY YOU OR THIRD PARTIES OR A FAILURE OF THE PROGRAM TO OPERATE WITH ANY OTHER PROGRAMS), EVEN IF SUCH HOLDER OR OTHER PARTY HAS BEEN ADVISED OF THE POSSIBILITY OF SUCH DAMAGES.
17. Interpretation of Sections 15 and 16.
If the disclaimer of warranty and limitation of liability provided above cannot be given local legal effect according to their terms, reviewing courts shall apply local law that most closely approximates an absolute waiver of all civil liability in connection with the Program, unless a warranty or assumption of liability accompanies a copy of the Program in return for a fee.
END OF TERMS AND CONDITIONS
How to Apply These Terms to Your New Programs
If you develop a new program, and you want it to be of the greatest possible use to the public, the best way to achieve this is to make it free software which everyone can redistribute and change under these terms.
To do so, attach the following notices to the program. It is safest to attach them to the start of each source file to most effectively state the exclusion of warranty; and each file should have at least the “copyright” line and a pointer to where the full notice is found.
*one line to give the program's name and a brief idea of what it does.*
Copyright (C) *year* *name of author*
This program is free software: you can redistribute it and/or modify
it under the terms of the GNU General Public License as published by
the Free Software Foundation, either version 3 of the License, or
(at your option) any later version.
This program is distributed in the hope that it will be useful,
but WITHOUT ANY WARRANTY; without even the implied warranty of
MERCHANTABILITY or FITNESS FOR A PARTICULAR PURPOSE.  See theGNU General Public License for more details.
You should have received a copy of the GNU General Public License
along with this program.  If not, see http://www.gnu.org/licenses/.
Also add information on how to contact you by electronic and paper mail.
If the program does terminal interaction, make it output a short notice like this when it starts in an interactive mode:
*program* Copyright (C) *year* *name of author*
This program comes with ABSOLUTELY NO WARRANTY; for details type ‘show w'.
This is free software, and you are welcome to redistribute it
under certain conditions; type ‘show c' for details.
The hypothetical commands ‘show w’ and ‘show c’ should show the appropriate parts of the General Public License. Of course, your program’s commands might be different; for a GUI interface, you would use an “about box”.
You should also get your employer (if you work as a programmer) or school, if any, to sign a “copyright disclaimer” for the program, if necessary. For more information on this, and how to apply and follow the GNU GPL, see http://www.gnu.org/licenses/.
The GNU General Public License does not permit incorporating your program into proprietary programs. If your program is a subroutine library, you may consider it more useful to permit linking proprietary applications with the library. If this is what you want to do, use the GNU Lesser General Public License instead of this License. But first, please read http://www.gnu.org/philosophy/why-not-lgpl.html.
SocialNetworks
Default: Disable
Asks: ___ social network links in opac detail pages
Values:
Description:
Important
In order for these share buttons to work when clicked you must have filled in your OPACBaseURL preference.